Overview
In this tutorial, we will explore a simple iOS application to authenticate user utilizing OIDC with authorization code grant type with PKCE Additionally, Authentication Services provided by the iOS SDK are used as they provide an external user-agent that the developer cannot access and mitigates and prevents the risk of rogue applications from receiving the authorization server callback. This application follows best practices as described in the OAuth for Native Apps specification.
Mobile applications should be generally treated as untrusted clients and must be assumed that they cannot store any system credentials securely. An application developer should not store any long lived system credentials secrets in these applications since they can be decompiled and the secrets extracted.With mobile and native applications it is also possible for multiple applications to register the same custom URL scheme. The behaviour is then undefined for which application receives the callback from the authorization server.
Both of these concerns can be mitigated by using OAuth Proof Key for Code Exchange (PKCE) flow and, in the case of an iOS application, taking advantage of the iOS SDK frameworks that ensure the correct application is given the authorization code.
Reference repo

Check out the below github repo for complete source code of the reference application in this tutorial
OIDC authentication in iOS App
Prerequisites
- Cloudentity tenant
- Workspace and Client application prepared for PKCE
- Xcode 13+
- iOS 15+
Prepare Cloudentity Workspace
-
In your workspace, create a new client application.
-
For the client application you created, set the token endpoint authentication method to None.

-
Optionally, in Auth Settings under the General tab turn on Enforce PKCE for all clients.
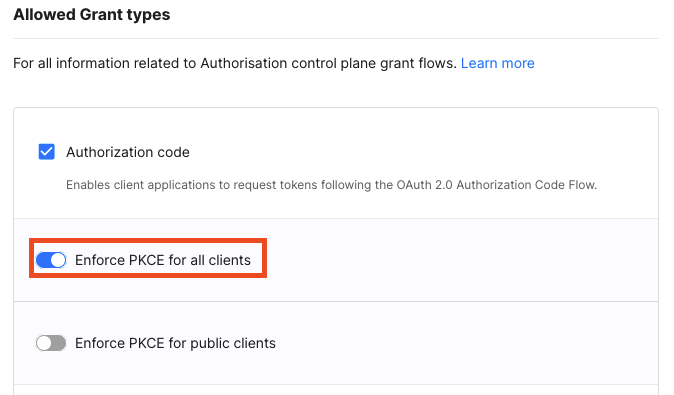
Setting up enforcement of PKCE for all client application causes that all applications registered within this workspace must use the Proof Key for Code Exchange.
-
In your application settings, copy the client identifier, token endpoint, and authorization endpoints from the OAuth tab.
-
Set the redirect URI.
The redirect URI should include your custom URL scheme and the reverse DNS string for your domain and application name to ensure uniqueness.
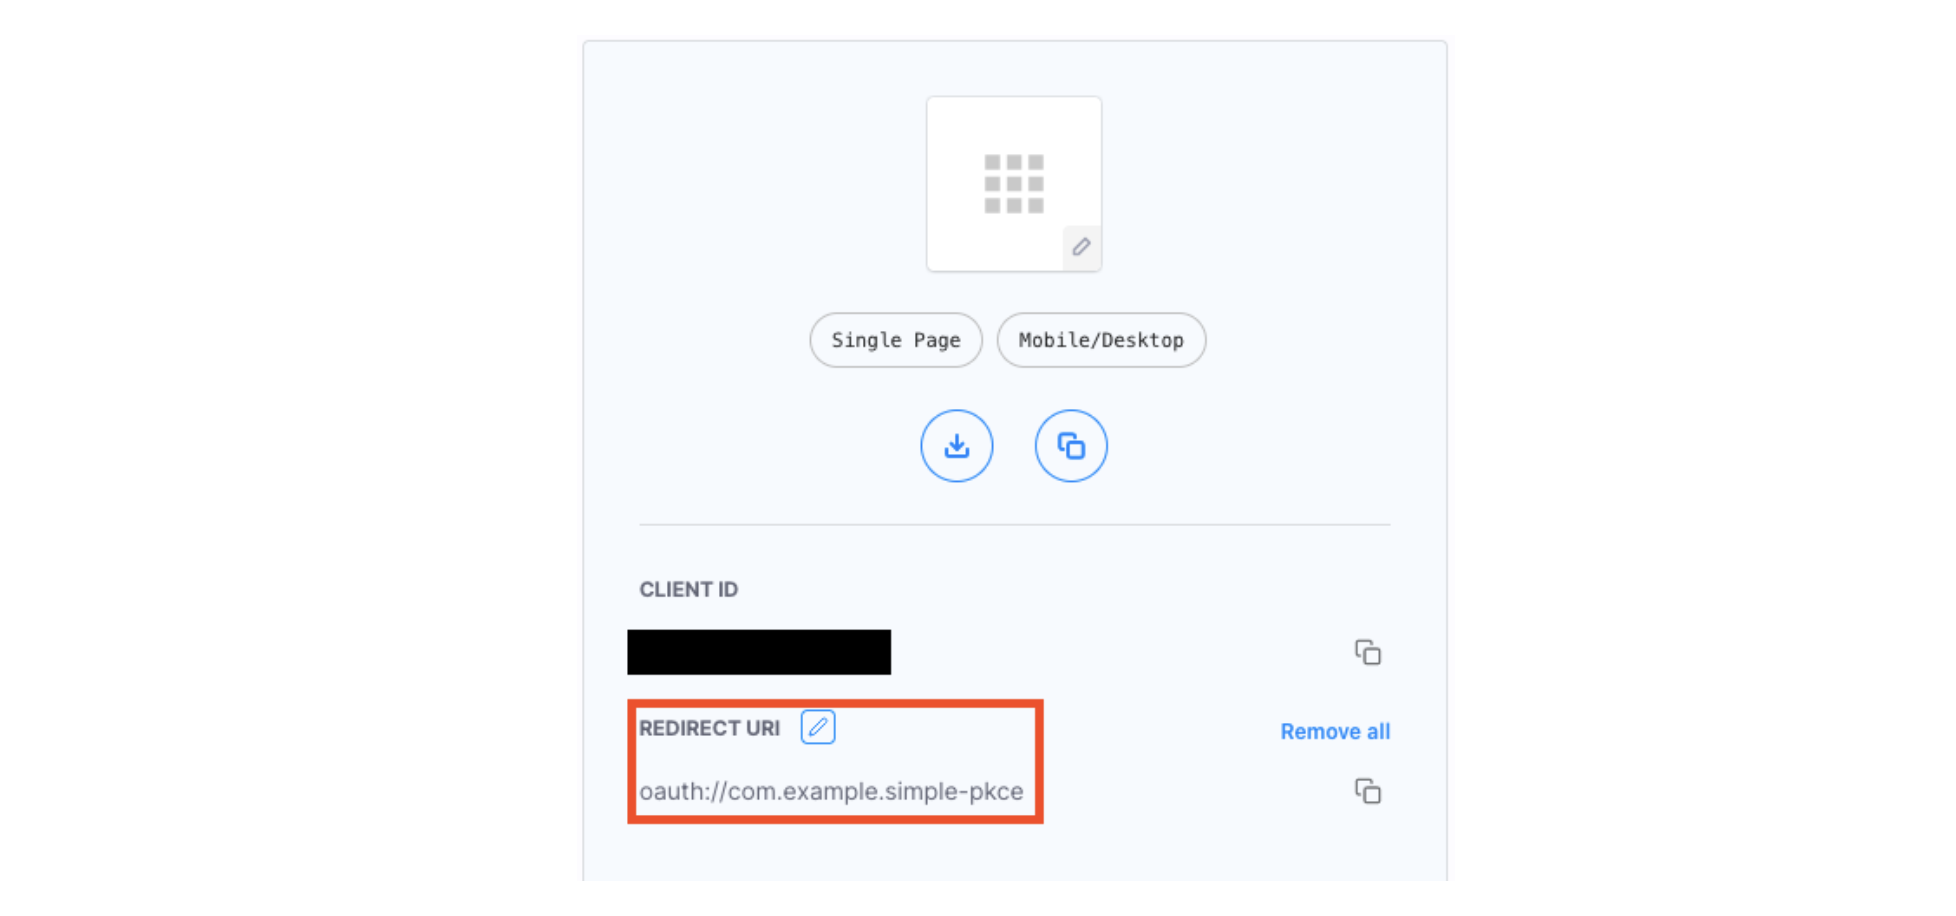
In the sample iOS application, the identifier is set to
com.example.simple-pkceand the scheme is set tooauthin theInfo.plistas shown in the next section. Therefore, in your client application set the redirect URI tooauth://com.example.simple-pkceas shown above. In a production-ready application, choose an appropriate scheme and a reverse DNS string.
Configure the Sample iOS Application
First clone the provided github repo and let’s configure the application. In this tutorial, we will configure and run the app first and then explore the code for understanding.
The iOS Application can be configured in two ways:
Using custom iOS target properties in Xcode
-
In the custom iOS target properties menu in Xcode, set the values of the client identifier, token endpoint URL, and the authorize endpoint URL.
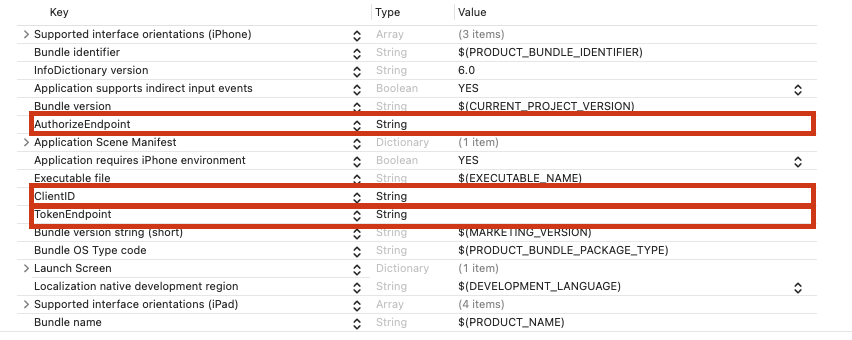
You can find all needed credentials in the Cloudentity platform in your client application settings.
-
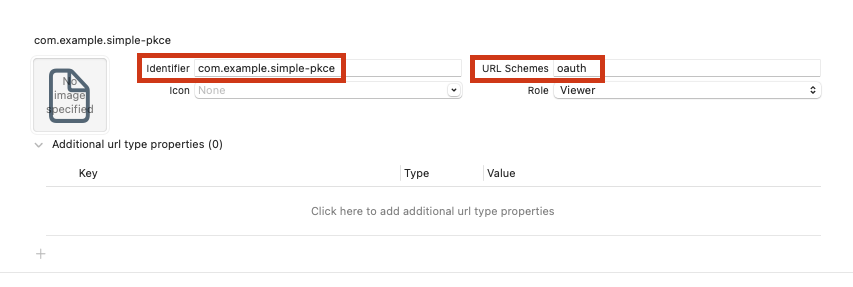
In the URL Types, set the identifier to the reverse DNS string that incorporates your domain and application name.
-
Set URL Schemes to your chosen scheme ensuring that the values match the redirect URI that was set in the previous section.
If the values set in the previous section are left as the defaults in the sample application, no change is required for this step.
Directly in the Info.plist File
Configure the sample iOS application as in the example below:
<?xml version="1.0" encoding="UTF-8"?>
<!DOCTYPE plist PUBLIC "-//Apple//DTD PLIST 1.0//EN" "http://www.apple.com/DTDs/PropertyList-1.0.dtd">
<plist version="1.0">
<dict>
    <key>AuthorizeEndpoint</key>
     <string>--enter authorization URL--</string>
    <key>CFBundleURLTypes</key>
    <array>
    <dict>
         <key>CFBundleTypeRole</key>
         <string>Viewer</string>
         <key>CFBundleURLName</key>
         <string>--enter reverse DNS string here--</string>
         <key>CFBundleURLSchemes</key>
         <array>
            <string>--enter scheme here--</string>
         </array>
    </dict>
    </array>
    <key>ClientID</key>
    <string>--enter client ID here--</string>
    <key>TokenEndpoint</key>
    <string>--enter token endpoint URL here--</string>
</dict>
</plist>
Note that a custom URL scheme is used. Since we are using the iOS SDK, Authentication Services provided by the iOS SDK help to protect the application from rogue applications getting the callback from the authorization server. However, when not using Authentication Services, it is possible for multiple applications to register the same callback.
This is where PKCE is helpful because any application that receives the callback with the authorization code also needs the corresponding code verifier for the code challenge presented to the authorization server. This will be explored more in the following sections.
Run the application
-
Run the application and verify there are no errors. You should see the sign-in screen as shown.
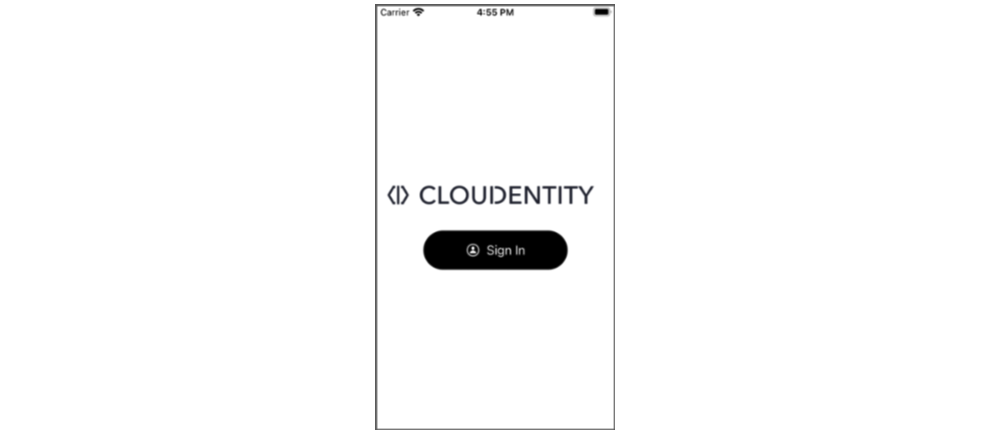
-
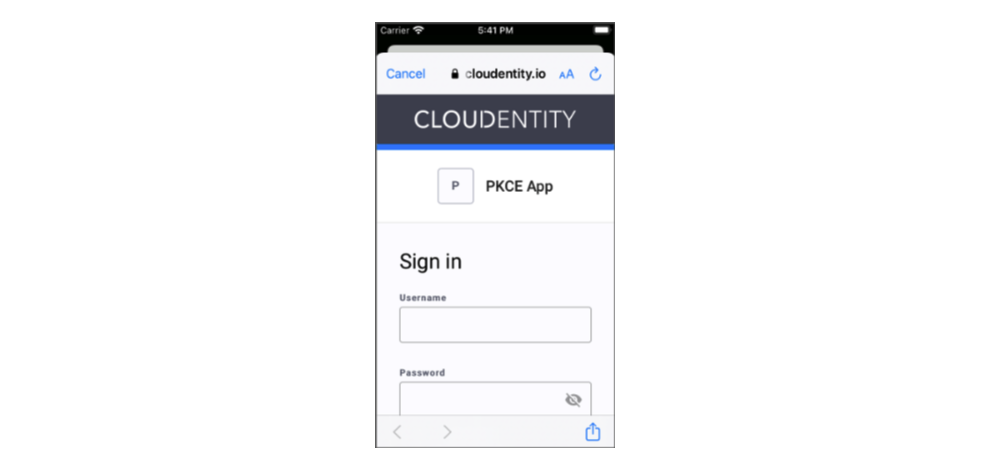
Log in to the application by tapping Sign In.
You should see no errors and be presented with the Cloudentity OAuth sign-in modal.
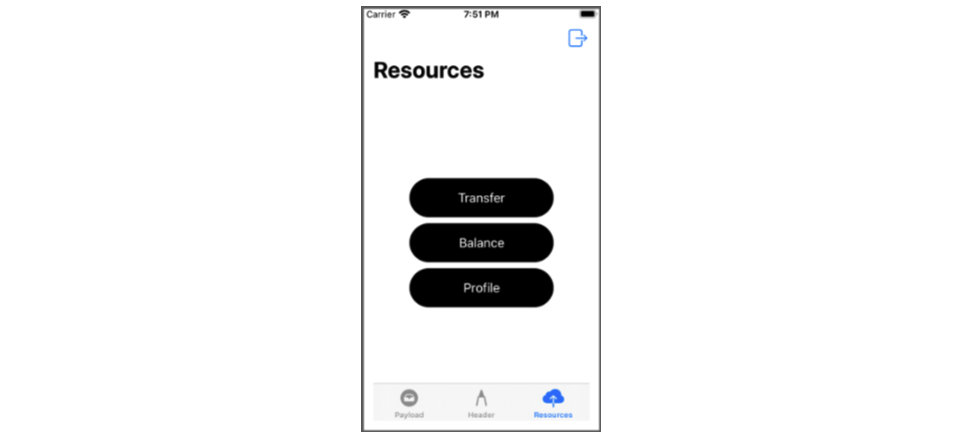
You can view the token header and the payload by selecting the corresponding tabs from the home screen upon successful login.
Additionally, there is a tab for Resources. The Resources tab is explored further in the next section.
Explore the Code
The relevant portion of the code for handling the authentication flow can be seen in the
Helpers folder in Authenticator.swift. The Authenticator class uses AuthenticationServices
to simplify the authentication flow. It also restricts access to the browser presented to the user
because the application developer cannot access what the user enters since it is an external
user-agent. Developers should not use an embedded webview since the users' entries could be
visible to the developer. Furthermore, an embedded view would not share session data with the
mobile applications primary browser.
The authenticate() method starts the authentication flow by first generating a code verifier
as explained in RFC 7636.
The authenticate() method then gets the authentication endpoint URL and required parameters.
In the next section, the authentication URL and its parameters are explored in more detail.
In the event, if the authentication URL is not set, an error is returned.
Notice that since PKCE is being used, a code challenge, generated from the code verifier, is included as required by RFC 7636
func authenticate() {
        codeGenerator.generateVerifier()

        guard let authURL = URL(string: AuthConfig.authEndpoint)?.getAuthURL(clientID: AuthConfig.clientID, challenge: codeGenerator.getChallenge(), urlScheme: AuthConfig.urlScheme) else {
            self.completion(nil, .failedToSetAuthURL)
        return
}
An ASWebAuthenticationSession is obtained by providing the authentication URL with required
parameters and the callback URL scheme. In the callback, a check is performed for an error.
If there is no error, the callback URL is verified to be present and it is verified
that no error is returned from the OAuth server. Finally, the authorization code is extracted from the
query parameters and passed to fetchToken(code: String).
let session = ASWebAuthenticationSession(url: authURL, callbackURLScheme: "oauth")
        { [self] callbackURL, error in

            guard error == nil else {
                self.completion(nil, .cancelled)
                return
            }

            guard let callbackURL = callbackURL else {
                self.completion(nil, .callbackMissingCallbackURL)
                return
            }

            guard callbackURL.getQueryParam(value: "error") == nil else {
                self.completion(nil, .errorReturnedFromAuthorize(callbackURL.getQueryParam(value: "error")!))
                return
            }

            guard let code = callbackURL.getQueryParam(value: "code") else {
                self.completion(nil, .callbackMissingCode)
                return
            }

            self.fetchToken(code: code)
        }
        session.presentationContextProvider = self
        session.prefersEphemeralWebBrowserSession = true
        session.start()
The fetchToken(code: String) method retrieves the code verifier and creates a URLRequest using
the code verifier and the authorization code returned from the Cloudentity OAuth
server. A request for the token to the token endpoint is made. If there is an error, the UI is
updated with the error. Otherwise, the token is saved and the user is presented with the
application home screen.
private func fetchToken(code: String) {
        guard let url = URL(string: AuthConfig.tokenEndpoint) else {
            self.completion(nil, .failedToGetTokenEndpoint)
            return
        }

        let verifier = self.codeGenerator.getVerifier()
        let request = url.getTokenRequest(clientID: AuthConfig.clientID, verifier: verifier, code: code, urlScheme: AuthConfig.urlScheme)

        URLSession.shared.dataTask(with: request) {
            data,_,err in
            if err != nil {
                self.completion(nil, .tokenRequestFailed(err!))
                return
            }

            DispatchQueue.main.async {
                guard let data = data else {
                    self.completion(nil, .unableToParseTokenResponse)
                    return
                }
                do {
                    let v = try JSONDecoder().decode(TokenResponse.self, from: data)
                    self.completion(v, nil)
                } catch {
                    self.completion(nil, .unableToParseTokenResponse)
                }
            }
        }.resume()
}
When making an authorization request, scopes are requested. In addition to the code challenge,
the request also requires the code challenge method, the redirect URI, the client ID,
and, in this case, a response type set to code.
The authorization URL is constructed in the URLExtensions.swift in the getAuthURL method.
In addition to the usual parameters, the code_challenge and code_challenge_method are sent in
the request. This is also where the requested scopes are added to the request.
 func getAuthURL(clientID: String, challenge: String, urlScheme: String) -> URL? {
        guard var components = URLComponents(string: self.absoluteString) else {
            return nil
        }

        components.queryItems = [
            URLQueryItem(name:"client_id", value: clientID),
            URLQueryItem(name:"redirect_uri", value: urlScheme),
            URLQueryItem(name:"response_type", value: "code"),
            URLQueryItem(name:"scope", value: "email openid profile"),
            URLQueryItem(name:"code_challenge", value: challenge),
            URLQueryItem(name:"code_challenge_method", value: "S256"),
        ]

        return components.url
}
The URLExtensions.swift file also contains the getTokenRequest method which is used to create
a request and set the necessary query parameters for getting the access token using the
authorization code. The code_verifier is included in the request so the authorization server can
verify that this is the application for which the authorization code was intended.
func getTokenRequest(clientID: String, verifier: String, code: String, urlScheme: String) -> URLRequest {
        var components = URLComponents()
        components.queryItems = [
            URLQueryItem(name:"client_id", value: clientID),
            URLQueryItem(name:"redirect_uri", value: urlScheme),
            URLQueryItem(name:"grant_type", value: "authorization_code"),
            URLQueryItem(name:"code_verifier", value: verifier),
            URLQueryItem(name:"code", value: code),
        ]

        return buildRequest(components: components)
}
Recall the Resources tab in the sample application. The scopes can be used to control which
buttons are present, the titles the buttons have, and the resource that is accessed when a button
is tapped. In the sample application the scopes are set to email openid profile.
Open the scopeData.json file under Resources in the project.
[
    {
        "scope":"openid",
        "title": "Transfer",
        "url": "http://localhost:8080/banking/transfer"
    },
    {
        "scope":"email",
        "title": "Balance",
        "url": "http://localhost:8080/banking/balance"
    },
    {
        "scope":"profile",
        "title": "Some name",
        "url": "http://localhost:8080/pets/pet/2"
    },
    {
        "scope":"phone",
        "title": "Phone",
        "url": "http://localhost:8080/pets/pet/1"
    }
]
This file contains a list of possible buttons as shown.
Notice the sample application requested three scopes: email openid profile, but scopeData.json
shows four entries. Upon receiving authorization, the application iterates over the scopes in
scopeData.json and for each scope granted to the application, if there is a corresponding scope
in this file, a button is displayed. Each entry in scopeData.json represents a JSON object
with three fields. scope is a scope that the application could request.
The url is for a protected resource that the application would like to access.
The title key sets the title that is displayed on the button. Try changing the title value
for a few buttons and run the application to see the updated title. Change scopes requested by
removing one of the scopes and verify that the application only displays two buttons after
logging in to the application.
Conclusion
A simple iOS application was created which obtains an access token using Cloudentity authorization platform. PKCE was used with the authorization code flow ensuring that only this application can obtain an access token using the authorization code returned from the authorization server. If another application used the same custom URL scheme and obtained the authorization code it would not be able to obtain an access token because it would not have the correct code verifier. Cloudentity Authorization Platform conforms to the current OAuth 2.0 standards and facilitates creating secure mobile applications, protects user data, and enables developers to build applications quickly and easily with security in mind.