Enhancing Developer Login Experiences
In the rapidly evolving landscape of API management, the developer experience is a critical factor. Developers are the backbone of any API-driven ecosystem. Their experience in interacting with API gateways directly influences productivity, innovation, and overall satisfaction. The login process is a pivotal point in this experience, often determining the ease with which developers can access and work with APIs.
In this blog post, we’ll explore how Cloudentity is elevating the developer login experience, seamlessly integrating with Tyk Enterprise Developer Portal to enhance security, streamline workflows, and – ultimately – empower developers.
Traditional login methods can be cumbersome, requiring multiple credentials, posing security risks, and causing friction in the development process. As organizations scale and their API ecosystems grow, addressing these challenges becomes paramount. Cloudentity recognizes this need and can integrate easily with Tyk to redefine and elevate the developer login experience.
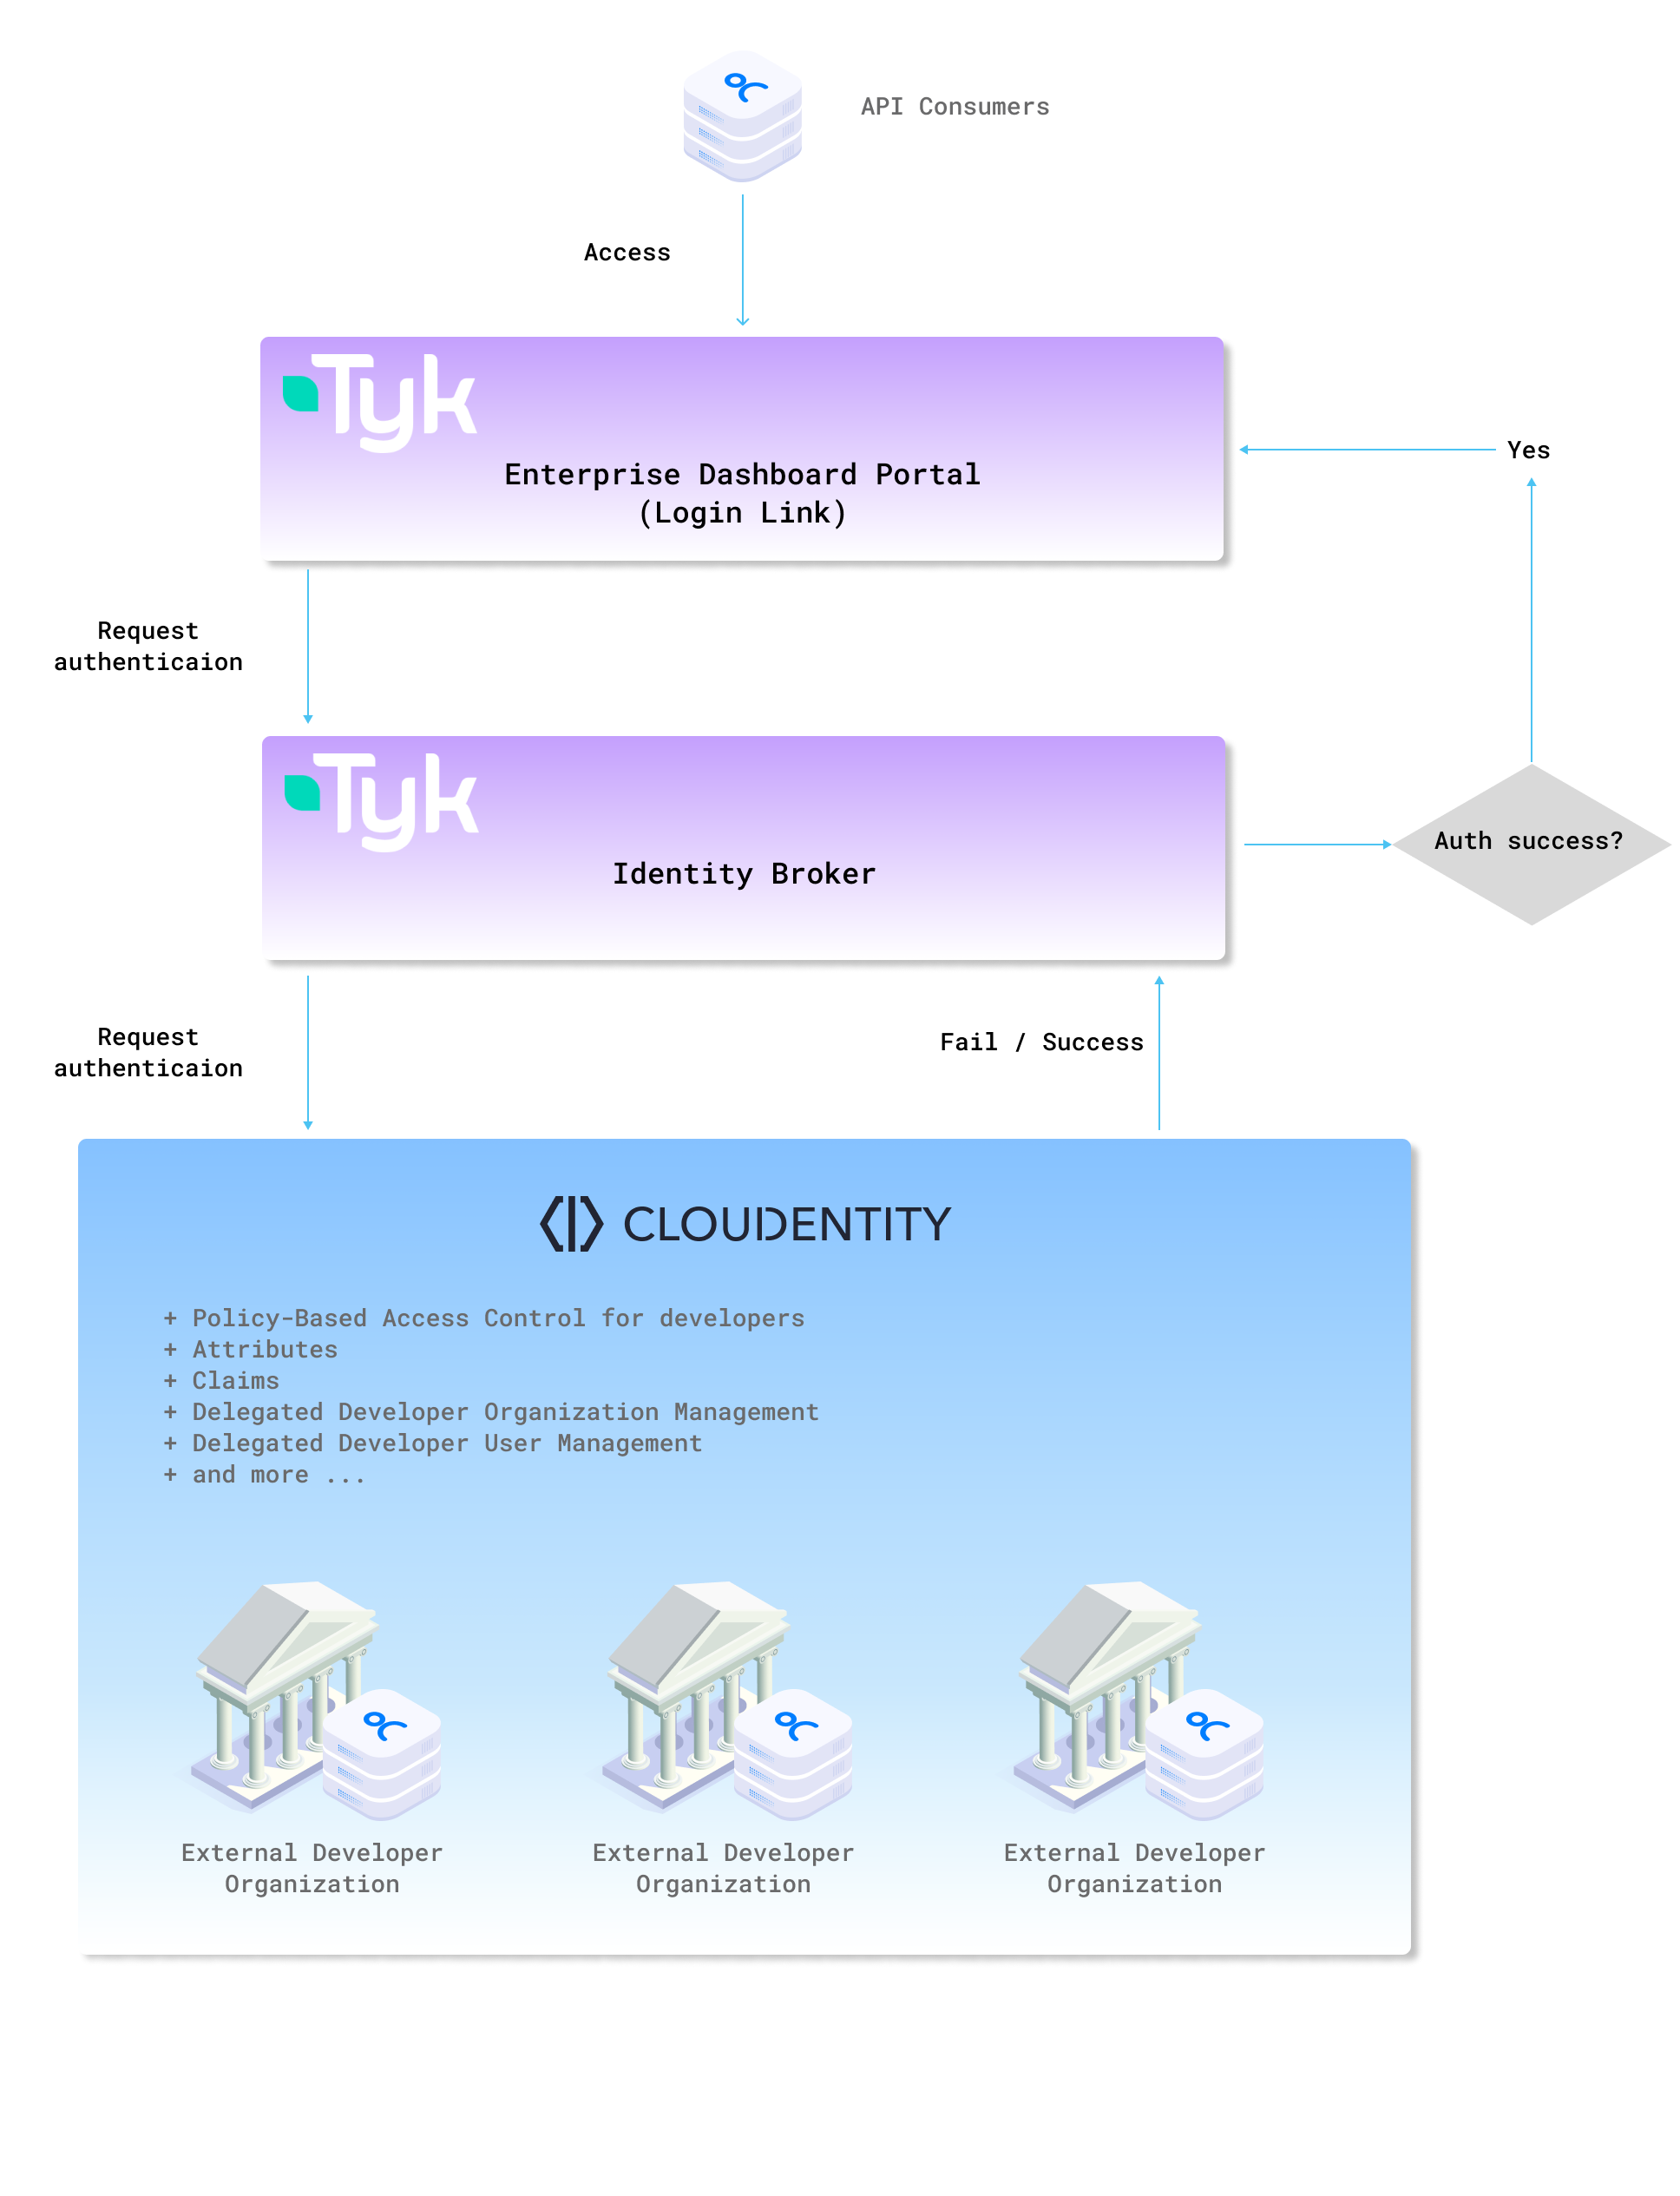
Let’s dive into how we connect Tyk Enterprise Developer Portal with Cloudentity platform for developer organization and developer user management and administration.
Prerequisites
Configure Cloudentity for Developer Organization and User Management
-
Create a workspace of the Consumer Applications and Services type within Cloudentity.
-
Select Organizations and create a new organization.
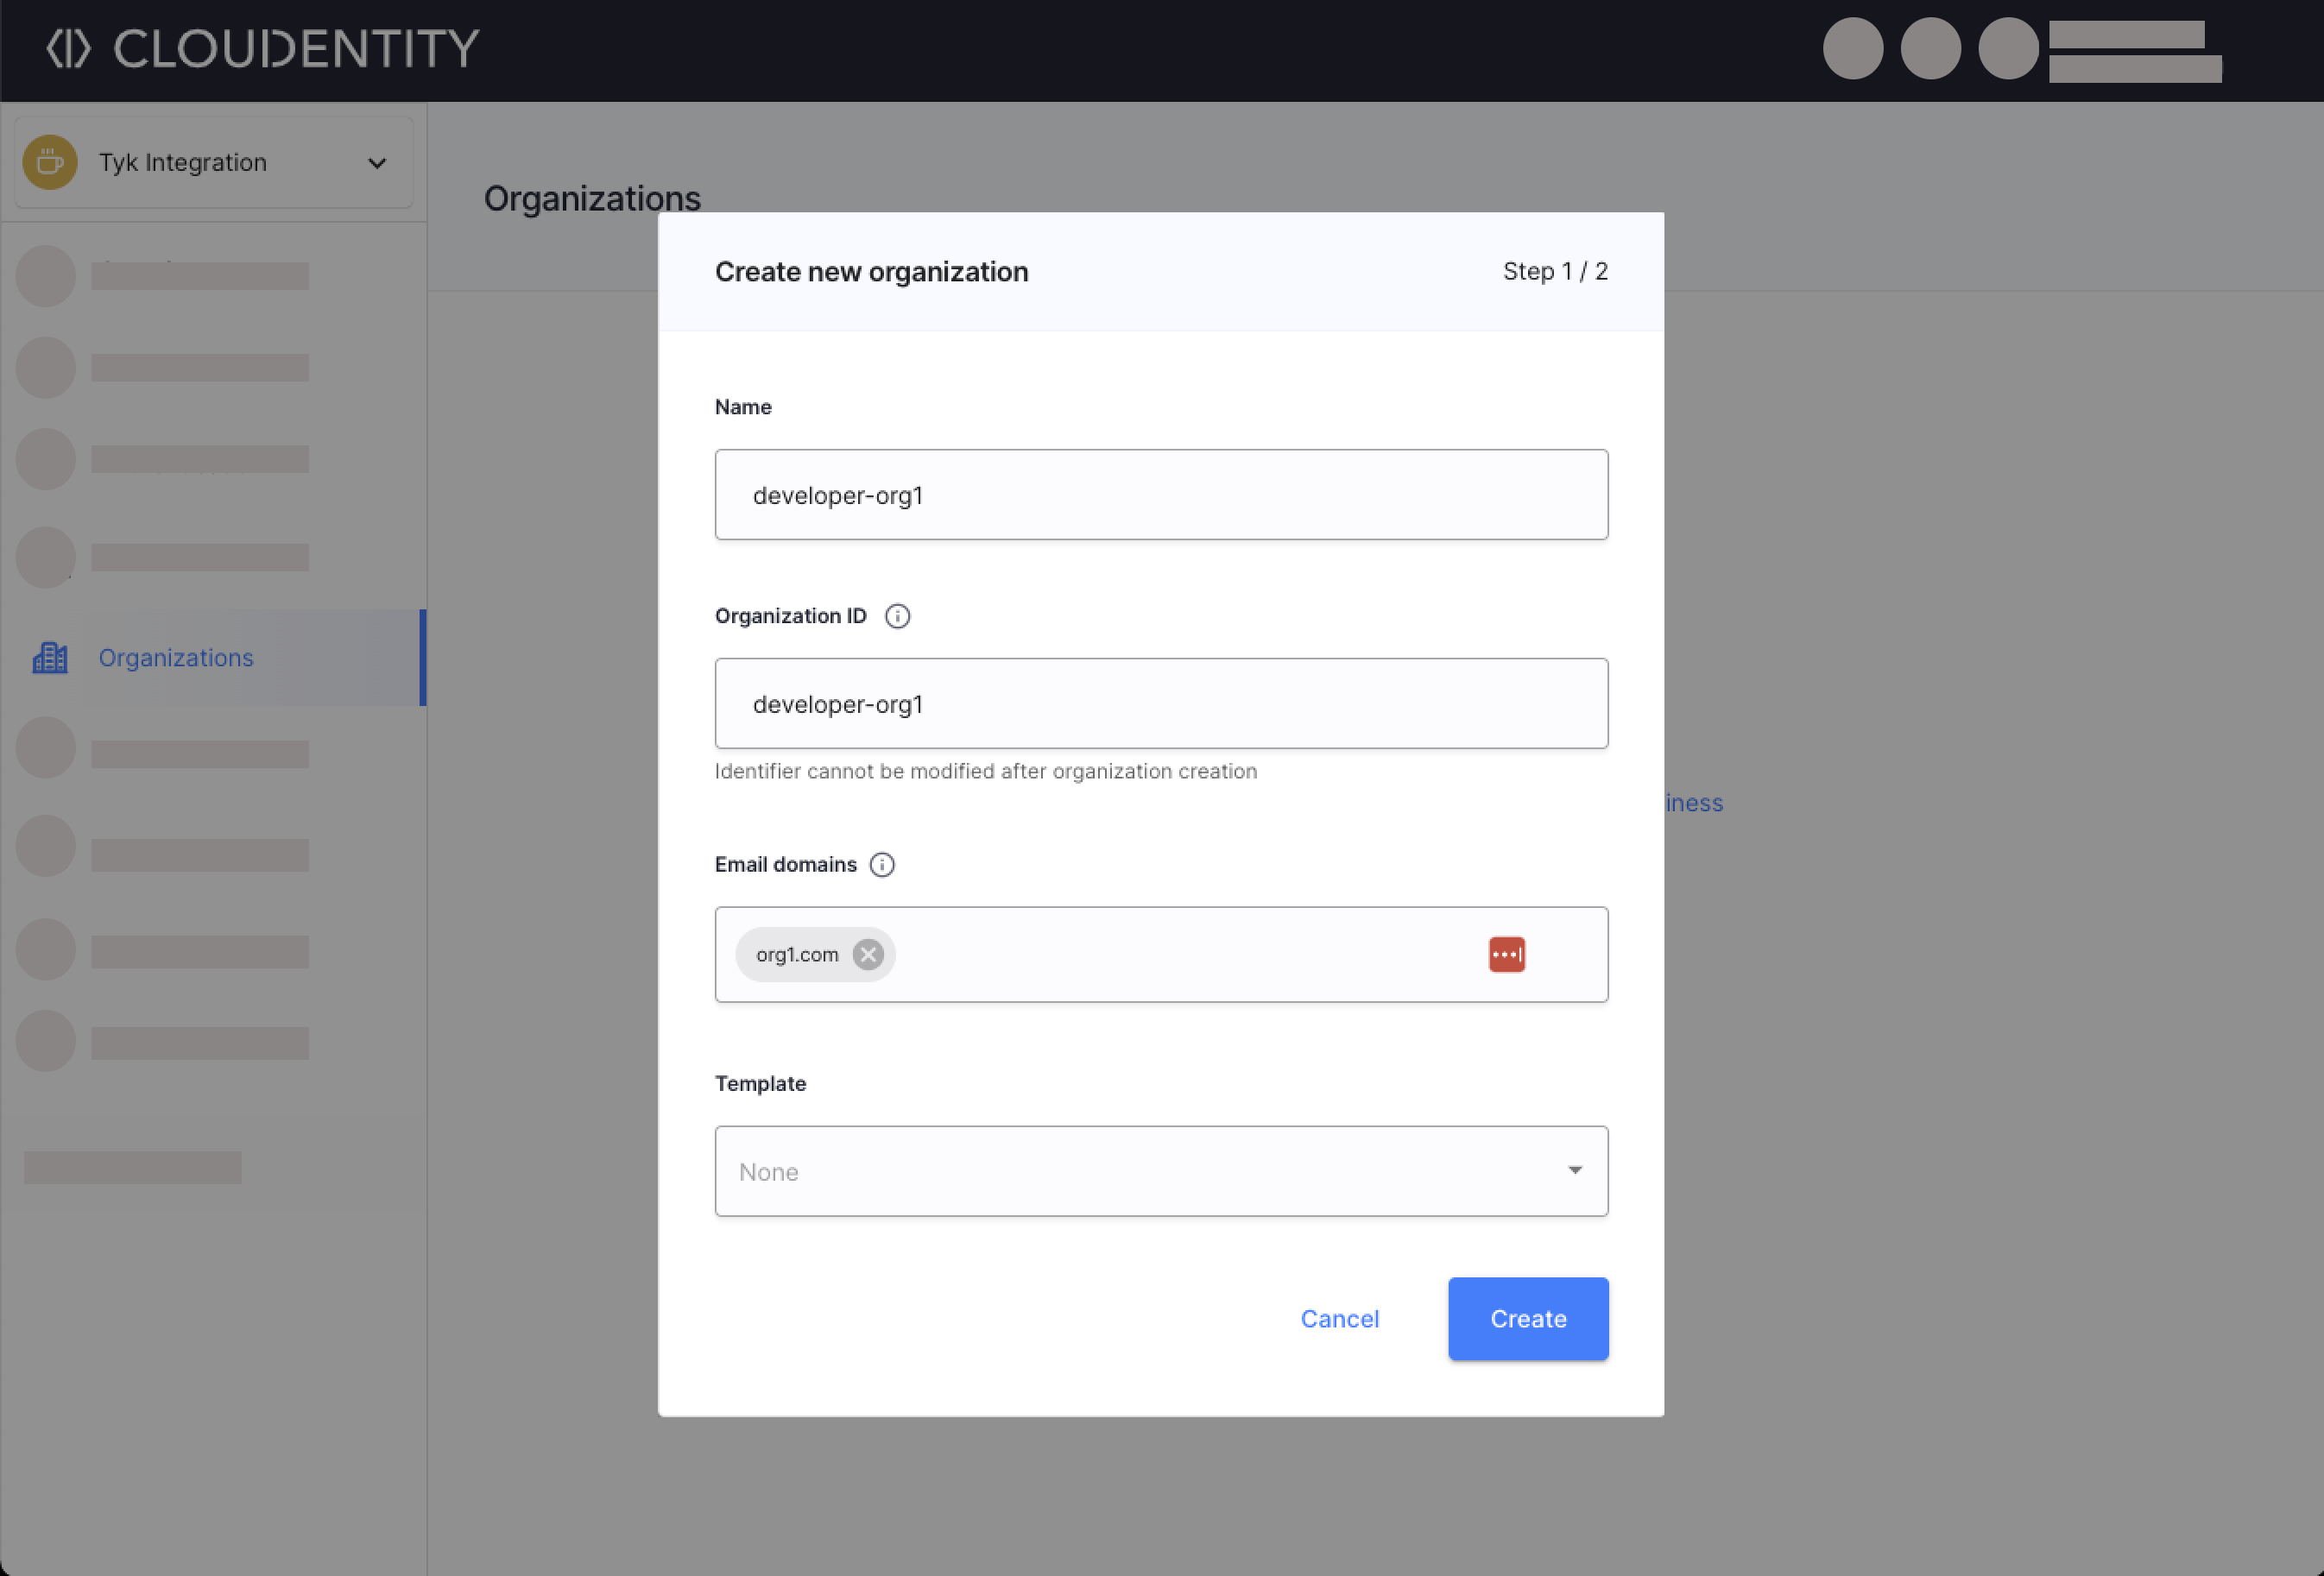
Your organization is ready! Now you may:
-
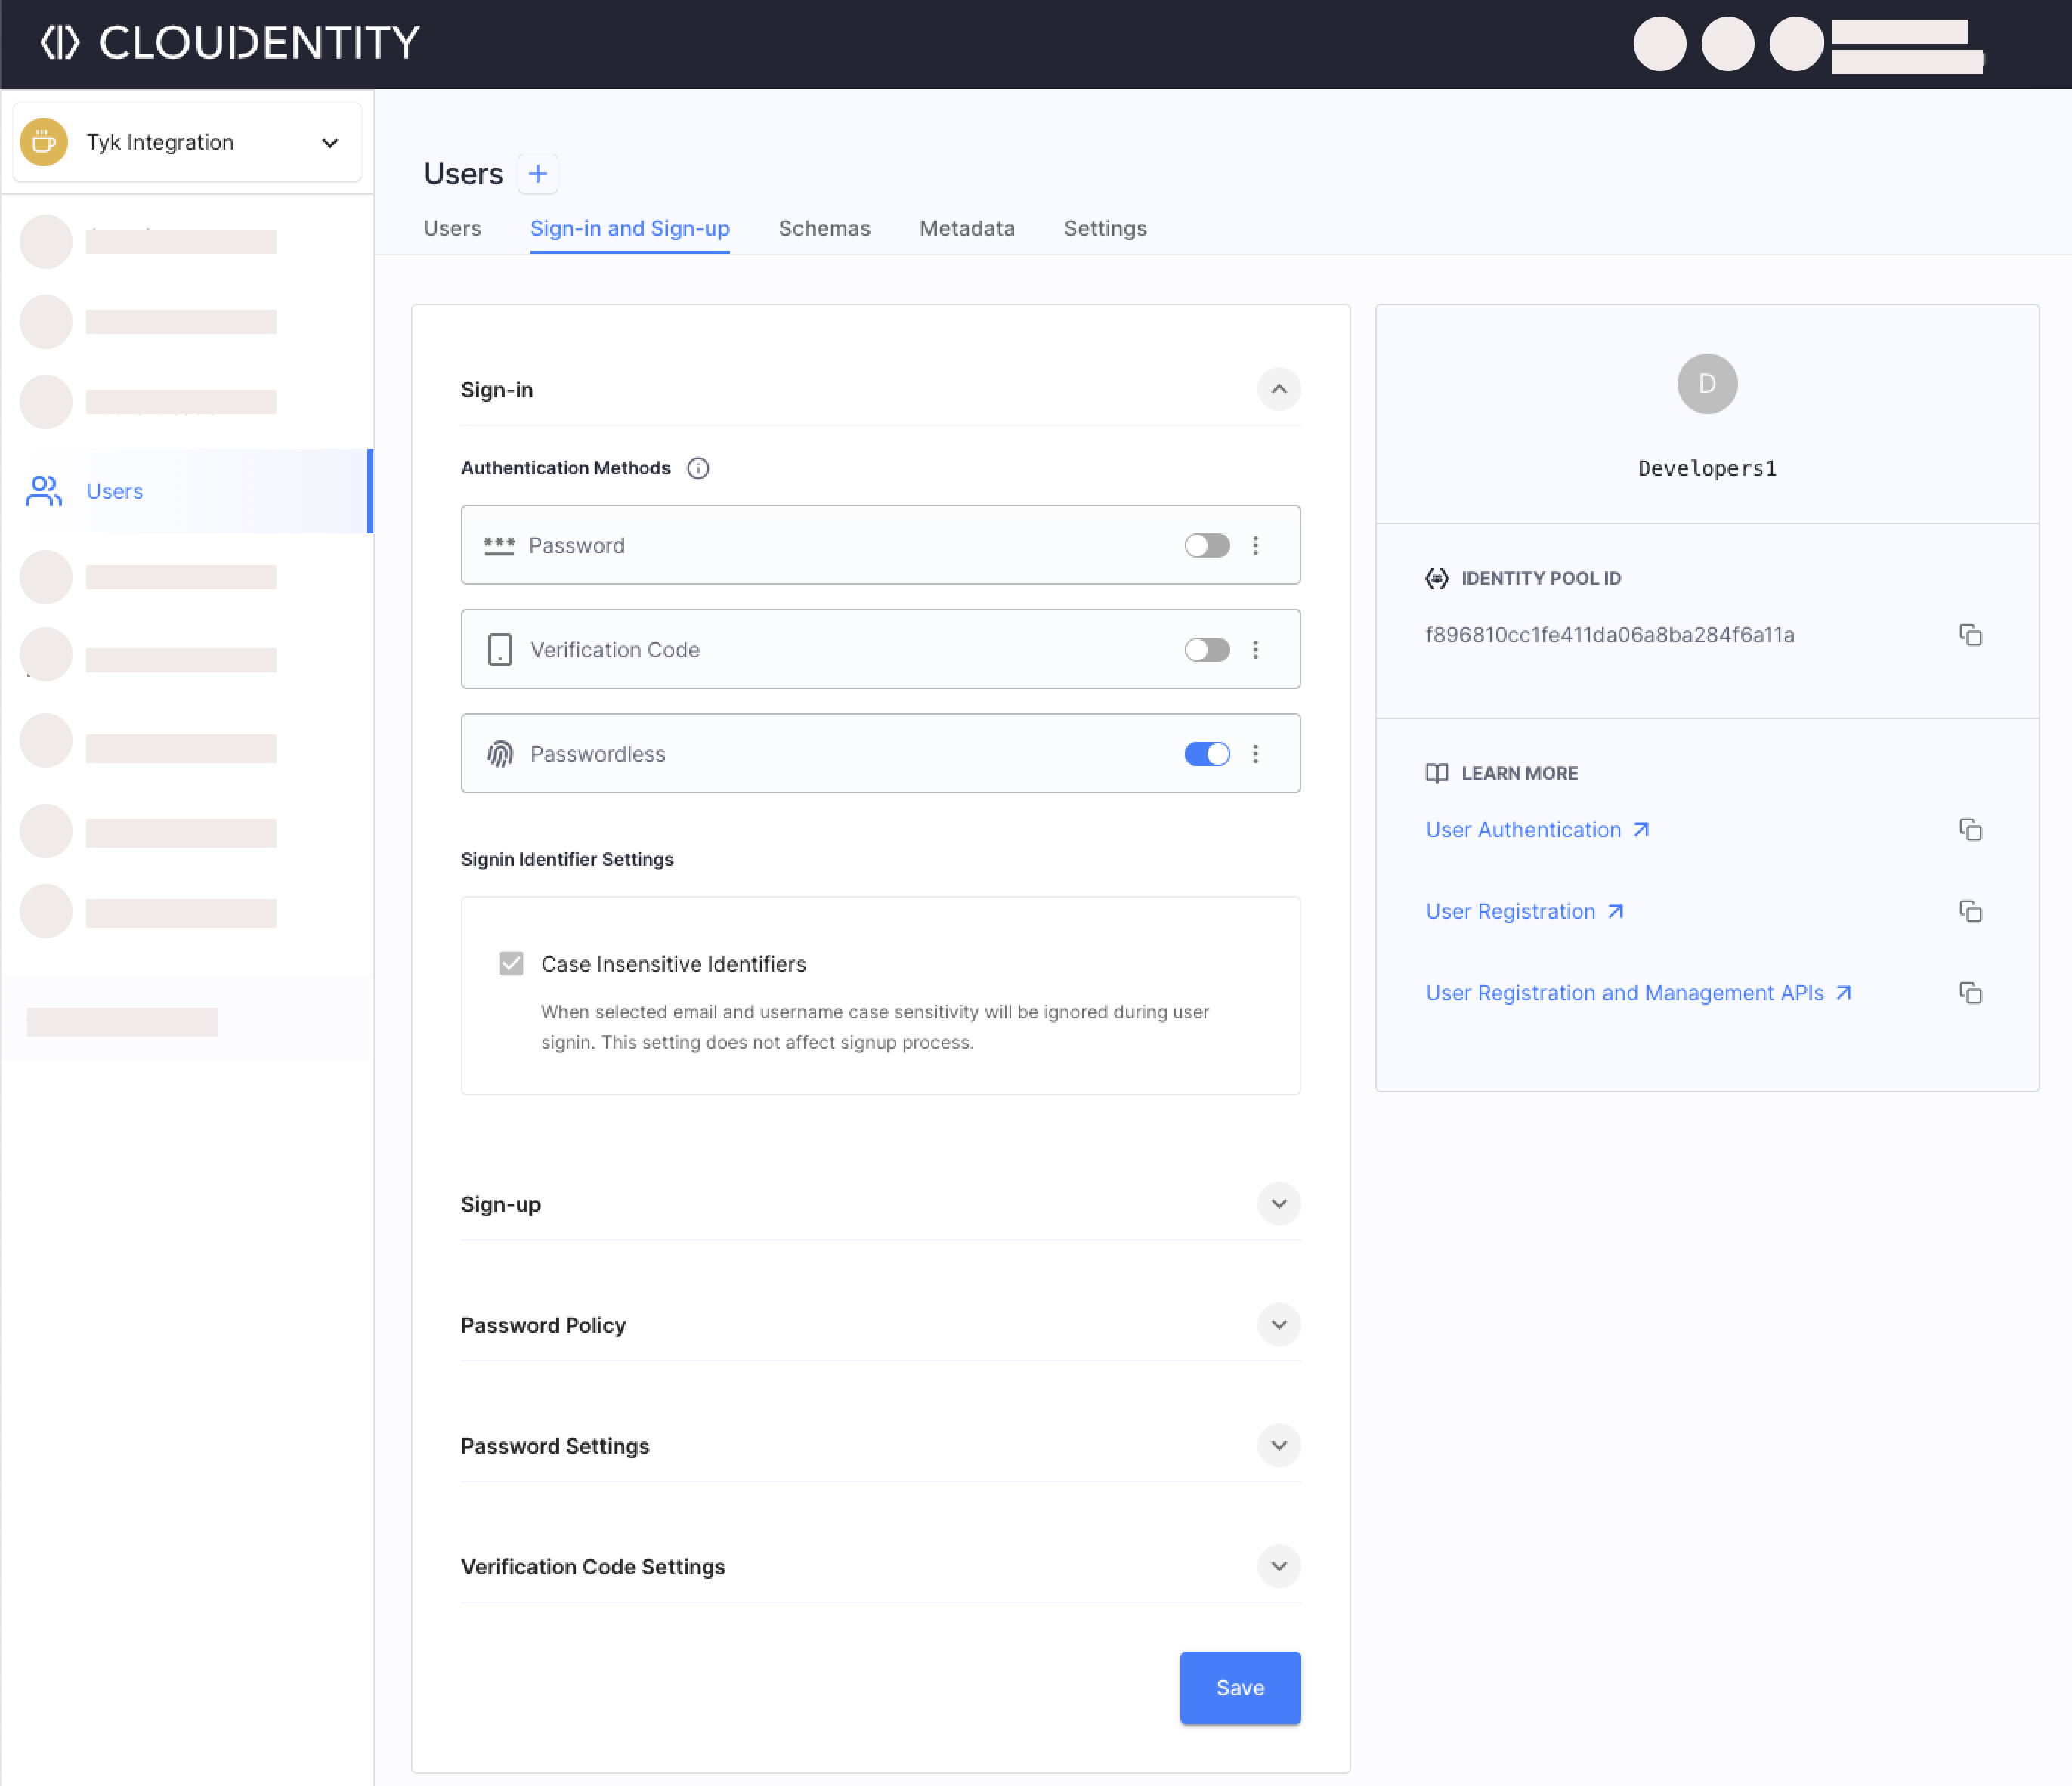
Select Users » Identity Pool (create new pool if no pools are available)» Sign-In and Sign-Up.
-
Enable the Passwordless option under the Authentication Methods
-
Save.
Your developers will now be able to authenticate using the passwordless sign-in method with Passkeys. Learn more details by reading the Enabling Passwordless Authentication article.
-
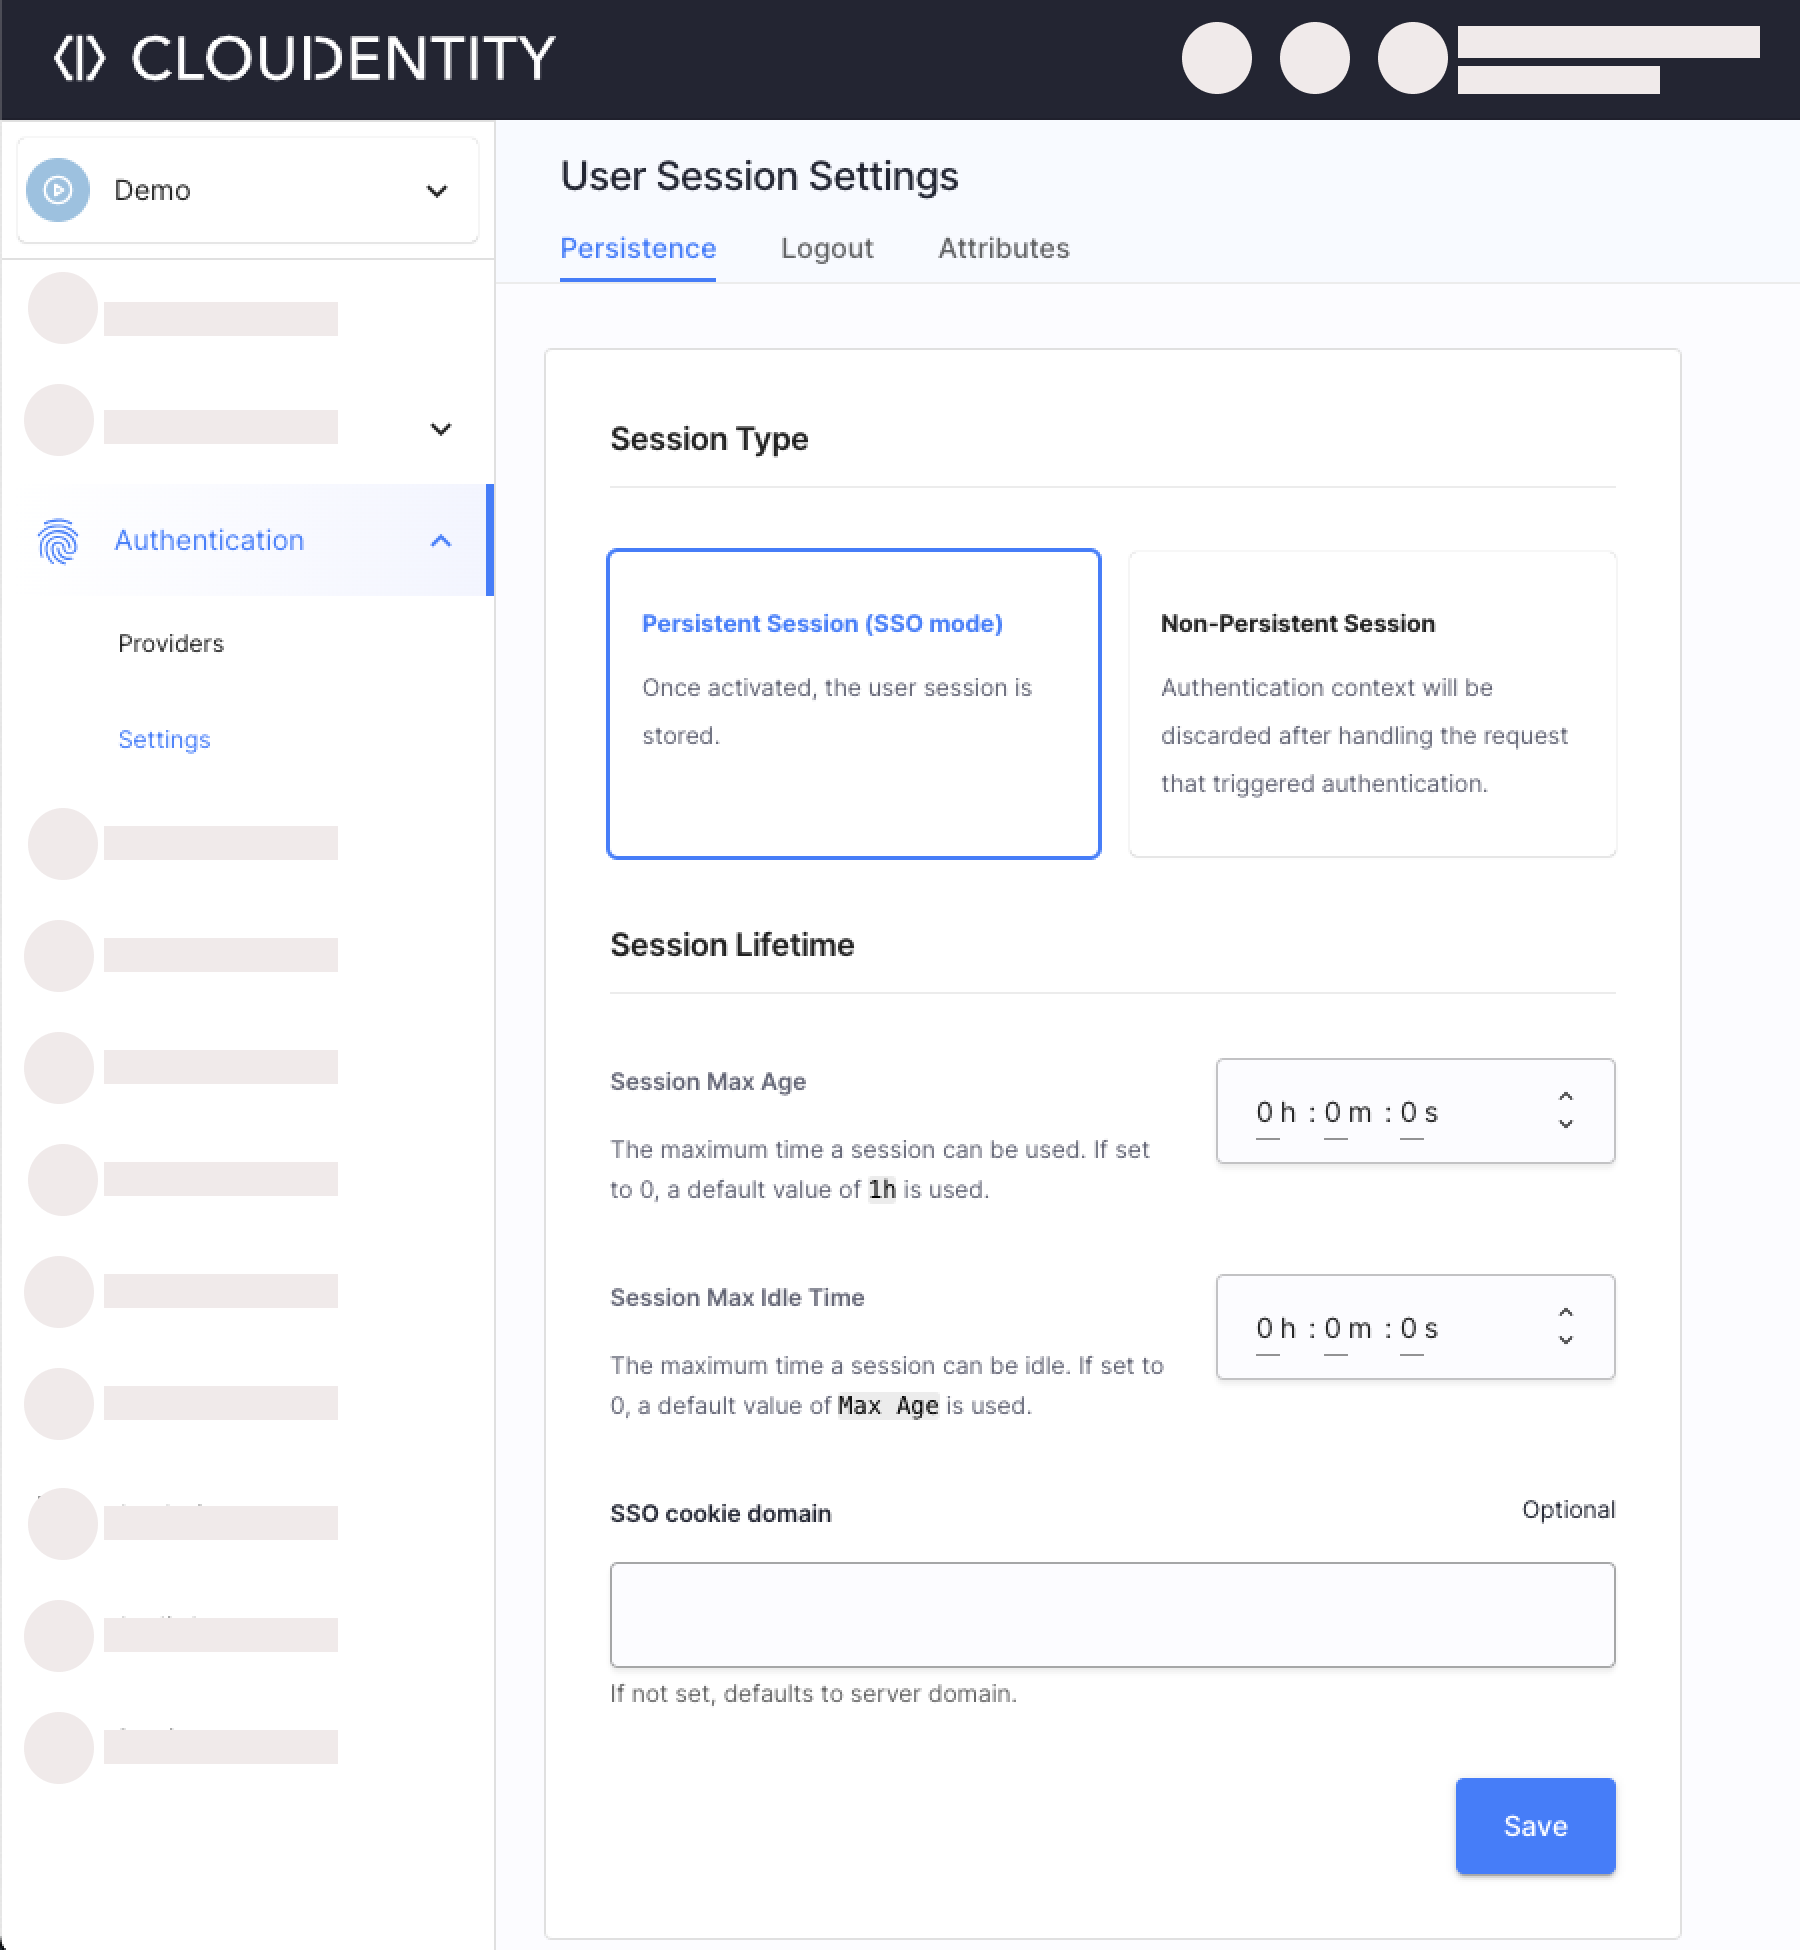
Select Authentication » Settings (if not visible, select the Show All option) » Persistence.
-
Enable the Persistent Session (SSO mode) option.
-
Save.
From now on, the developers' session are persistent allowing the developers to sign-in once and access multiple connected apps. Learn more details by reading the Persistent User Sessions with Single Sign-On (SSO) article.
-
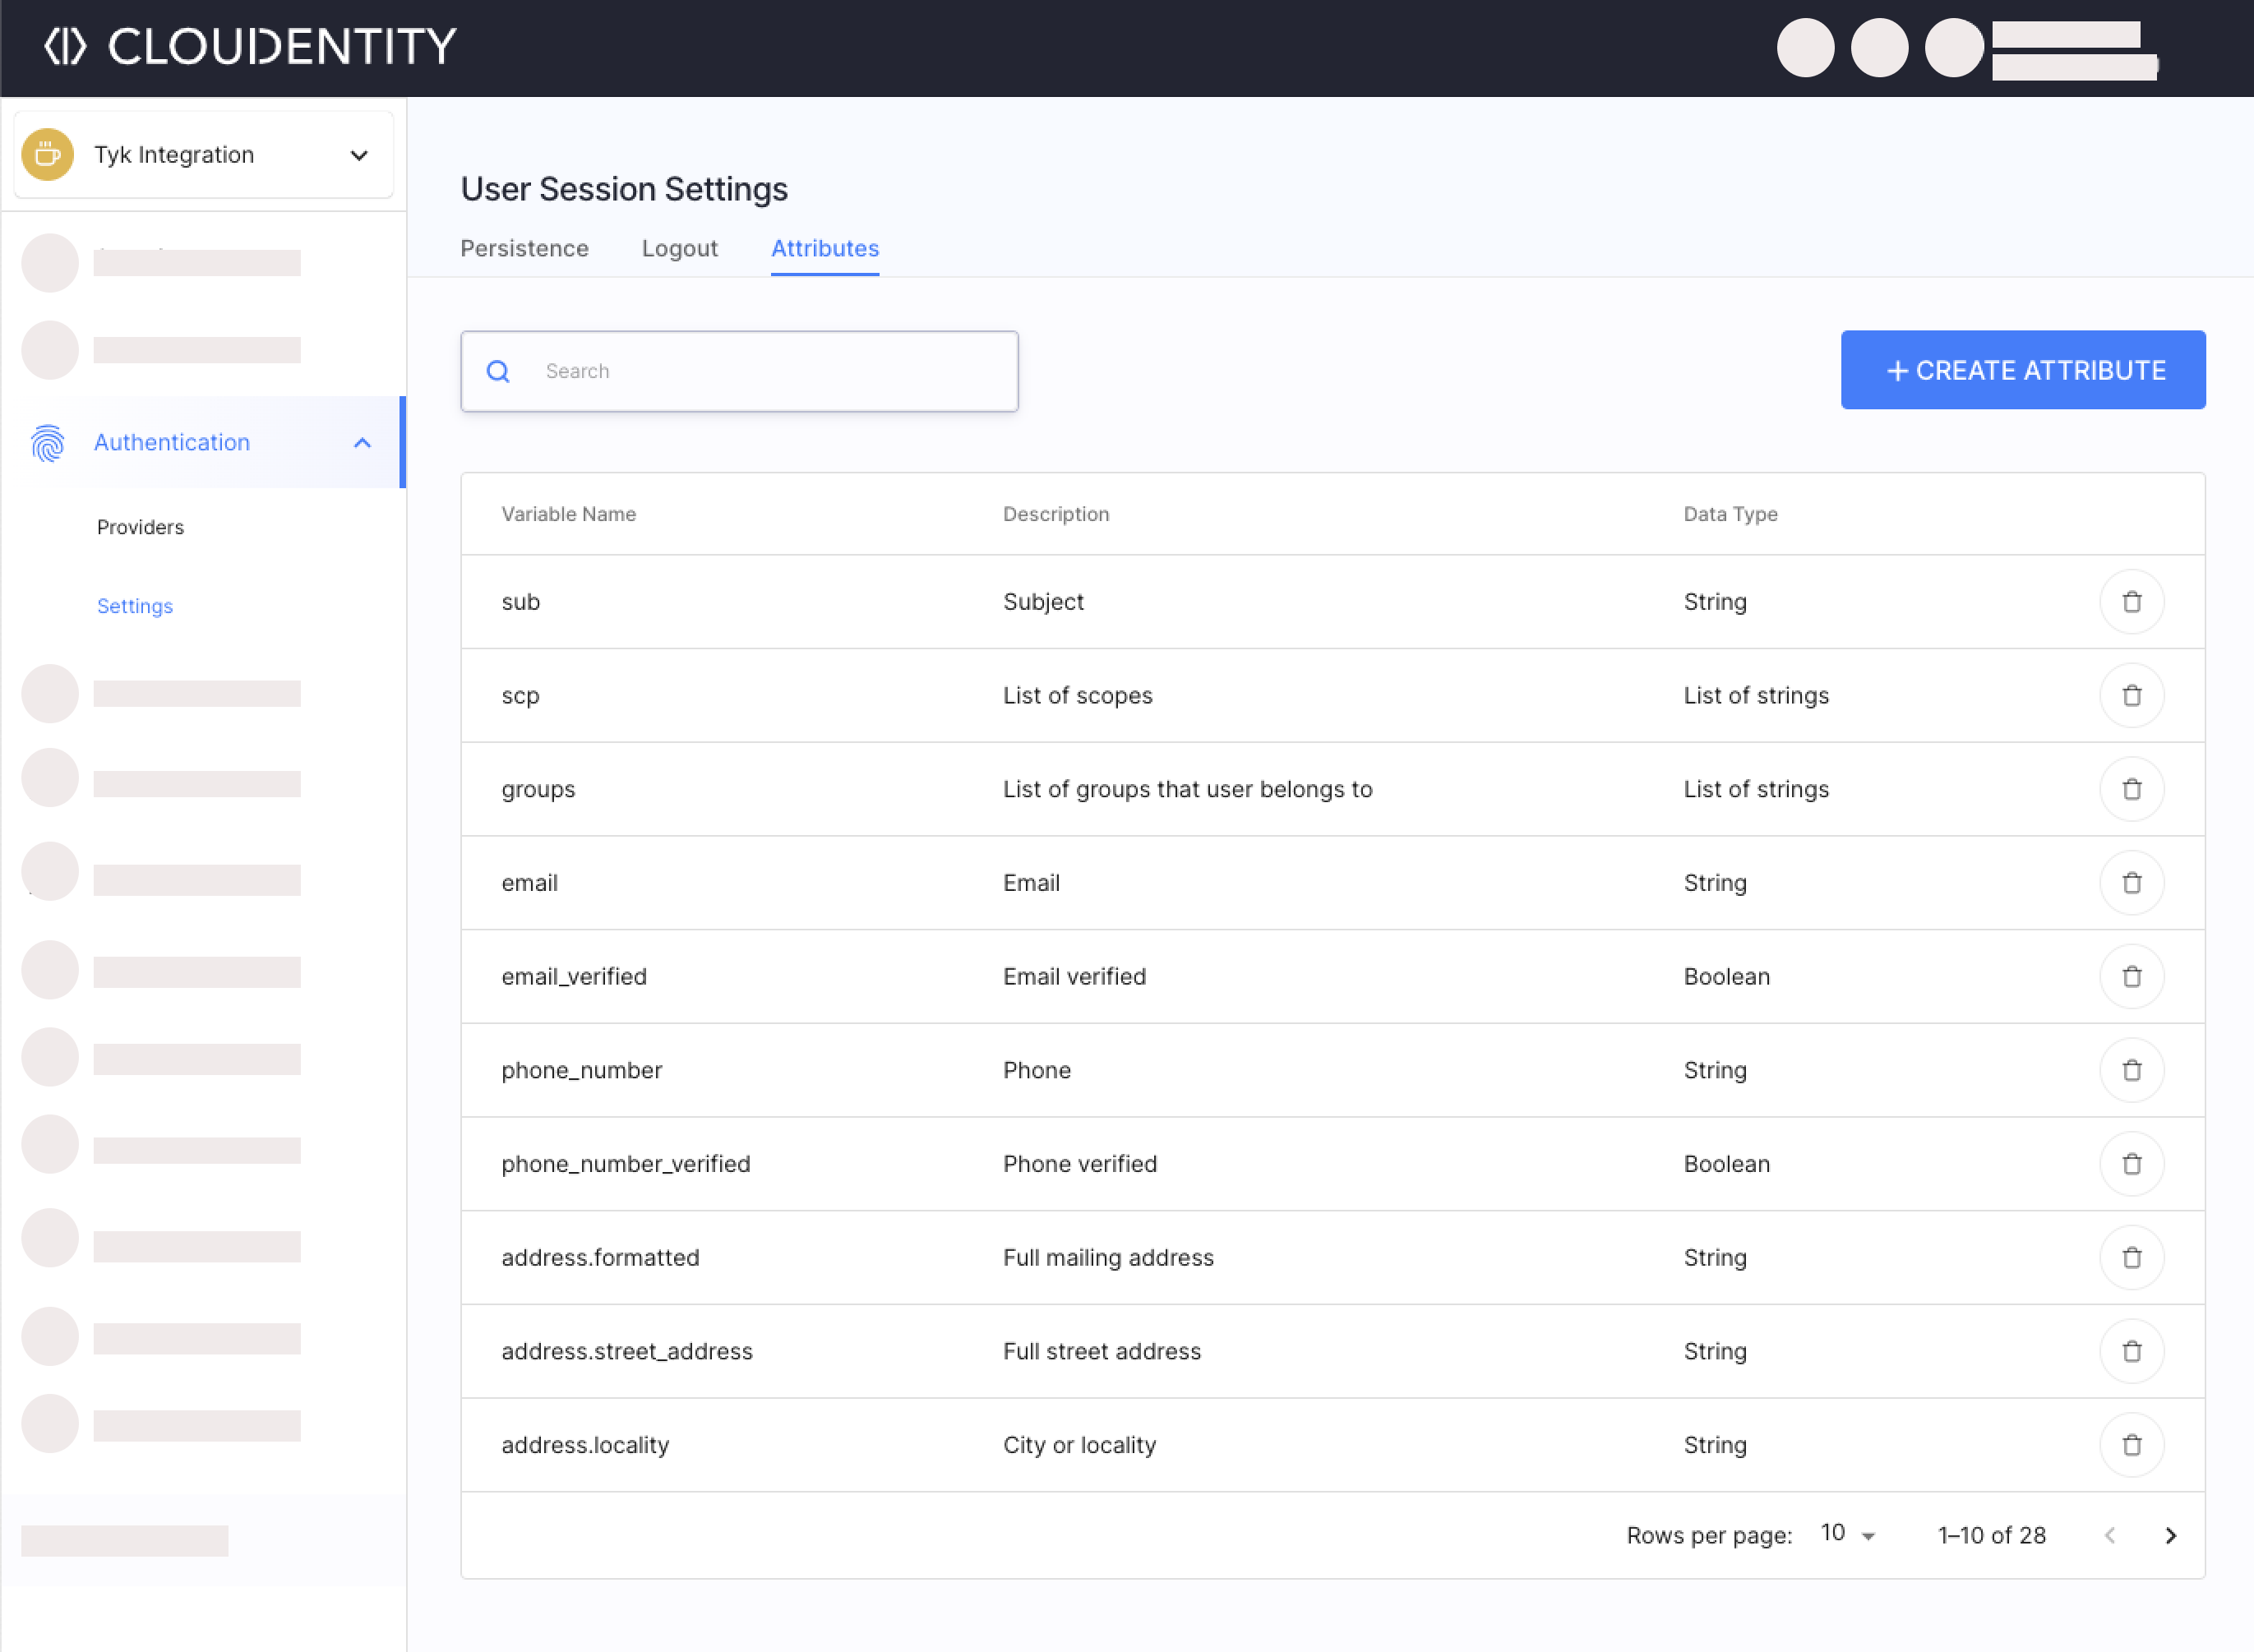
Select Authentication » Settings (if not visible, select the Show All option) » Attributes.
-
Select +Create Attribute.
-
Provide a name, data type, and a description of your choice.
-
Select Create.
The attribute is added. Now, you may proceed to mapping the user pool attibute to the newly created user session attribute. Later on, you can map the user session attribute to a token claim.
-
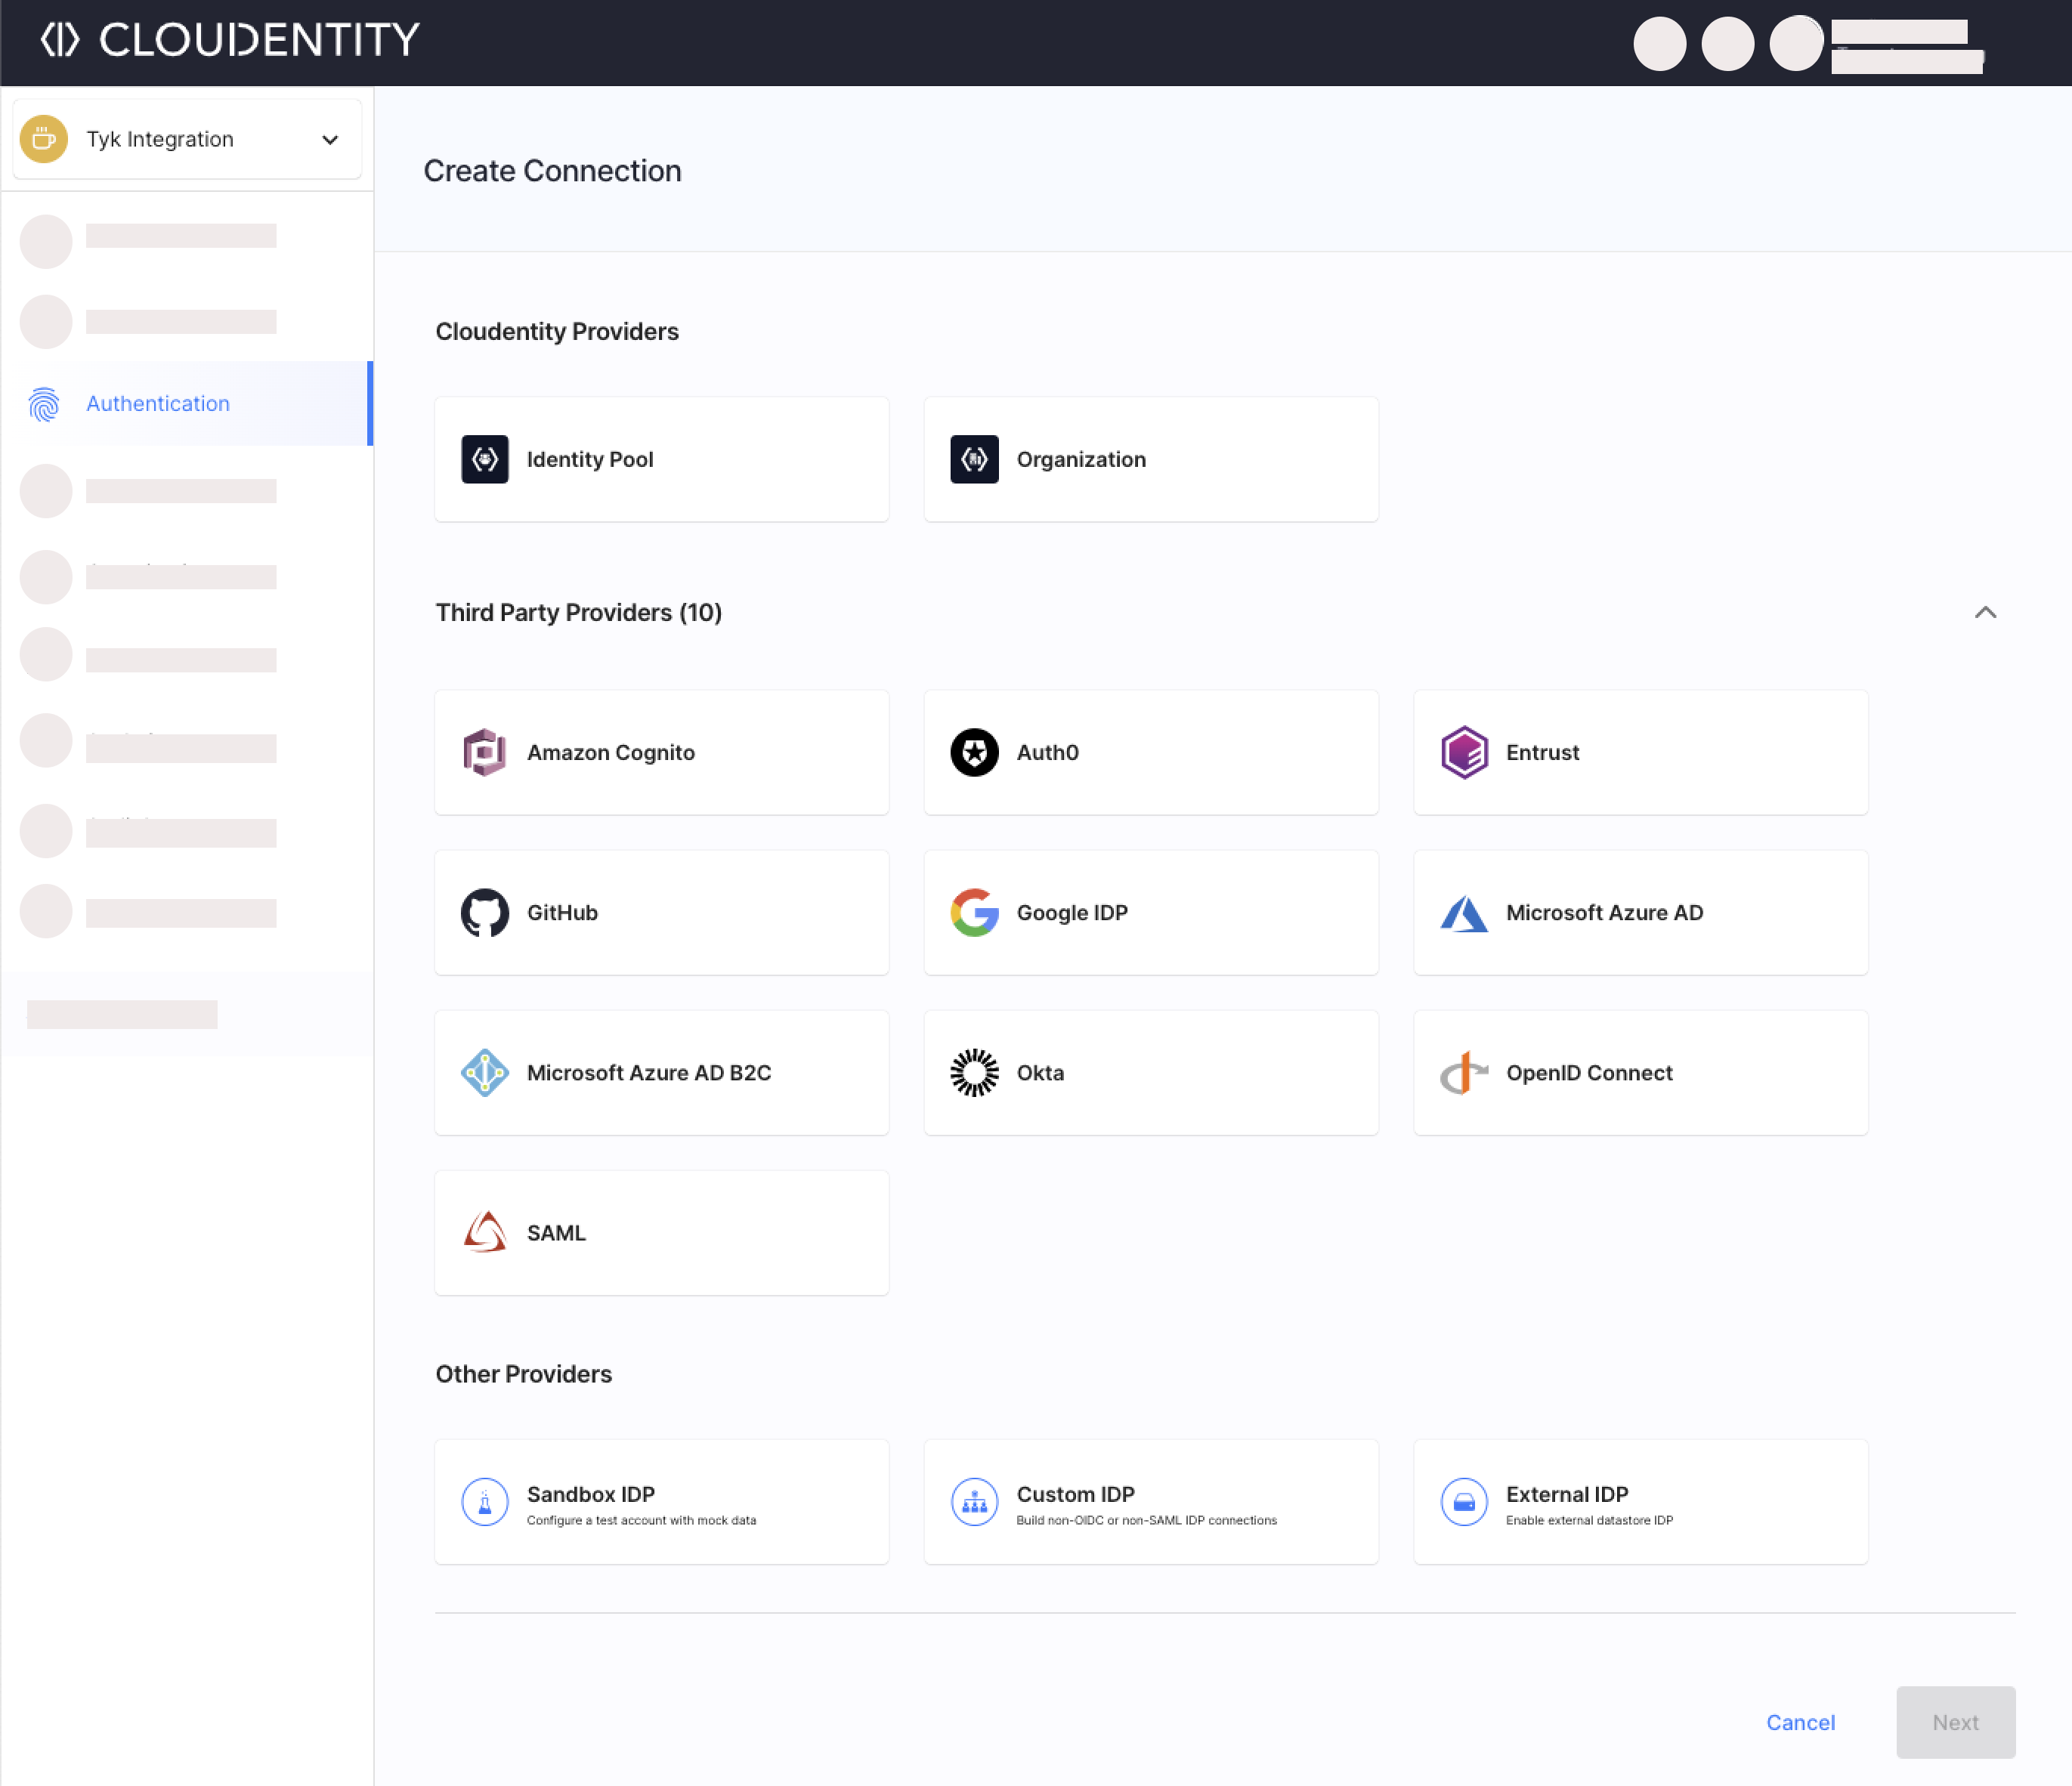
Select Authentication » Providers.
-
Select + Create Connection or enable the provider under the External Providers label (depending on the chosen layout).
Once connected, the developers are able to choose this external provider when asked for authentication.
Add Client Application for Tyk Integration
Create an application in Cloudentity for Tyk Identity Broker Integration. Do not worry about setting redirect URIs yet.
-
Select Applications » Clients.
-
Provide a name and pick Server-Side Web type.
-
Select create.
Learn more about applications.
You can find all client app’s credentials and useful endpoints in the application’s Overview tab. Later on, you will use them to configure the Tyk Identity Broker.
Install and Run Tyk Self-Managed
We chose the Self Managed option for this demonstration as it contains the Enterprise Developer Portal for developers. Follow official Tyk instructions by signing up for free quickstart trial.
Note
Before you run Tyk, create a secret for the Tyk Identity Broker to talk to Tyk Enterprise Developer Portal internally.
This can be configured by setting this environment variable in
tyk_portal.envPORTAL_API_SECRET=your-portal-api-secret
Configure and Run Tyk Identity Broker
More details on Tyk Identity Broker and its configurtion can be found in this Tyk article.
Below configurations has the value of PORTAL_API_SECRET (your-portal-api-secret) referenced
under:
profile.json->IdentityHandlerConfig -> DashboardCredentialtib.conf->TykAPISettings -> DashboardConfig -> AdminSecret
tib.conf also has docker network IP of other Tyk components which can be obtained using docker inspect tyk-pro-docker-demo_tyk
Adjust the below configuration files. You can find all client credentials and endpoints needed in the client application you created in Cloudentity.
- .profiles.json
 [{
 "ActionType": "GenerateOrLoginDeveloperProfile",
 "ID": "1",
 "IdentityHandlerConfig": {
  "DashboardCredential": "your-portal-api-secret"
 },
 "OrgID": "0",
 "ProviderConfig": {
  "CallbackBaseURL": "http://localhost:3010",
  "FailureRedirect": "http://localhost:3001/?fail=true",
  "UseProviders": [{
   "Name": "openid-connect",
   "Key": "REPLACE_WITH_CLOUDENTITY_OAUTH_CLIENT_ID",
   "Secret": "REPLACE_WITH_CLOUDENTITY_OAUTH_CLIENT_SECRET",
   "Scopes": ["openid", "email"],
   "DiscoverURL": "REPLACE_WITH_CLOUDENTITY_WELL_KNOWN_URL",
   "SkipUserInfoRequest": true
  }]
 },
 "ProviderName": "SocialProvider",
 "ReturnURL": "http://localhost:3001/sso",
 "Type": "redirect",
 "DefaultUserGroupID": "1"
}]
For example, the UseProviders section will look like this
"UseProviders": [
    {
        "Name": "openid-connect",
        "Key": "1774d147a16a43528e2f0434af896900",
        "Secret": "REDACTED____REPLACE_WITH_CLOUDENTITY_OAUTH_CLIENT_SECRET",
        "Scopes": ["openid", "email"],
        "DiscoverURL": "https://ce-se-demo.us.authz.cloudentity.io/ce-se-demo/tyk-gateway-demo/.well-known/openid-configuration",
        "SkipUserInfoRequest": true
    }]
- .tib.conf
{
 "Secret": "test-secret",
 "log_level": "debug",
 "HttpServerOptions": {
  "UseSSL": false,
  "CertFile": "./certs/server.pem",
  "KeyFile": "./certs/server.key"
 },
 "SSLInsecureSkipVerify": true,
 "BackEnd": {
  "Name": "in_memory",
  "IdentityBackendSettings": {
   "Hosts" : {
    "172.21.0.5": "6379"
   },
   "Password": "",
   "Database": 0,
   "EnableCluster": false,
   "MaxIdle": 1000,
   "MaxActive": 2000
  }
 },
 "TykAPISettings": {
  "GatewayConfig": {
   "Endpoint": "http://172.21.0.2",
   "Port": "8080",
   "AdminSecret": "352d20ee67be67f6340b4c0605b044b7"
  },
  "DashboardConfig": {
   "Endpoint": "http://172.21.0.4",
   "Port": "3001",
   "AdminSecret": "your-portal-api-secret"
  }
 }
}
Once configured, run the Tyk Identity Broker.
docker run -p 3010:3010 --network=tyk-pro-docker-demo_tyk -e TYK_LOGLEVEL='debug' -v $(pwd)/confs/tib.conf:/opt/tyk-identity-broker/tib.conf -v $(pwd)/confs/profiles.json:/opt/tyk-identity-broker/profiles.json tykio/tyk-identity-broker:v1.4
Verify Integration
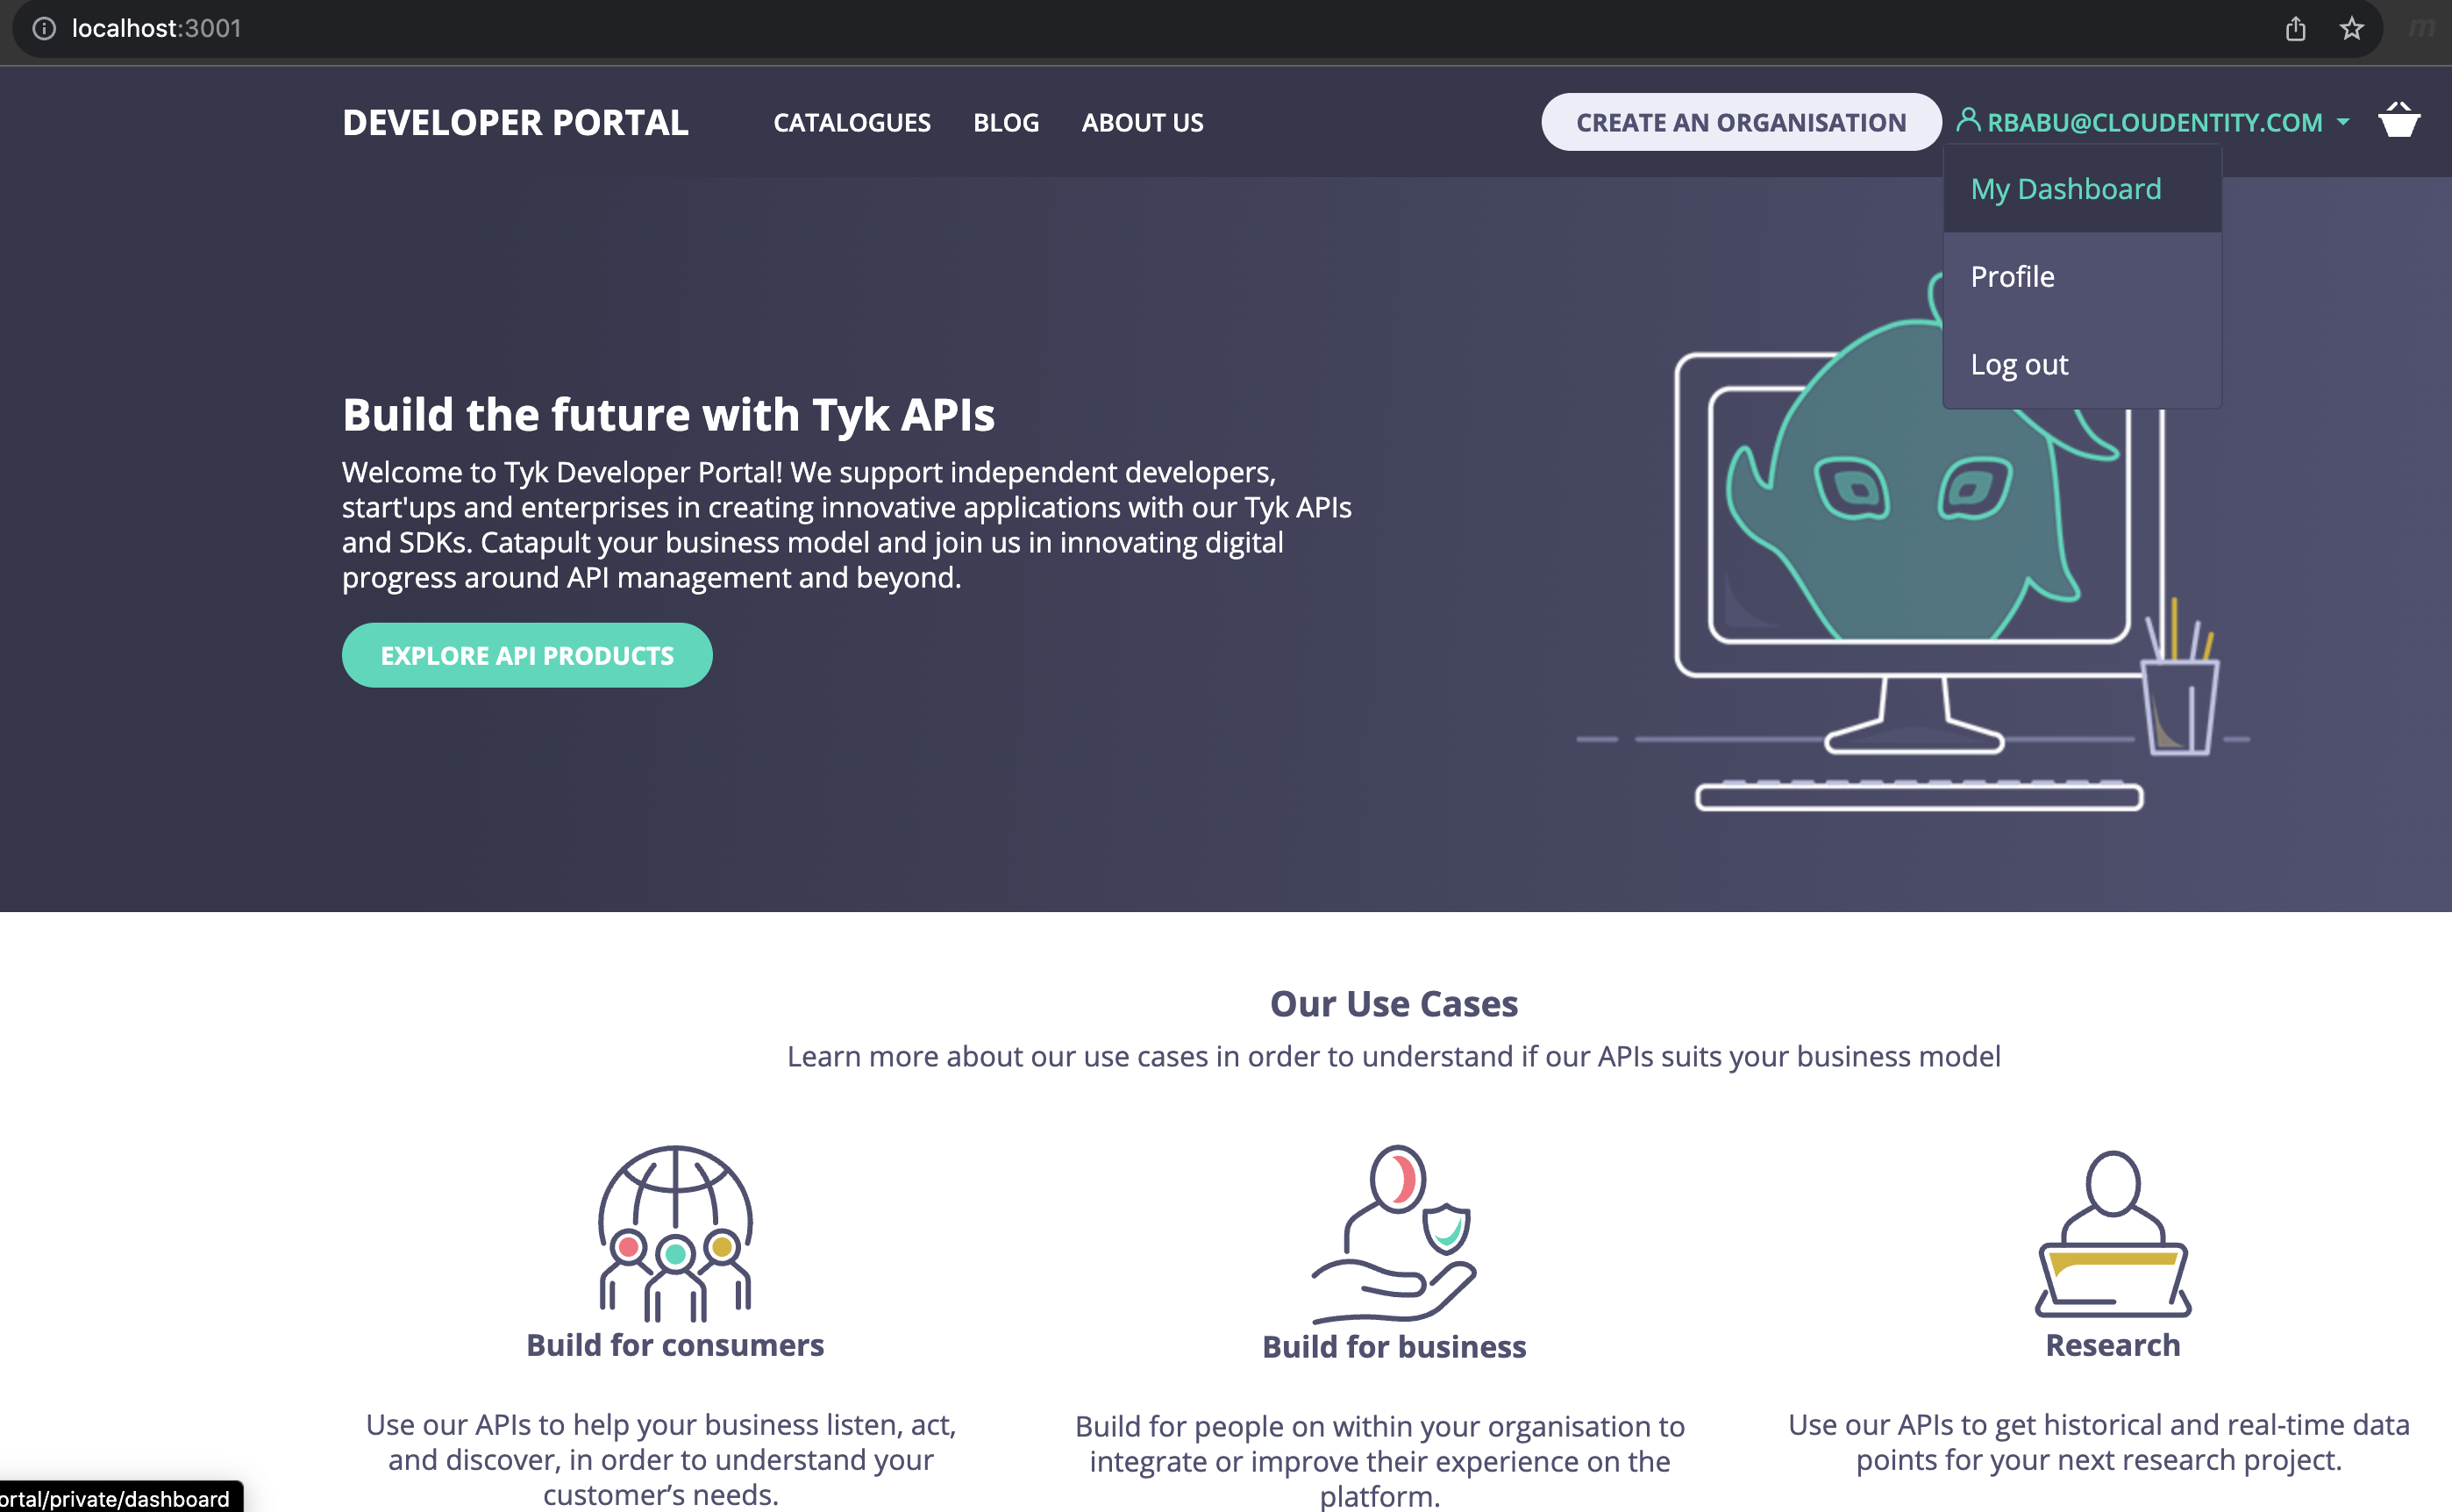
Now that the configuration is complete and all components are running, let’s try to authenticate a developer via Cloudentity and then let the developer seamlessly access the Tyk Enterprise Developer Portal.
-
Launch the login URL.
http://localhost:3010/auth/1/openid-connect -
Sign in a developer using one of the methods you configured in Cloudentity.
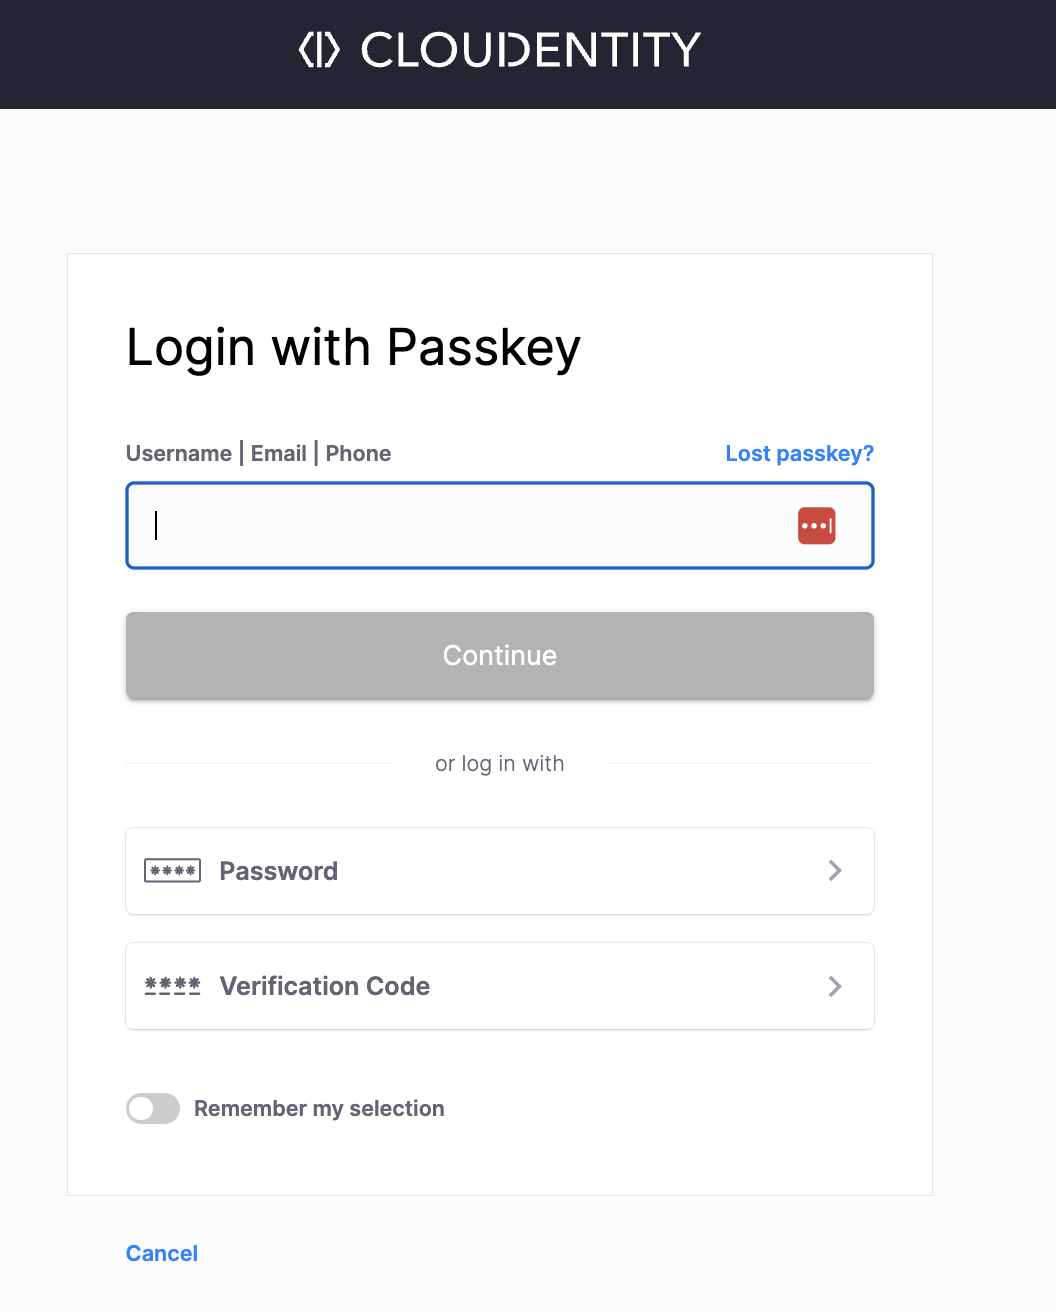
You should be able to access the Tyk Enterprise Developer Portal.
Now that you have seen how easily you can integrate Cloudentity with Tyk Enterprise developer portal for developer organization and developer onboarding. Cloudentity also provides capability for delegated management of developers to dedicated organization administrators using Cloudentity delegated B2B functionality
Summary
By prioritizing simplicity, security, and scalability, Cloudentity integration with Tyk API Gateway developer portal empowers developers to unleash their full potential in building innovative applications. As organizations continue to embrace API-driven strategies, the seamless integration of identity and access management with API gateways becomes not just a convenience but a strategic necessity.

