Overview
React (also known as React.js or ReactJS) is a free and open-source front-end JavaScript library for building user interfaces. It is painless, declartive, and component based. In this tutorial, we will create a React based front-end application that serves as an authentication application template. In this modern stack, we will use the OpenID Connect specification and use the OAuth Authorization code flow with PKCE to fetch an ID token that represents the identity of the authenticated user.
We will use Cloudentity as the OIDC provider. Cloudentity platform can plug in into any of your existing Identity providers like Okta, Auth0, Google, Facebook, and more. It abstracts away the dependency of the application on a specific identity provider and acts like pure open standard compliant OAuth and OIDC server. This way the application is integrated with Cloudentity as an OIDC provider via the open standard specifications.
Reference repo

Check out the below GitHub repository for a complete source code of the reference application in this tutorial
ReactjS OIDC Application
Prerequisites
- Cloudentity SaaS tenant
- Development
Building React Application
Initialize React Application
Within the directory of your choice, initialize the application by executing the following command in your terminal:
npx create-react-app oidc-auth-sample-app && cd oidc-auth-sample-app
Install Packages
We will use a couple of npm packages to build this application:
- react-router-dom which is responsible for client-side routing for React
- @cloudentity/auth which is a Cloudentity JS SDK responsible for handling OAuth/OIDC protocol handshakes, OAuth PKCE flow, PKCE code generation,and fetching and storing OAuth access tokens or ID tokens
- jwt-decode to decode JWT tokens, such as OAuth access tokens and OIDC ID tokens
Let’s go ahead and install the packages.
npm install --save react-router-dom @cloudentity/auth jwt-decode
Define React Components
To keep our application organized, let’s create a components directory and create some
basic React components
Login.js - view for unauthenticated traffic.
Profile.js - view for authenticated users.
-
Within your React application directory, execute the following command:
mkdir src/components && cd src/components -
Create a file named
Login.jswith below contents:const Login = () => { return ( <div> <h1>Welcome!</h1> <button> Please log in. </button> </div> ); } export default Login; -
Create another file named
Profile.jswith below contents:const Profile = () => { return ( <div> <h1>Welcome, { /* we'll dynamically populate this soon */ 'user' }!</h1> <h3> Your profile info: </h3> <div> { /* we'll dynamically populate this soon */ } </div> </div> ); }; export default Profile;
Configure Routing
Let’s define some routing within the React authentication app.
- The index route (
/) will not require authorization therefore any user who is not authorized will be redirected to this route. - The profile route (
/profile) will require authorization to access. After the login, authorized users will be redirected to this route.
We will use the react-router-dom package to
handle the routing. We will be building and securing these routes as we progress through this
article. At this point, anyone can visit them without authorization. Let’s modify the default
src/App.js to include above Routes and also import the view components for Login and Profile.
import {
  BrowserRouter,
  Routes,
  Route
} from 'react-router-dom';
import Login from './components/Login';
import Profile from './components/Profile';
import './App.css';

function App() {
  return (
    <div className="App">
      <BrowserRouter>
        <Routes>
          <Route index element={<Login />} />
          <Route path="profile" element={<Profile />} />
        </Routes>
      </BrowserRouter>
    </div>
  );
}

export default App;
Let’s do some basic styling for App by editing src/App.css, we’ll modify the App class to
look like the following snippet, and discard everything else. You may choose to style it for your needs
.App {
  min-height: 100vh;
  display: flex;
  flex-direction: column;
  align-items: center;
  justify-content: center;
  text-align: center;
}
Start Development Server
You can start the development server by executing the following command in your project root catalog:
npm start
Navigate to http://localhost:3000. You’ll see the Login view. If you go directly to
http://localhost:3000/profile, you’ll see the Profile view.
| Login view | Profile view |
|---|---|
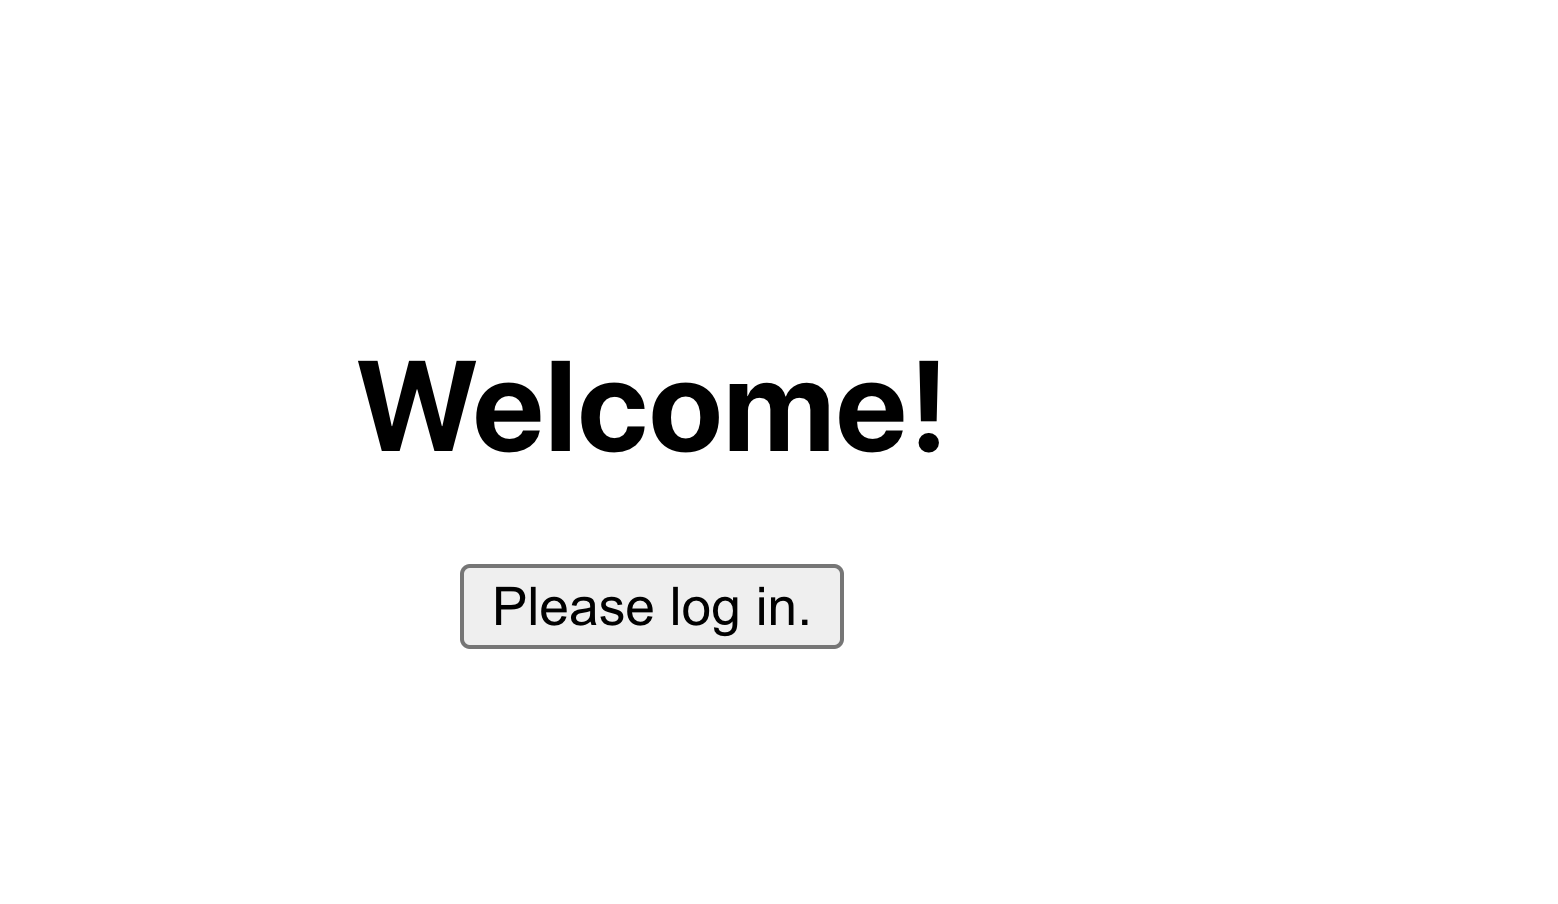 |
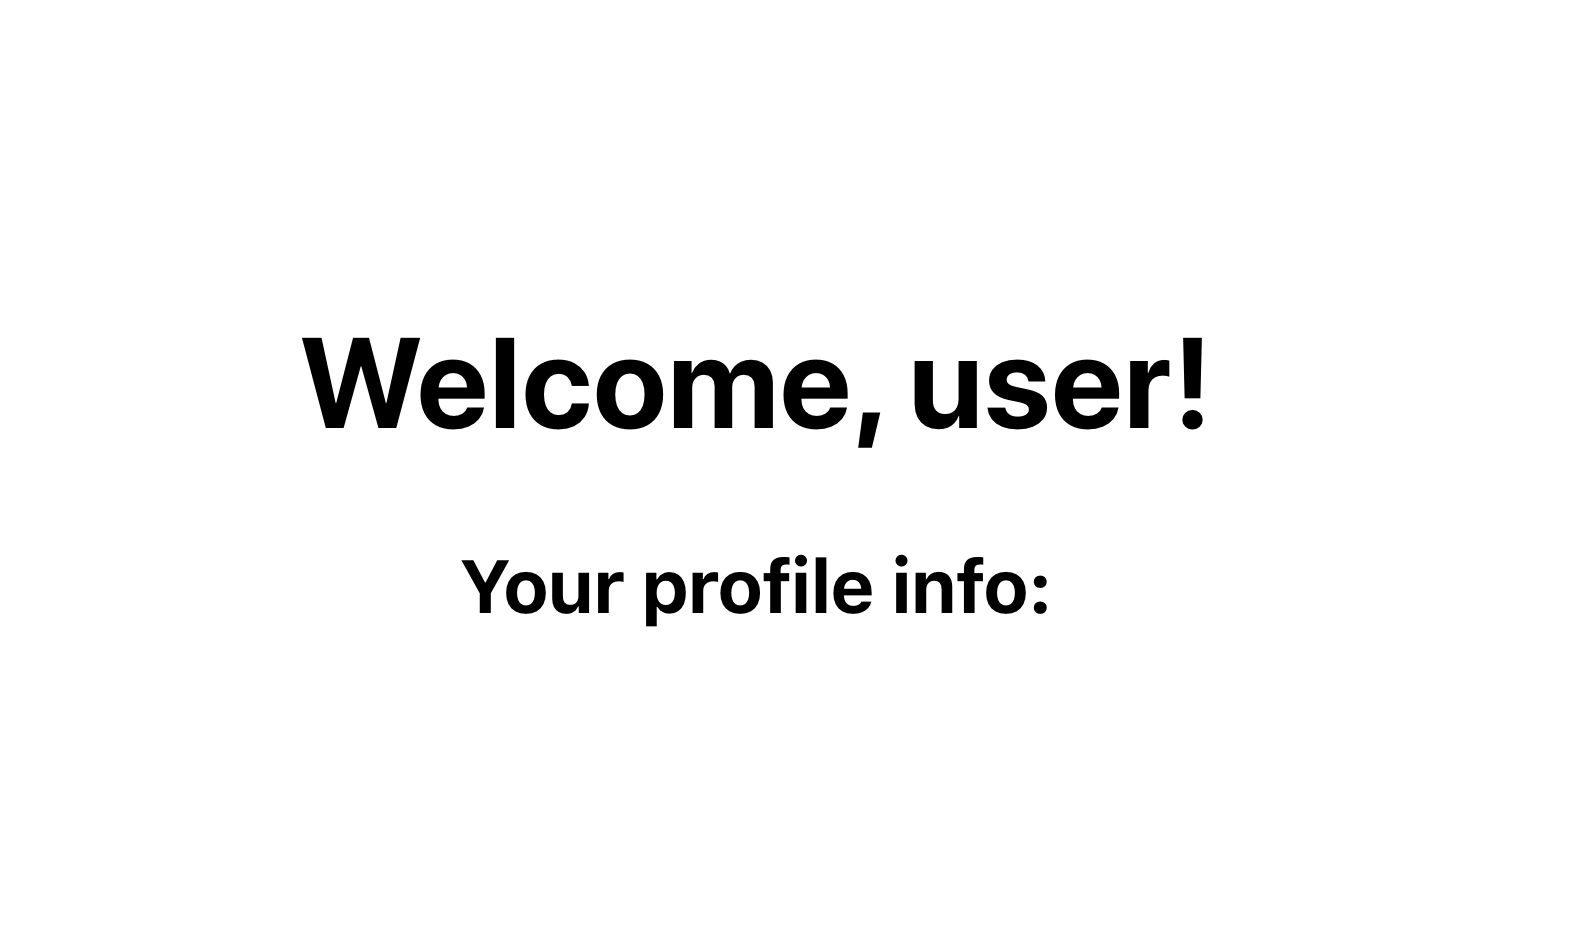 |
We have not applied the authorization logic to the routes yet, so let’s register the application with Cloudentity and then configure the application to protect the profile view to be accessible for authorized users.
Tip - Insight
Authorized users are represented in this application by the presence of a valid ID token fetched from Cloudentity as an OIDC provider. In this application, if a valid ID token is not available, then it reaches out to Cloudentity to get a new token for usage and display the profile page for the authenticated user.
Application Configuration
Register OAuth Client
We will register a public OAuth Client Application
in the Cloudentity platform. The client application type is recommended to be public
as this is a single page application with no trusted backend and there should NOT be any client
secrets/credentials used in this application for OAuth flow. This means we will use
the OAuth authorization code with PKCE flow - RFC7636
for securely obtaining the ID token
which represents an authenticated end user identity token.
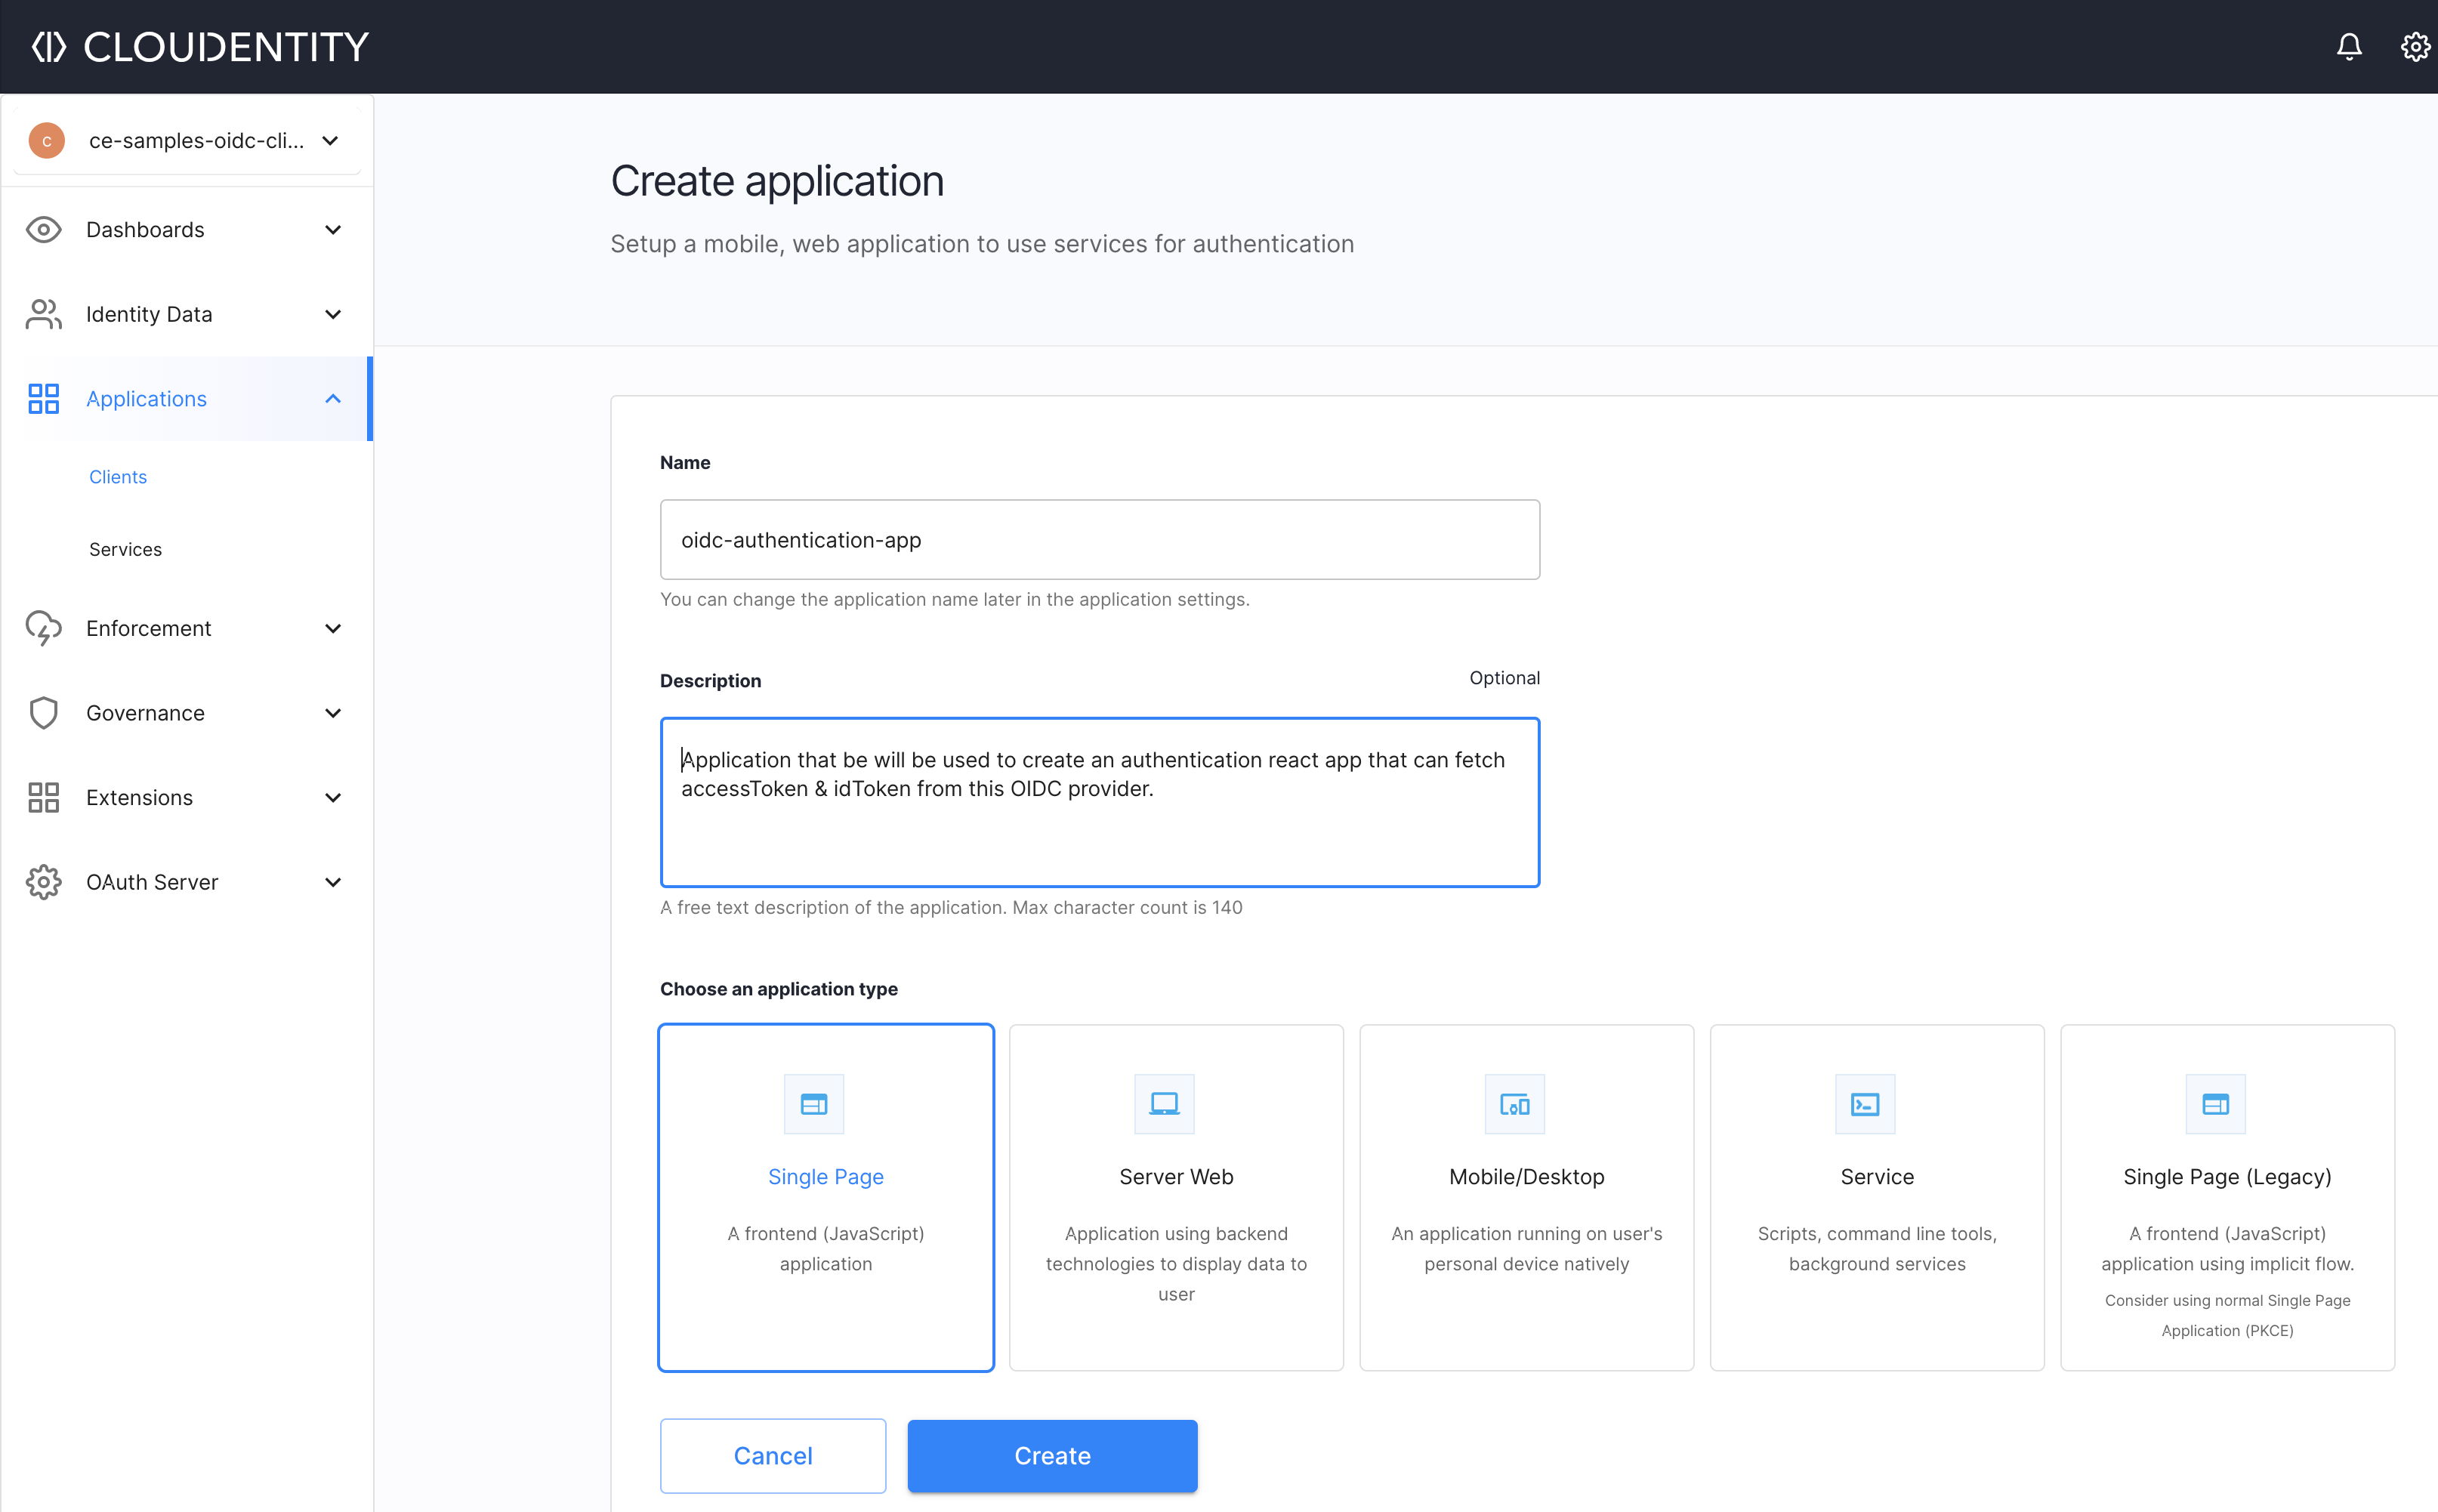
-
Create OAuth client application that is secure and is configured to satisfy above flow requirement in Cloudentity.
For your application, select the Single Page application type.
-
Add a redirect URL for this application.
As per the OAuth specification, once the interaction with an authentication system is complete, this is the URL to which the OAuth/OIDC provider, in this case Cloudentity, responds with the authorization code. The React application should be able to handle this incoming authorization code (which, in this case, is handled by the @cloudentity/auth library) and process it further. By default, the app runs at
http://localhost:3000but in case you have hosted this application somewhere else, then add that URL in this field.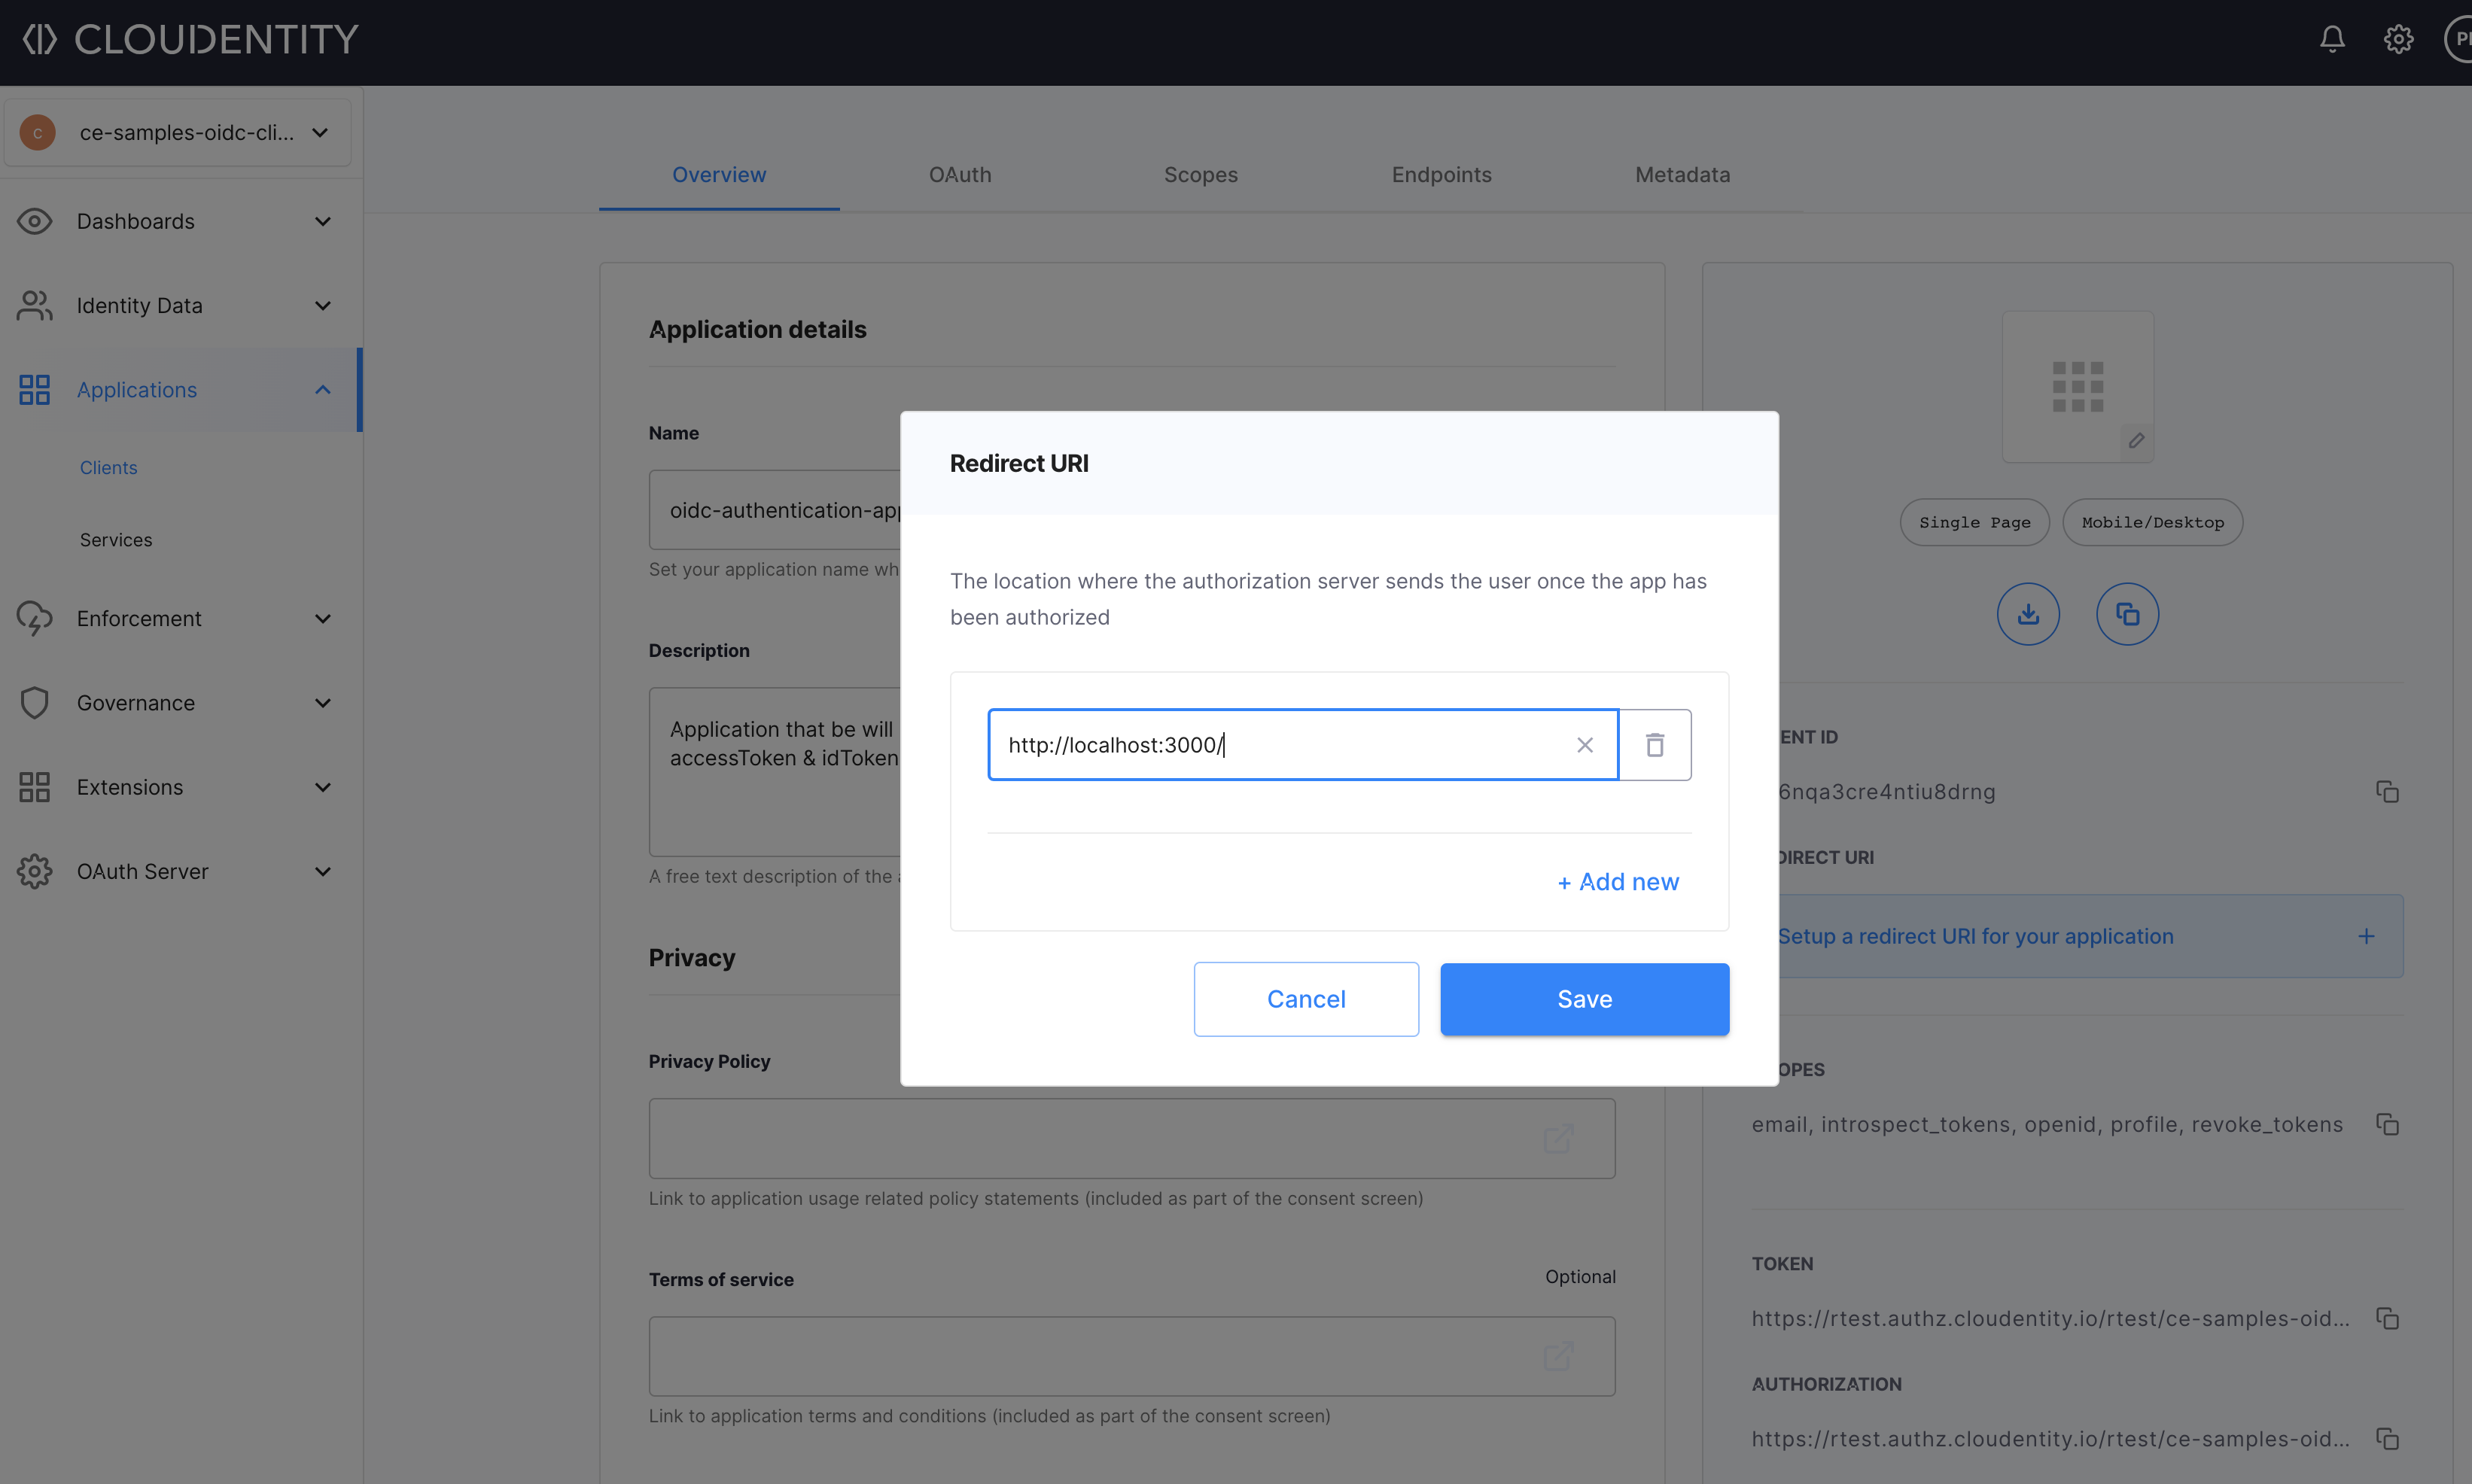
Now that we have registerd the OAuth client application, let’s look at some of the highlighted configurations.
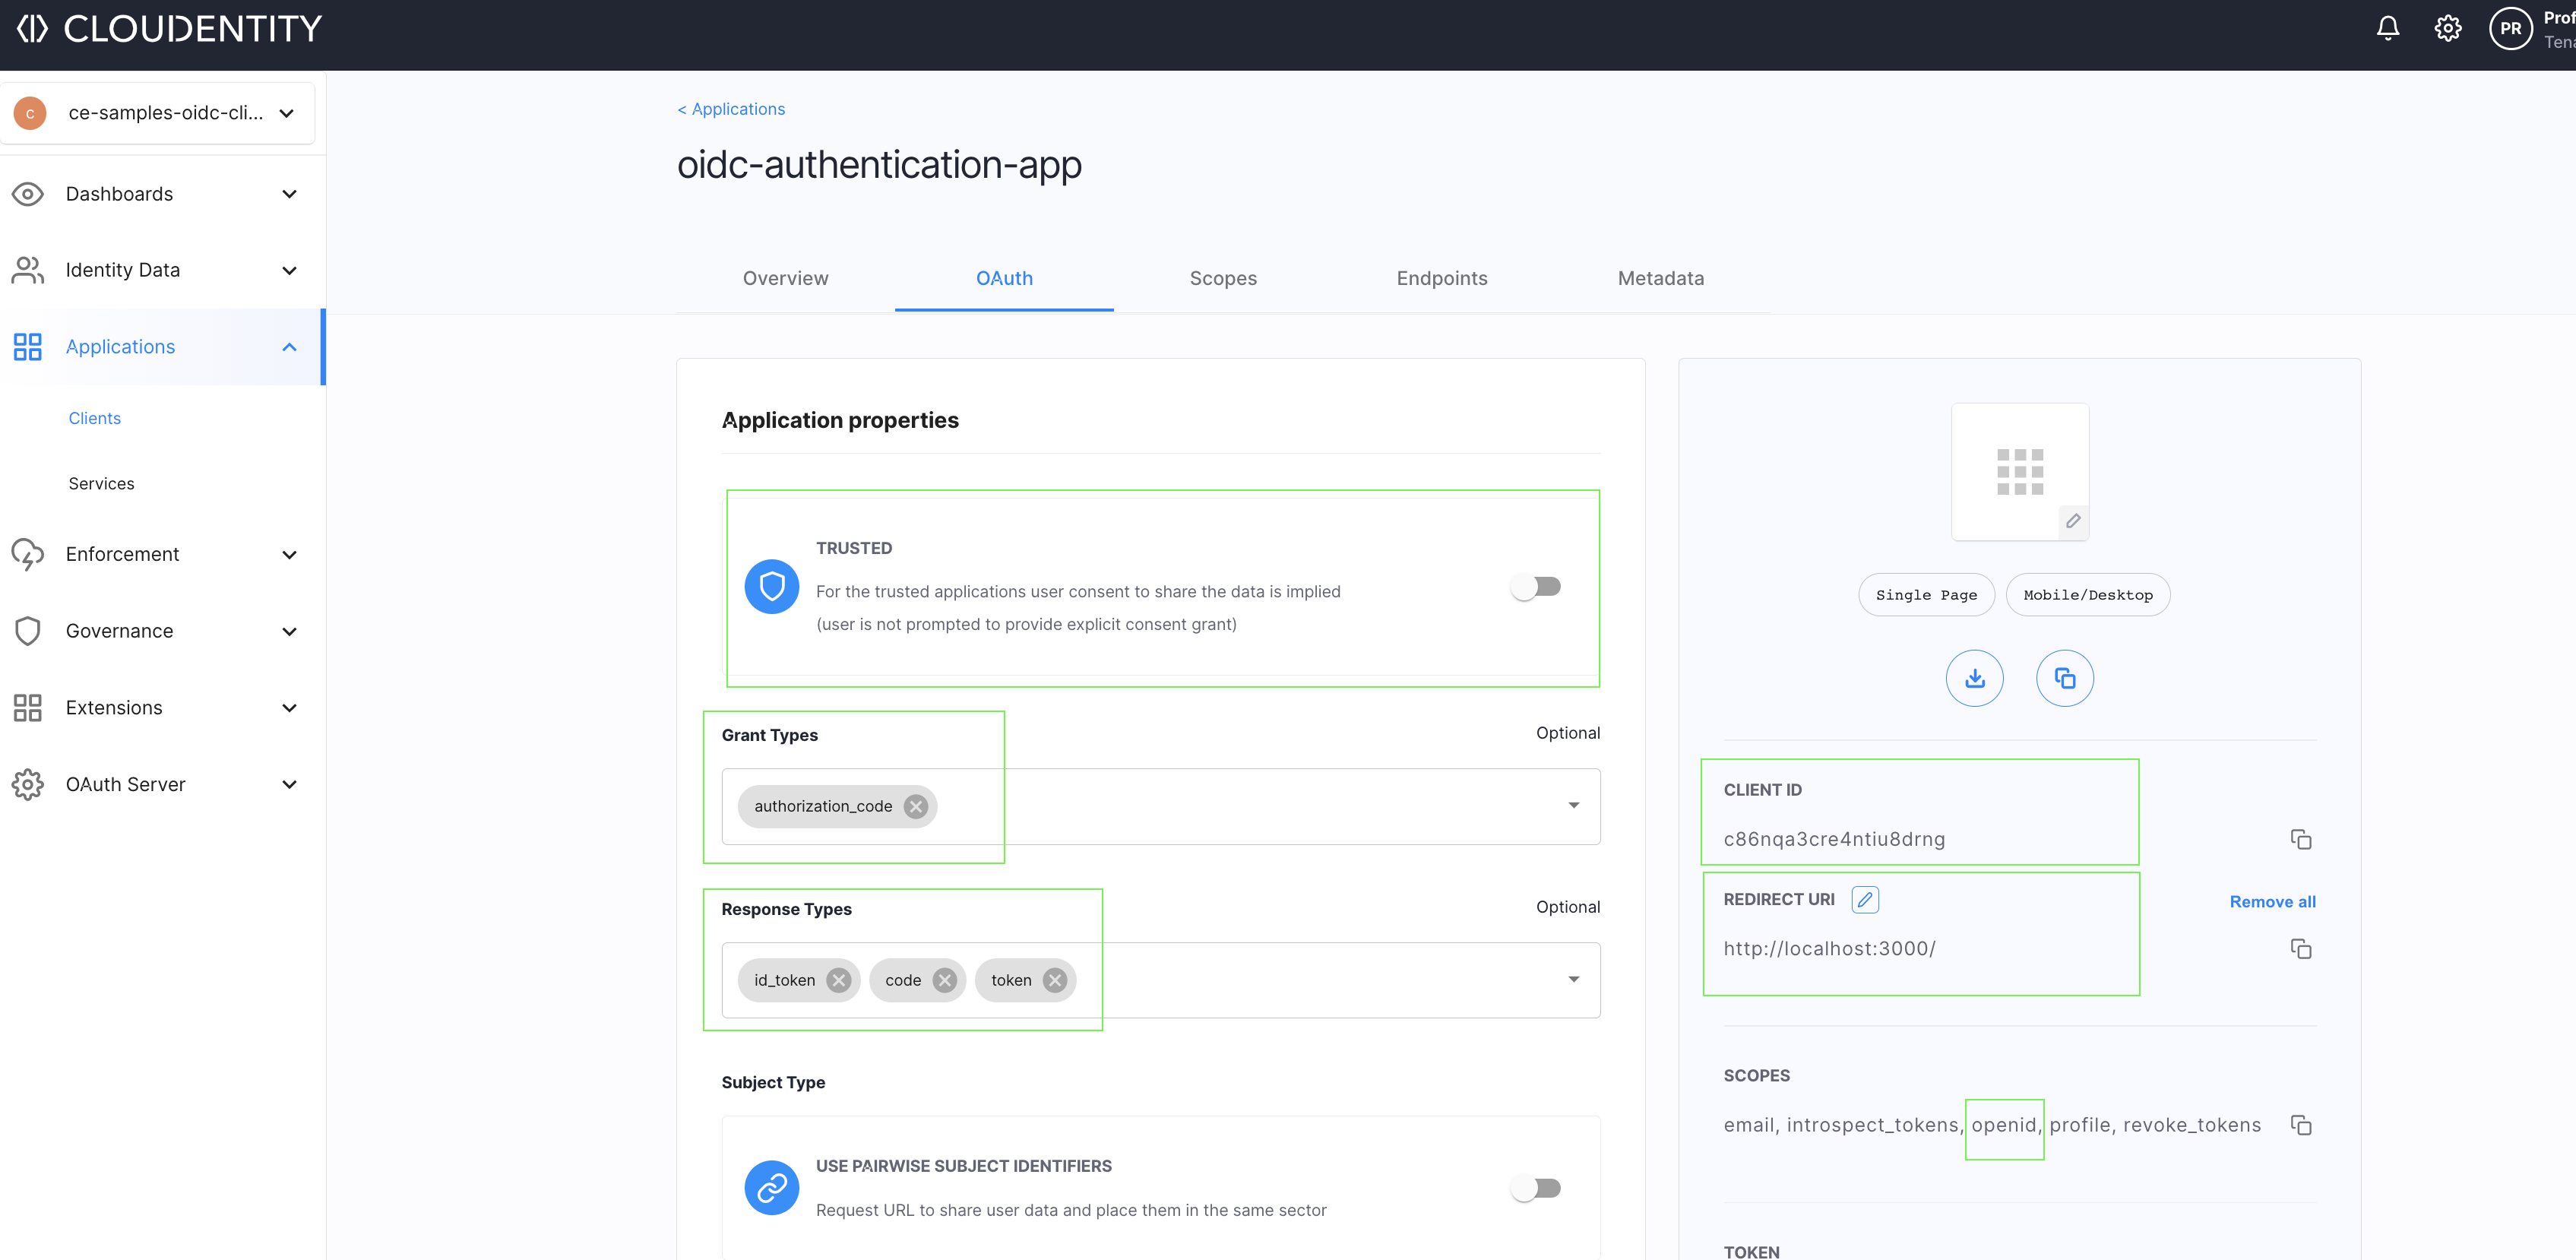
- Trusted app - This should be turned off as this is a single page application that is completely executed in an end user browser/device
- Grant type - indicates that we are using the recommended
authorization codegrant flow - Response type - indicates that we need an ID token back in the response of a call to the
/tokenendpoint - Client ID - identifier of the client application
- Redirect URI - URL to which the Cloudentity sends back the
authorization codeif authorized successfully. If the application is not authorized sucessfully, an error response is returned. - Scope - set of scopes that is required for the OIDC flow. We do require the
openidscope to retrieve the subject identifier and ID tokens.
Configure React App with OAuth Client
As we pointed our earlier, we will use the Cloudentity OAuth SDK library to wrap the entire handling of the OAuth handshake flows that includes PKCE code generation, authorize call, exchange code for tokens, and more. Let’s configure the Cloudentity OAuth SDK library in our React application with the registered OAuth client information.
First, we need to set up a config file that contains the registered OAuth client application information, and a file for an auth hook that we can use in our components to check whether the user is authorized to access a certain view.
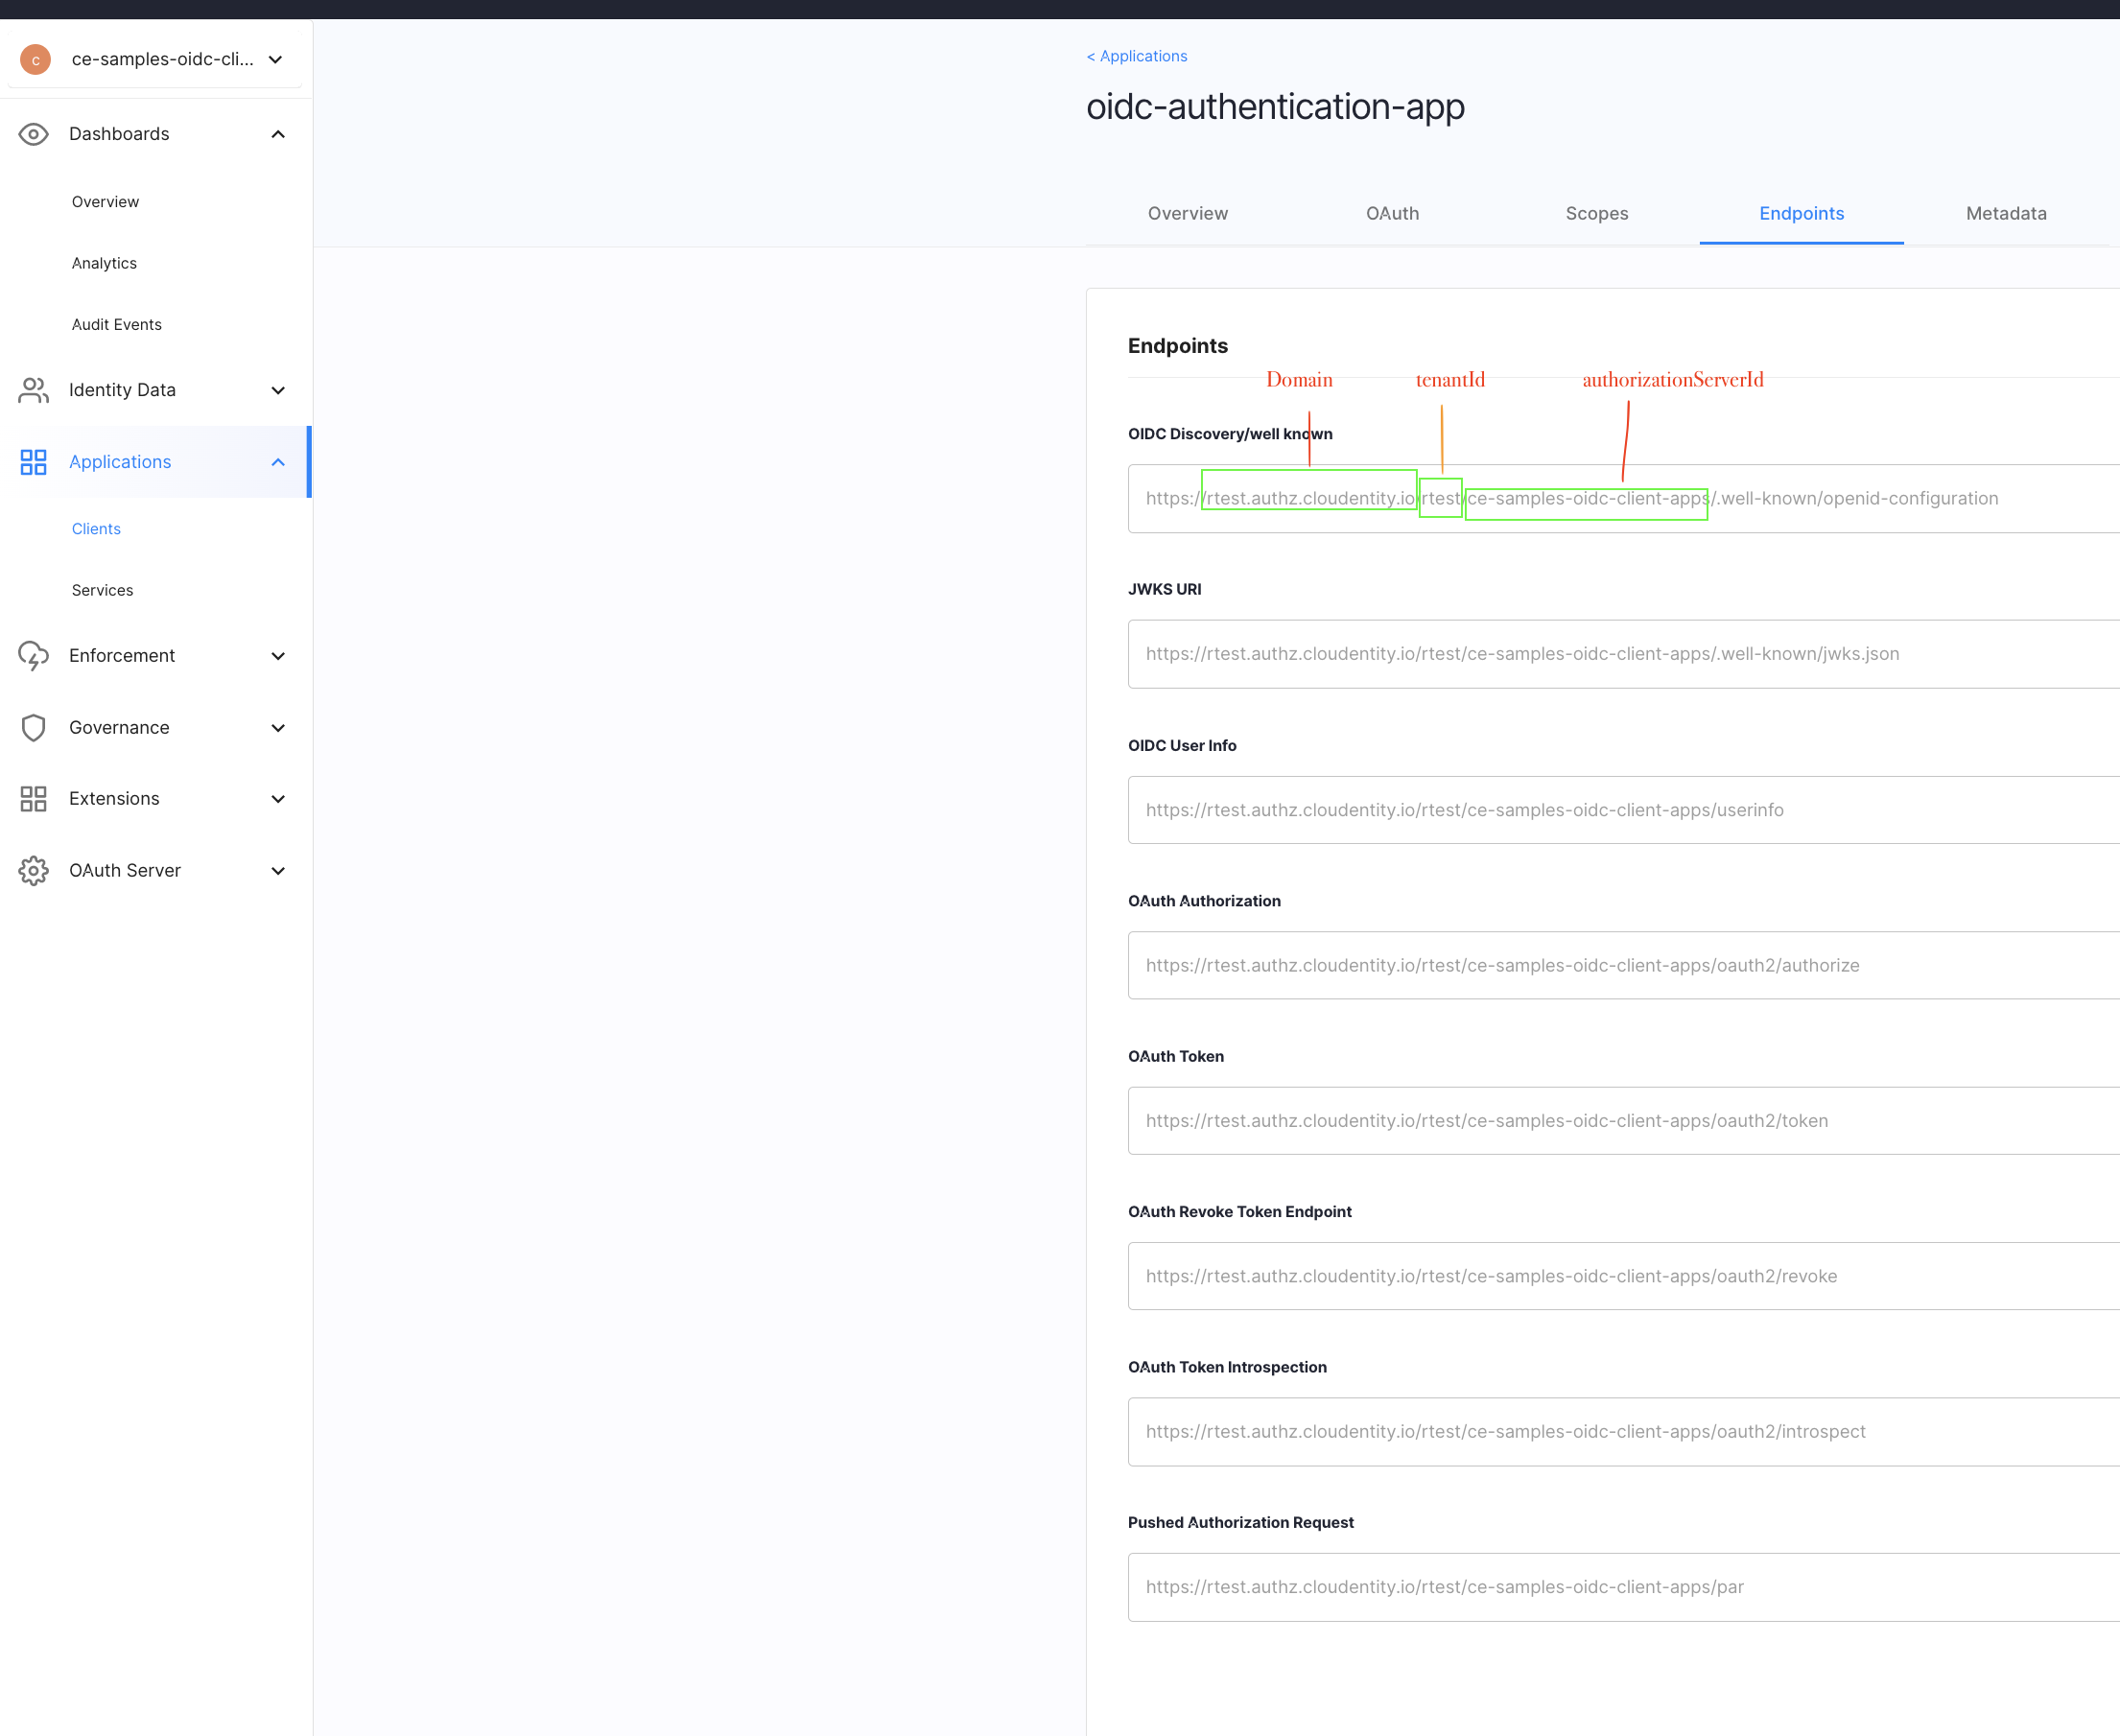
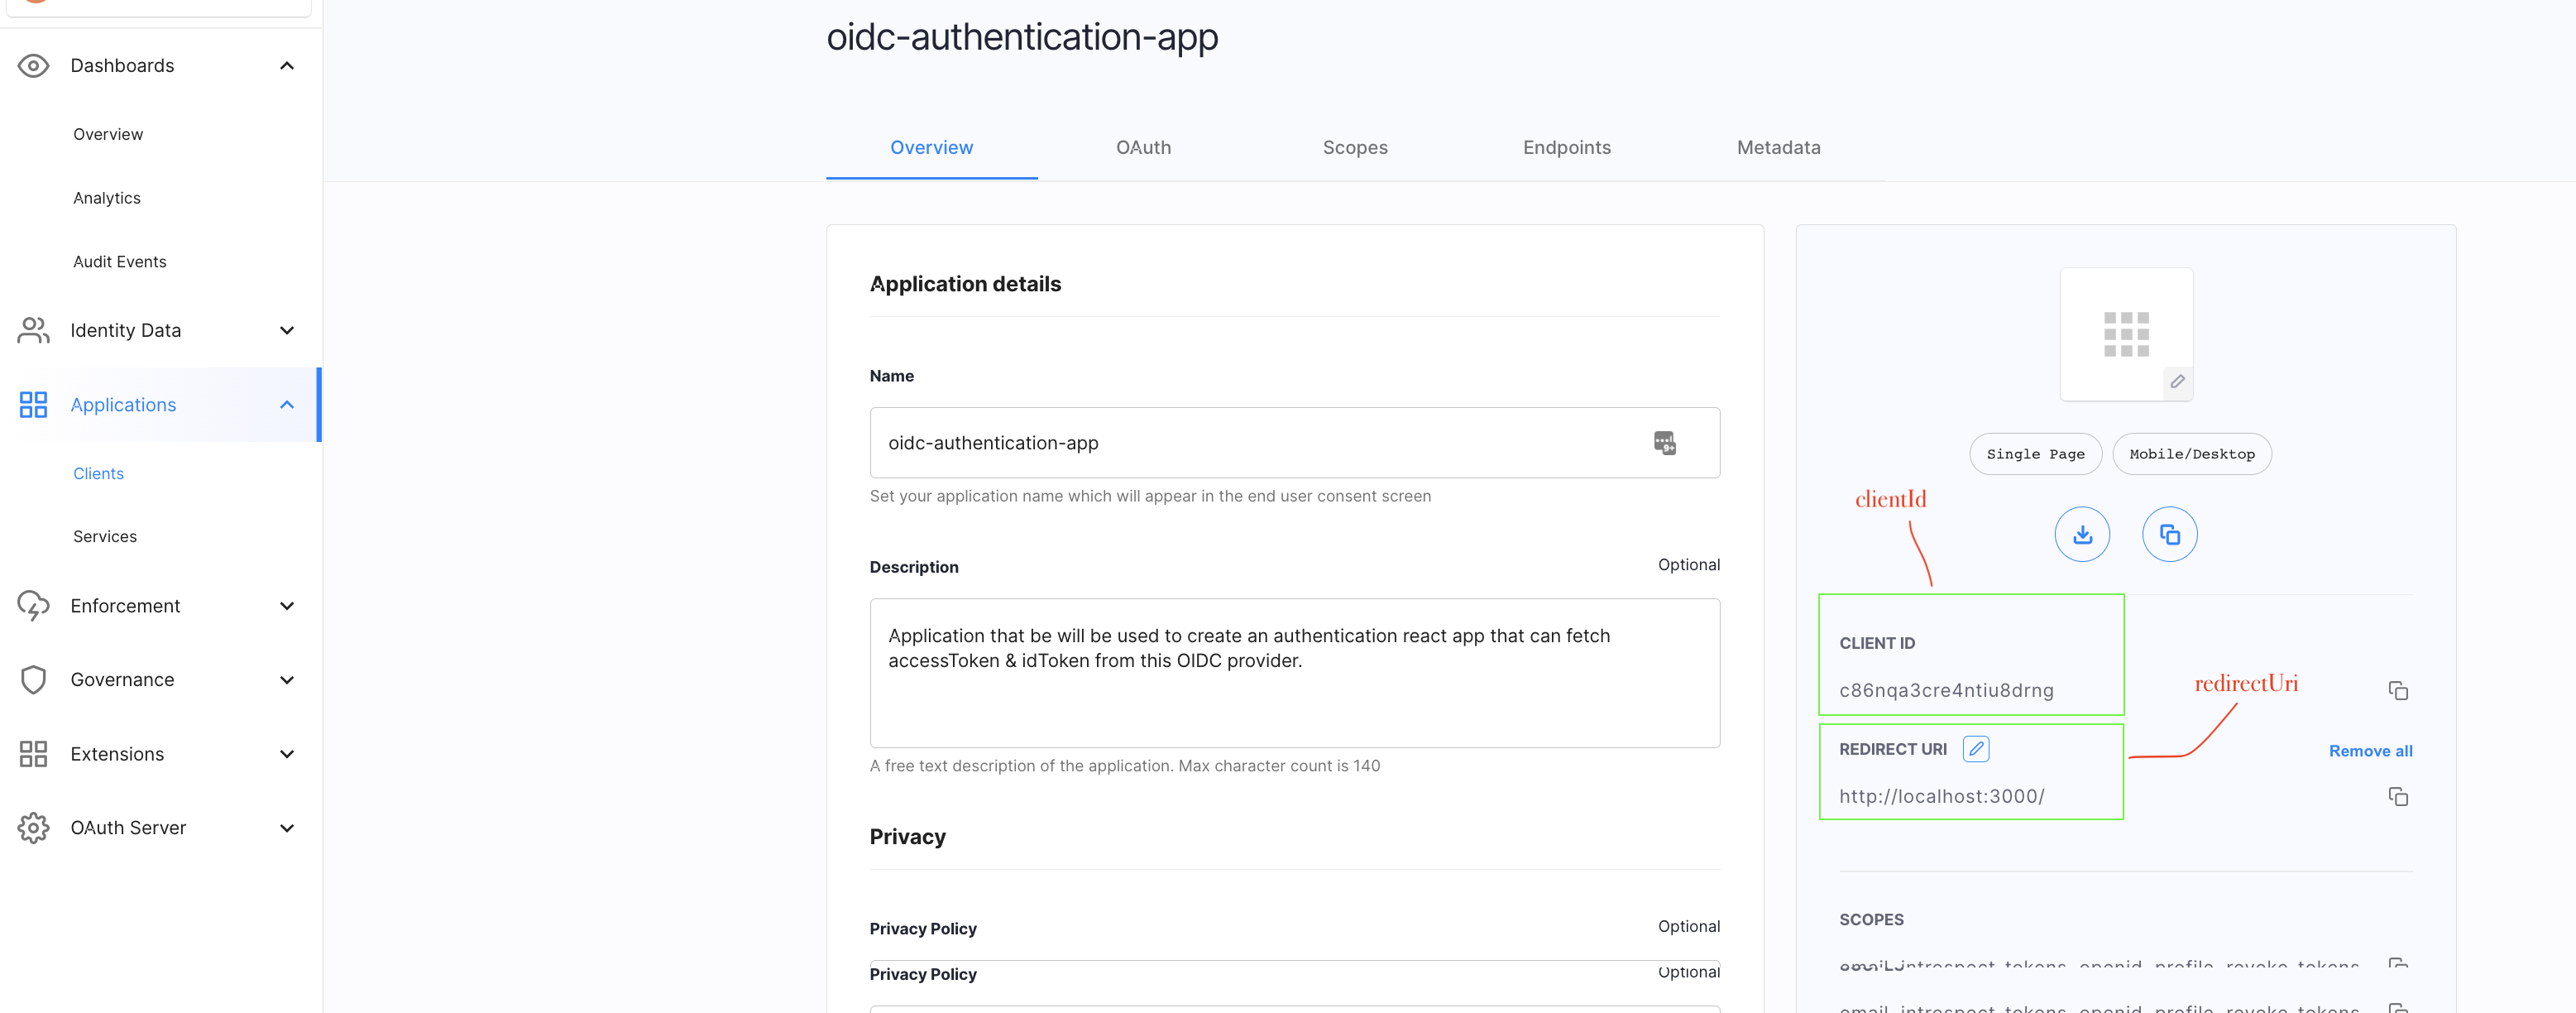
Let’s create a file named authConfig.js under the src directory. In the src/authConfig.js
file, replace the example values with values from the OAuth application set up within
Cloudentity. You can find the values for these from the Cloudentity
application registration page as shown in below images.
const authConfig = {
    domain: 'mytenant.us.authz.cloudentity.io', // e.g. 'mytenant.us.authz.cloudentity.io.' Recommended; always generates URLs with 'https' protocol.
     // baseUrl: optional alternative to 'domain.' Protocol required, e.g. 'https://mytenant.us.authz.cloudentity.io'
     // In situations where protocol may dynamically resolve to 'http' rather than 'https' (for example in dev mode), use 'baseUrl' rather than 'domain'.
     tenantId: 'mytenant', // This is generally in the subdomain of your Cloudentity ACP URL
     authorizationServerId: 'demo', // This is generally the name of the workspace you created the OAuth application in.
     clientId: 'application-client-id-goes-here',
     redirectUri: 'http://localhost:3000/',
     scopes: ['profile', 'email', 'openid'], // 'revoke_tokens' scope must be present for 'logout' action to revoke token! Without it, token will only be deleted from browser's local storage.
     accessTokenName: 'mytenant_demo_access_token', // optional; defaults to '{tenantId}_{authorizationServerId}_access_token'
     idTokenName: 'mytenant_demo_id_token', // optional; defaults to '{tenantId}_{authorizationServerId}_id_token'
 };

 export default authConfig;
Tip - Configuration reference
Tip - Insight
src/authConfig.jscontains the configuration required to handshake with Cloudentity to obtain anaccessTokento consume resources on behalf of an end user, and anidTokento provide identity data. The underlying Cloudentity SDK uses the authorization code grant with PKCE flow to get the accessToken. Read more about the OAuth PKCE flow.
React Hook to Maintain Auth State
Let’s create a React hook to manage the state whether user is authenticated or not.
In the src/auth.js file, we’ll create a simple hook to manage our authenticated state:
import {useState, useEffect} from 'react';

export const useAuth = (auth) => {
  const [authenticated, setAuthentication] = useState(null);

  function removeQueryString() {
    if (window.location.href.split('?').length > 1) {
      window.history.replaceState({}, document.title, window.location.href.replace(/\?.*$/, ''));
    }
  }

  useEffect(() => {
    auth.getAuth().then((res) => {
      if (res) {
        console.log('auth response:', JSON.stringify(res));
        removeQueryString();
      }
      setAuthentication(true);
    })
    .catch((_authErr) => {
      setAuthentication(false);
      if (window.location.href.split('?error').length > 1) {
        if (authenticated === false) {
          window.alert('The authorization server returned an error.');
        }
      } else {
        removeQueryString();
      }
    });
  });

  return [authenticated];
};
Now we have all the building blocks to wire the OAuth flow with Cloudentity as
an OIDC provider within the React application. Cloudentity Auth SDK handles
the OAuth authorization (code => token exchange), redirects. and
setting the access token. If an access token is not available in the local storage, the user
is redirected to the / route that prompts them to login.
Add Login and Logout Handlers
As the last step, let’s go back to the src/App.js file, and import the
Cloudentity Auth SDK, registered OAuth client application configuration,
and the auth hook; we’ll then add the login and logout handlers to pass as props
to our Login and Profile components (as shown below).
// ...

import CloudentityAuth from '@cloudentity/auth';
import authConfig from './authConfig';
import { useAuth } from './auth';

function App() {
  const cloudentity = new CloudentityAuth(authConfig);
  const [authenticated] = useAuth(cloudentity);

  function authorize () {
    cloudentity.authorize();
  };

  function clearAuth () {
    cloudentity.revokeAuth()
      .then(() => {
        window.location.reload();
      })
      .catch(() => {
        window.location.reload();
      });
  };

  return (
    <div className="App">
      <BrowserRouter>
        <Routes>
          <Route index element={<Login auth={authenticated} handleLogin={authorize} />} />
          <Route path="profile" element={<Profile auth={authenticated} handleLogout={clearAuth} />} />
        </Routes>
      </BrowserRouter>
    </div>
  );
}

// ...
Now, we just need to wire up our Login and Profile components to detect the auth state and redirect if necessary.
In the src/components/Login.js file:
import { Navigate } from 'react-router-dom';

const Login = ({auth, handleLogin}) => {
  return (
    <div>
      {auth === null && <div>Loading...</div>}
      {auth === false && (
        <div>
          <h1>Welcome!</h1>
          <button onClick={handleLogin}>
            Please log in.
          </button>
        </div>
      )}
      {auth && <Navigate to='/profile' />}
    </div>
  );
};

export default Login;
Display Userinfo in Profile View
In src/components/Profile.js:
import { Navigate } from 'react-router-dom';

const Profile = ({auth, handleLogout}) => {
  return (
    <div>
      {auth === null && <div>Loading...</div>}
      {auth === false && <Navigate to='/' />}
      {auth && (
        <div>
          <h1>Welcome, { /* we'll dynamically populate this soon */ 'user' }!</h1>
          <h3>
            Your profile info:
          </h3>
          <div>
            { /* we'll dynamically populate this soon */ }
          </div>
          <button onClick={handleLogout} style={{marginTop: 20}}>
            Log out
          </button>
        </div>
      )}
    </div>
  );
};

export default Profile;
Note that there is both a false and null state for auth. This is because checking the
auth state is asynchronous, so when redirecting to our app after the OAuth handshake,
there is a brief moment where our application renders, but the auth check is not finished.
To handle this, we’ll display a message that reads “Loading…” in that brief moment after
the successful redirect from Cloudentity.
The one thing remaining is to extract the user’s identity data from the OAuth ID token and
display it in their profile view. To do this, we’ll import the jwt-decode library into
our Profile page, and add a simple list of profile attributes. Parameters such as
iat or issued at, which can allow us to display a human-readable last login time,
are returned as Unix timestamps and must be converted.
After adding some profile data and minimal styles, here’s our finished src/components/Profile.js file:
import { Navigate } from 'react-router-dom';
import jwt_decode from 'jwt-decode';
import authConfig from '../authConfig';

const Profile = ({auth, handleLogout}) => {
  const idToken = window.localStorage.getItem(authConfig.idTokenName);
  const idTokenData = idToken ? jwt_decode(idToken) : {};
  const lastLogin = idTokenData.iat ? (new Date(idTokenData.iat*1000)).toLocaleString() : 'N/A';

  console.log(idTokenData, lastLogin, idTokenData.iat);

  const profileItemStyle = {
    display: 'flex',
    justifyContent: 'space-between'
  };

  const profileLabelStyle = {
    fontWeight: 'bold'
  };

  return (
    <div>
      {auth === null && <div>Loading...</div>}
      {auth === false && <Navigate to='/' />}
      {auth && (
        <div>
          <h1>Welcome, {idTokenData.sub || 'user'}!</h1>
          <h3>
            Your profile info:
          </h3>
          <div style={{marginTop: 20, minWidth: 270}}>
            <div style={profileItemStyle}>
              <div style={profileLabelStyle}>Username:</div>
              <div>{idTokenData.sub}</div>
            </div>
            <div style={profileItemStyle}>
              <div style={profileLabelStyle}>Email:</div>
              <div>{idTokenData.email || 'N/A'}</div>
            </div>
            <div style={profileItemStyle}>
              <div style={profileLabelStyle}>Last login:</div>
              <div>{lastLogin}</div>
            </div>
          </div>
          <button onClick={handleLogout} style={{marginTop: 20}}>
            Log out
          </button>
        </div>
      )}
    </div>
  );
};

export default Profile;
Now you should see your username, email (if your logged-in user has one configured), and last login time.
Verify
Now that the app is built and ready, let’s verify the complete user journey using the application. Let’s go ahead and add a Sandbox identity provider that allows us to verify the flow without the need to configure connection to a regular identity provider. Once this is added, login to the application and explore the application we just developed.
Summary
This wraps up our tutorial for the React.JS based authentication application utilizing OAuth/OIDC specification and Cloudentity as an OIDC provider, to authenticate users and store the authenticated user information in a single page application. After going through the tutorial, you will have accomplished the following:
- Build a simple React UI application with a login and profile page
- Create an OAuth Application with the Cloudentity Authorization Platform
- Manage redirects between Login and Profile pages for authorized and unauthorized users
- Authorize and set OAuth access and ID tokens in your React app
- Display basic profile info on the profile page for authorized users