Quickstart
Cloudentity offers a CDR sandbox project you can refer to when creating your applications. It helps better understand how the flow works and how you can integrate with Cloudentity.
This project includes a separate consent single-page app that interacts with Cloudentity and Data Holder APIs to display the data and scopes the end consumer can share with the application.
Alternatively, you can implement a custom consent page and integrate it with Cloudentity. Thus, you control your custom consent page fully and can flexibly tailor to your needs. While you are free to choose technology, your apps must meet specific requirements to be compliant with Consumer Data Right.
Consent Screens
Consumer consent and authorization are central to the Consumer Data Right (CDR). Accredited Data Recipients (ADRs) and Data Holders (DHs) must obtain consent from the consumer before sharing consumer data. Customer consent applies to specific customer data. The CDR rules require that the customer must be fully informed regarding the data shared according to the consent.
Consent details are communicated between the ADR and DH via the OIDC authorization request object. Consent details are specified in the form of OIDC scopes and claims. According to the CDR CX guidelines, consent must be fine-grained and allow account selection. At the same time, the consent request must comply with OAuth flows. Cloudentity’s concept of a custom consent screen is an extended integration point that provides Data Holders with flexibility in customization to develop consent screens that adhere to the CX guidelines via various digital channels.
When the consumer gets redirected to the Data Holder’s custom consent page from Cloudentity upon any data authorization request flows, the consent screen receives the following parameters needed later on to fetch/accept/reject the consent arrangement within Cloudentity:
| Parameter | Description |
|---|---|
login_id |
The identifier of the user’s session. |
login_state |
Used to mitigate Cross-site request forgery (CSRF) attacks. |
The Data language standards must be presented in consumer-facing interactions (Consent app UI/UX/CX) to ensure consistent interpretation and description of the consumer data shared across organizations.
Requirements
-
Consent applications must follow the Consumer Data Standard CX Guidelines.
-
Consent page applications must be of the confidential client type. It means custom consent application must be able to store client credentials securely. Such credentials are used in the client credentials OAuth grant flow.
Remember
the custom consent page will also call to Data Holder’s internal APIs, for example, to retrieve consumer accounts. Such requests may contain your consumer’s personal data.
When a third-party provider’s application gets authorized, as the result of the user authentication, consent pages may receive your consumer’s identity (authentication) context. Such requests can consist of sensitive data; thus, complete confidentiality of your consent page application is necessary.
-
Consent pages must be able to request Data Holder internal APIs. The responses contain data to be displayed on a consumer-faced UI. As a result, the consumer can consciously make a consent decision.
-
Once the consumer accepts/rejects a consent, the consent page app must redirect them to the Cloudentity-specific URL received in response to the accept/reject arrangement API in the
redirect_tofield. It ensures the complete consent capture flow in the Cloudentity system.
Configure Consent Screen in Cloudentity
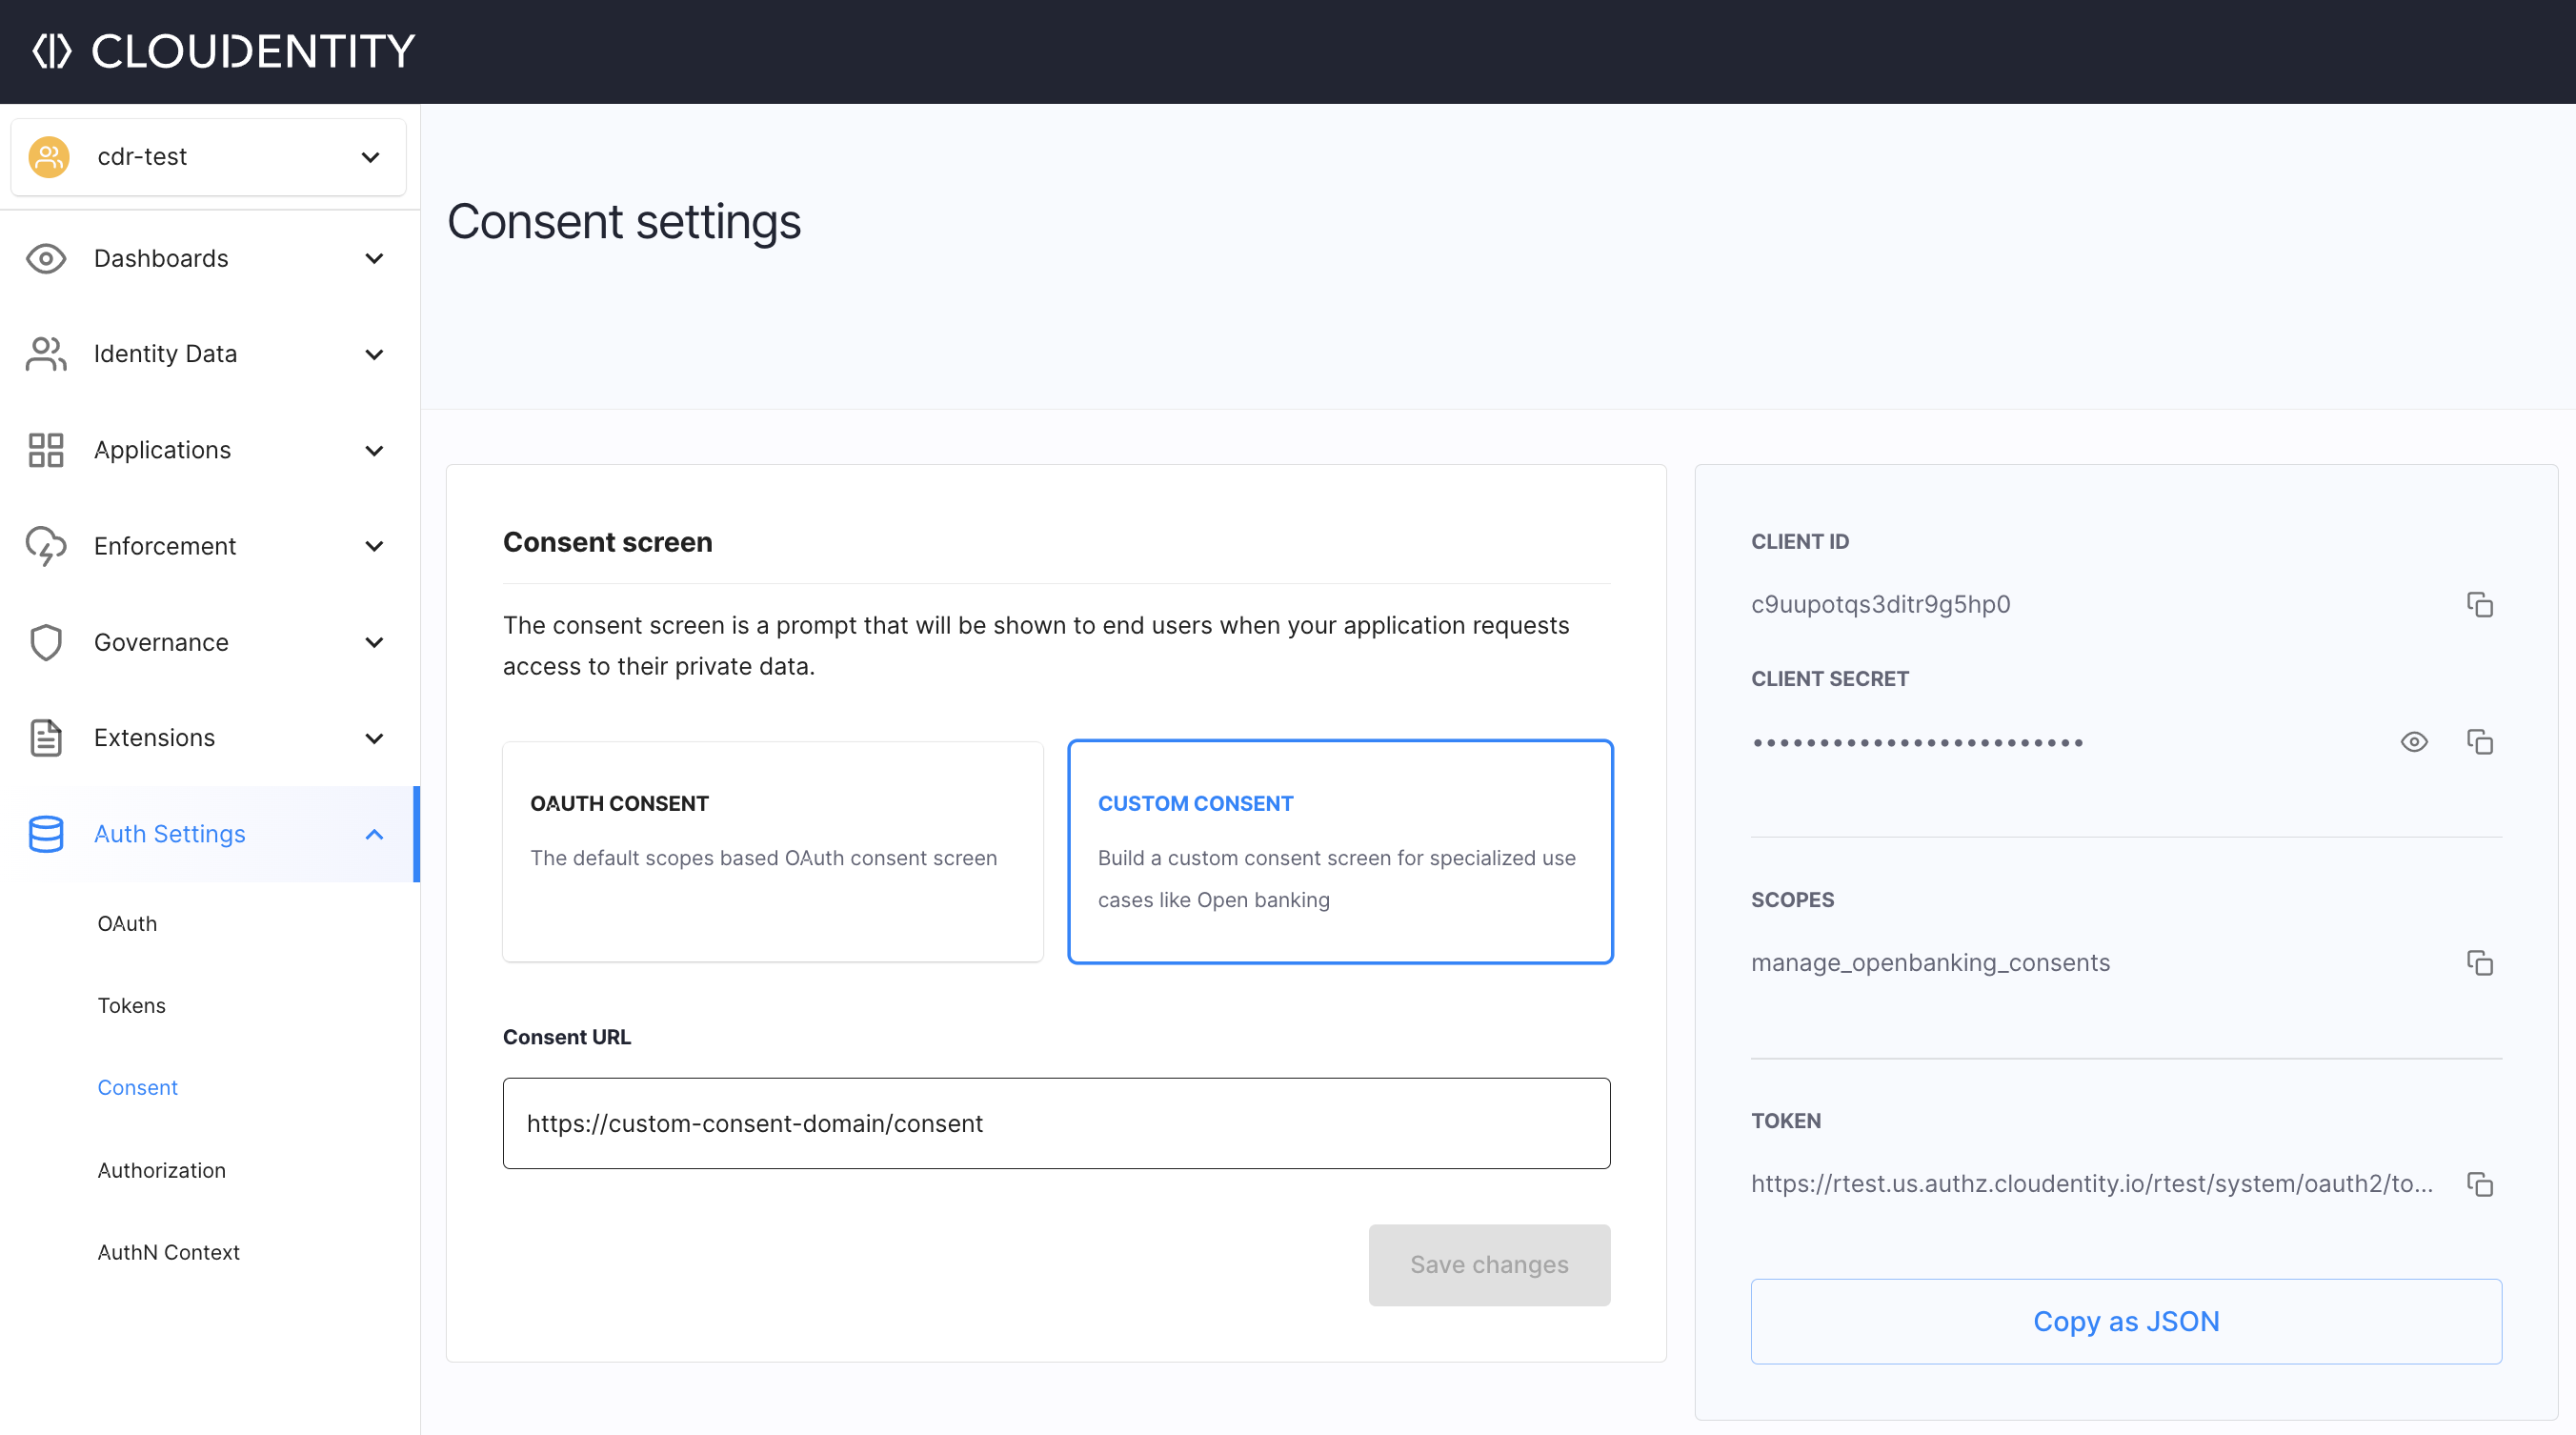
Your custom consent screen requires a URL configured within Cloudentity. Cloudentity redirects consumers to this URL when the Cloudentity authorization server finds a need to redirect consumers to the consent page (for example, if the consumer has not consented to share the requested information yet).
-
Go to OAuth » Authorization Server » Consent.
-
In the Consent view:
-
Select Custom Consent to enable a custom consent screen for CDR.
-
In the Consent URL field, provide the web address of your custom consent to be integrated.
-
Click Save changes.
Result
A trusted client is created automatically within Cloudentity. It represents the custom consent screen app. This consent screen app’s data appears in the right-side pane.
The client credentials you see in the right-side pane must be used to fetch access tokens in interactions between the Cloudentity CDR Get/Accept/Reject arrangement APIs and the consent screen app.
-
Integrate Custom Consent Screen Apps
Otherwise, the consent screen app authenticates again. acp->>cApp: redirect_to=$REDIRECT_URI (pointing to the Data Recipient client app) deactivate cApp deactivate acp activate dr activate user Note over user, cApp: User is redirected back to the Data Recipient client app deactivate dr deactivate user else User accepted activate cApp cApp->>acp: POST Accept CDR Arrangement with token Note over cApp, acp: When the access token obtained in step 5 is still valid, it's sent along with the request.
Otherwise, the consent screen app authenticates again. activate acp acp->>cApp: redirect_to=$REDIRECT_URI (pointing to the Data Recipient client app) deactivate cApp activate dr activate user Note over user, cApp: User is redirected back to the Data Recipient client app deactivate user acp->>dr: Authorization code dr->>acp: POST OAuth 2.0 Token endpoint acp->>dr: Access token deactivate acp Note over cApp, acp: This new token is used in further requests to Data Holder's Open Banking APIs dr->>dh: Call API activate dh deactivate dh deactivate dr end
To integrate your consent application with Cloudentity, use the following APIs:
- Authentication (steps 5, 9, 21)
POSTOAuth 2.0 token endpoint- Authenticate your consent screen app to Cloudentity to call APIs.
- The consent application calls the
/tokenendpoint to authenticate itself before calling Cloudentity consent APIs and Data Holder’s Open Banking APIs. - Authentication can be performed before steps 14 or 16 as well.
Tip
When requesting tokens, it is a good practice to explicitly define the scopes your client app needs. It is recommended that you limit the scope of the token requested by your consent screen app by explicitly providing the
manage_openbanking_consentsas the value of thescopeparameter.
- Retrieve CDR data (step 6)
GETGet CDR Request- Get the details of CDR arrangements from Cloudentity, available for your workspace applications. Based on these details, build your consent screen to be presented to the consumer.
- Accept arrangement (step 16)
POSTAccept CDR Arrangement- Call this endpoint when the user accepts the arrangement to notify Cloudentity about this. The data recipient client app is authorized to access the requested resources.
- The consent screen app receives the
redirect_toparameter in response to this call. The Consent screen app redirects the consumer to the URL provided as the value of this parameter. - Reject arrangement (step 14)
POSTReject CDR arrangement- Call this endpoint when the user rejects the arrangement to notify Cloudentity about this. The data recipient client app is not authorized to access the requested resources.
- The consent screen app receives the
redirect_toparameter in response to this call. The consent screen app redirects the consumer to the URL provided as the value of this parameter.