Prerequisites
-
Identity Pool created and connected to a workspace.
For the purpose of this article, we assume you have enabled the user self-registration in Identity Pools but admin-initiated registration can be used too.
-
For testing purposes, you can use the Demo Portal (Application) built into the Demo workspace of your tenant. If you deleted it, create a Demo workspace with Demo Application enabled.
-
Passkeys enabled as an authentication method in Identity Pool configuration.
Sign Up with Passkey as Authentication Method
The procedure below assumes you do not use a custom registration page, but the one built into Identity Pools. Additionally, it assumes you use the Demo Application to register the user manually, but you can also initiate the registration for the mock user in your Identity Pool.
Note
Although the steps below describe passkey registration during the user registration flow, passkey registration can also be achieved through a reset-passkey flow.
-
Launch the Demo Application and select Login.

-
Optional: if you have more authentication providers connected to the workspace, select the Identity Pool you configured for passwordless authentication using passkeys.
If there are no other authentication providers, you are taken straight to Identity Pool login page.
-
Select Sign Up.
-
Fill out the user details and continue.
-
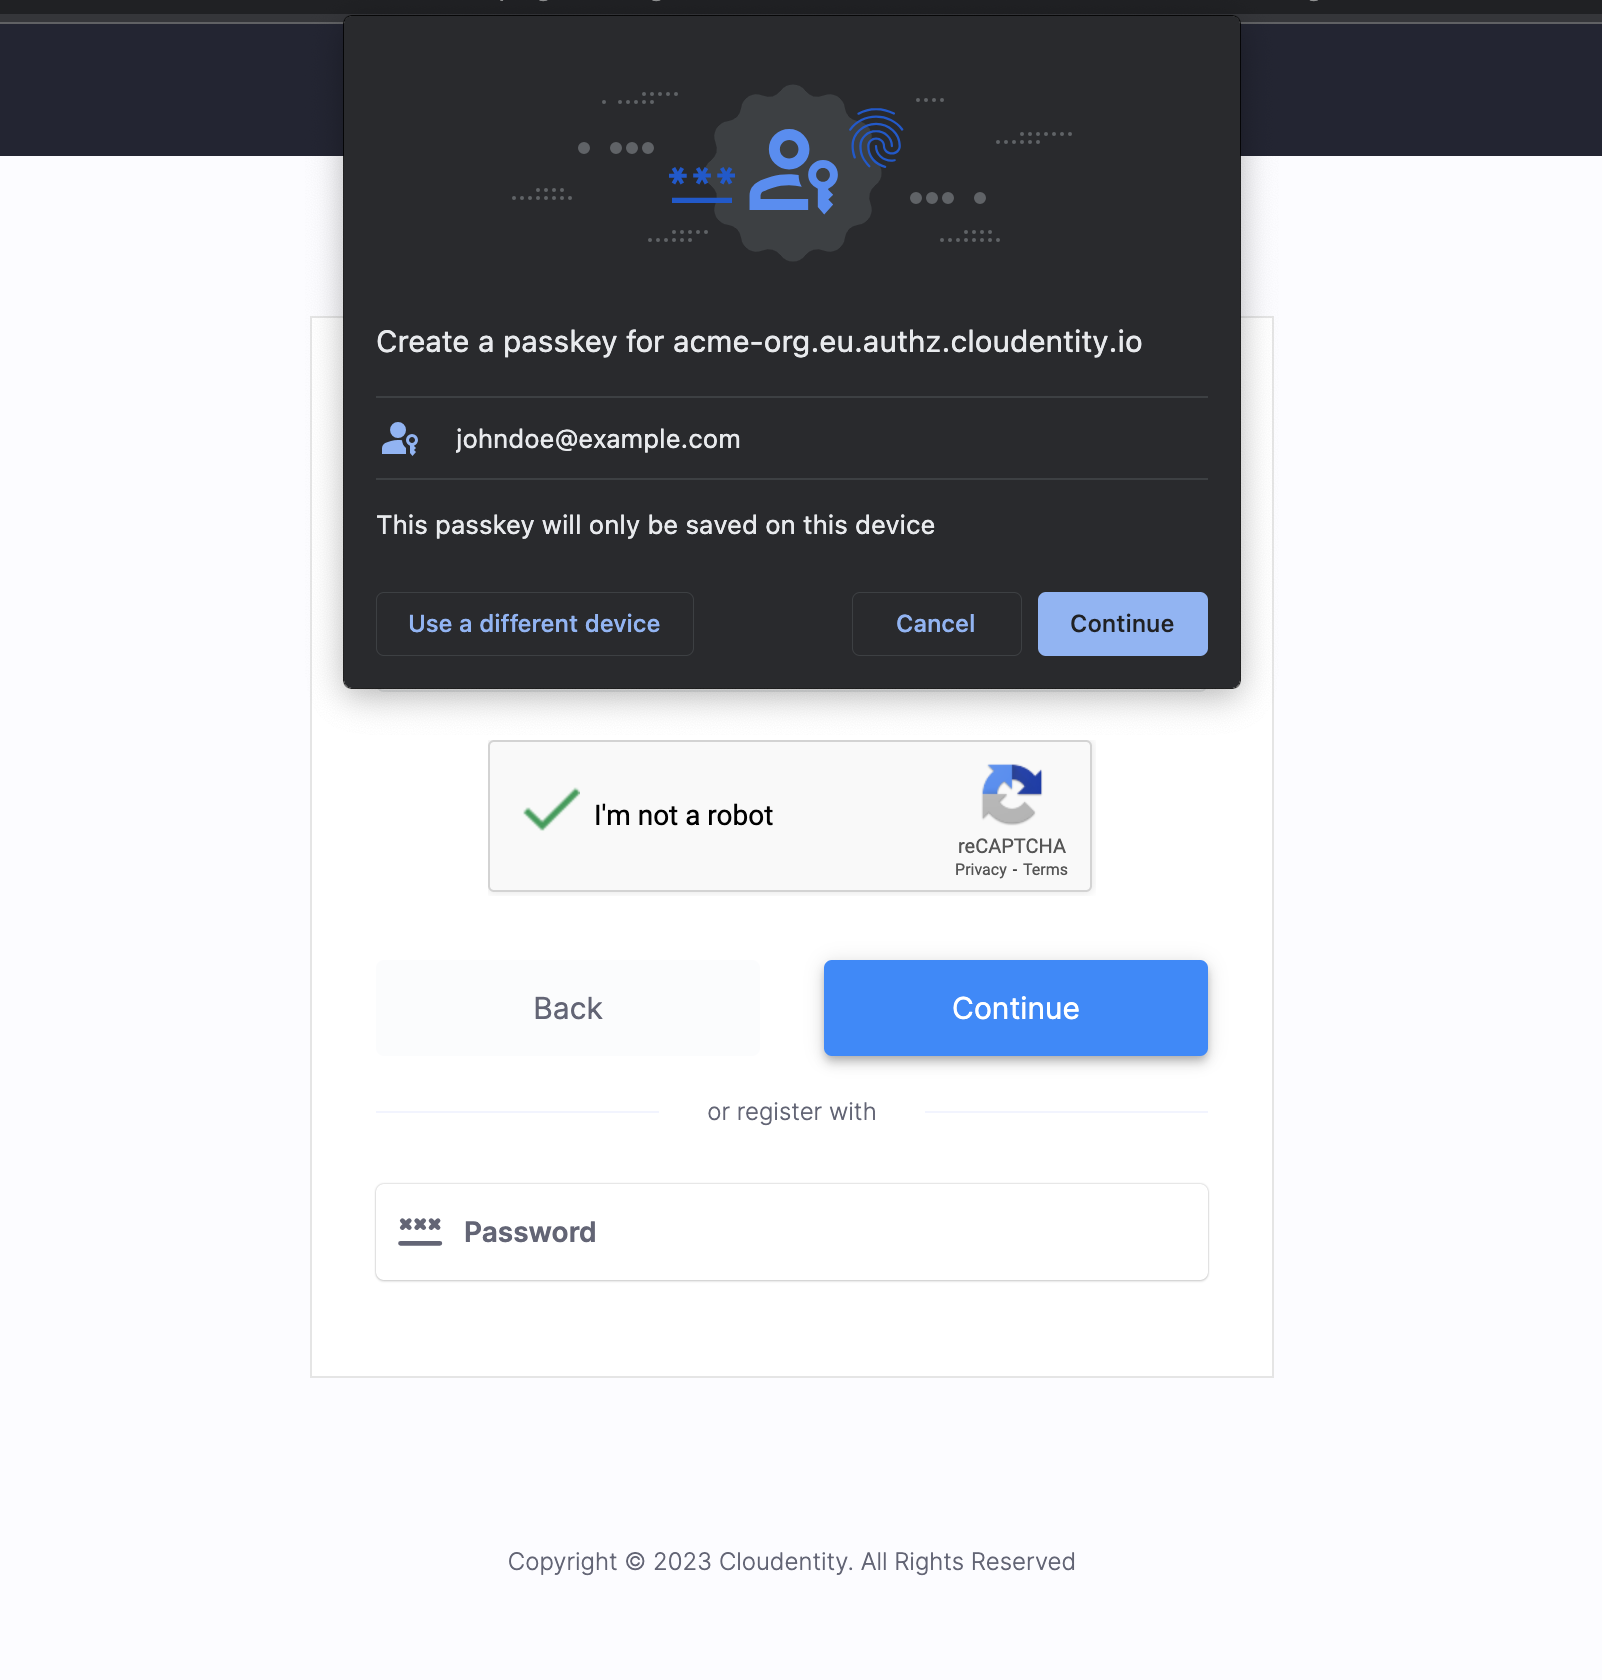
If prompted for password (because it is enabled for the Identity Pool), select Passkey under the or register with label.
-
Complete the Captcha and continue.
Depending on the browser/oparating system the passkey registration may look differently, but works the same way.
-
At this point, the WebAuthn flow is initiated by the browser calling Cloudentity’s Begin WebAuthn Registration API:
sequenceDiagram participant U as User participant A as Authenticator device participant B as Client app participant C as Cloudentity U->>B: Clicks Continue B->>+C: "Begin WebAuthn Registration" API Note right of C: Generate challenge C-->>-B: Return challenge B->>A: Send challenge andcreate credentials command A->>U: Request authentication U-->>+A: Authenticates successfully Note right of A: Create keypair and signchallenge using private key A-->>-B: Signed challenge, public key and keypair ID B->>+C: "Finish WebAuthn Registration" API withsigned challenge, public key and keypair ID Note right of C: Validate signed challenge,store public key C-->>-B: User registered B-->>U: SuccessPOST https://{domain}/{tenantId}/identity/{poolId}/register/webauthn/begin {"identifier": "johndoe@example.com"}Cloudentity – which acts as the “relying party” (RP) – issues a WebAuthn challenge to the browser. The challenge includes a generated byte string used to prevent replay attacks, information about the RP and user, an array of acceptable public key types,and other details:
{ "publicKey": { "challenge": "oifr9oIOE...", // Generated challenge bytes "rp": { "name": "Test Pool", // Identity pool name "id": "tenant_id.region_id.authz.cloudentity.com" // Domain name }, "user": { "name": "johndoe@example.com", "displayName": "johndoe@example.com", "id": "OTZiMDYwZj..." }, "pubKeyCredParams": [ { "type": "public-key", "alg": -7 }, { "type": "public-key", "alg": -35 }, ... ], "authenticatorSelection": {}, "timeout": 60000 } } -
The browser uses Cloudentity’s challenge data to call
navigator.credentials.create(), prompting the user to select an authentication mechanism:
Note that this may include additional passkey devices, including fingerprint scans and hard tokens.
-
The user then completes authentication using the selected authenticator device:
-
The authenticator device creates a new public-private keypair, and signs the Cloudentity’s challenge using the private key. It then sends the credential ID, signed challenge, public key and other information to Cloudentity using the “Finish WebAuthn Registration” API:
POST https://{domain}/{tenantId}/identity/{poolId}/register/webauthn/finish { "id": "PeMyAT...", // Credential ID "rawId": "PeMyAT...", // Credential ID "type": "public-key", "response": { "attestationObject": "o2NmbXR...", // Contains credential public key and signed challenge "clientDataJSON": "eyJ0eXBlIjoid..." // Data passed from browser to authenticator } } -
Cloudentity parses the attestation to retrieve the public key and validate that the challenge was indeed signed by the corresponding private key. Finally, it stores the public key against the user’s record.
-
The user completes activation as in a normal password-based registration flow.
Sign In Using Passkey
Once the passkey is registered using the previous process, the user can login using their passkey.
-
Launch the Demo Application, select Login and pick the Identity Pool if there are more authentication providers connected to the workspace.
-
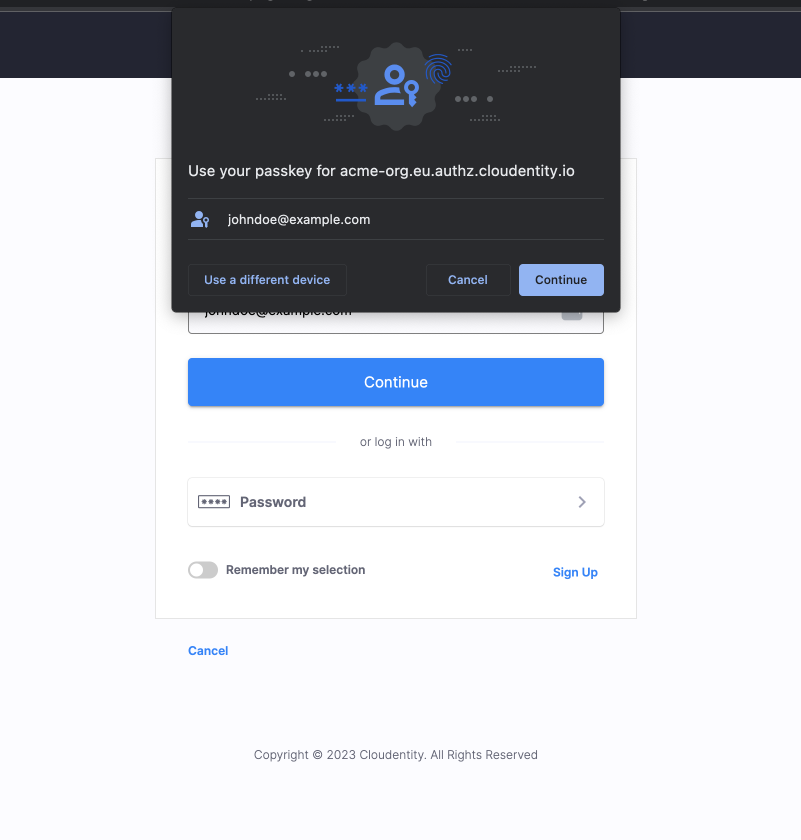
In the Identity Pool login screen, select Passkey.
-
Enter your email and continue.
-
The WebAuthn login flow is initiated by the browser calling Cloudentity’s “Begin WebAuthn Login” API:
sequenceDiagram participant U as User participant A as Authenticator device participant B as Client app participant C as Cloudentity U->>B: Clicks Continue B->>+C: "Begin WebAuthn Login" API Note right of C: Look up user publickey, generate challenge C-->>-B: Return challenge and key ID B->>A: Send challenge, key ID andget credentials command A->>U: Request authentication U-->>+A: Authenticates successfully Note right of A: Sign challenge using private key A-->>-B: Signed challenge B->>+C: "Finish WebAuthn Login" API withsigned challenge Note right of C: Validate signed challenge againststored public key C-->>-B: User authenticated B-->>U: SuccessPOST https://{domain}/{tenantId}/identity/{poolId}/login/webauthn/options {"identifier": "johndoe@example.com"} -
Cloudentity initiates a new WebAuthn challenge and responds with the challenge value, as well as IDs for any public keys associated with the user:
{ "publicKey": { "challenge": "IzH/6L6EJ...", "timeout": 60000, "rpId": "tenant_id.region_id.authz.cloudentity.com", "allowCredentials": [ { "type": "public-key", "id": "PeMyAT..." } ] } } -
The browser sends the challenge value and keypair ID to the user’s authenticator, which then prompts the user to authenticate:
-
After you complete the authentication, the authenticator looks up its private key using the keypair ID. Then it uses the private key to sign the challenge from Cloudentity. The signed challenge and other information are sent to Cloudentity’s “Finish WebAuthn Login” API:
POST https://{domain}/{tenantId}/identity/{poolId}/login/webauthn/finish { "id": "PeMyAT...", "rawId": "PeMyAT...", "type": "public-key", "response": { "authenticatorData": "SZYN5YgOjGh...", "clientDataJSON": "eyJ0eXBlIjoid...", "signature": "MEUCIQDU...", // Signed challenge "userHandle": "" } } -
Cloudentity uses the saved public key to validate the authenticator’s signed challenge.
-
You are signed into the application.