-
Select Applications » Clients > Create client in the selected workspace.
-
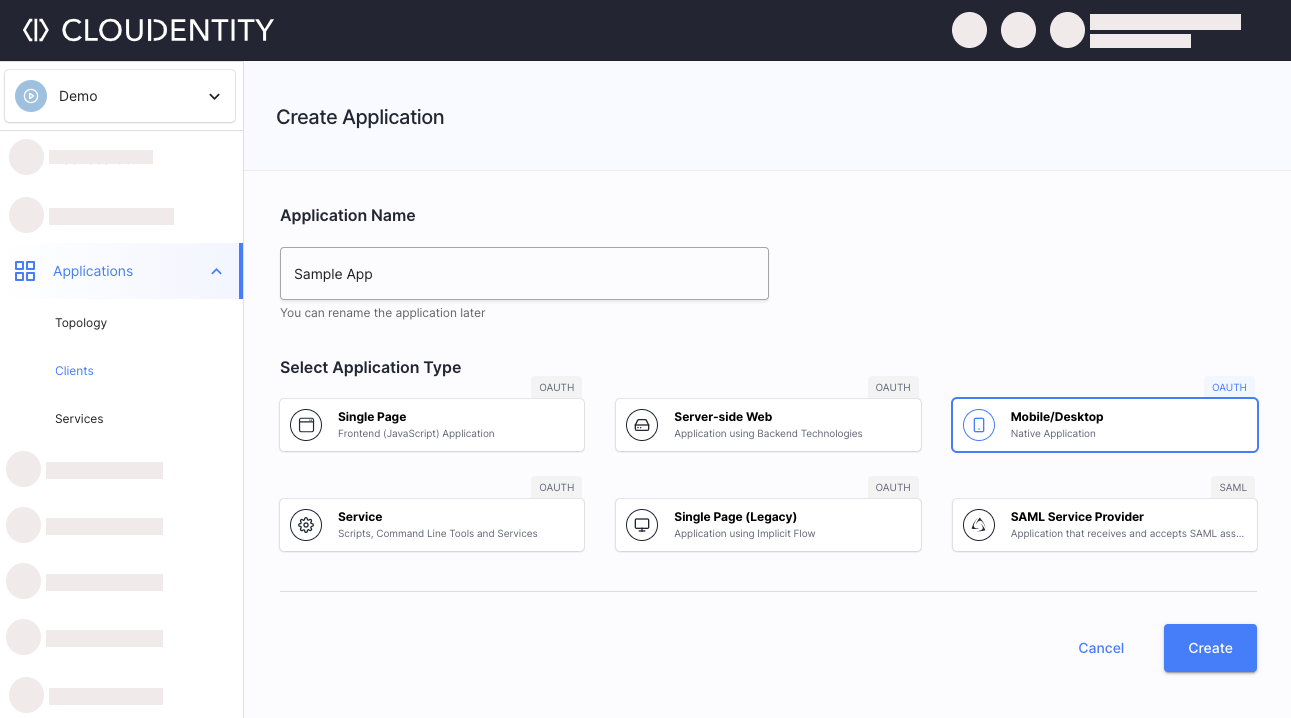
Provide a name for your application, pick the Mobile/Desktop (native) type, and select Create.
-
Configure the redirect URI for your application.
The redirect URI tells us where to redirect users after authentication and consent gathering.

-
Copy or download the client application configuration (client ID most importantly) and add it to your application code. Use any OAuth library you want!
 React.js with cloudentity-auth-jsVue.js cloudentity-auth-js
                     // generate react app using yarn create react-app
   // install dependencies using yarn install
   // add cloudentity auth library (https://github.com/cloudentity/cloudentity-auth-js) using yarn add @cloudentity/auth
   // go to src/App.js
   // import the library
   import CloudentityAuth from '@cloudentity/auth';

   import logo from './logo.svg';
   import './App.css';
   import {useEffect, useState} from "react";

   // initialize the library
   const cloudentity = new CloudentityAuth({
     responseType: ['code'], // required, array with a list of OAuth 2 respose types
     domain: 'postmance.eu.authz.cloudentity.io',
     tenantId: 'postmance',
     authorizationServerId: 'docs',
     clientId: '3ad9f3f1235242689f661d0c303183d0',
     redirectUri: "http://localhost:3000/",
     userInfoUri: 'https://postmance.eu.authz.cloudentity.io/postmance/docs/userinfo',
     scopes: ['profile', 'email', 'openid']
   });

   function App() {

     // create state for the user info
     const [user, setUser] = useState({})

     useEffect( () => {
       // check if user is logged in
       cloudentity.getAuth().then(
           function (authResponse) {
             // set authenticated state in client app, use oauth data, etc.
             // access token (and id token, if present) are automatically set in browser's local storage,
             // so there may be no need for the client app to handle the response data, unless there are custom requirements
             console.log('success', authResponse);
             cloudentity.userInfo().then(function (userinfoResponse) {
               console.log('userinfo', userinfoResponse);
               // store user info in local state
               setUser(userinfoResponse);
             })
           },
           function (errorResponse) {
             // user is not authorized
             // set unauthenticated state, redirect to login, etc.
             console.log('failure', errorResponse);
             cloudentity.authorize();
           }
       );
     }, [])

     return (
       <div className="App">
         <header className="App-header">
           <img src={logo} className="App-logo" alt="logo" />
           <p>
             Hello {user.name}!
           </p>
           <a
             className="App-link"
             href="https://reactjs.org"
             target="_blank"
             rel="noopener noreferrer"
           >
             Learn React
           </a>
         </header>
       </div>
     );
   }

   export default App;
// generate vue app using yarn create vue // install dependencies using yarn install // add cloudentity auth library (https://github.com/cloudentity/cloudentity-auth-js) using yarn add @cloudentity/auth // go to src/router/index.js // import the library import CloudentityAuth from '@cloudentity/auth' // after router initialization add const cloudentity = new CloudentityAuth({ responseType: ['code'], // required, array with a list of OAuth 2 respose types domain: 'postmance.eu.authz.cloudentity.io', tenantId: 'postmance', authorizationServerId: 'docs', clientId: '3ad9f3f1235242689f661d0c303183d0', redirectUri: "http://localhost:5173/", userInfoUri: 'https://postmance.eu.authz.cloudentity.io/postmance/docs/userinfo', scopes: ['profile', 'email', 'openid'] }); router.beforeEach((to, from, next) => { cloudentity.getAuth().then( function (authResponse) { // set authenticated state in client app, use oauth data, etc. // access token (and id token, if present) are automatically set in browser's local storage, // so there may be no need for the client app to handle the response data, unless there are custom requirements console.log('success', authResponse); cloudentity.userInfo().then(function (userinfoResponse) { console.log('userinfo', userinfoResponse); // do something with the userinfo response next(); }) }, function (errorResponse) { // user is not authorized // set unauthenticated state, redirect to login, etc. console.log('failure', errorResponse); cloudentity.authorize(); } ); }) -
Access your application and try the sign in.
-
Applications
- Add Application
- Add Single Page Application
- Add M2M Client
- Add SAML Service Provider
- Add Mobile/Native Application
- Add Service
- Dynamic Client Registration
- Developer Portals
- Manage Client Secrets
- Configure OAuth for Client Apps
- Subscribe Clients to Access Scopes
- mTLS Client Authentication
- Configure Token/Code TTL for App
- Authentication
- Identity Storage
- Authentication Providers
- Organizations
- Access Control
- Multi-Factor Authentication
- Access Policies
- Authorization for APIs
- Extensions
- Branding
- Authorization Servers
-
Tenant Settings
- Access Tenant Settings
- Manage Administrators
- Assign Administrator Roles
- Manage Workspaces
- Add Workspace
- Configure Verfication Codes for MFA
- Configure Custom Message Providers
- Migrate tenant using API
- Declarative configuration
- Export/Import Tenants Configuration
- Back up and Restore Tenants
- Brute Force Protection
- Audit Logs
-
Consumer Data Right
- Quickstart
- Create CDR Workspace
- Manage ADR Clients
- Build Consent Screen
- CDR Consumer Consent Dashboard
- Build Consent Administrator Portal
- Validate Data Recipients
- Amendment Arrangement
- Withdraw Arrangement
- Protect DH APIs
- FAPI 1.0 Advanced: Transition to Phase 2
- FAPI 1.0 Advanced: Transition to Phase 3
- FAPI 1.0 Advanced: Transition to Phase 4
- Brazil Open Banking and Insurance
- Financial Data Exchange
- UK Open Banking
- Generic Open Finance
- Cloudentity APIs
- Early Access Features
3 mins read
Adding Native or Mobile Applications
Integrate application for user login and access control.