Create Identity Schemas
-
Go to Tenant Settings » Identity Pools » Schemas.
-
Select Create Schema and save your schema under a unique name.
-
Open your schema and go to the Schema tab. This is where you define the schema as a JSON object. Initially, the default schema is shown. Take note of the top-level objects:
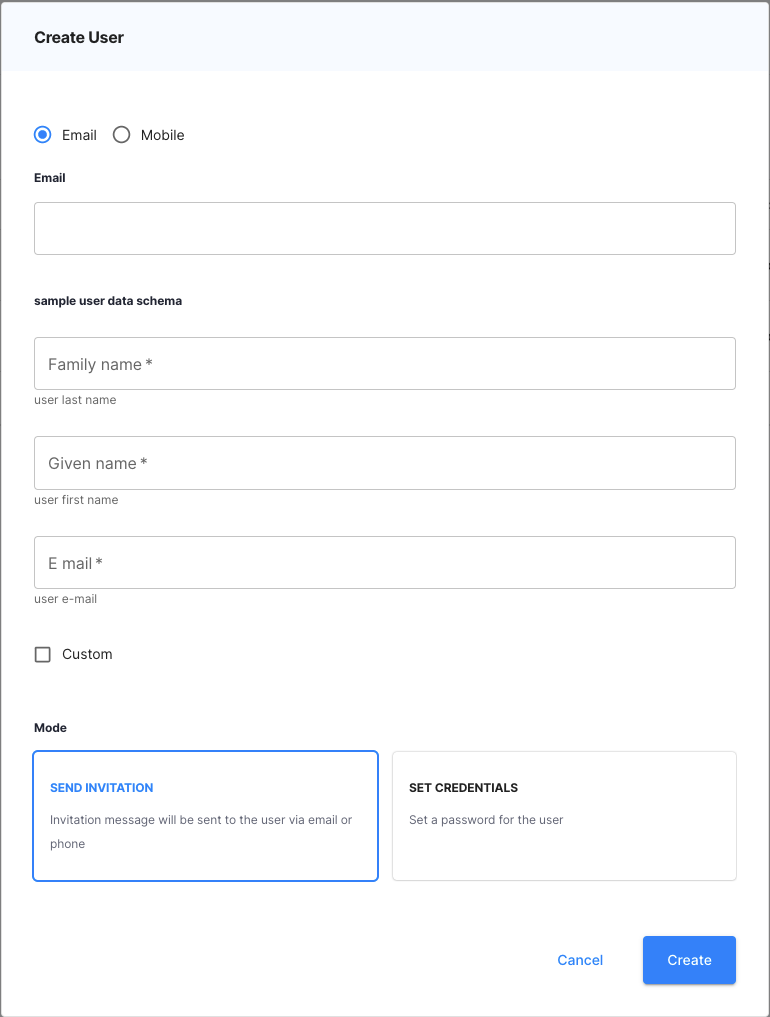
Object Description properties An array of objects where each object represents a property to be entered by the user description Schema description for identification purposes. This description is displayed as a header on the user registration form. type Schema data type - there should be no need to change this as the schema will always be an object. required List of mandatory properties for user registration Modify the schema by adding more properties. Add mandatory properties to the
requiredlist. For example, to add ane-mailandcustomproperties, you can make the following modifications:{ "properties":{ "family_name":{ "description":"user last name", "type":"string", "minLength":1 }, "given_name":{ "description":"user first name", "type":"string", "minLength":1 }, "name":{ "description":"user full name", "type":"string", "minLength":1 }, "e-mail":{ "description":"user e-mail", "type":"string", "minLength":1 }, "custom":{ "description":"Custom", "type":"boolean", "minLength":1 } }, "description":"sample user data schema", "type":"object", "required":[ "family_name", "given_name", "e-mail", "custom" ] }As a result, the required user payload (both on administrator and user side) looks as follows:
-
Save your schema to apply your changes.
Result
Your schema is created. You can now assign it to an Identity Pool either as a user schema or metadata schema.
Assign Schema
-
Navigate to the identity pool you wish to be configured with the new schema and select Schemas.
-
Set the schema either as a User Schema or Metadata Schema using dropdowns and save your changes.