Create Policy
-
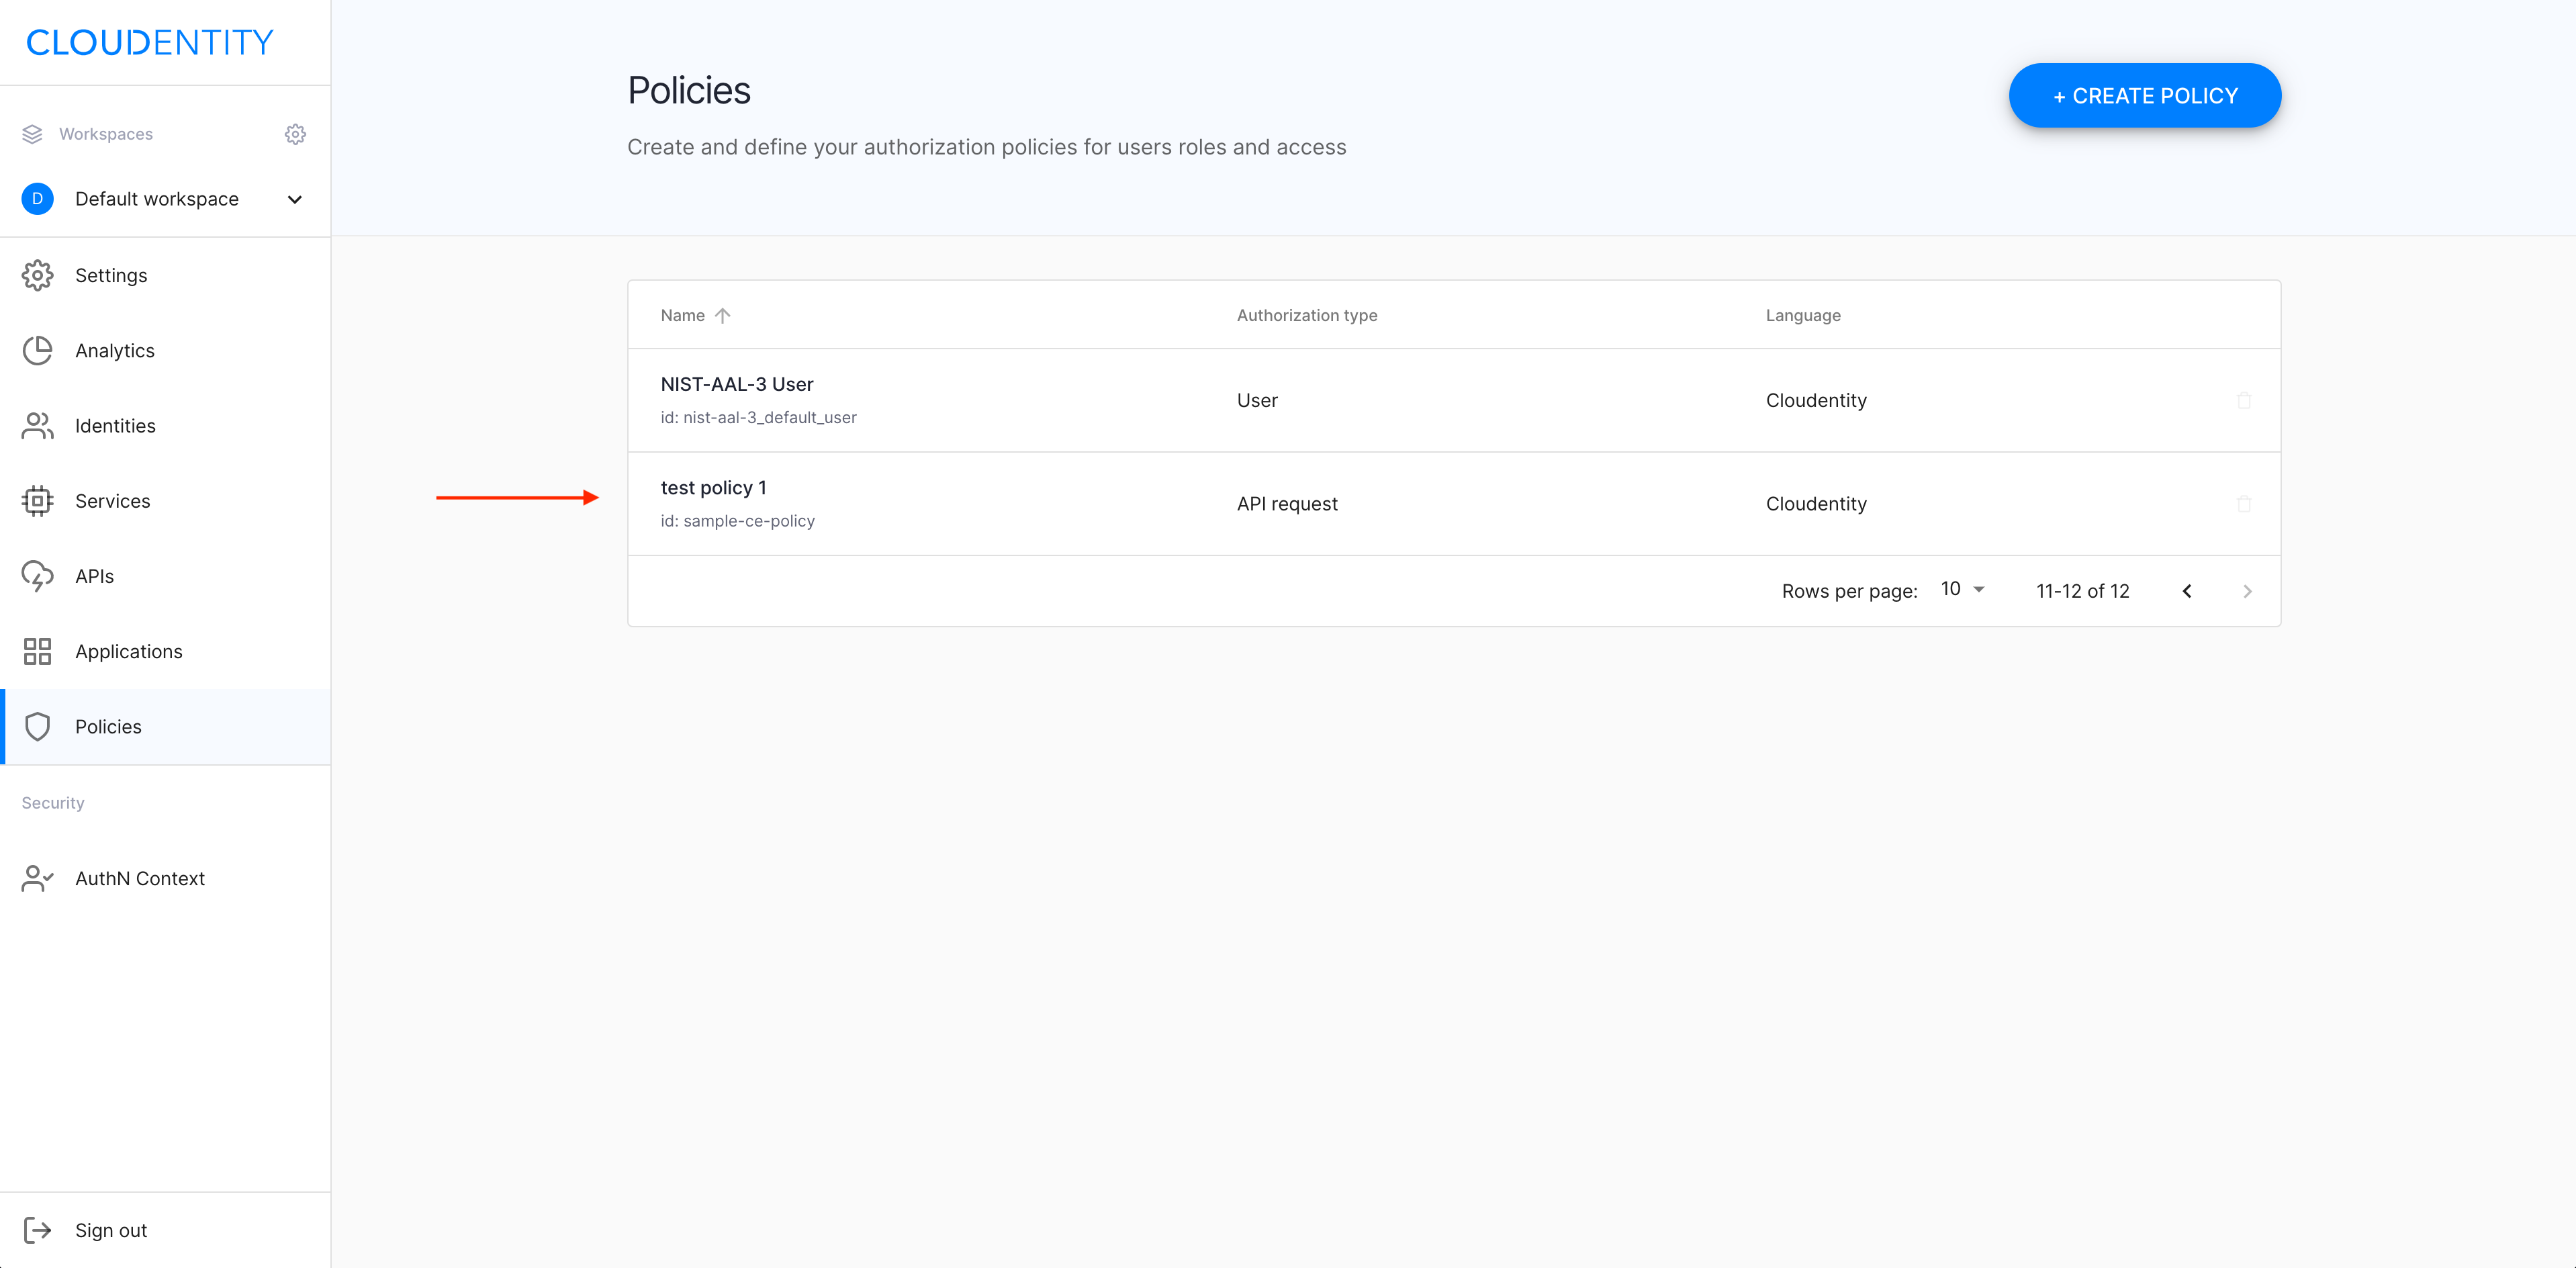
In your workspace, navigate to Authorization » Policies » + CREATE POLICY.
-
In the Create Policy popup window
-
Select Policy type from the dropdown menu.
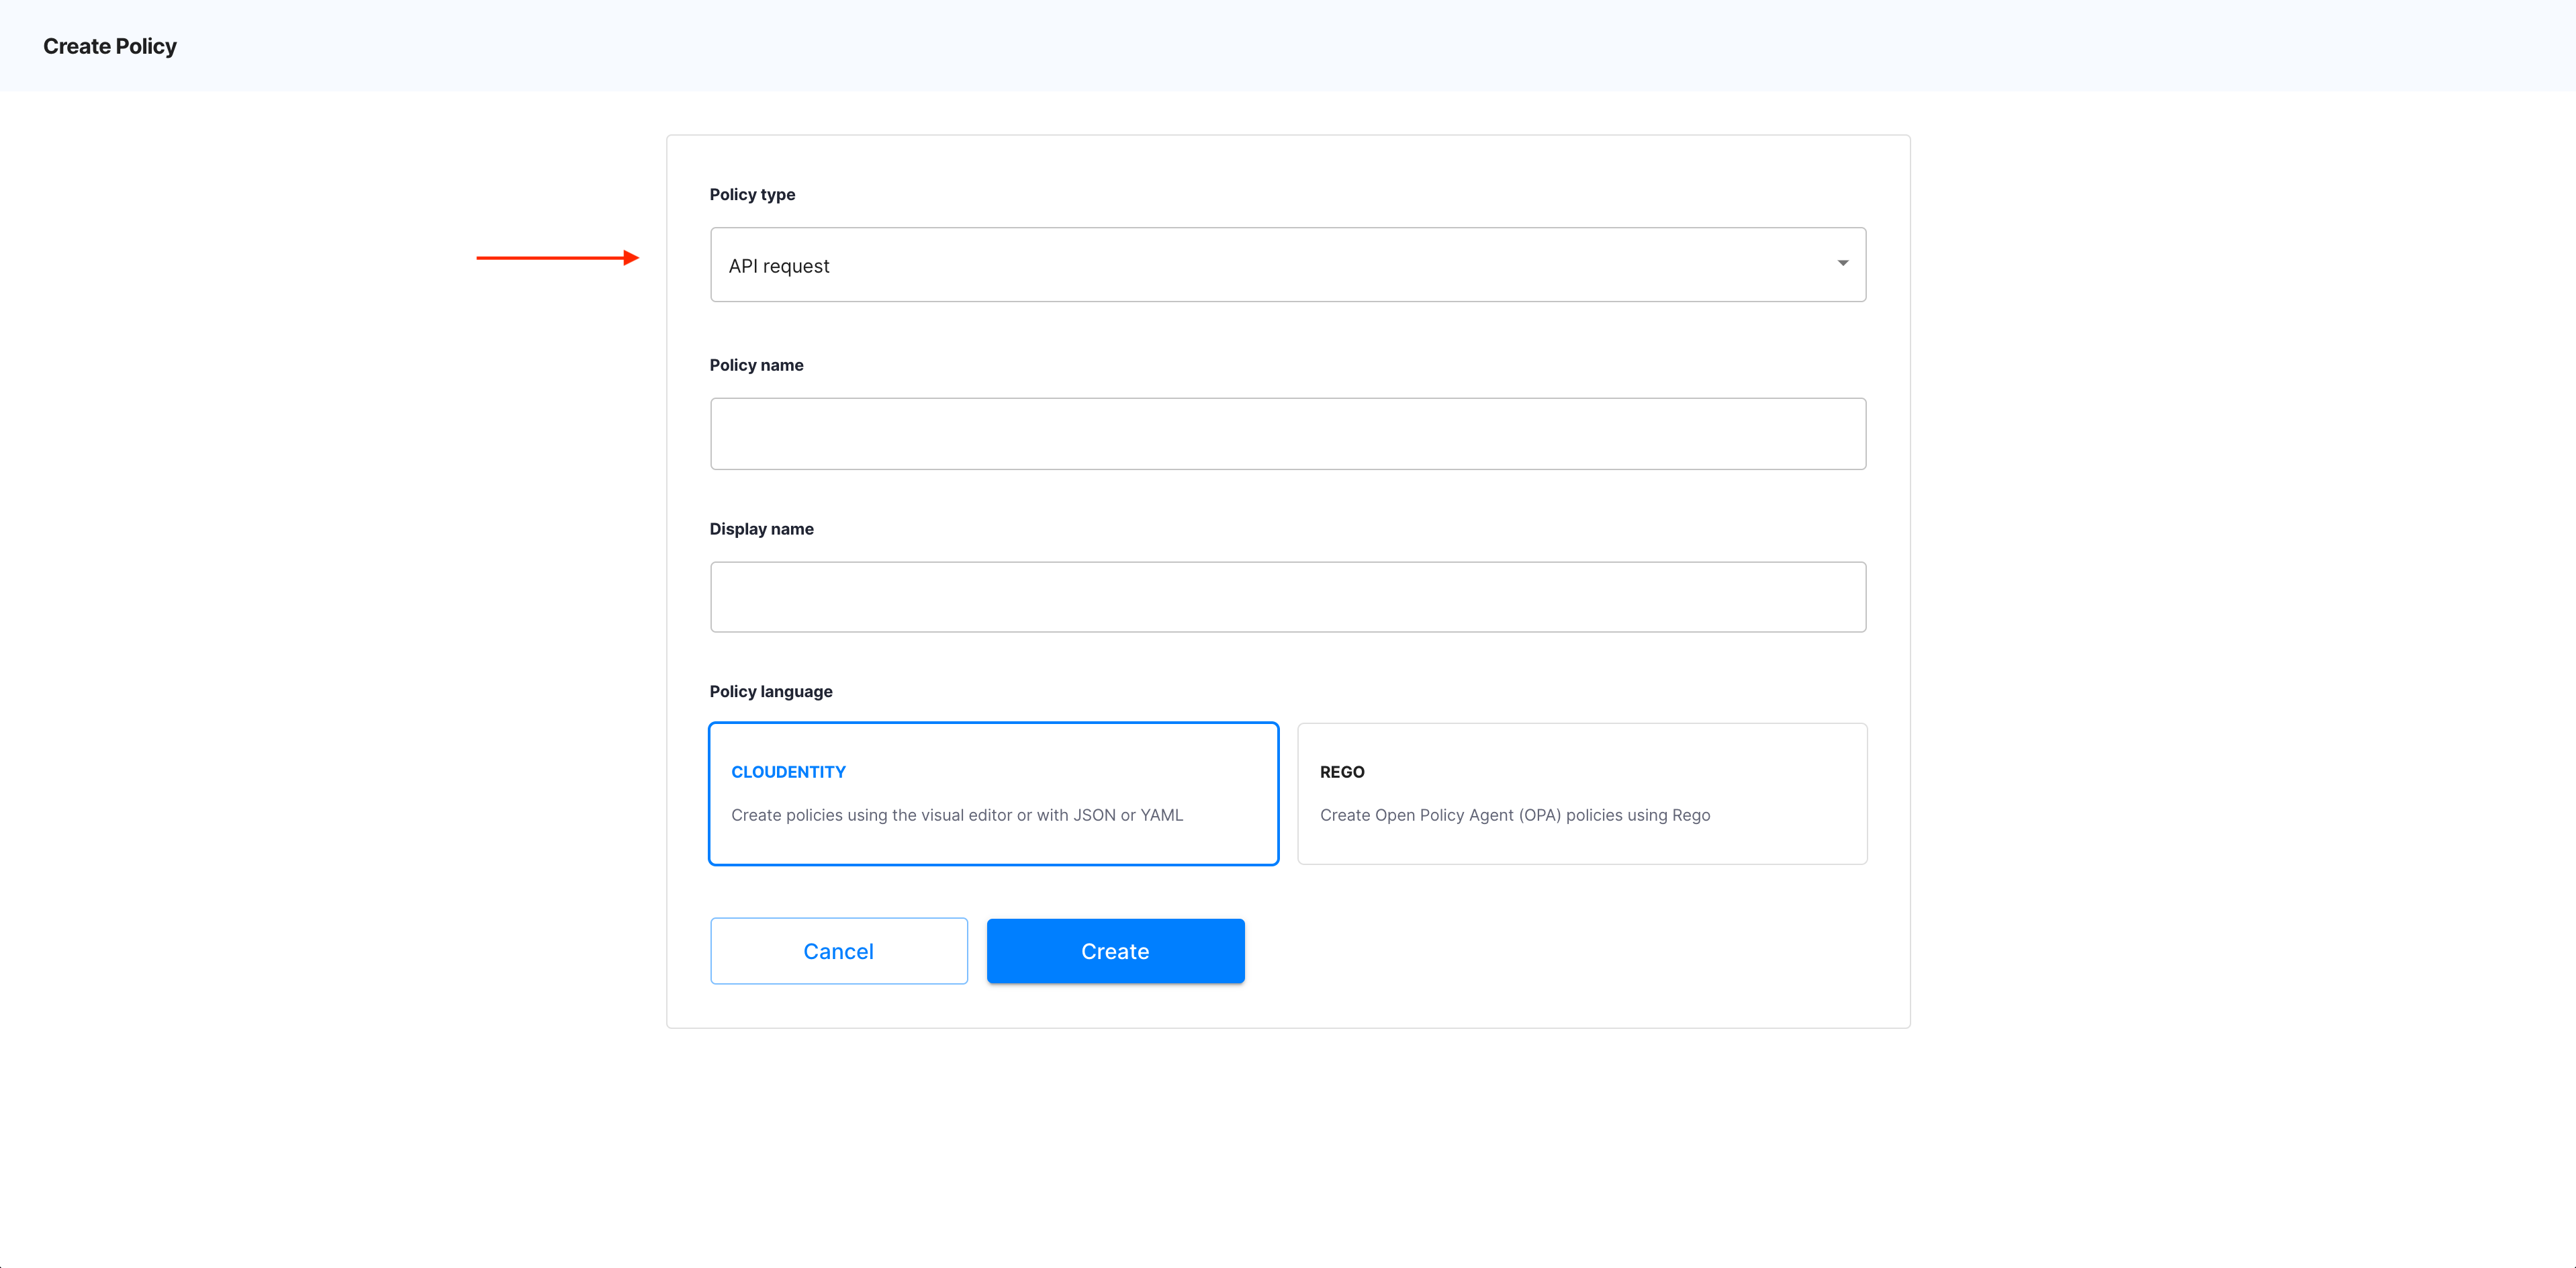
Policy types
There are a few policy types available in Cloudentity: API request, User, Machine to machine, Developer, Dynamic Client Registration.
-
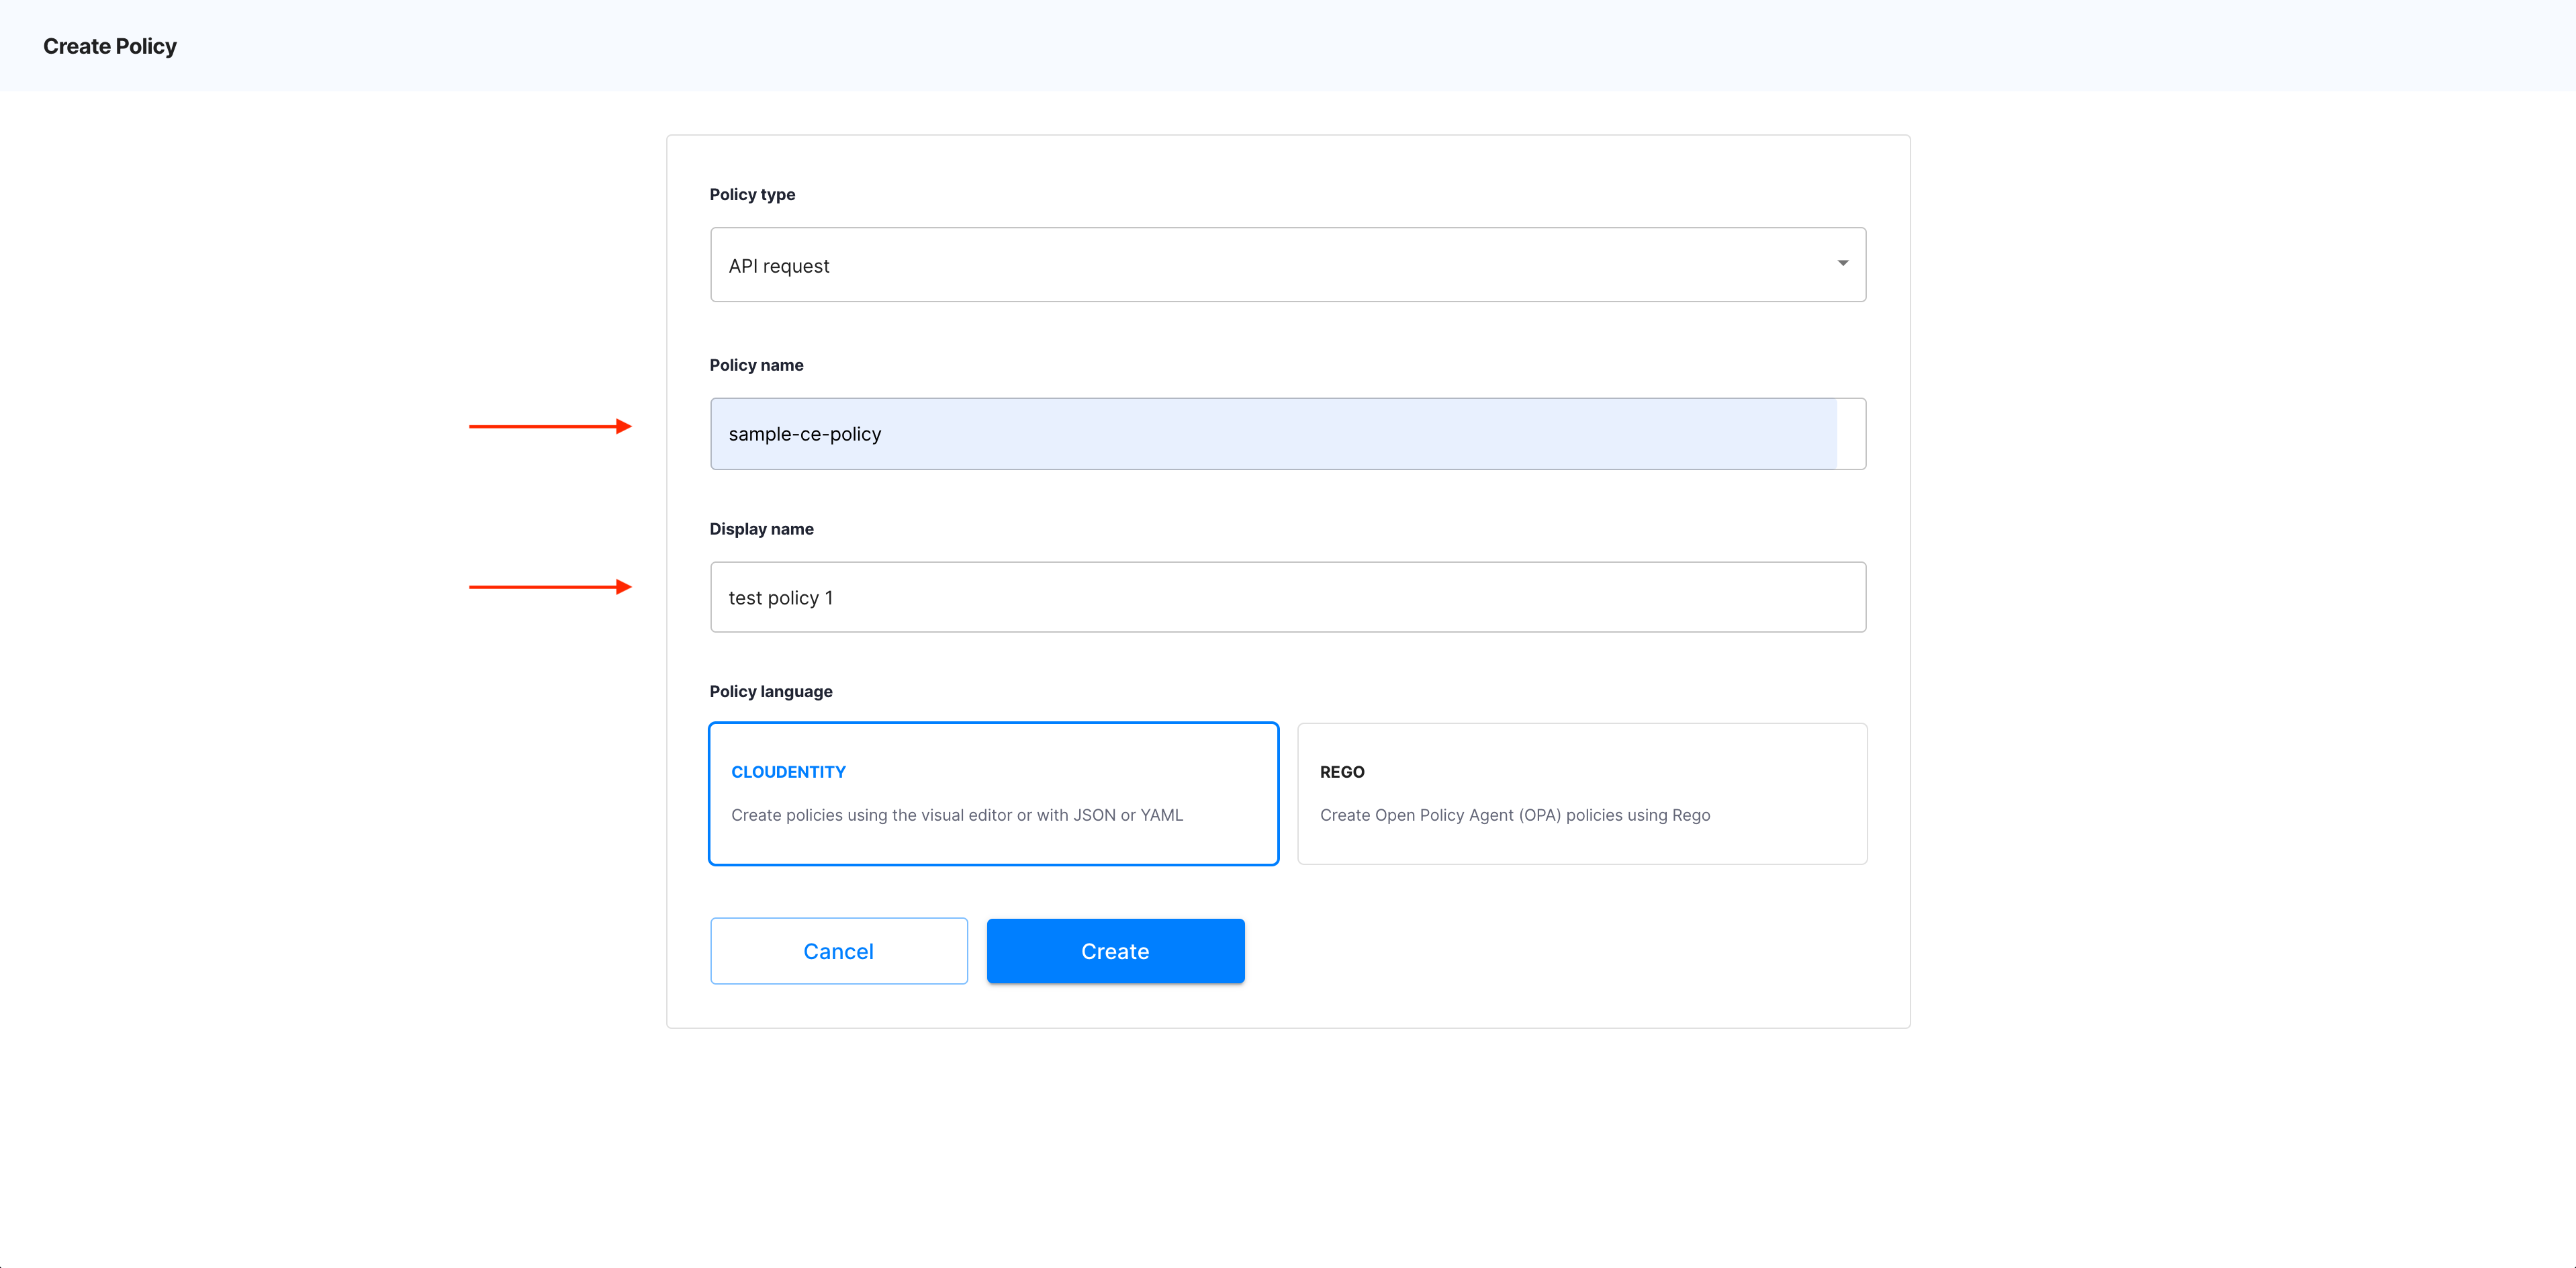
Specify Policy name and Display name.
-
Select Cloudentity as Policy language.
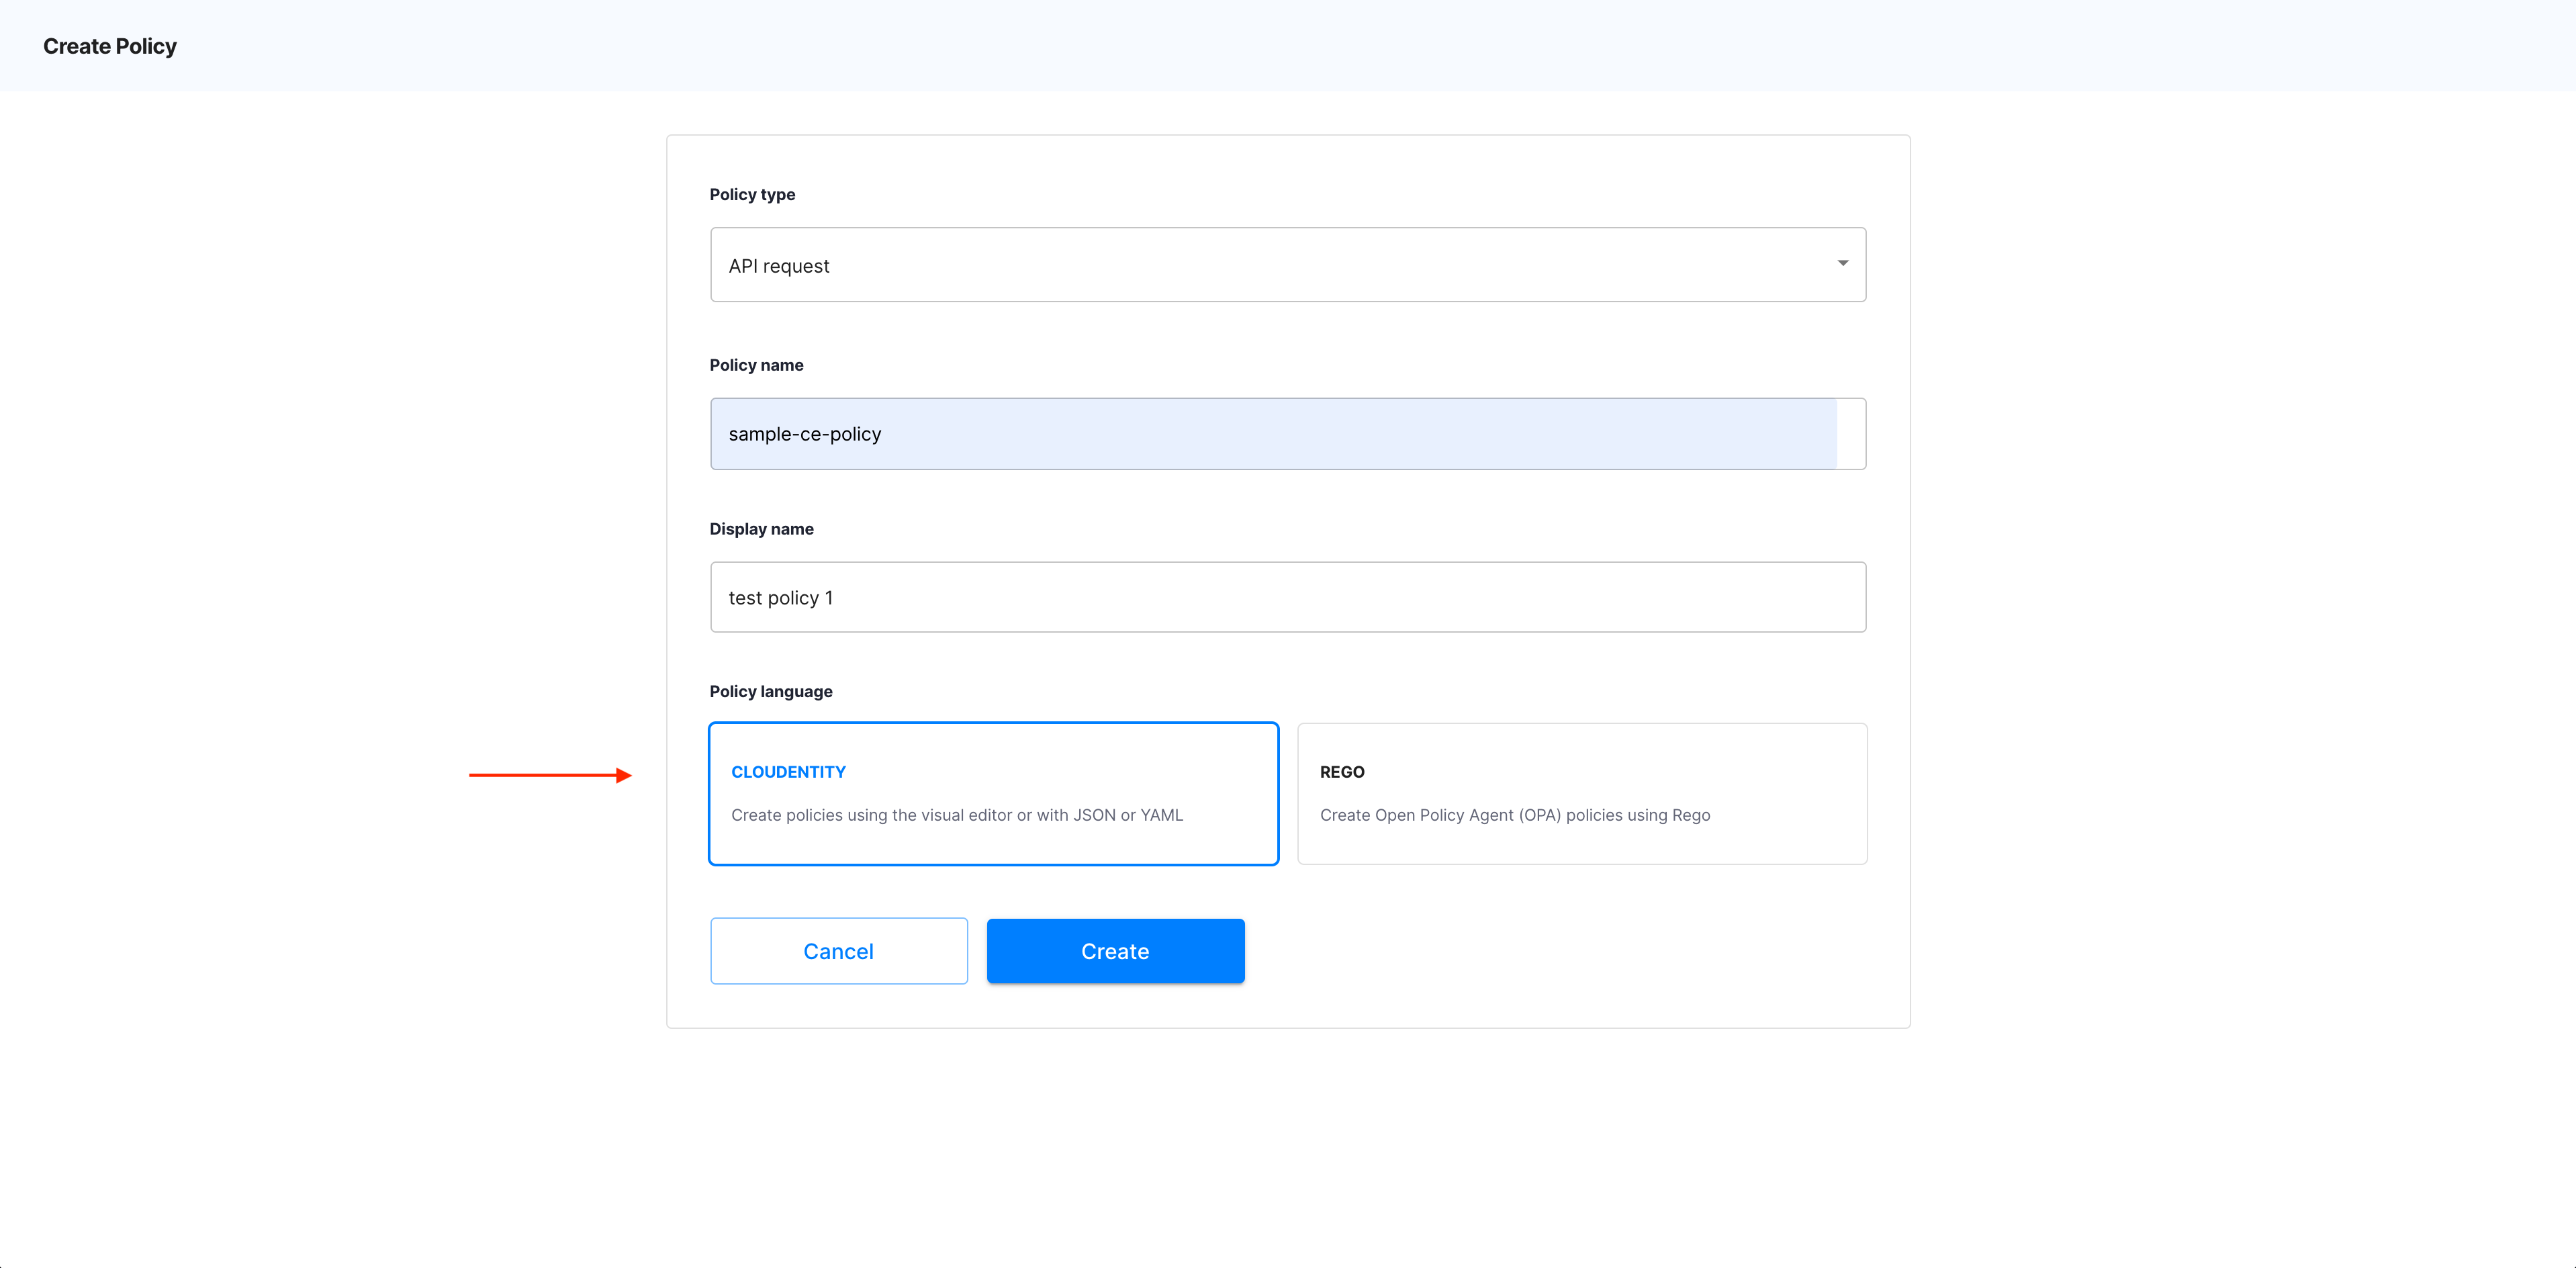
Policy language
Another type of policies that you can create in Cloudentity is OPA. For instruction on how to create OPA policies, see Protecting applications and APIs in Cloudentity using OPA.
-
Select Create.

-
Result
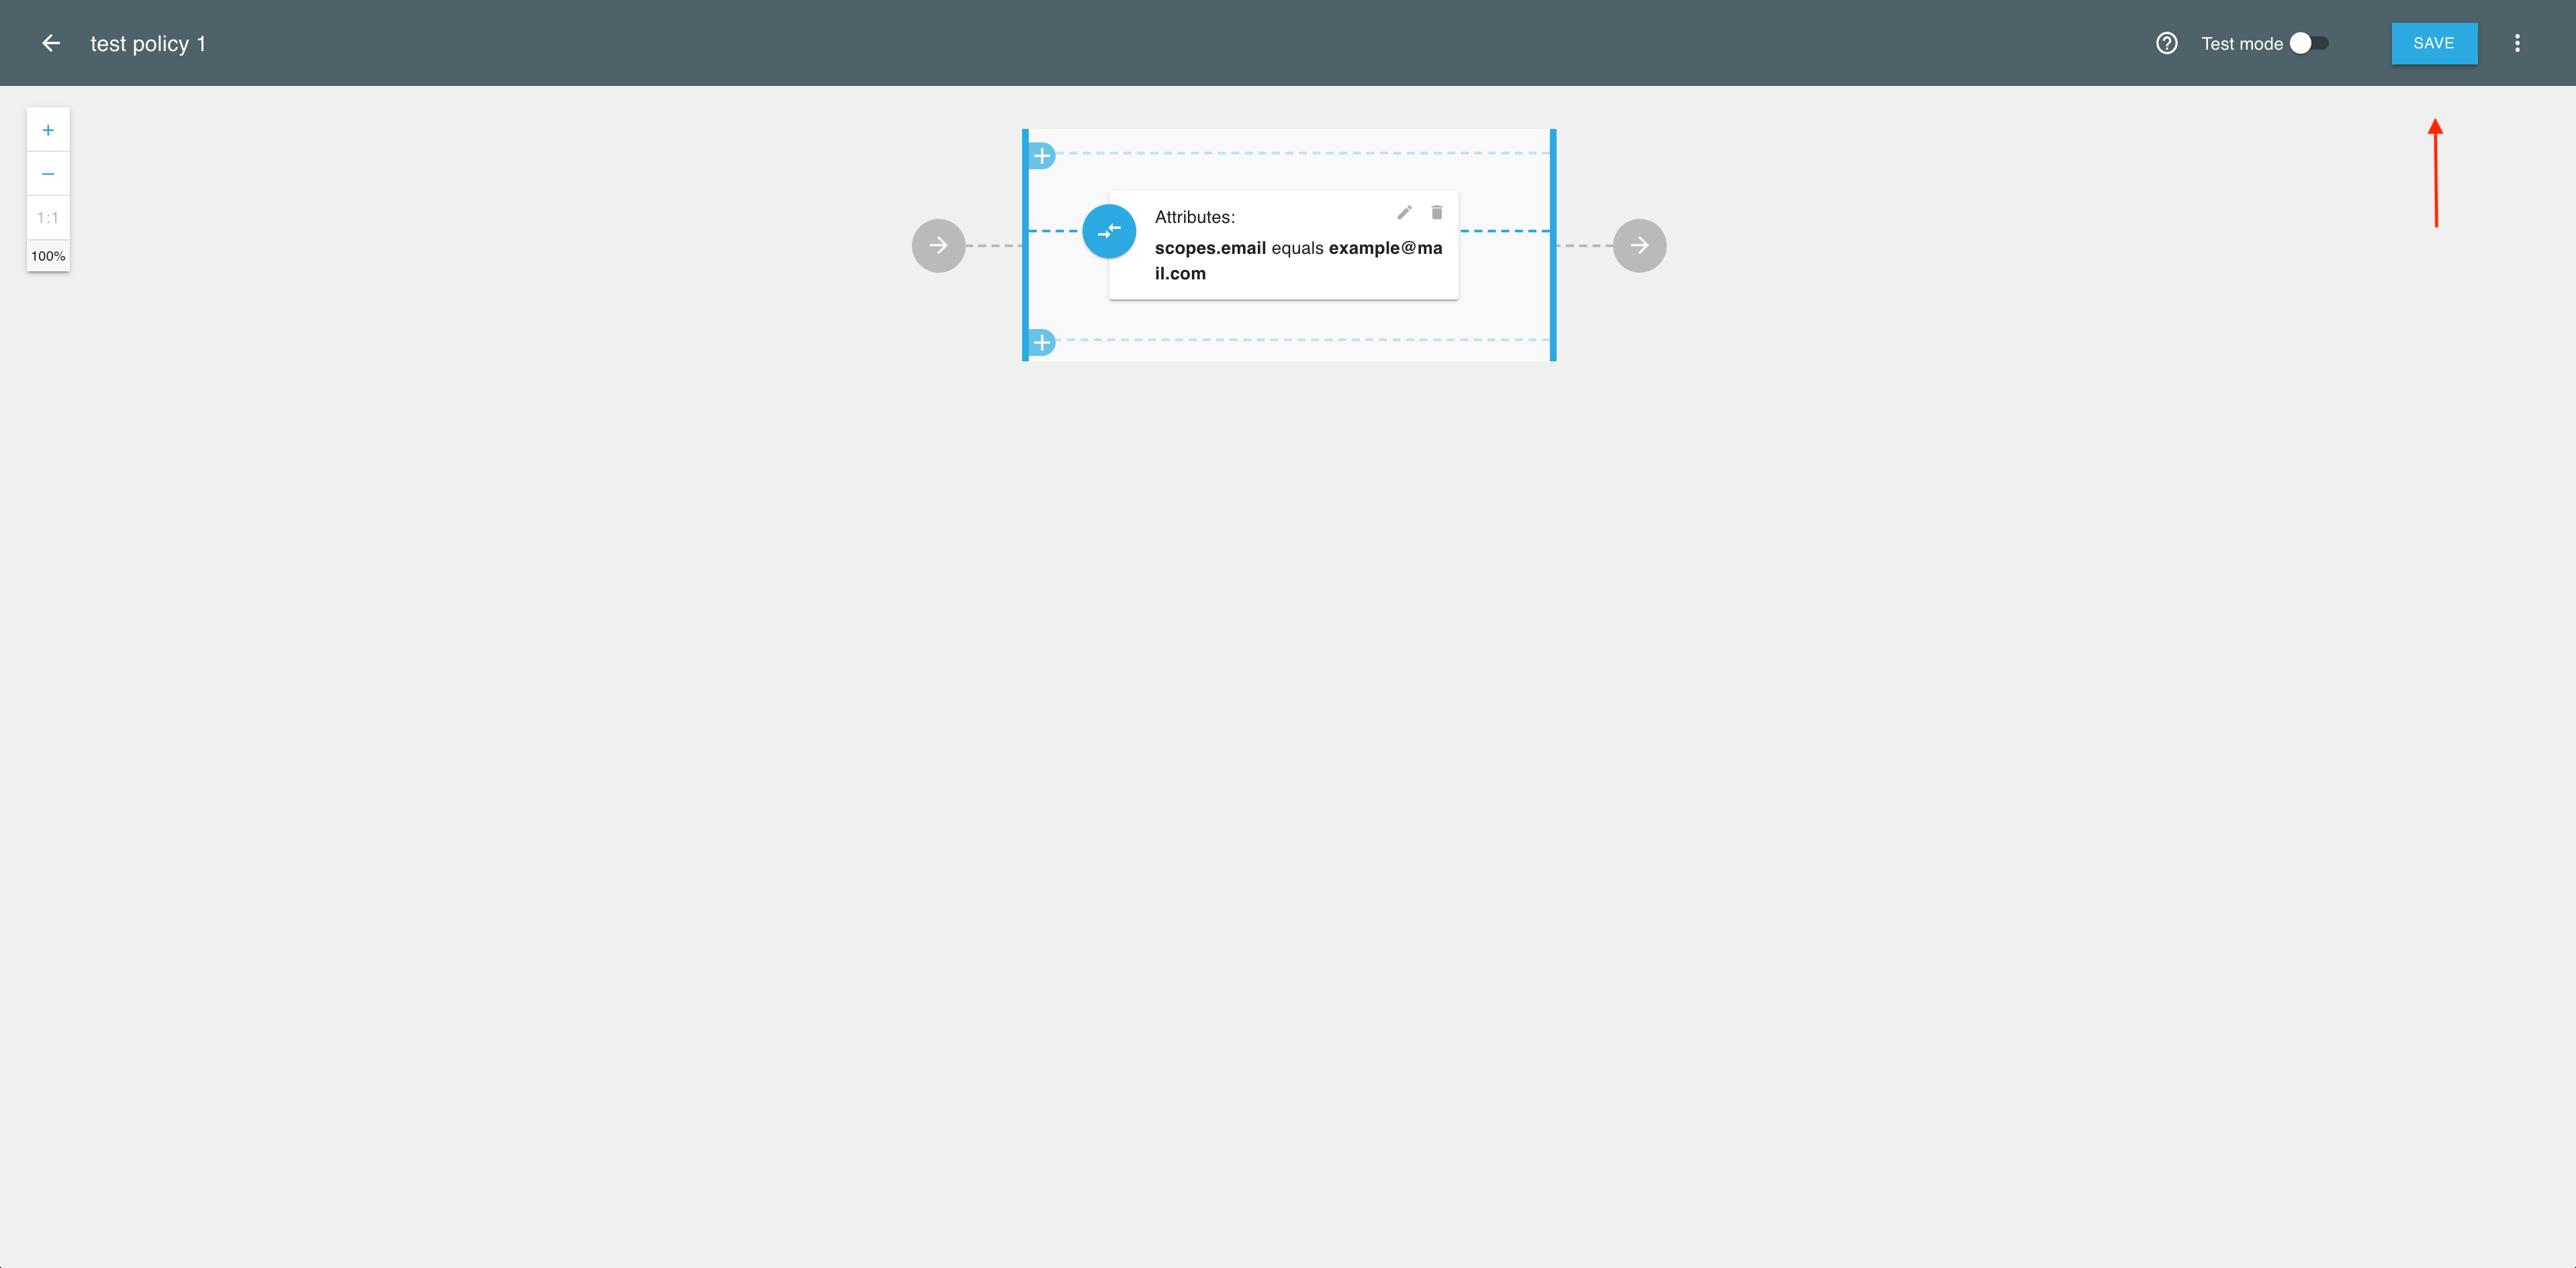
The Cloudentity policy builder opens.
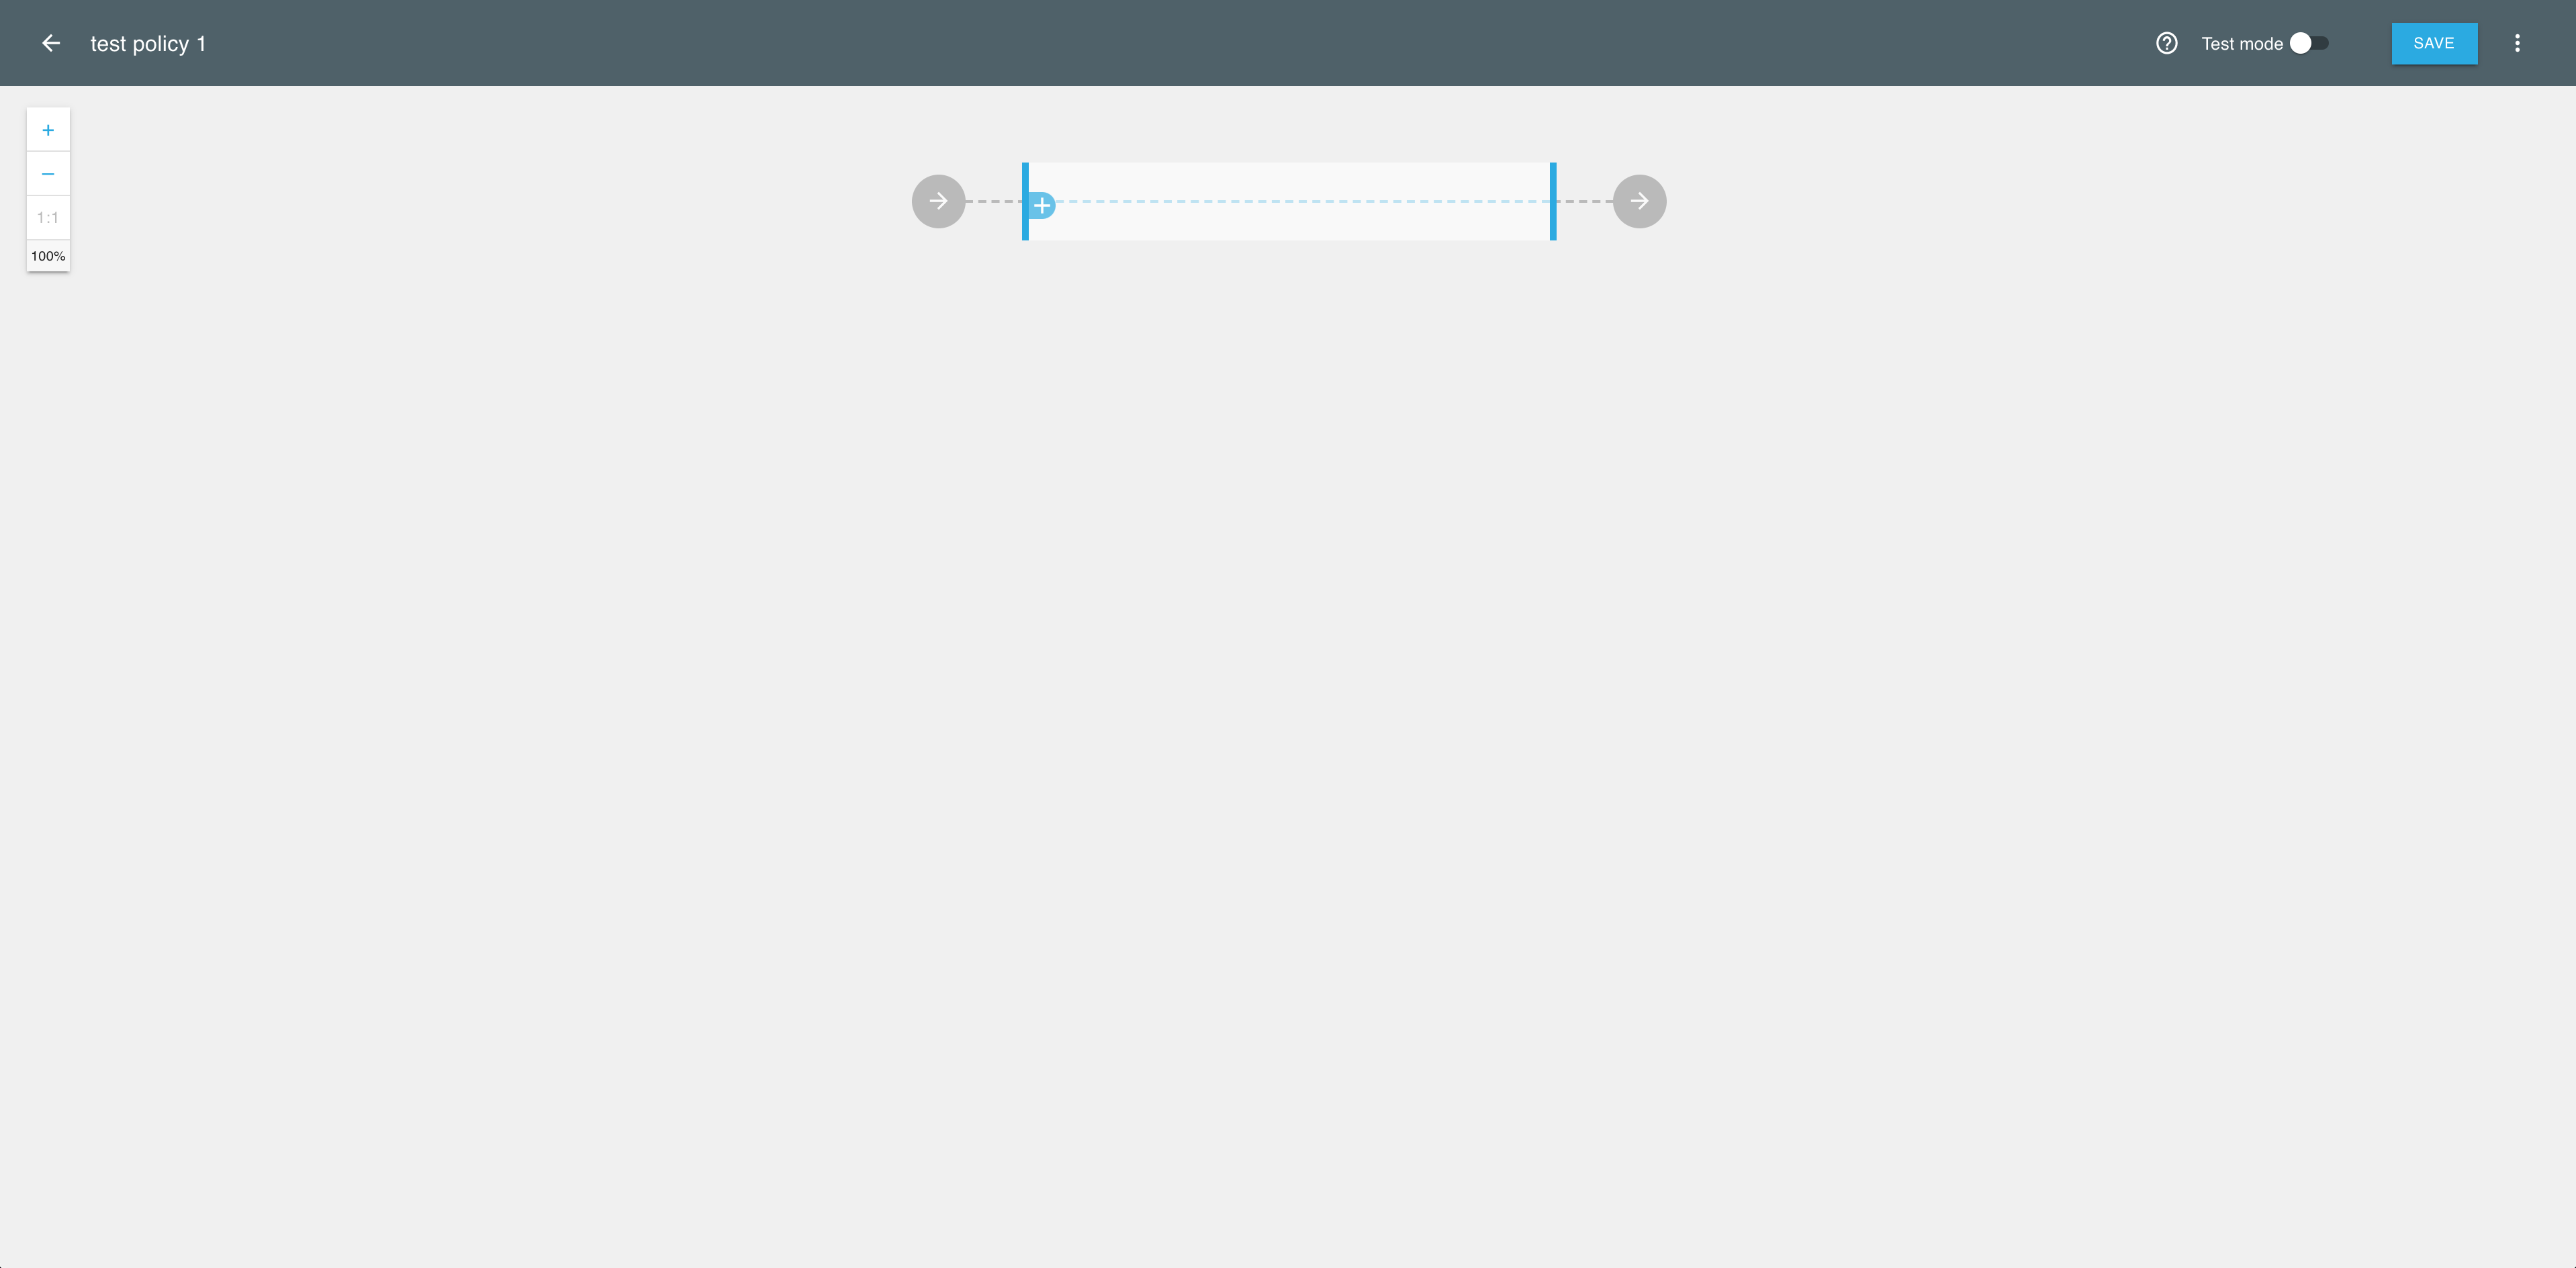
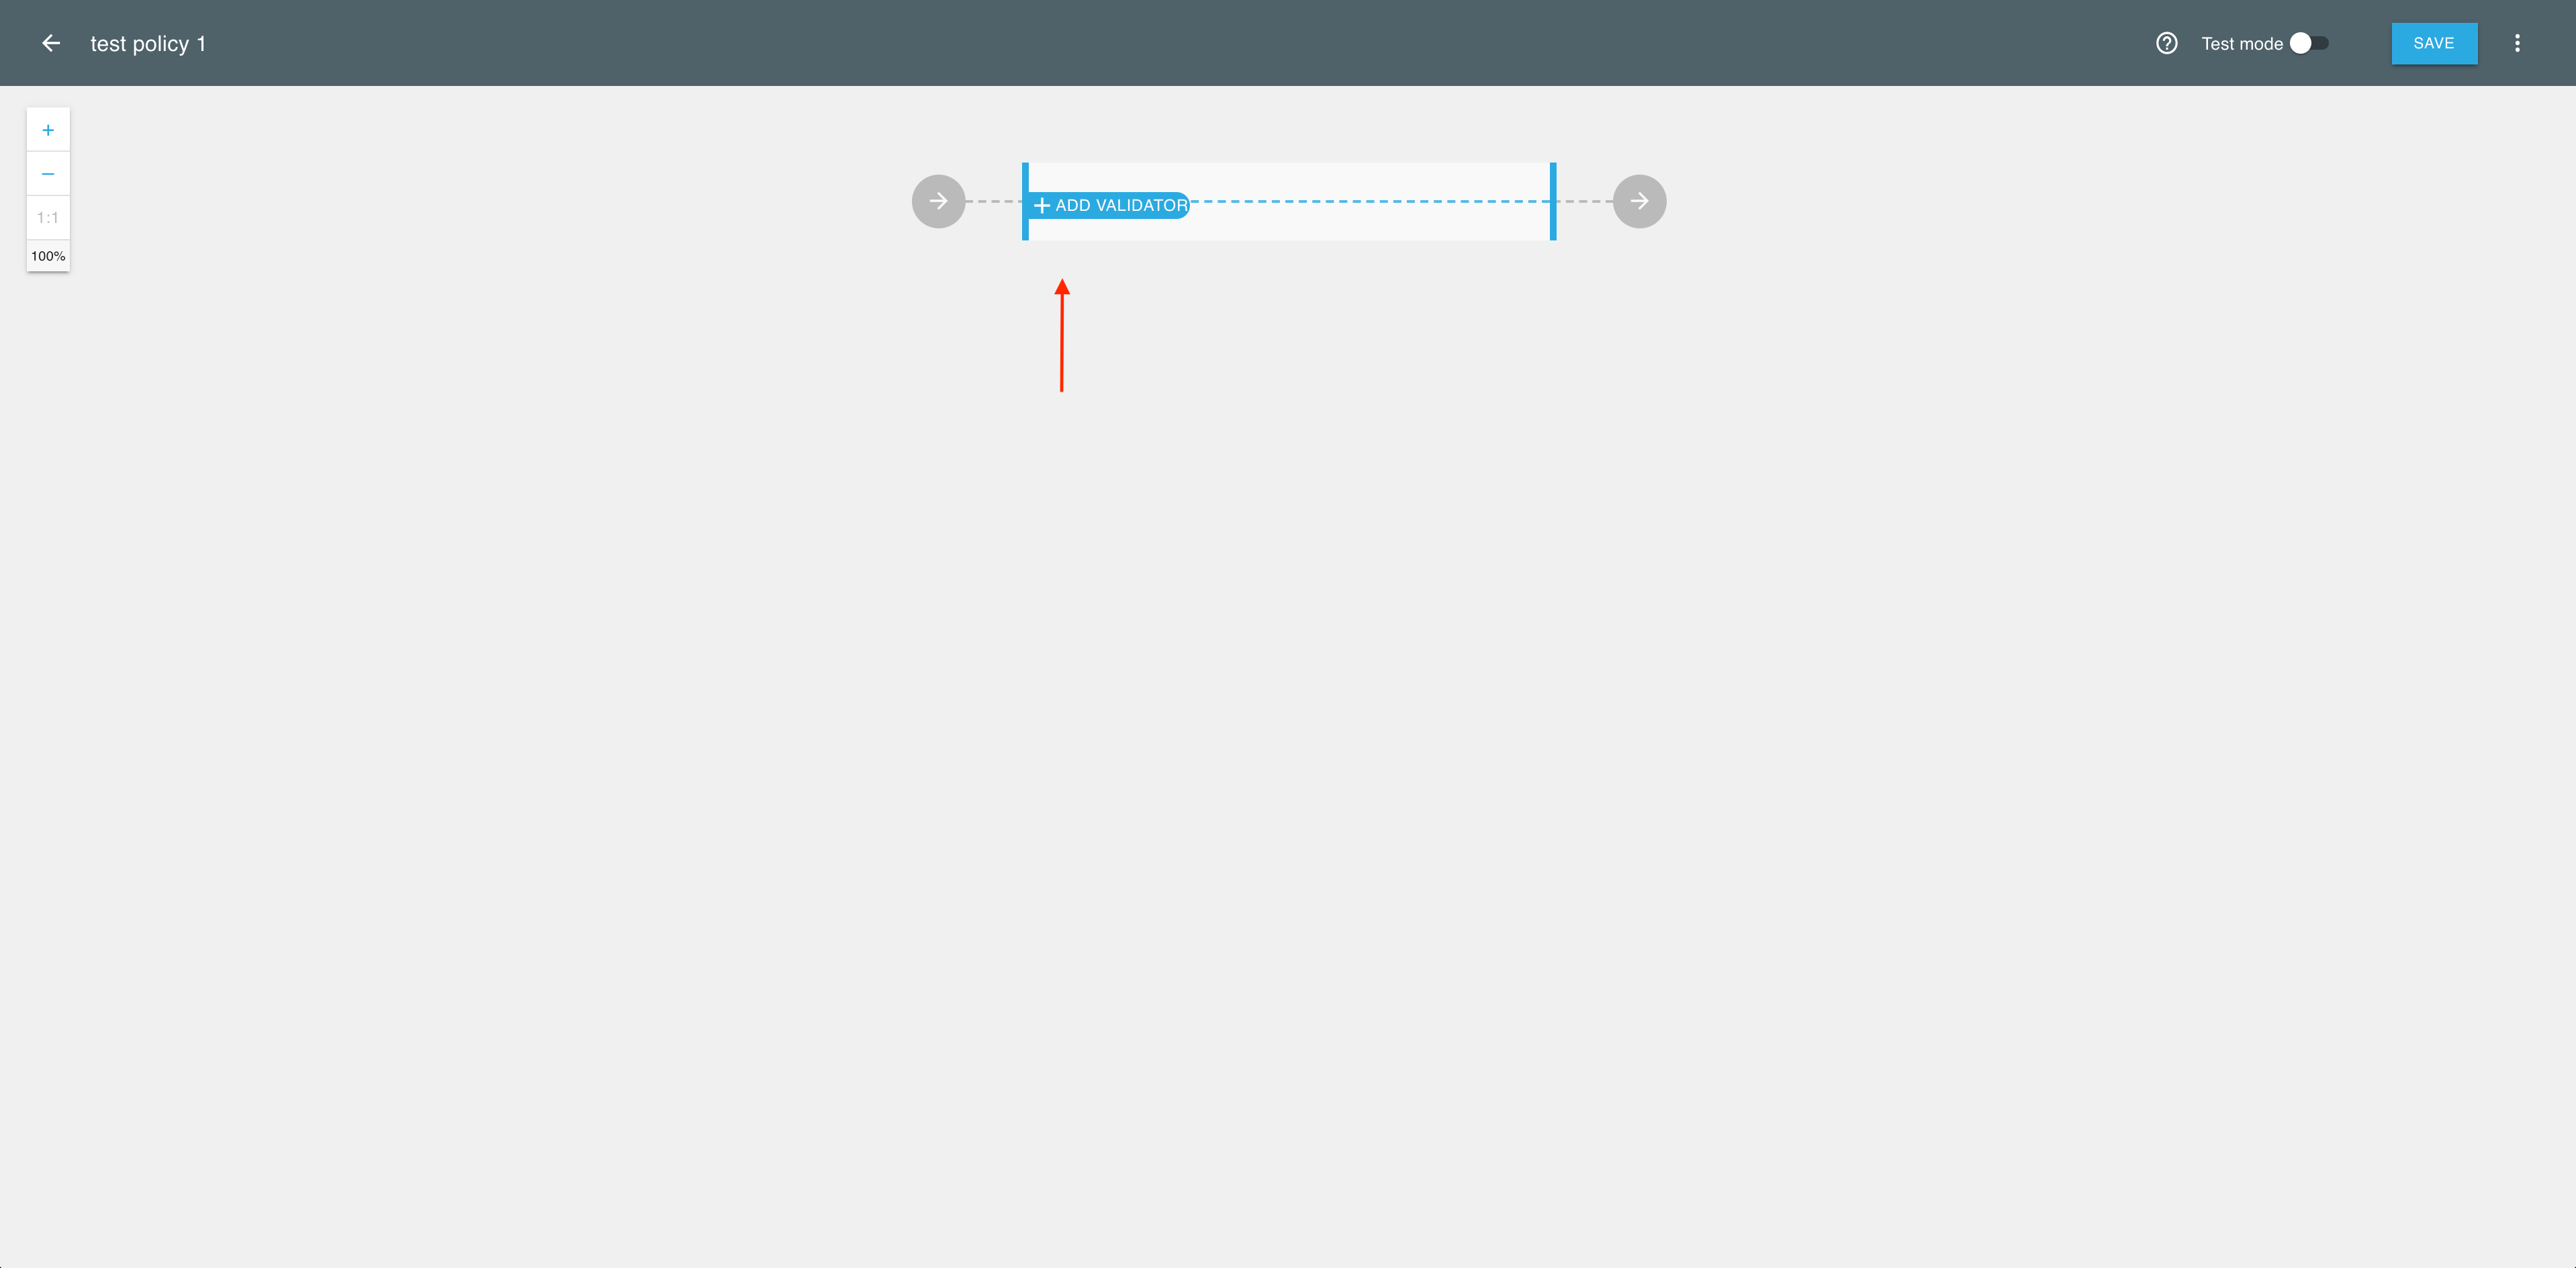
Add Validator
-
In the policy builder, select the + sign to add a validator.
-
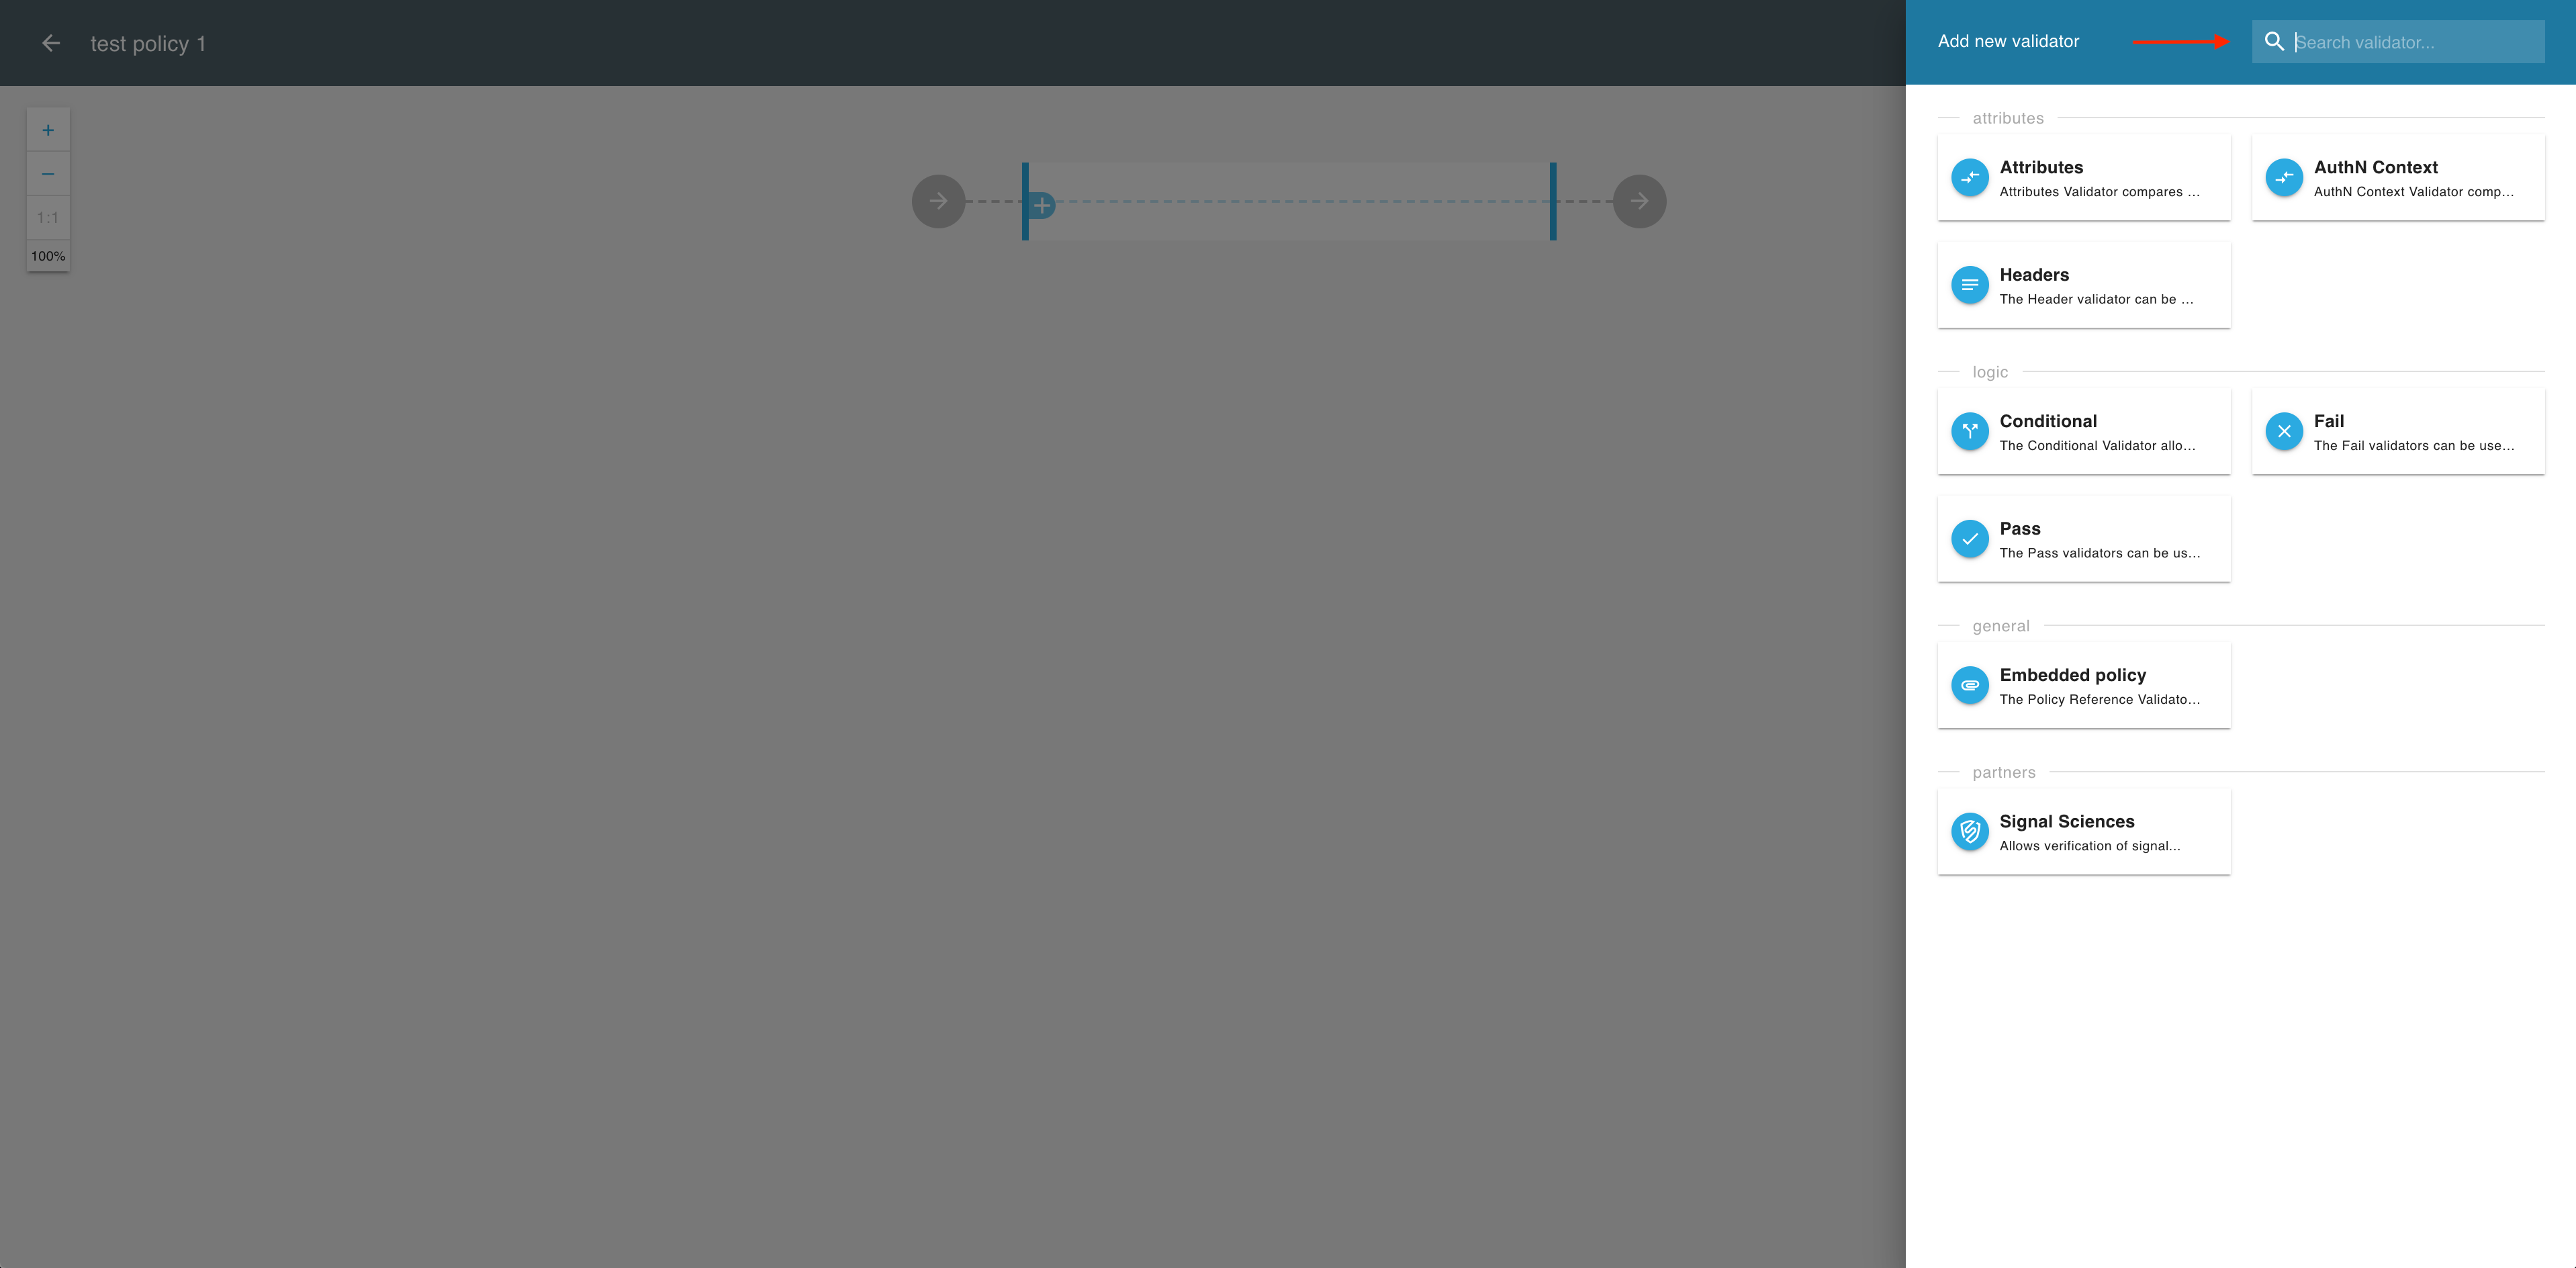
In the Add new validator fly-out view, enter a validator name of your preference into the search field and follow up to the validator setup.
-
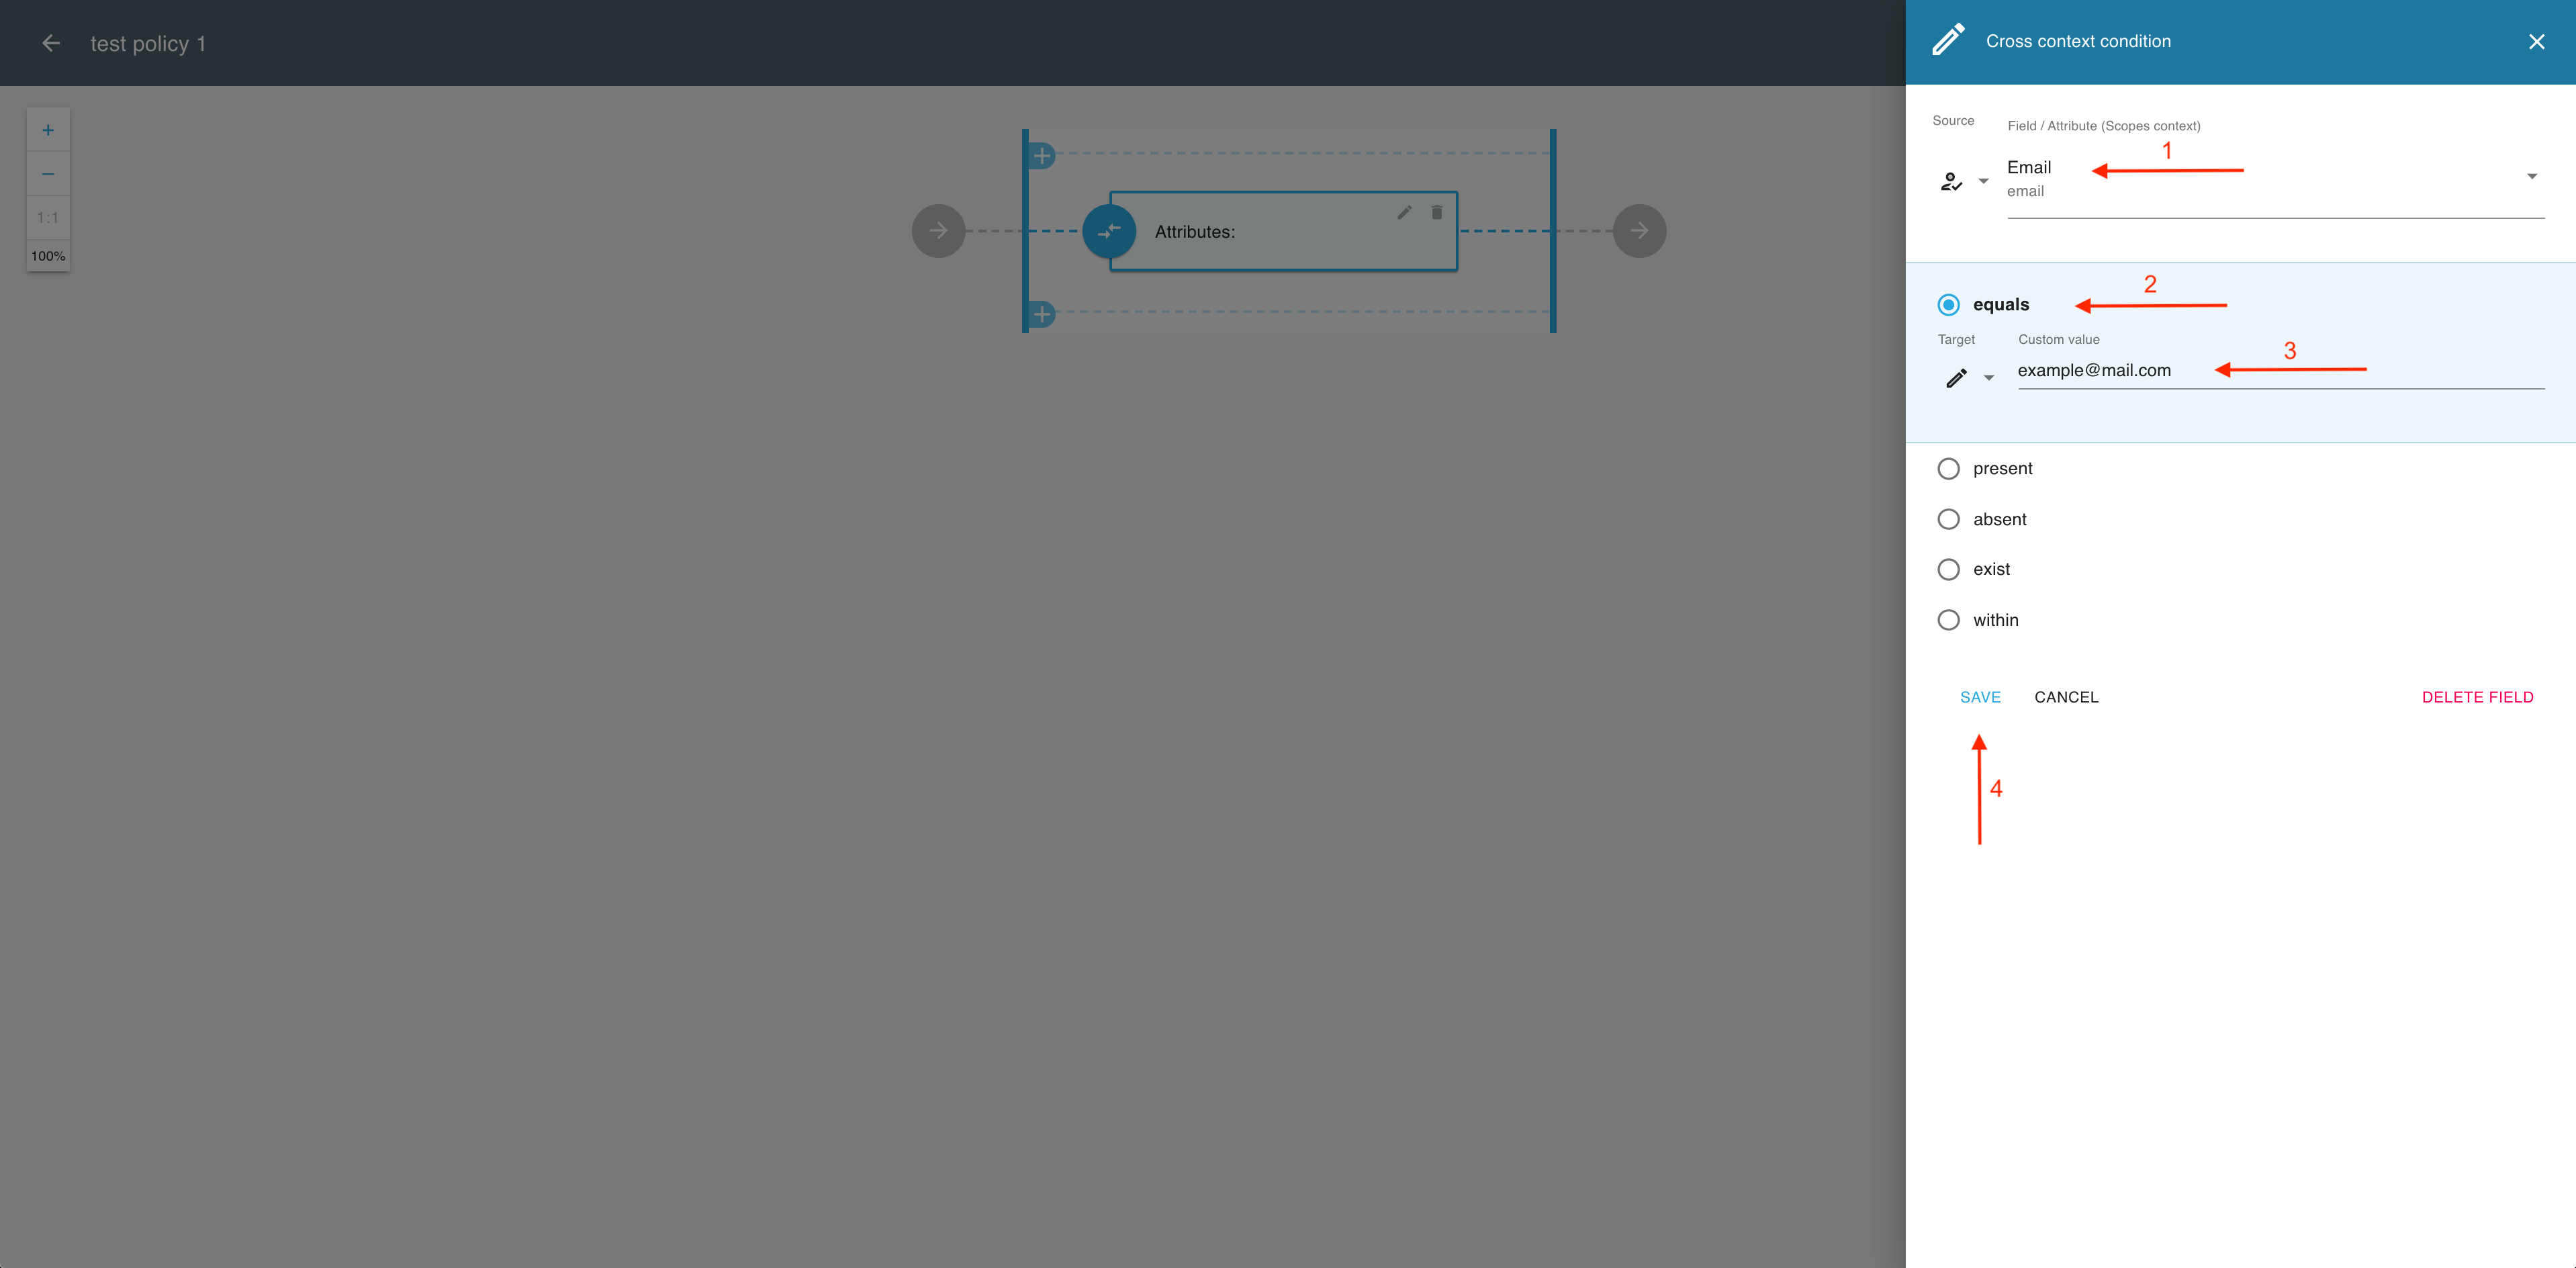
In the validator view, set up the validator by adding and configuring its fields:
- Select the source data context and specify the source value.
- Select the operator to define the relationship between the source and the target.
- Select the target data context and specify target value.
- Select Save to proceed.
-
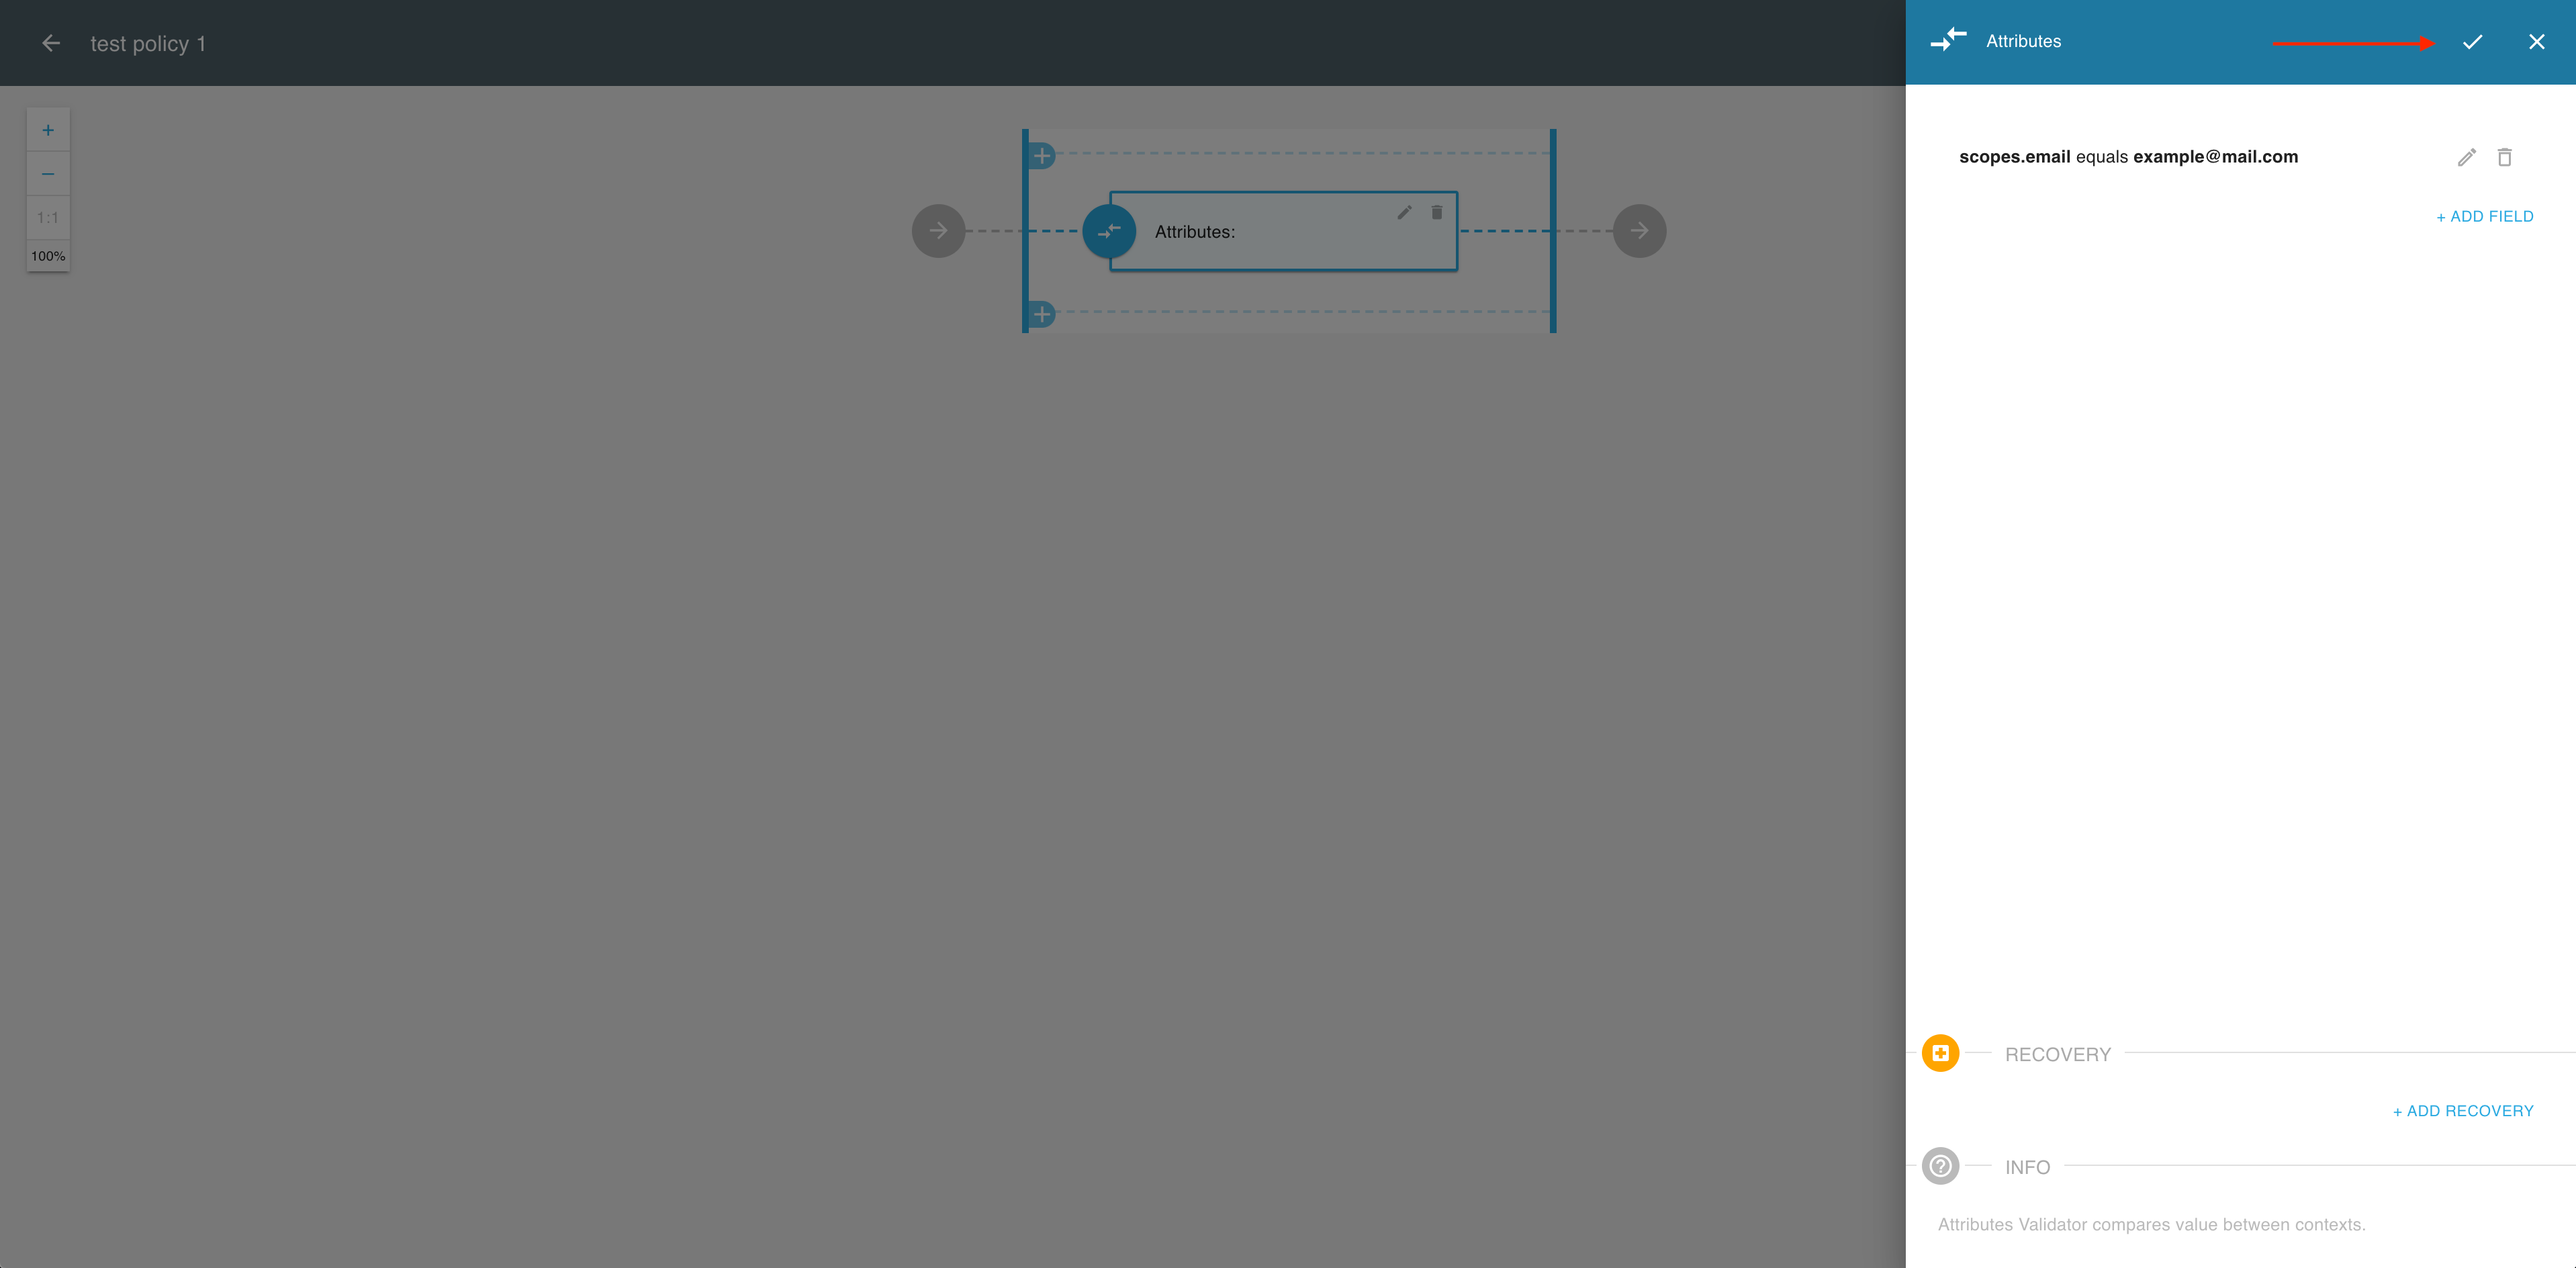
When all the fields for the validators are ready
-
Select the OK icon to finalize your validator.
-
Select Save to finalize your new policy.
Result
Your newly-created policy is available in the Policies view.
-