Prerequisites
- You have a Microsoft Azure account.
- You are permitted to access the API Management service and the Function App service in the Microsoft Azure portal.
Integrate Azure Authorizer with Azure GW
Create Azure GW
-
Go to Authorization » Gateways.
-
Select Add Gateway. A list of available gateways appears.
-
Select Azure API Management, enter the name and the description for your gateway, and select NEXT.
-
In the Gateway Management view, go to the QUICK START tab and follow the provided instruction to configure your gateway.
-
Go to the Microsoft Azure portal to configure Cloudentity Authorizer. See Configure Cloudentity Authorizer for detailed instructions.
-
Get back to the Cloudentity administrator portal (Gateway Management view > QUICK START tab) and select CONNECT API GROUPS to connect APIs and enable enforcement policies.
Result
A set of API groups that you have in the Azure portal has been imported to the Cloudentity administrator portal and displayed in the APIs tab of the Gateway Management view. The API groups are ready to be connected to services.
-
-
To access your gateway settings, select the SETTINGS tab.
-
In the SETTINGS tab, copy values of
ACP_CLIENT_ID,ACP_CLIENT_SECRET, andACP_ISSUER_URL.Note
ACP_CLIENT_ID,ACP_CLIENT_SECRET, andACP_ISSUER_URLare needed to configure Cloudentity Authorizer in the Microsoft Azure portal (step 2 in Set environment variables). -
Select Save.
Configure Azure Permissions
To configure the Azure API gateway, you need Cloudentity Authorizer, which uses a specific set of APIs. Your Azure application (OAuth client) needs permissions to access these APIs.
Register Application
-
Go to the Microsoft Azure portal, create an Azure Active Directory application according to instructions in How to: Use the portal to create an Azure AD application….
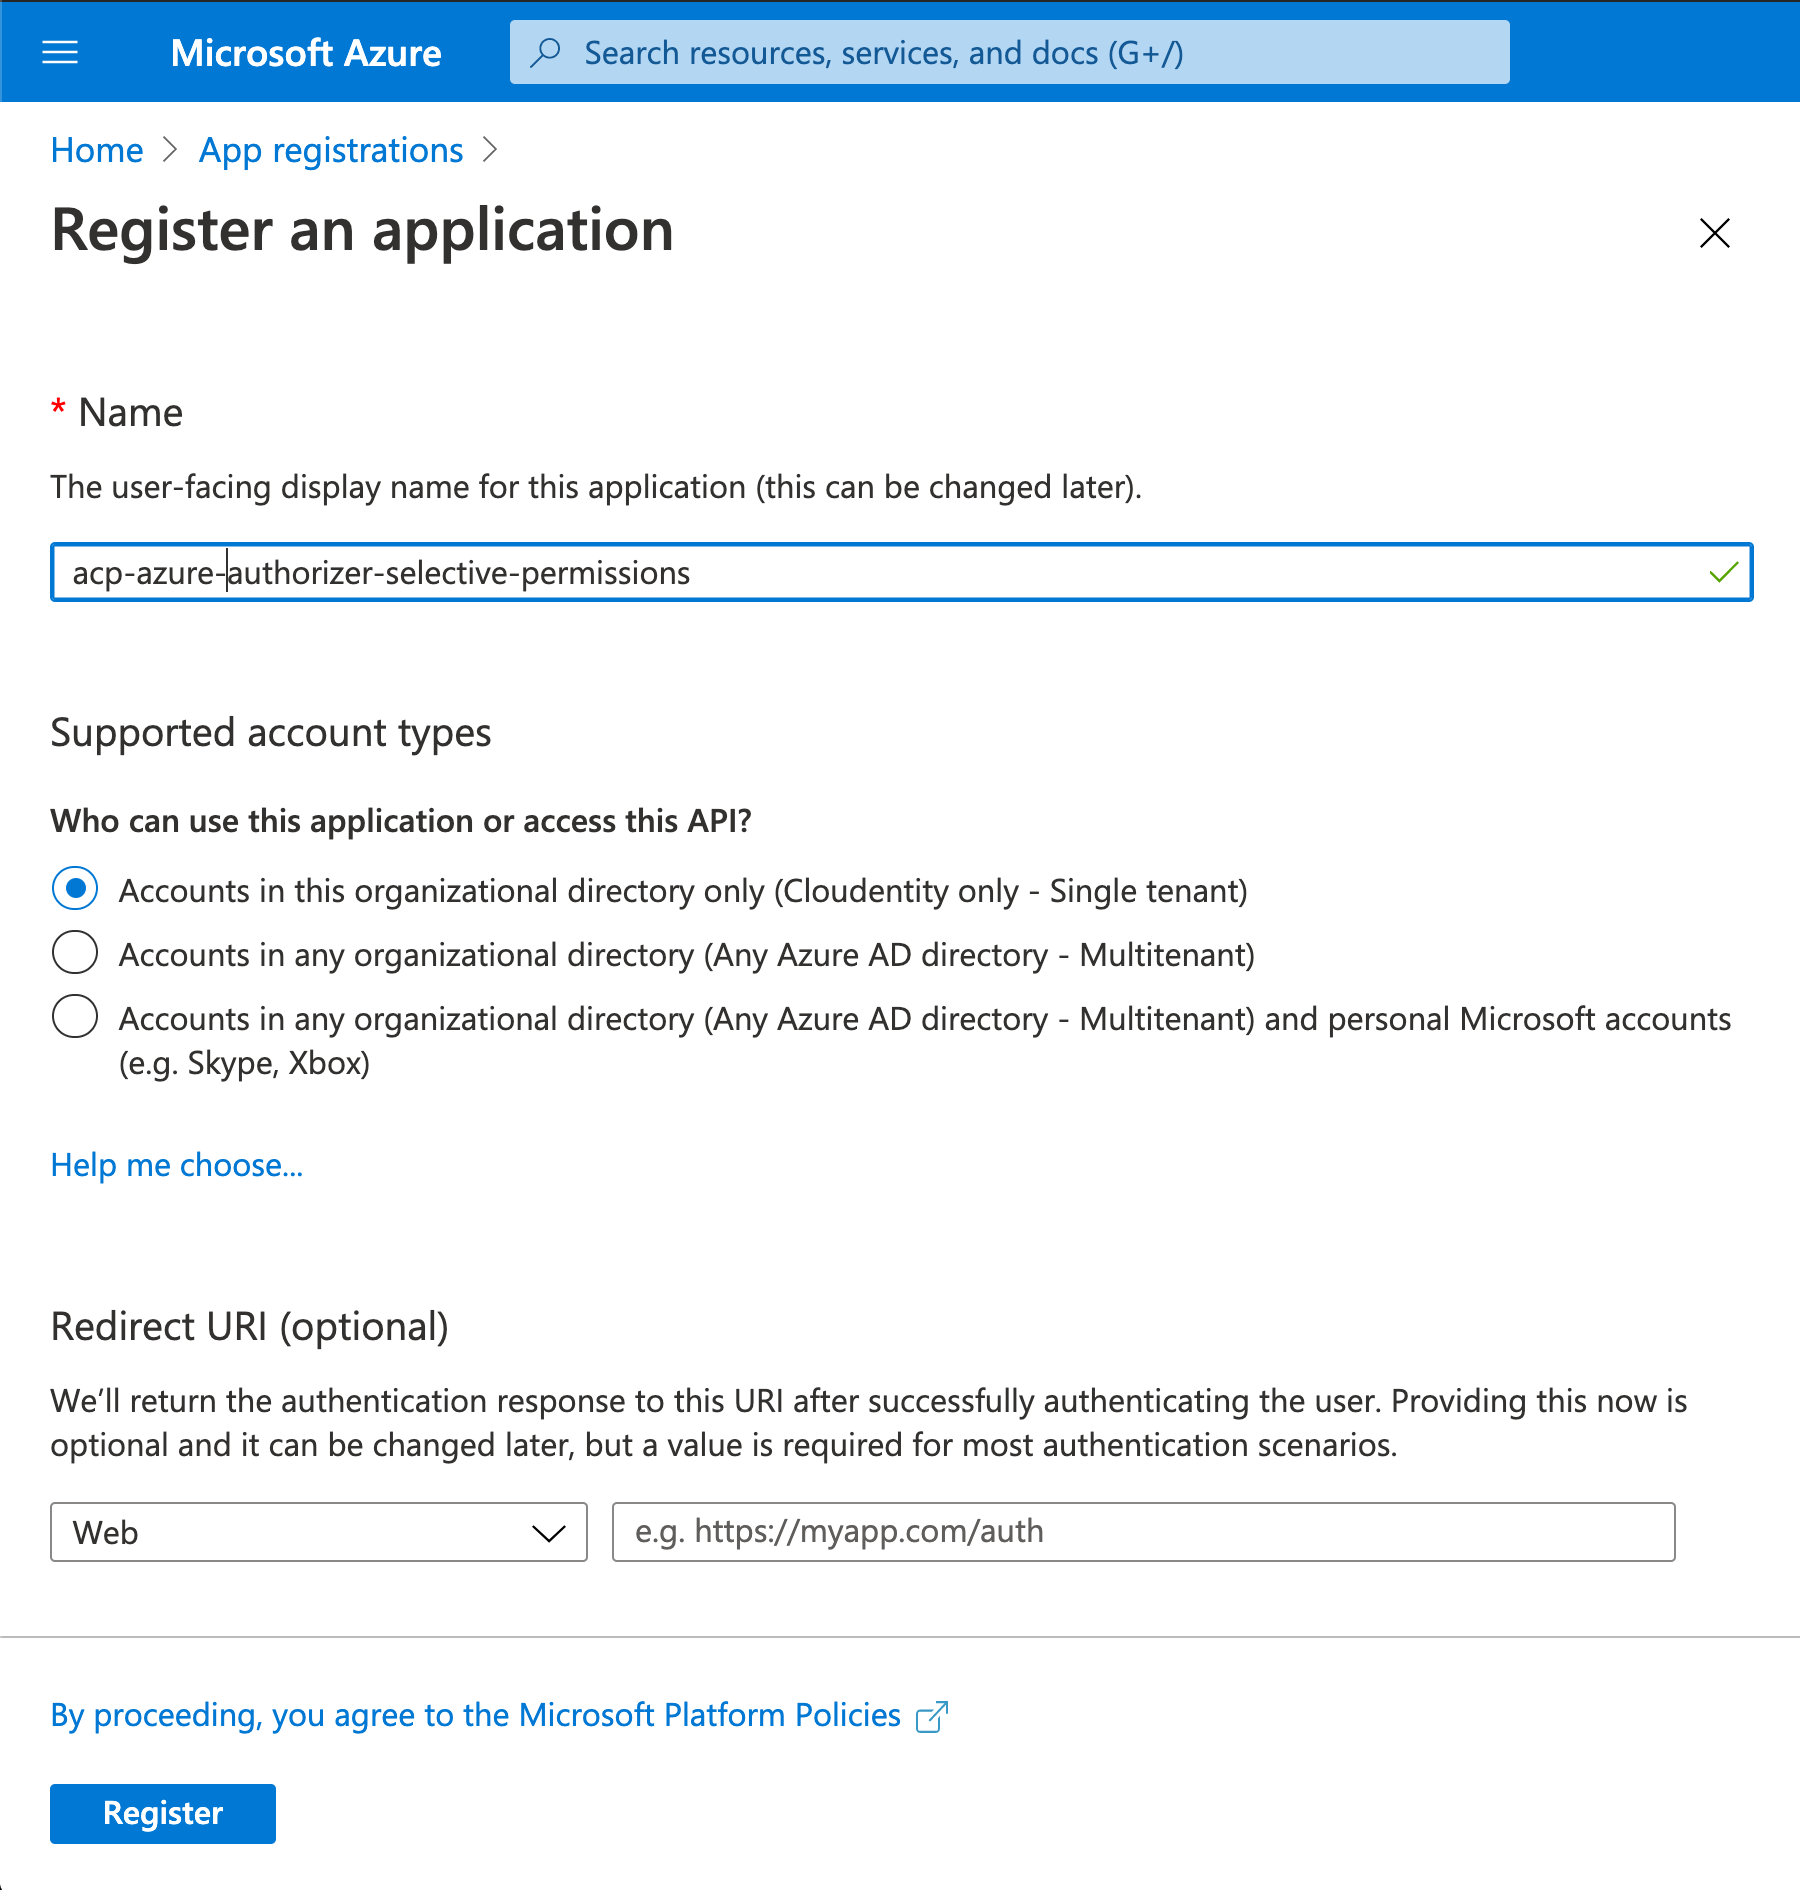
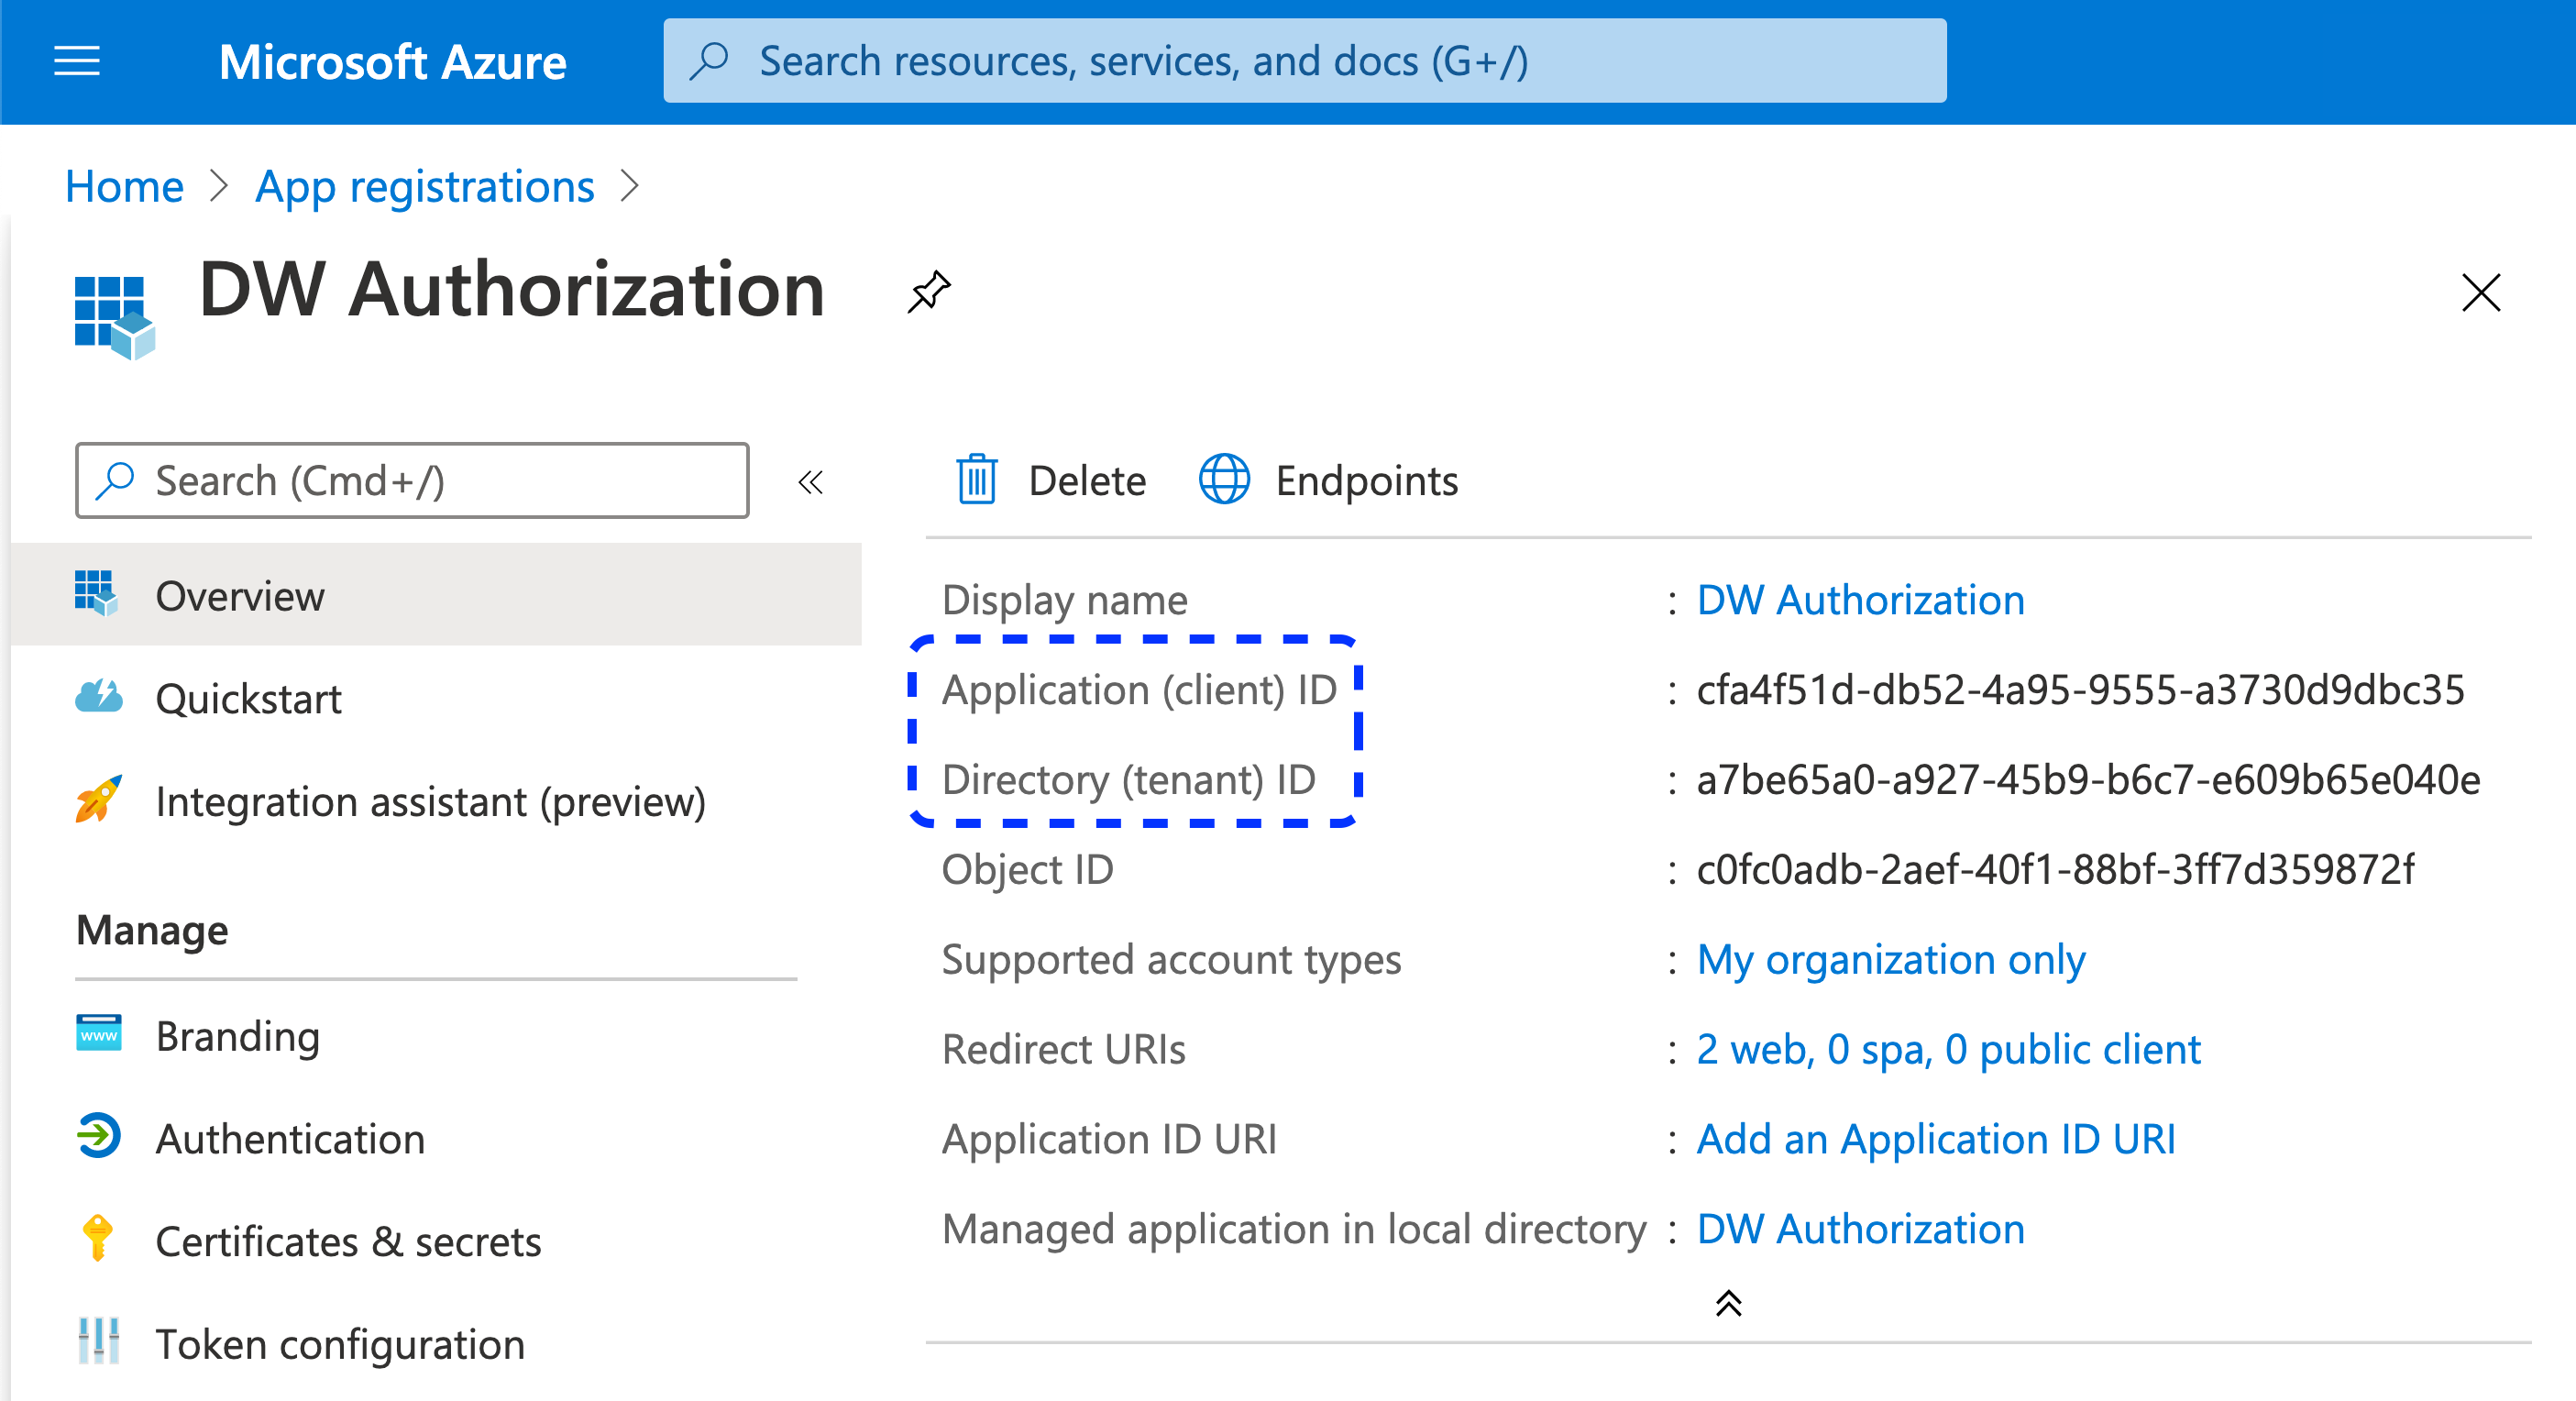
Result
You can identify AZURE_CLIENT_ID and AZURE_TENANT_ID for your new application.
-
Select Certificate and secrets from the sidebar and add a new secret for your application.
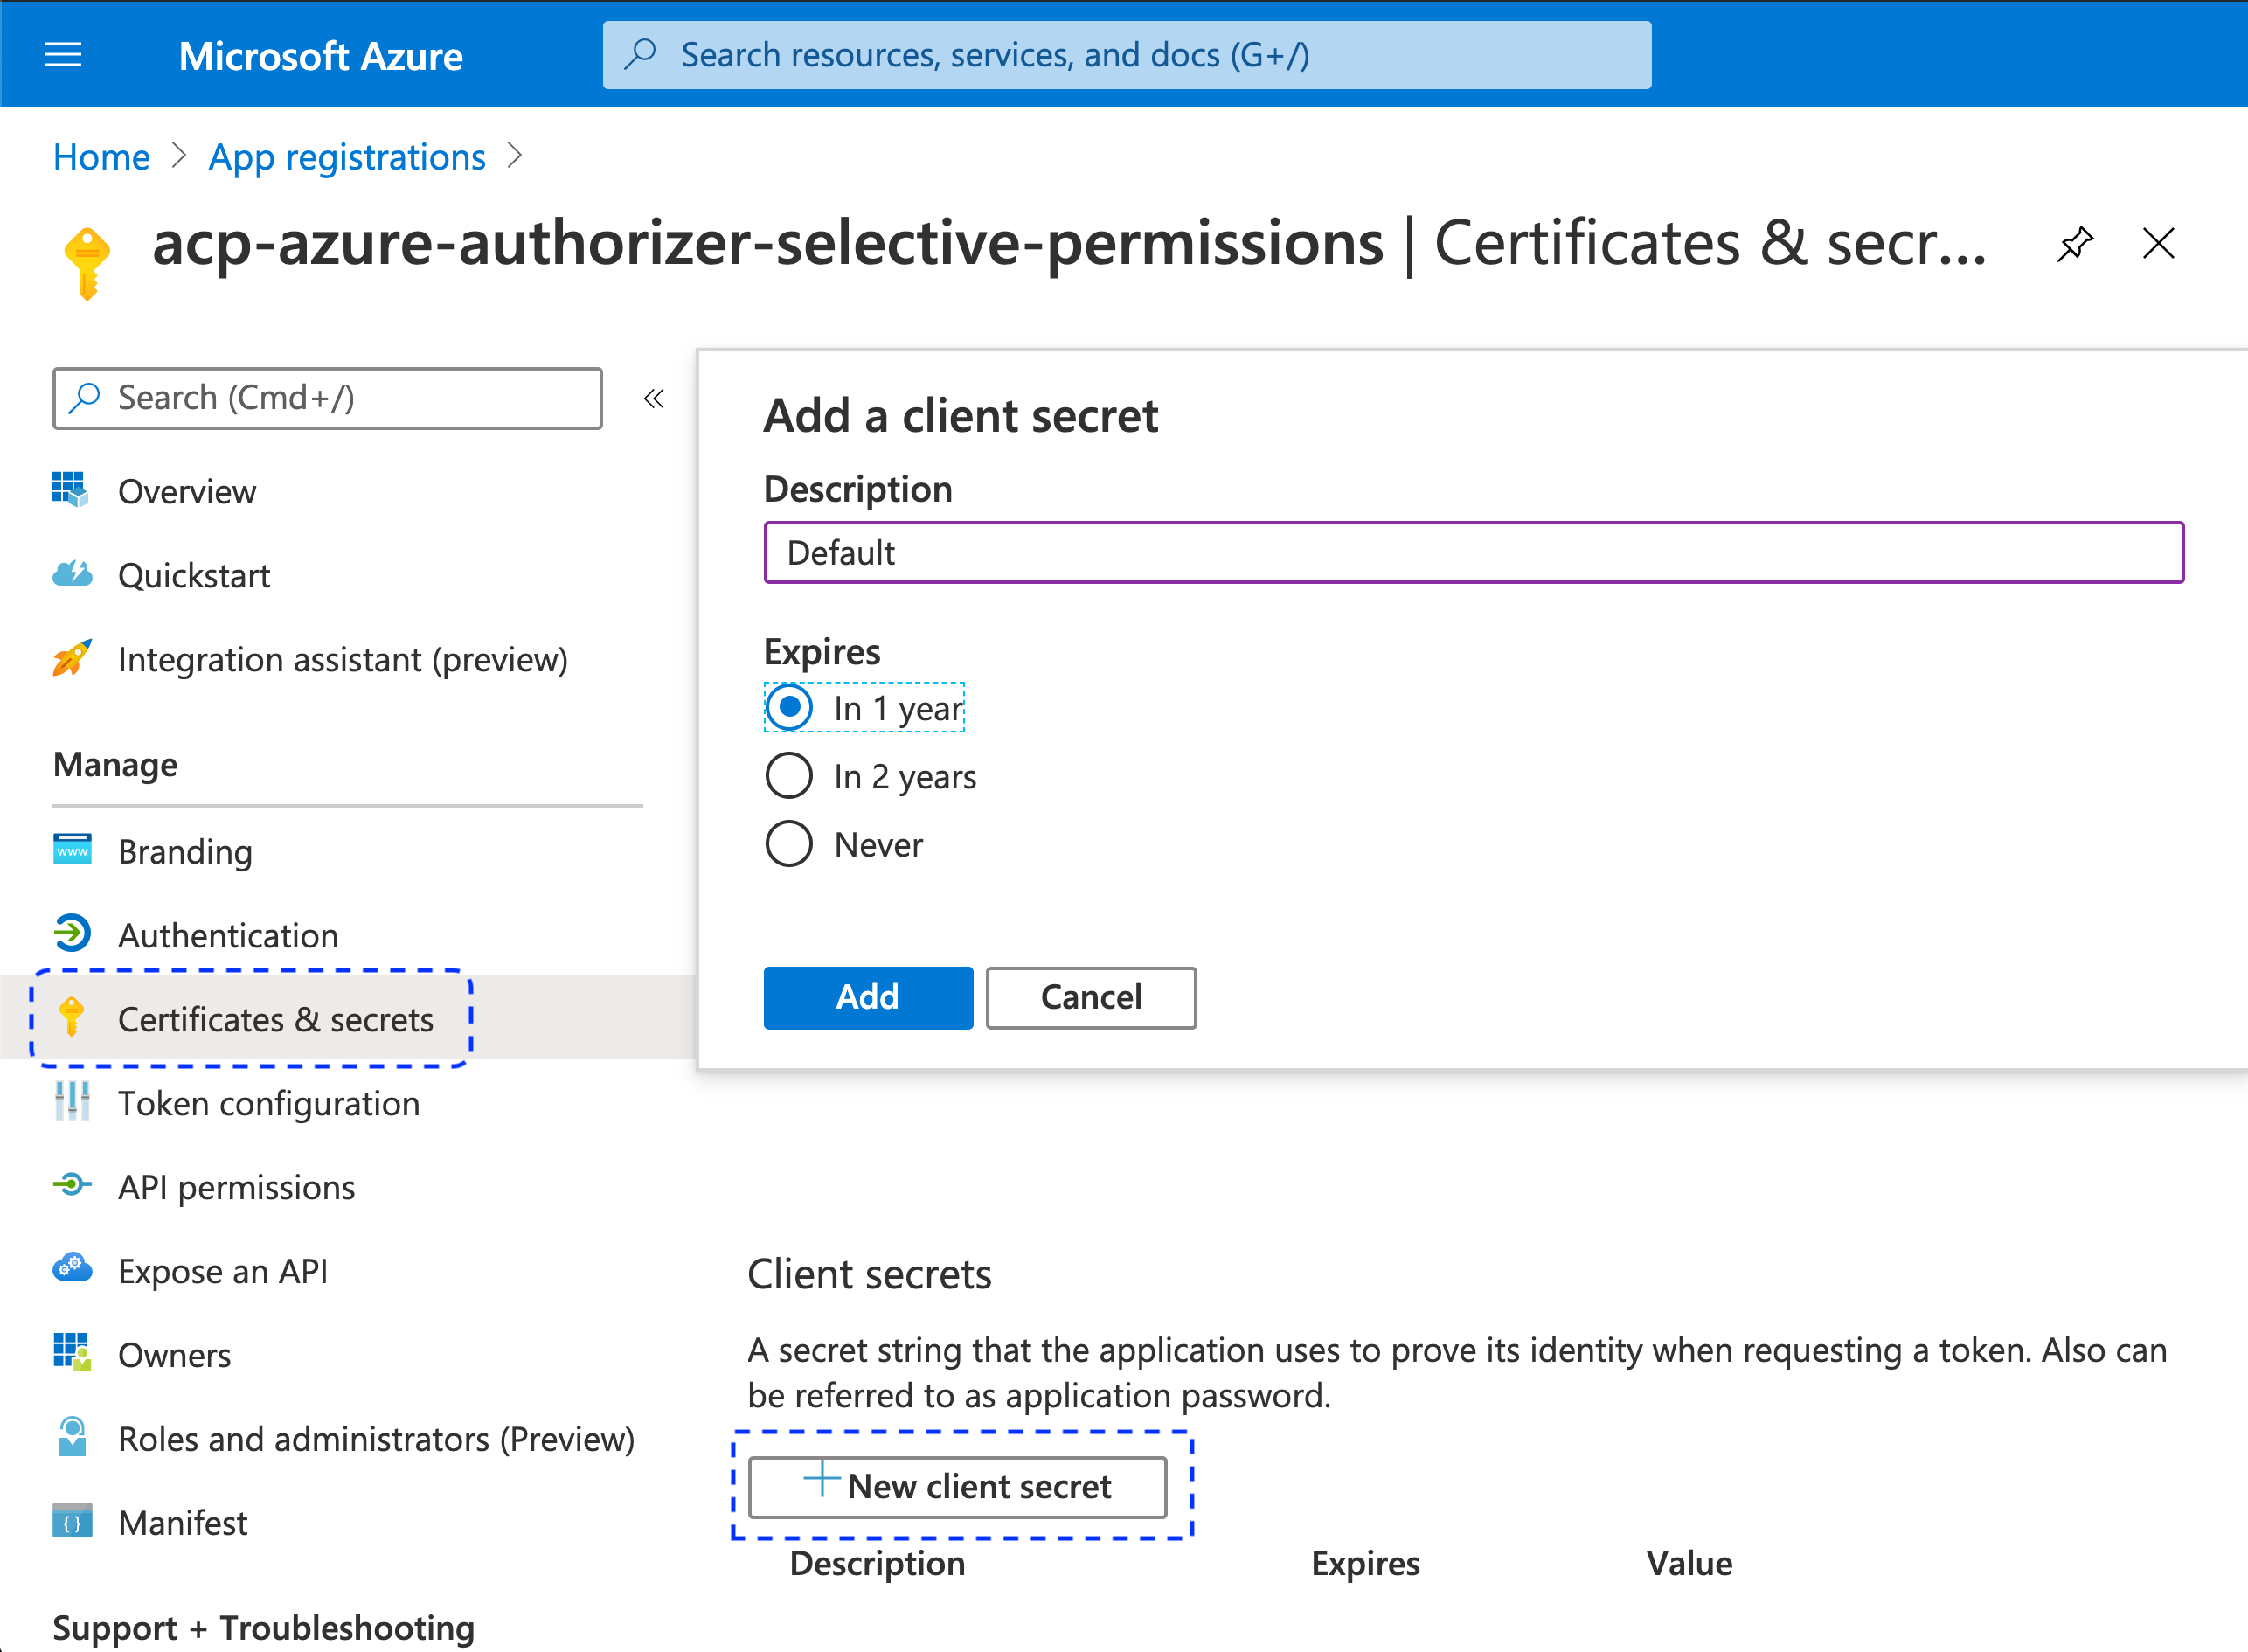
Result
AZURE_CLIENT_SECRET is generated.
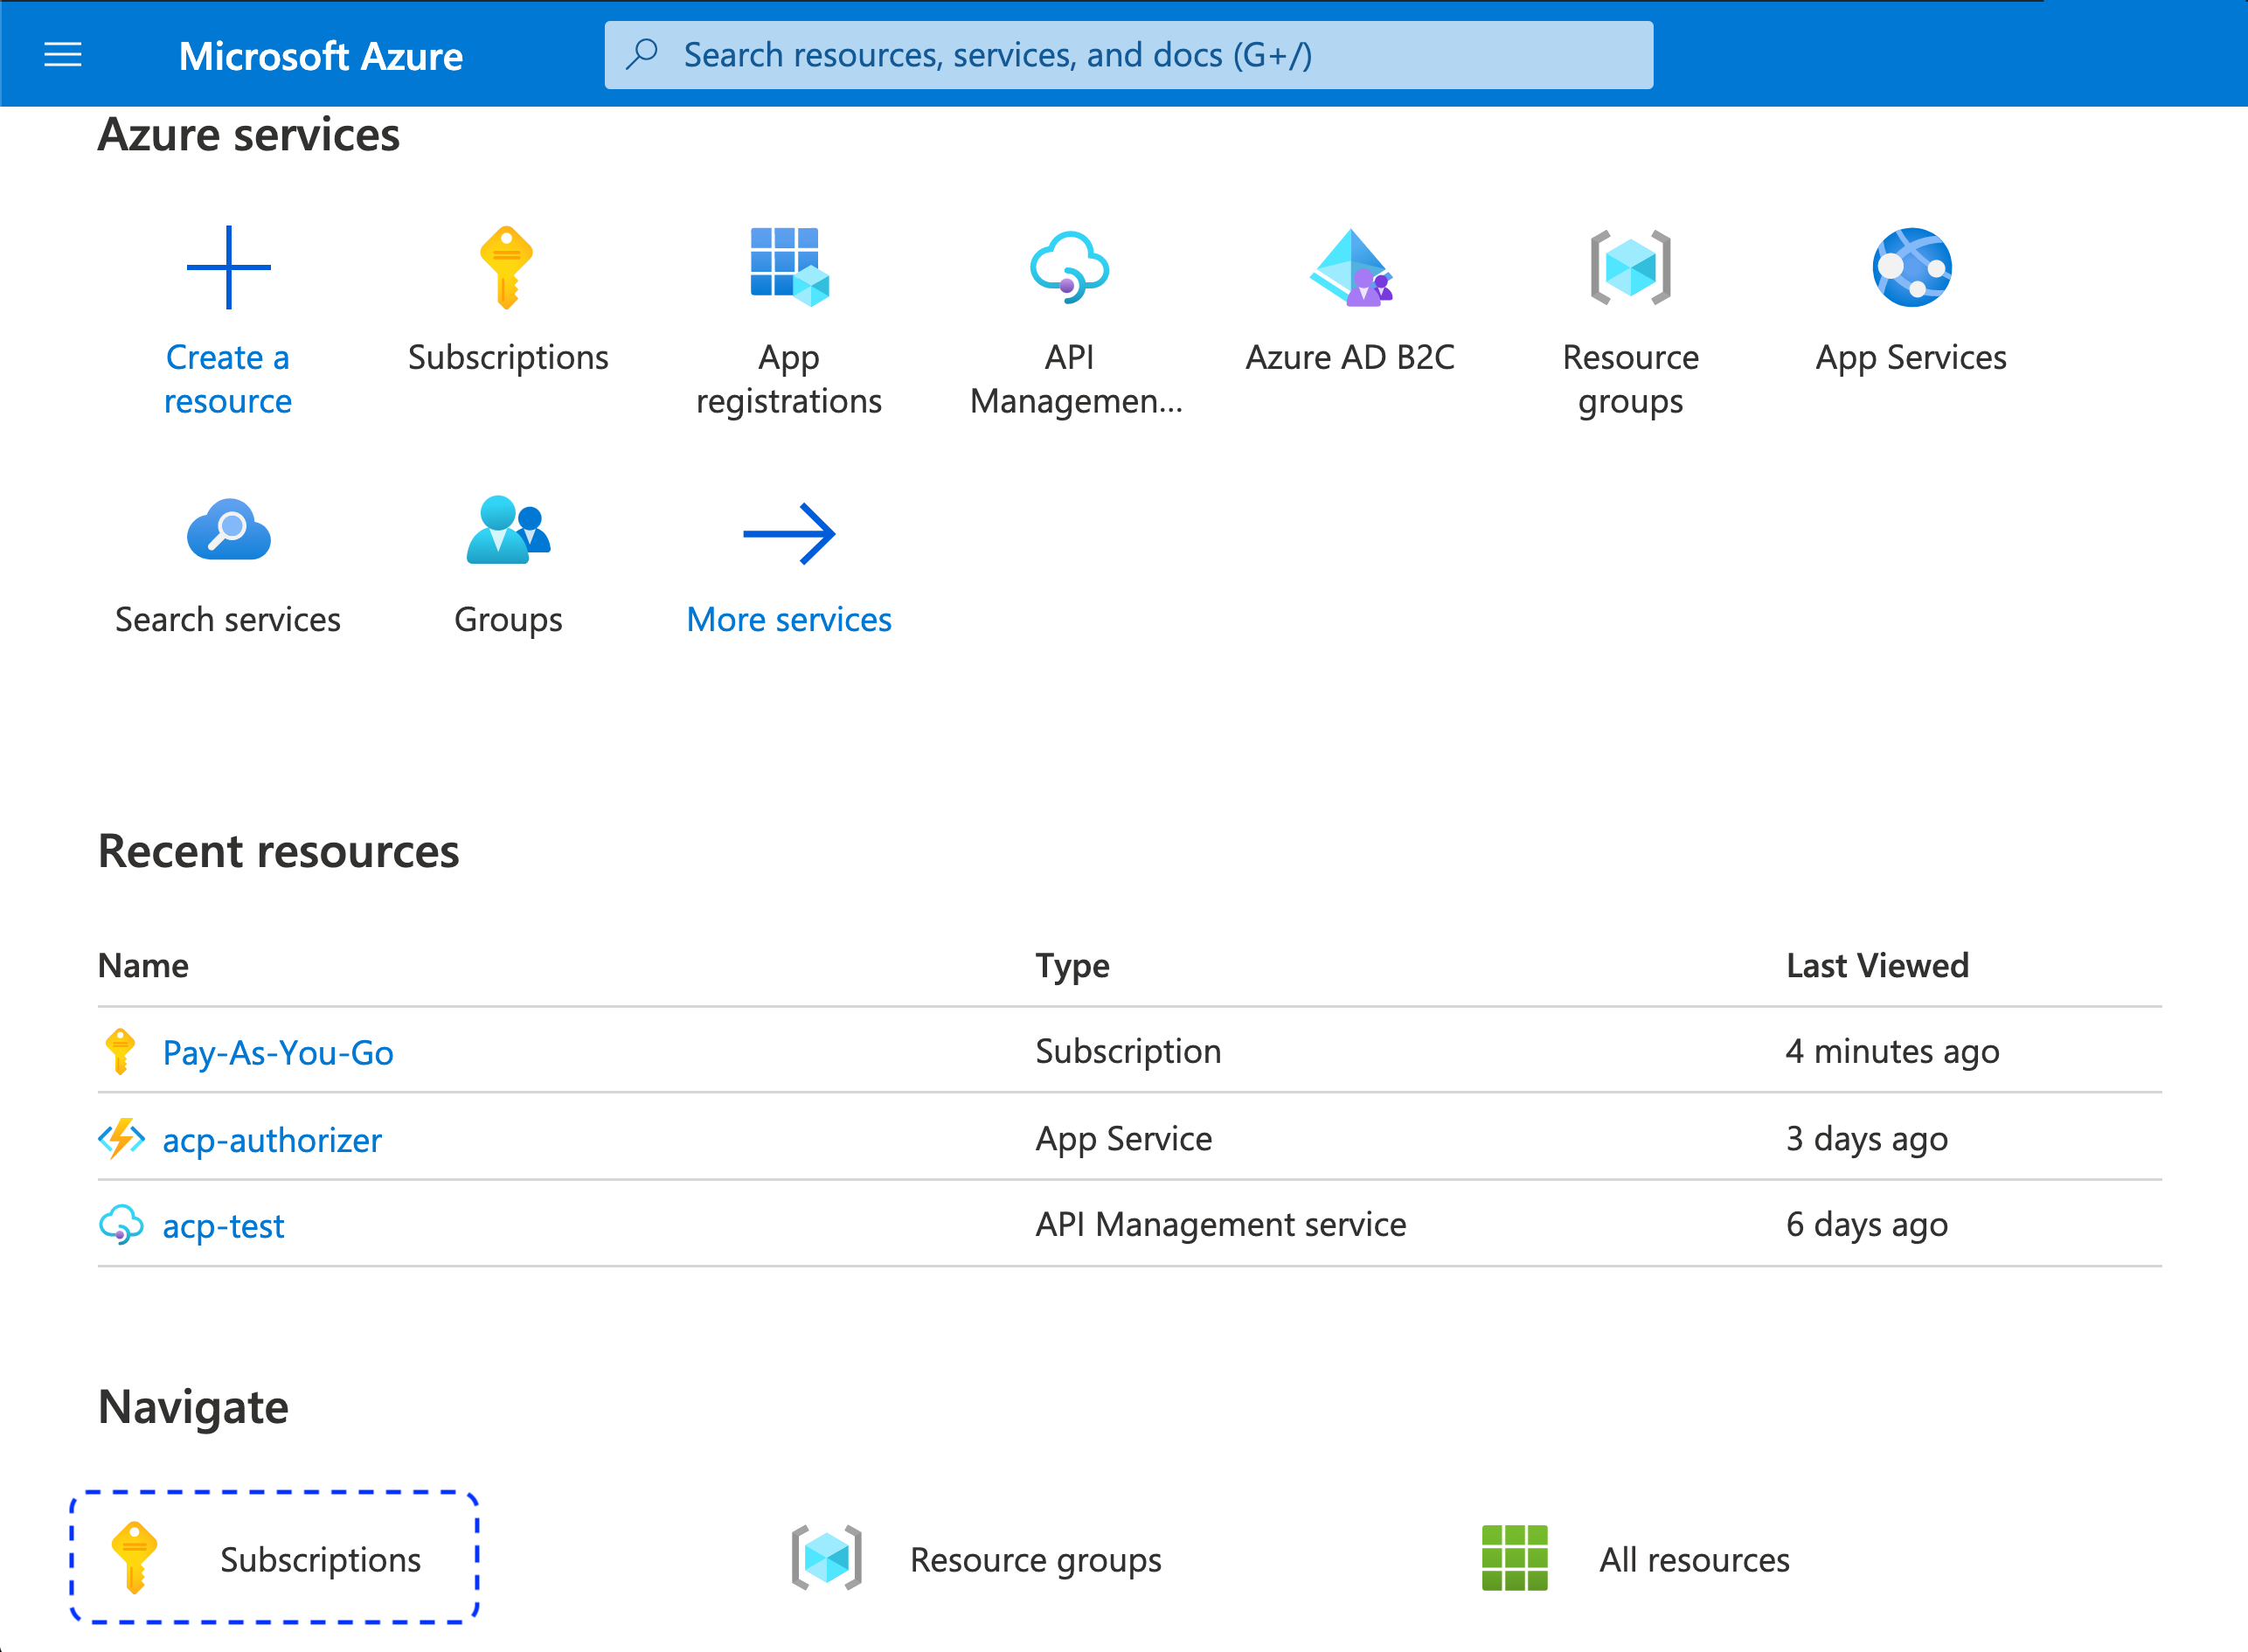
Assign Roles
-
Get back to the Microsoft Azure homepage and select Subscriptions from the sidebar.
-
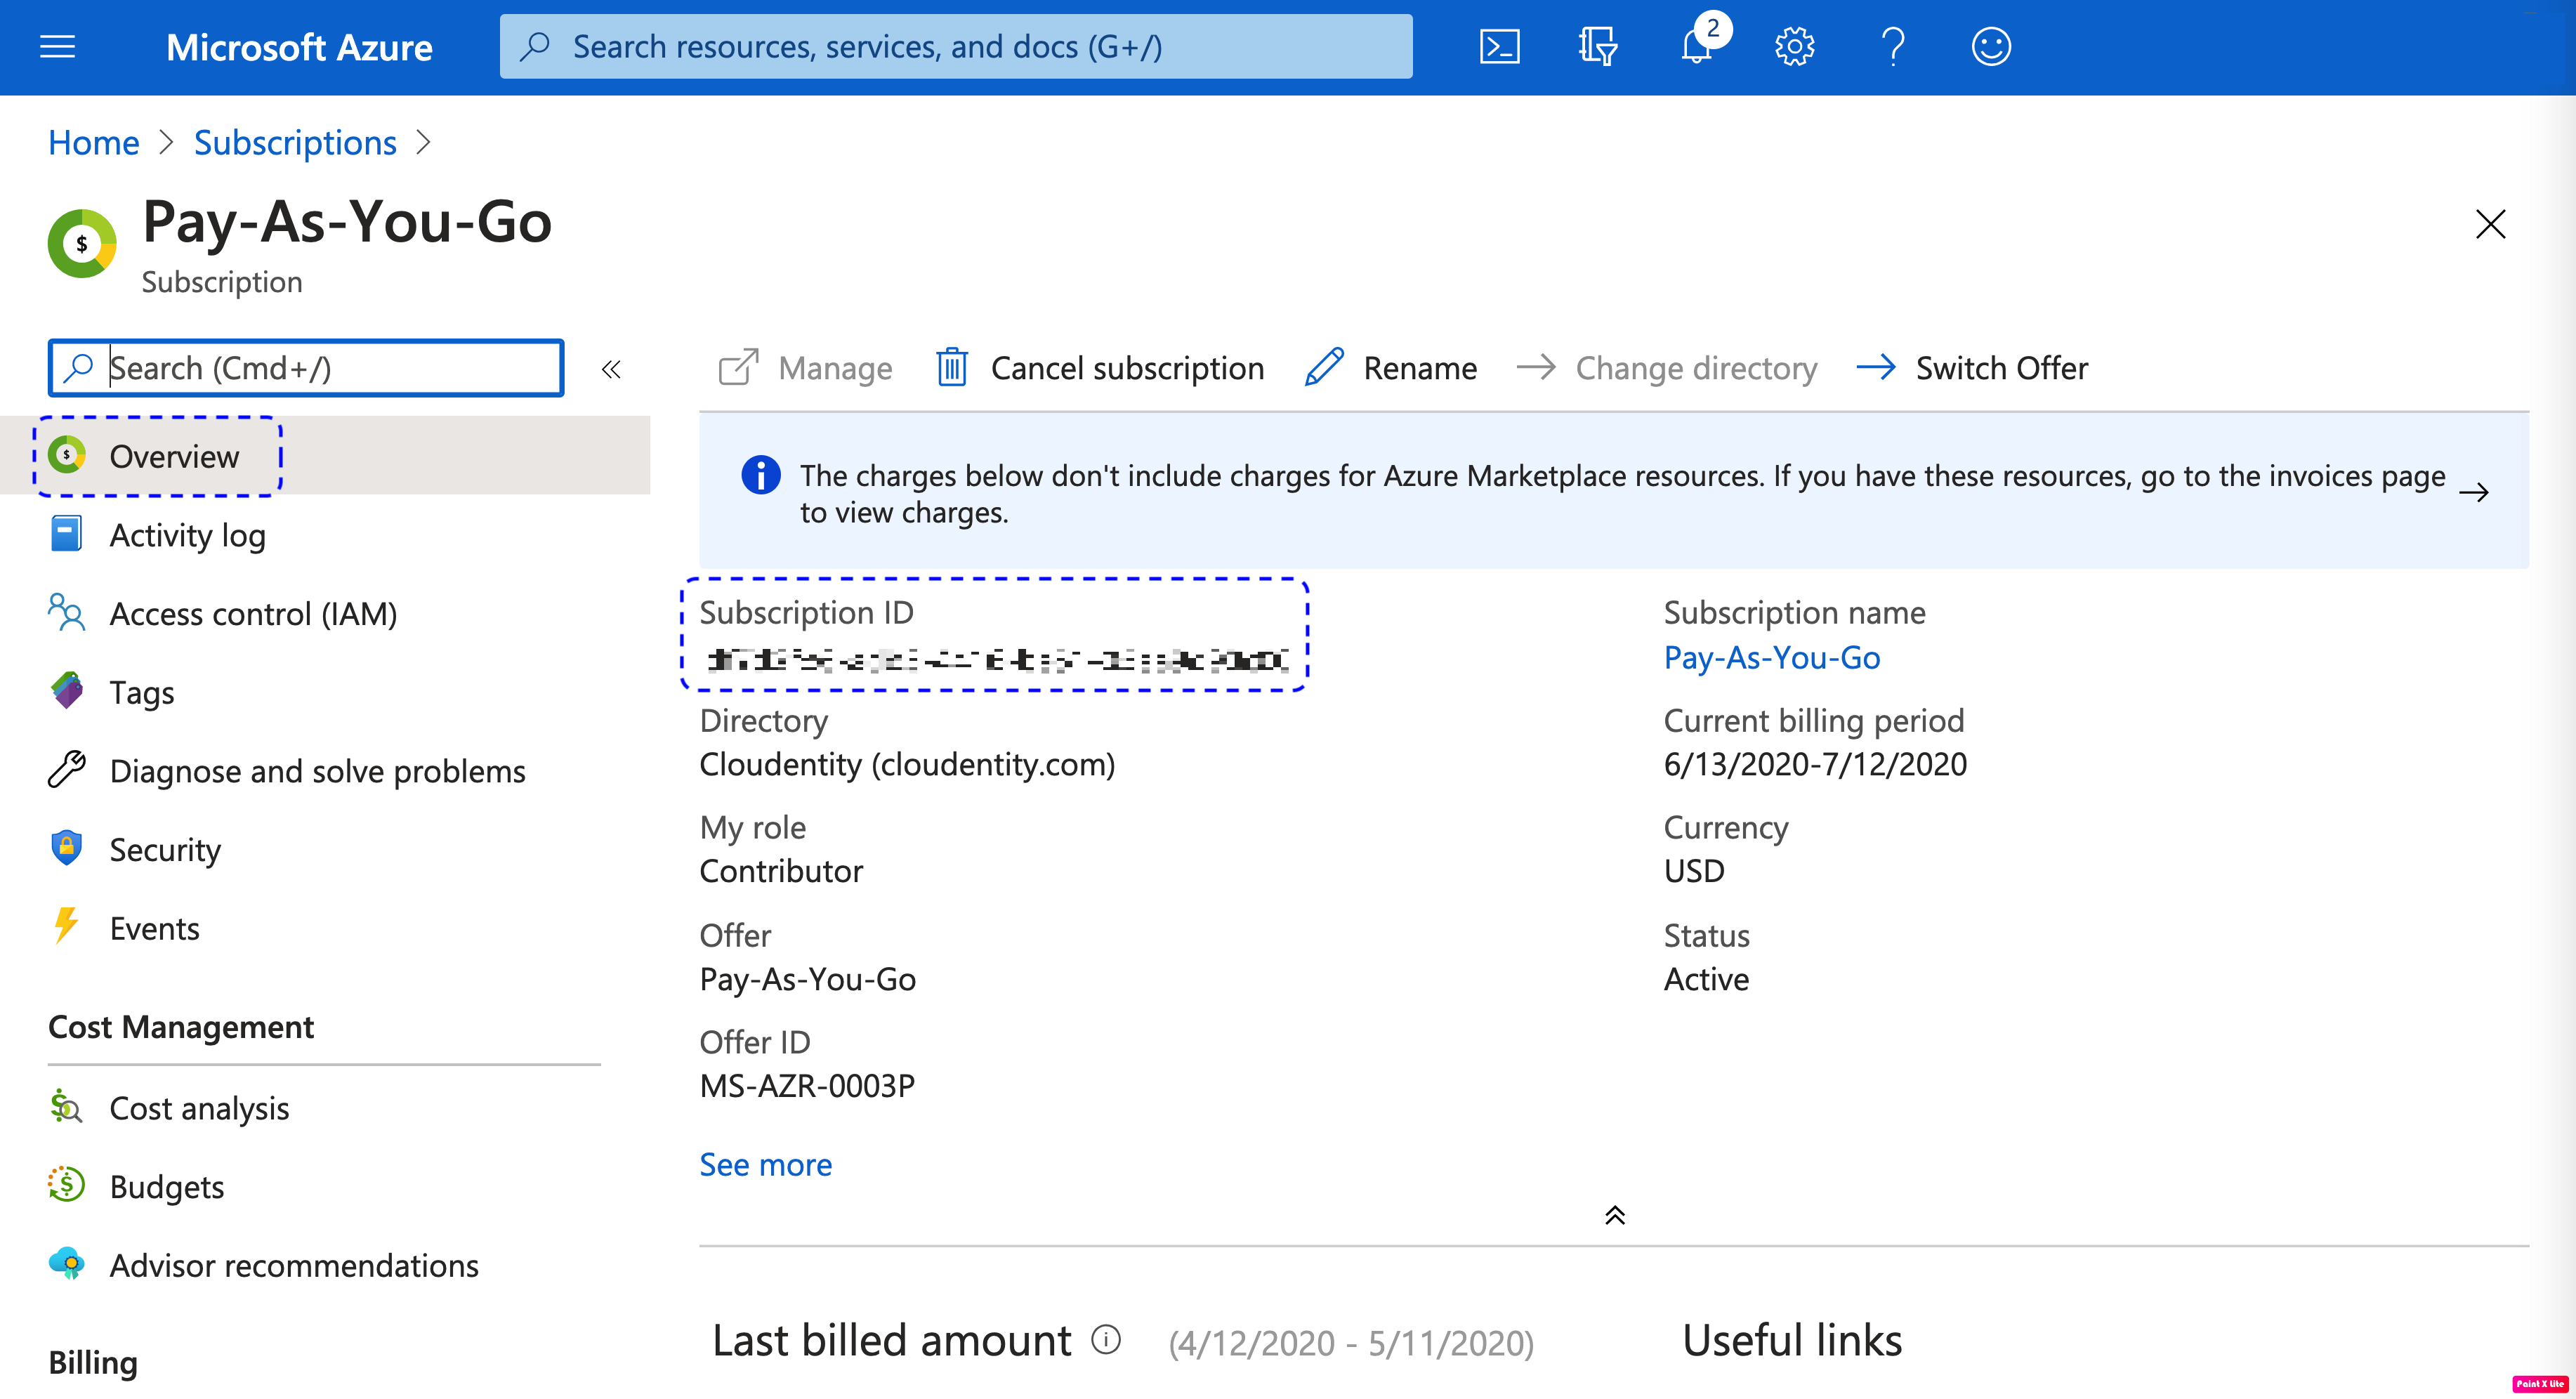
In the Subscriptions view, select a subscription that you want to configure.
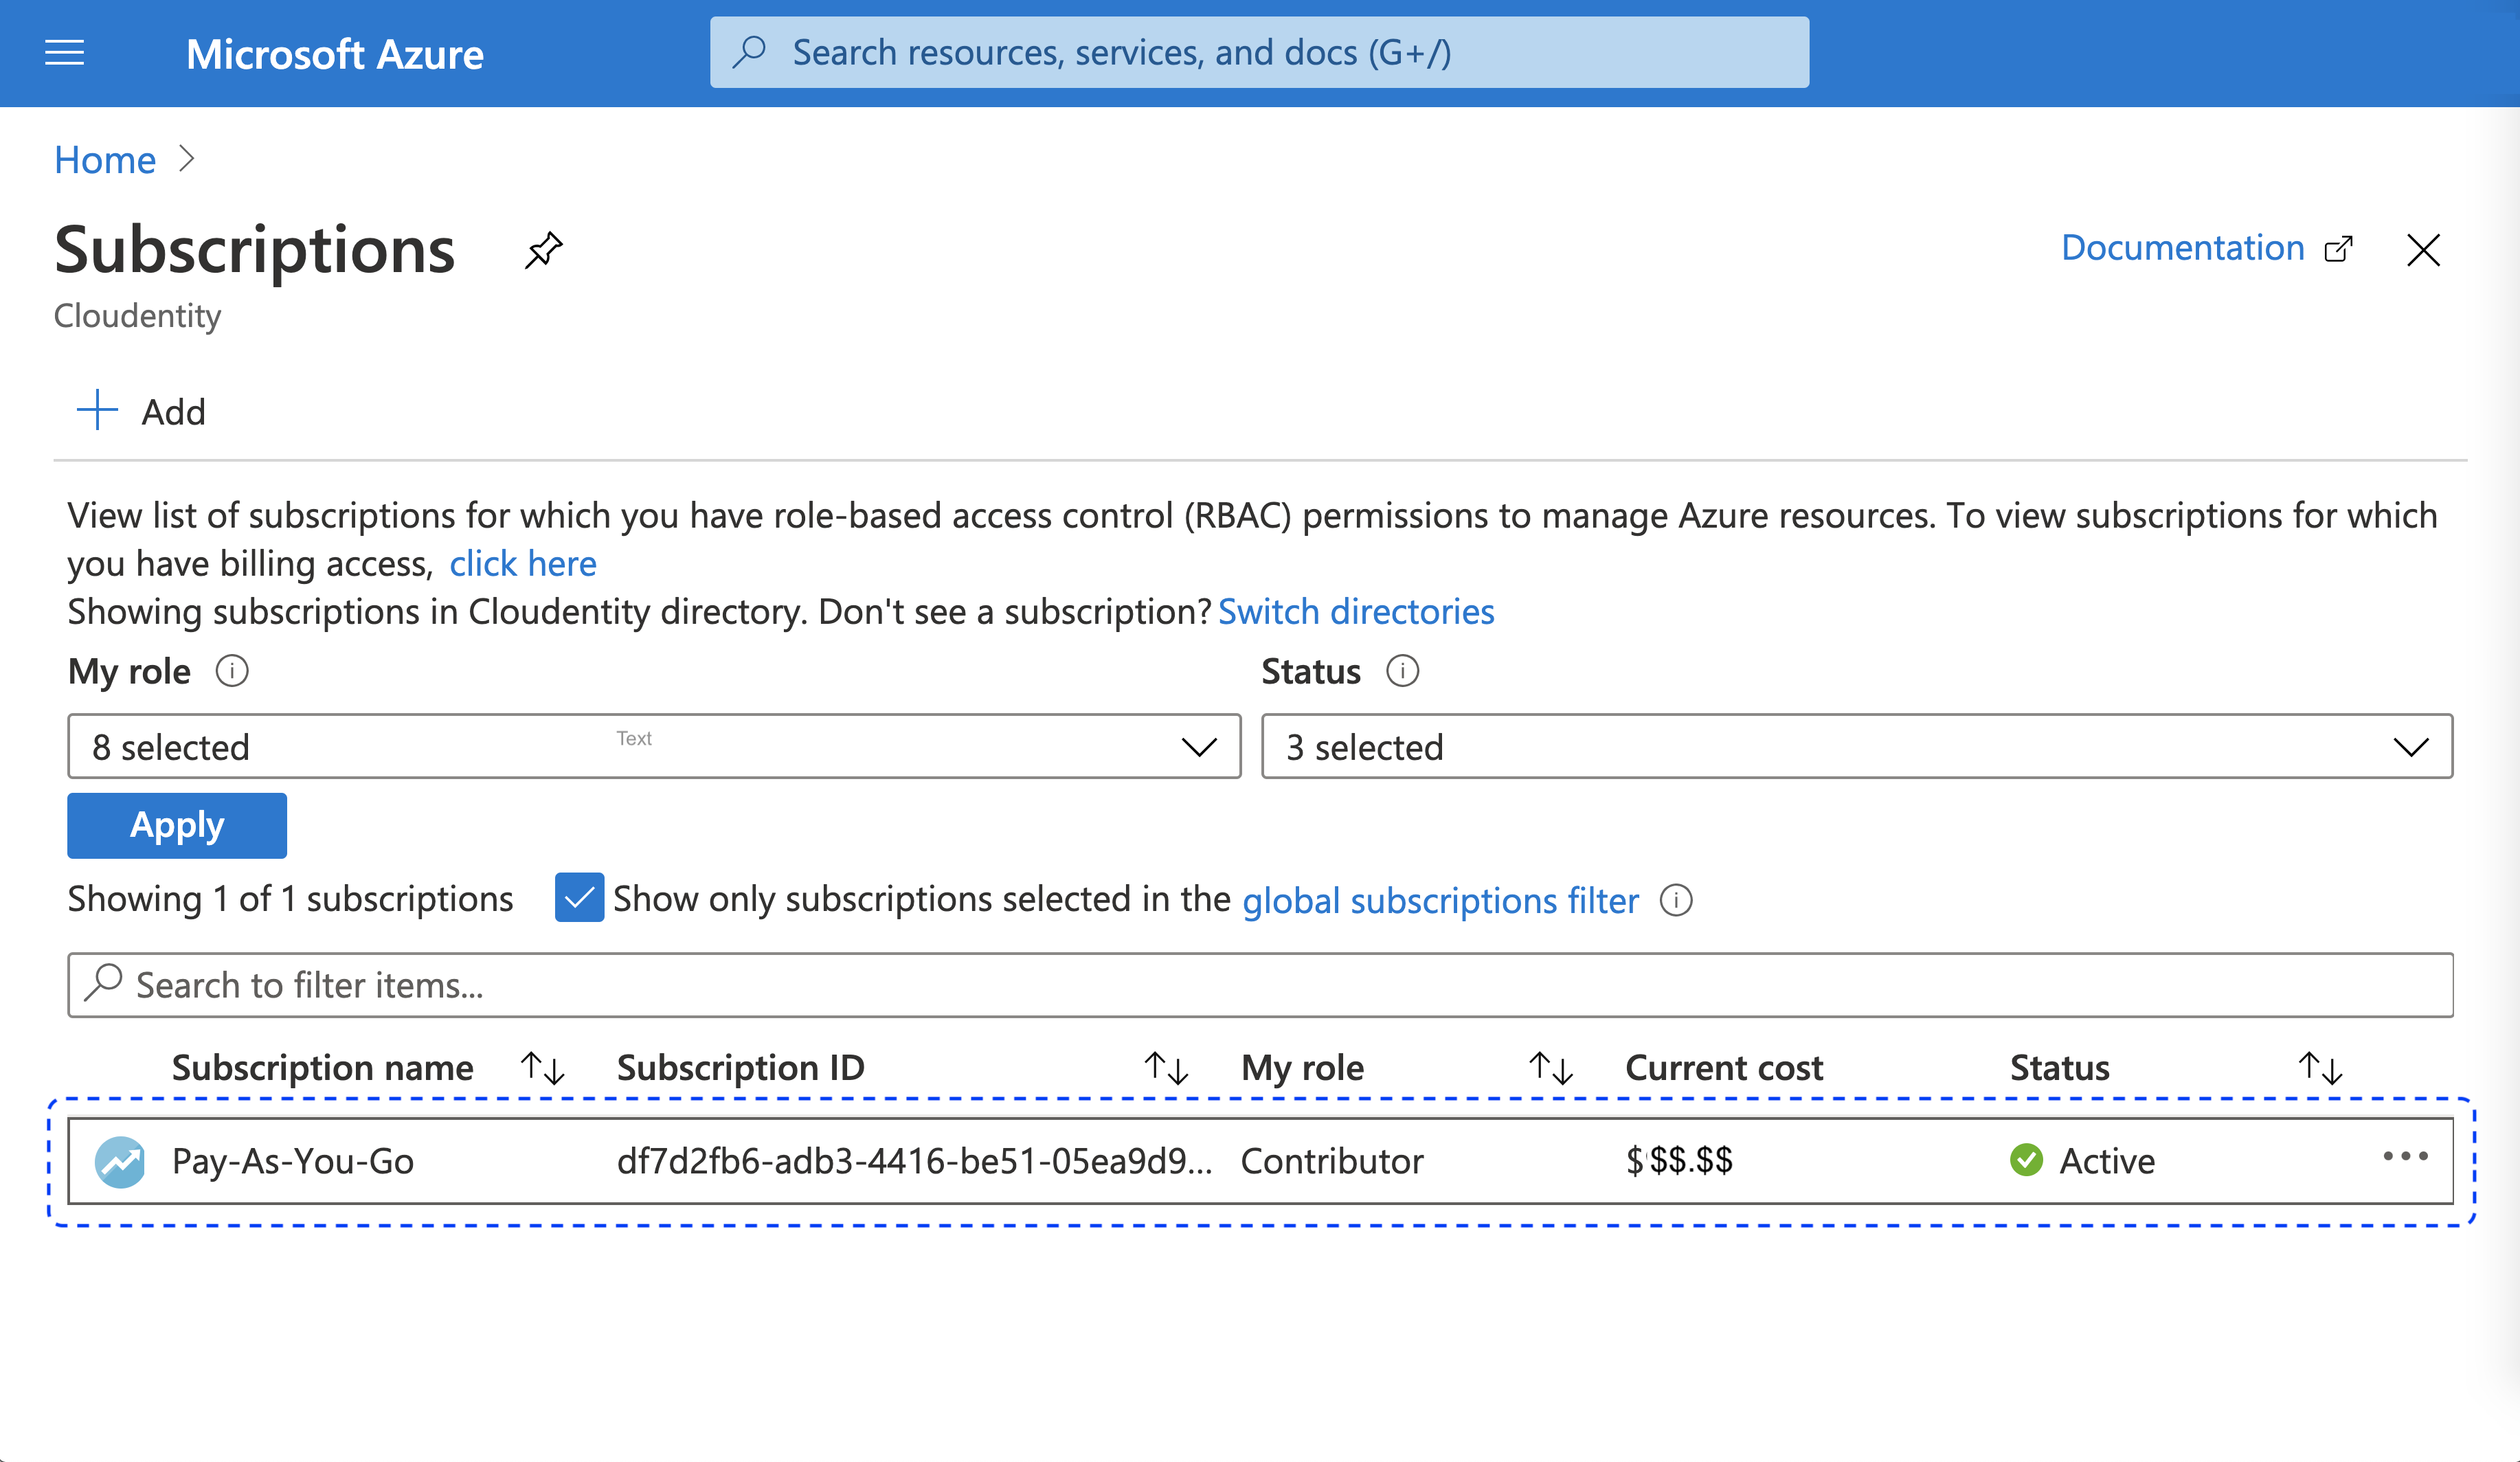
Result
An overview of the selected subscription opens and you can identify AZURE_SUBSCRIPTION_ID.
-
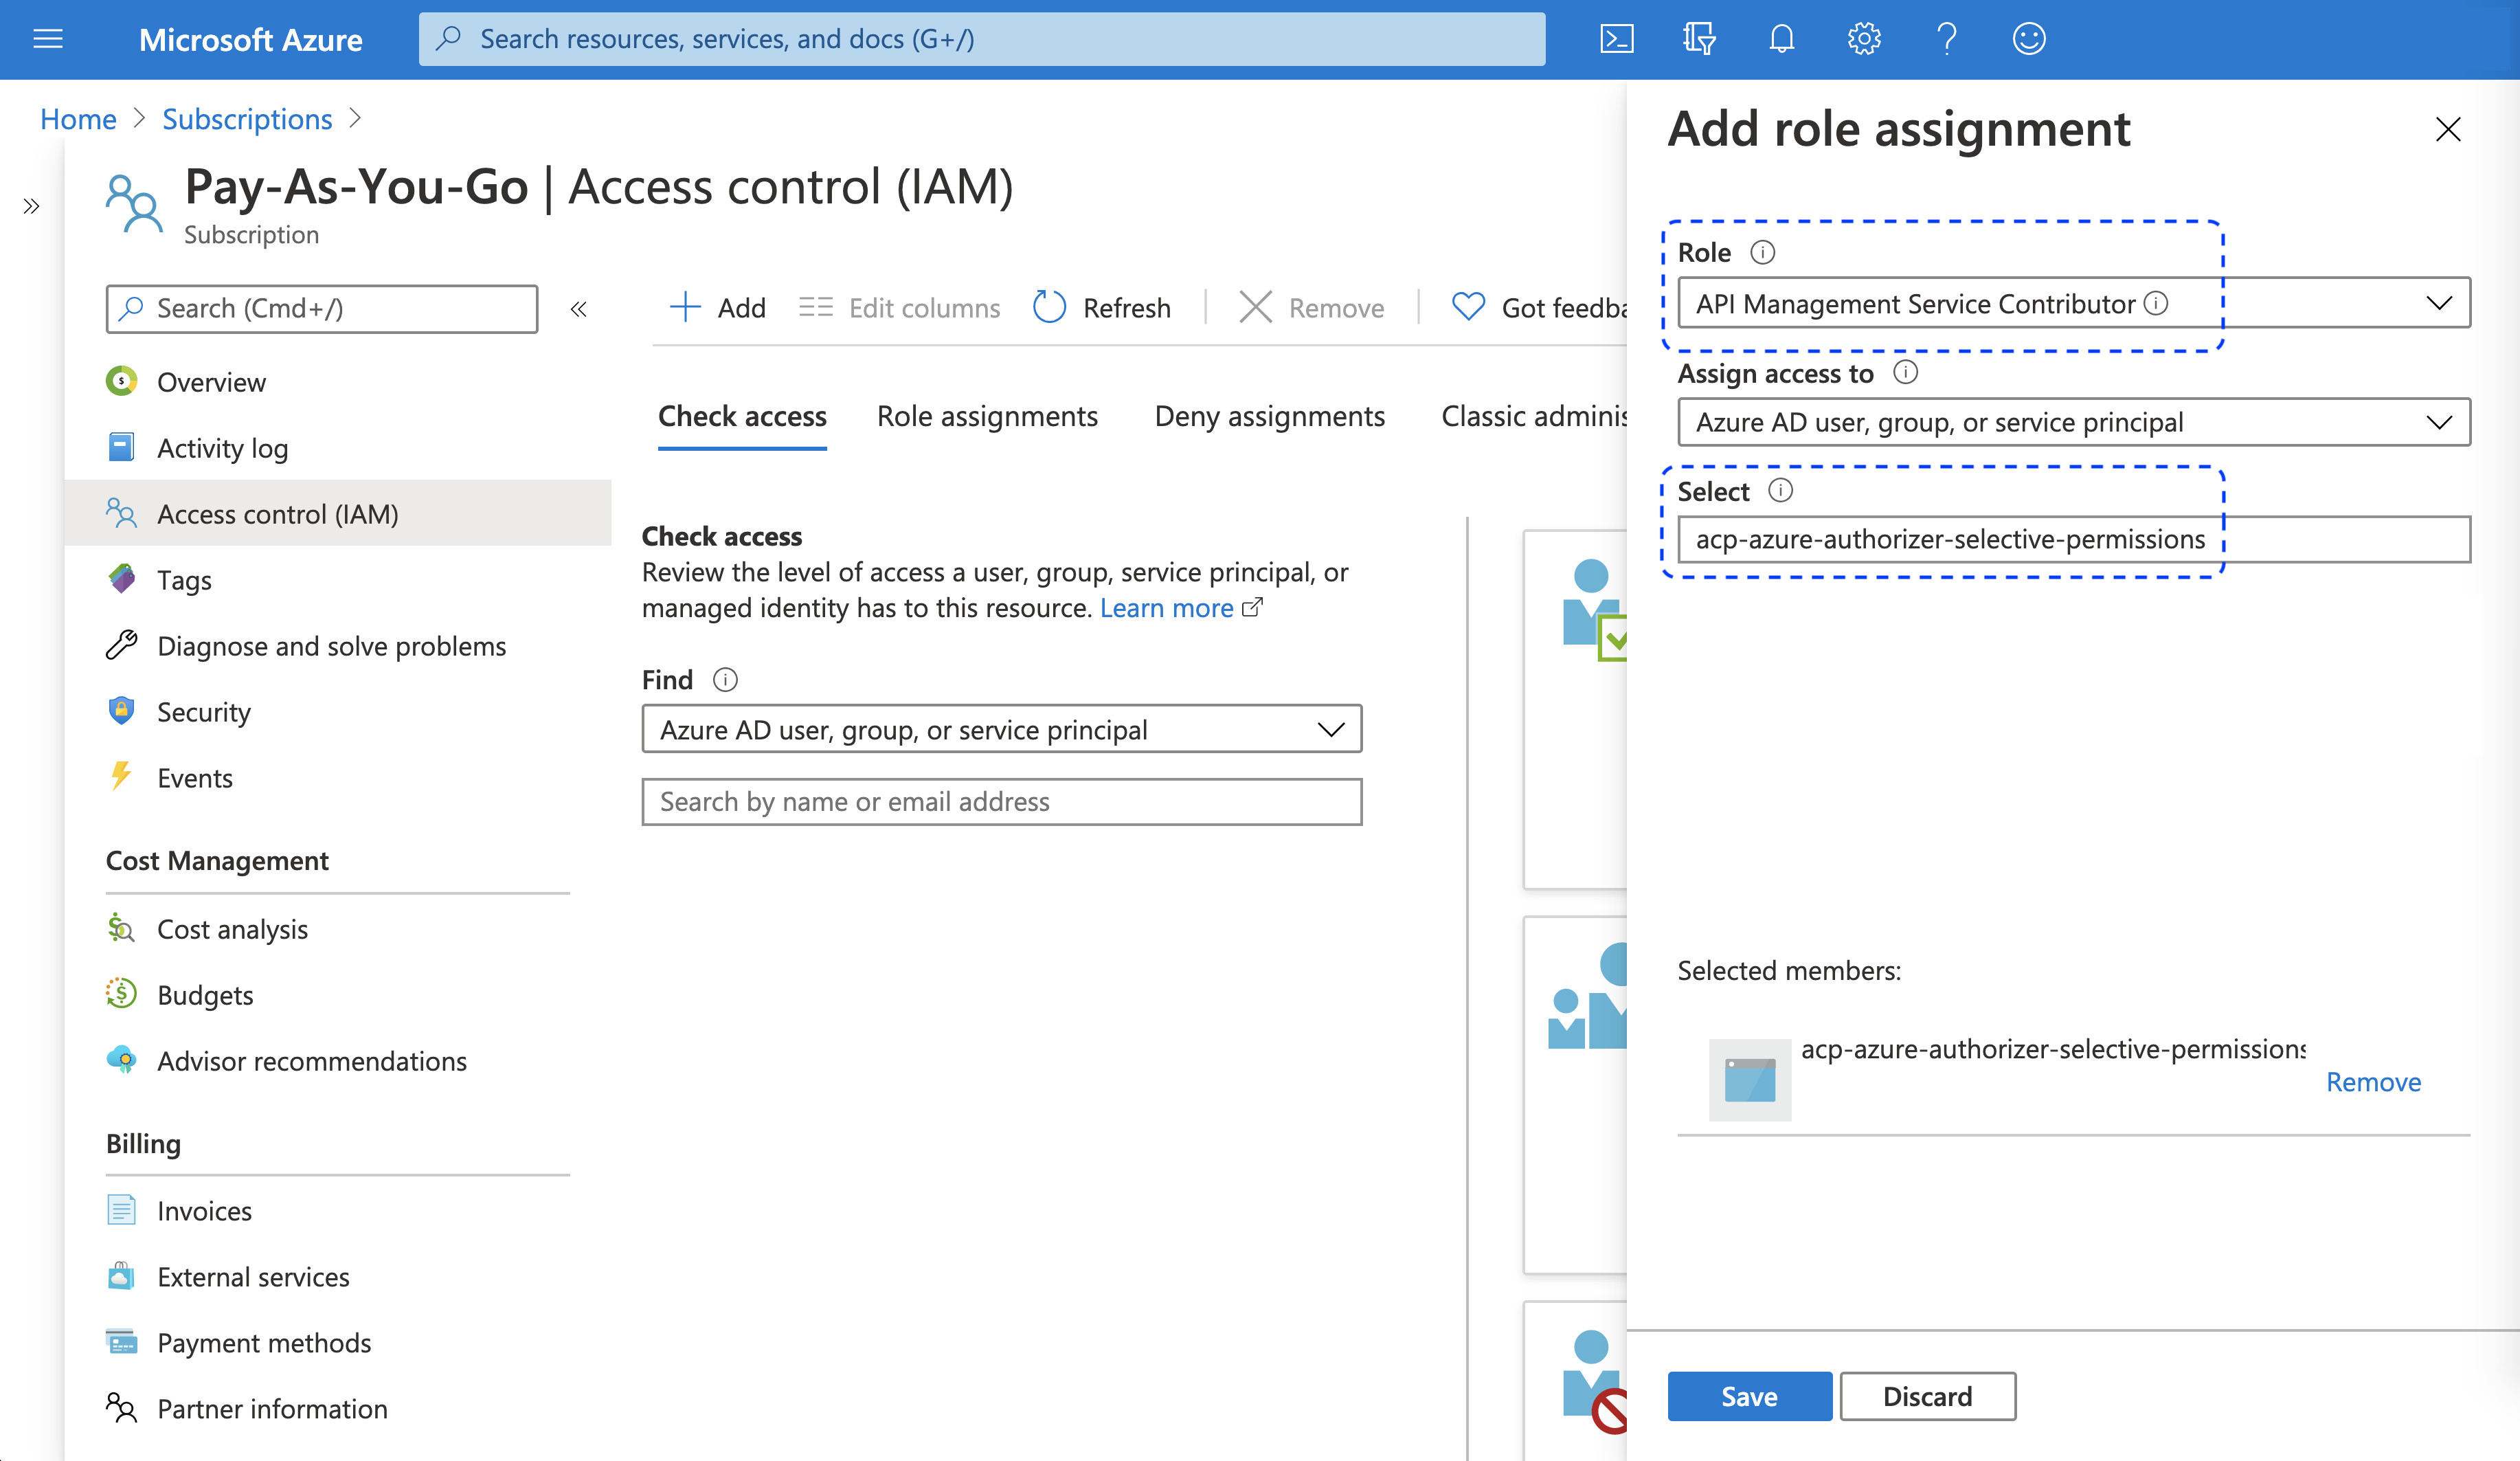
Select Access control from the sidebar and make sure that the Check access tab is open.
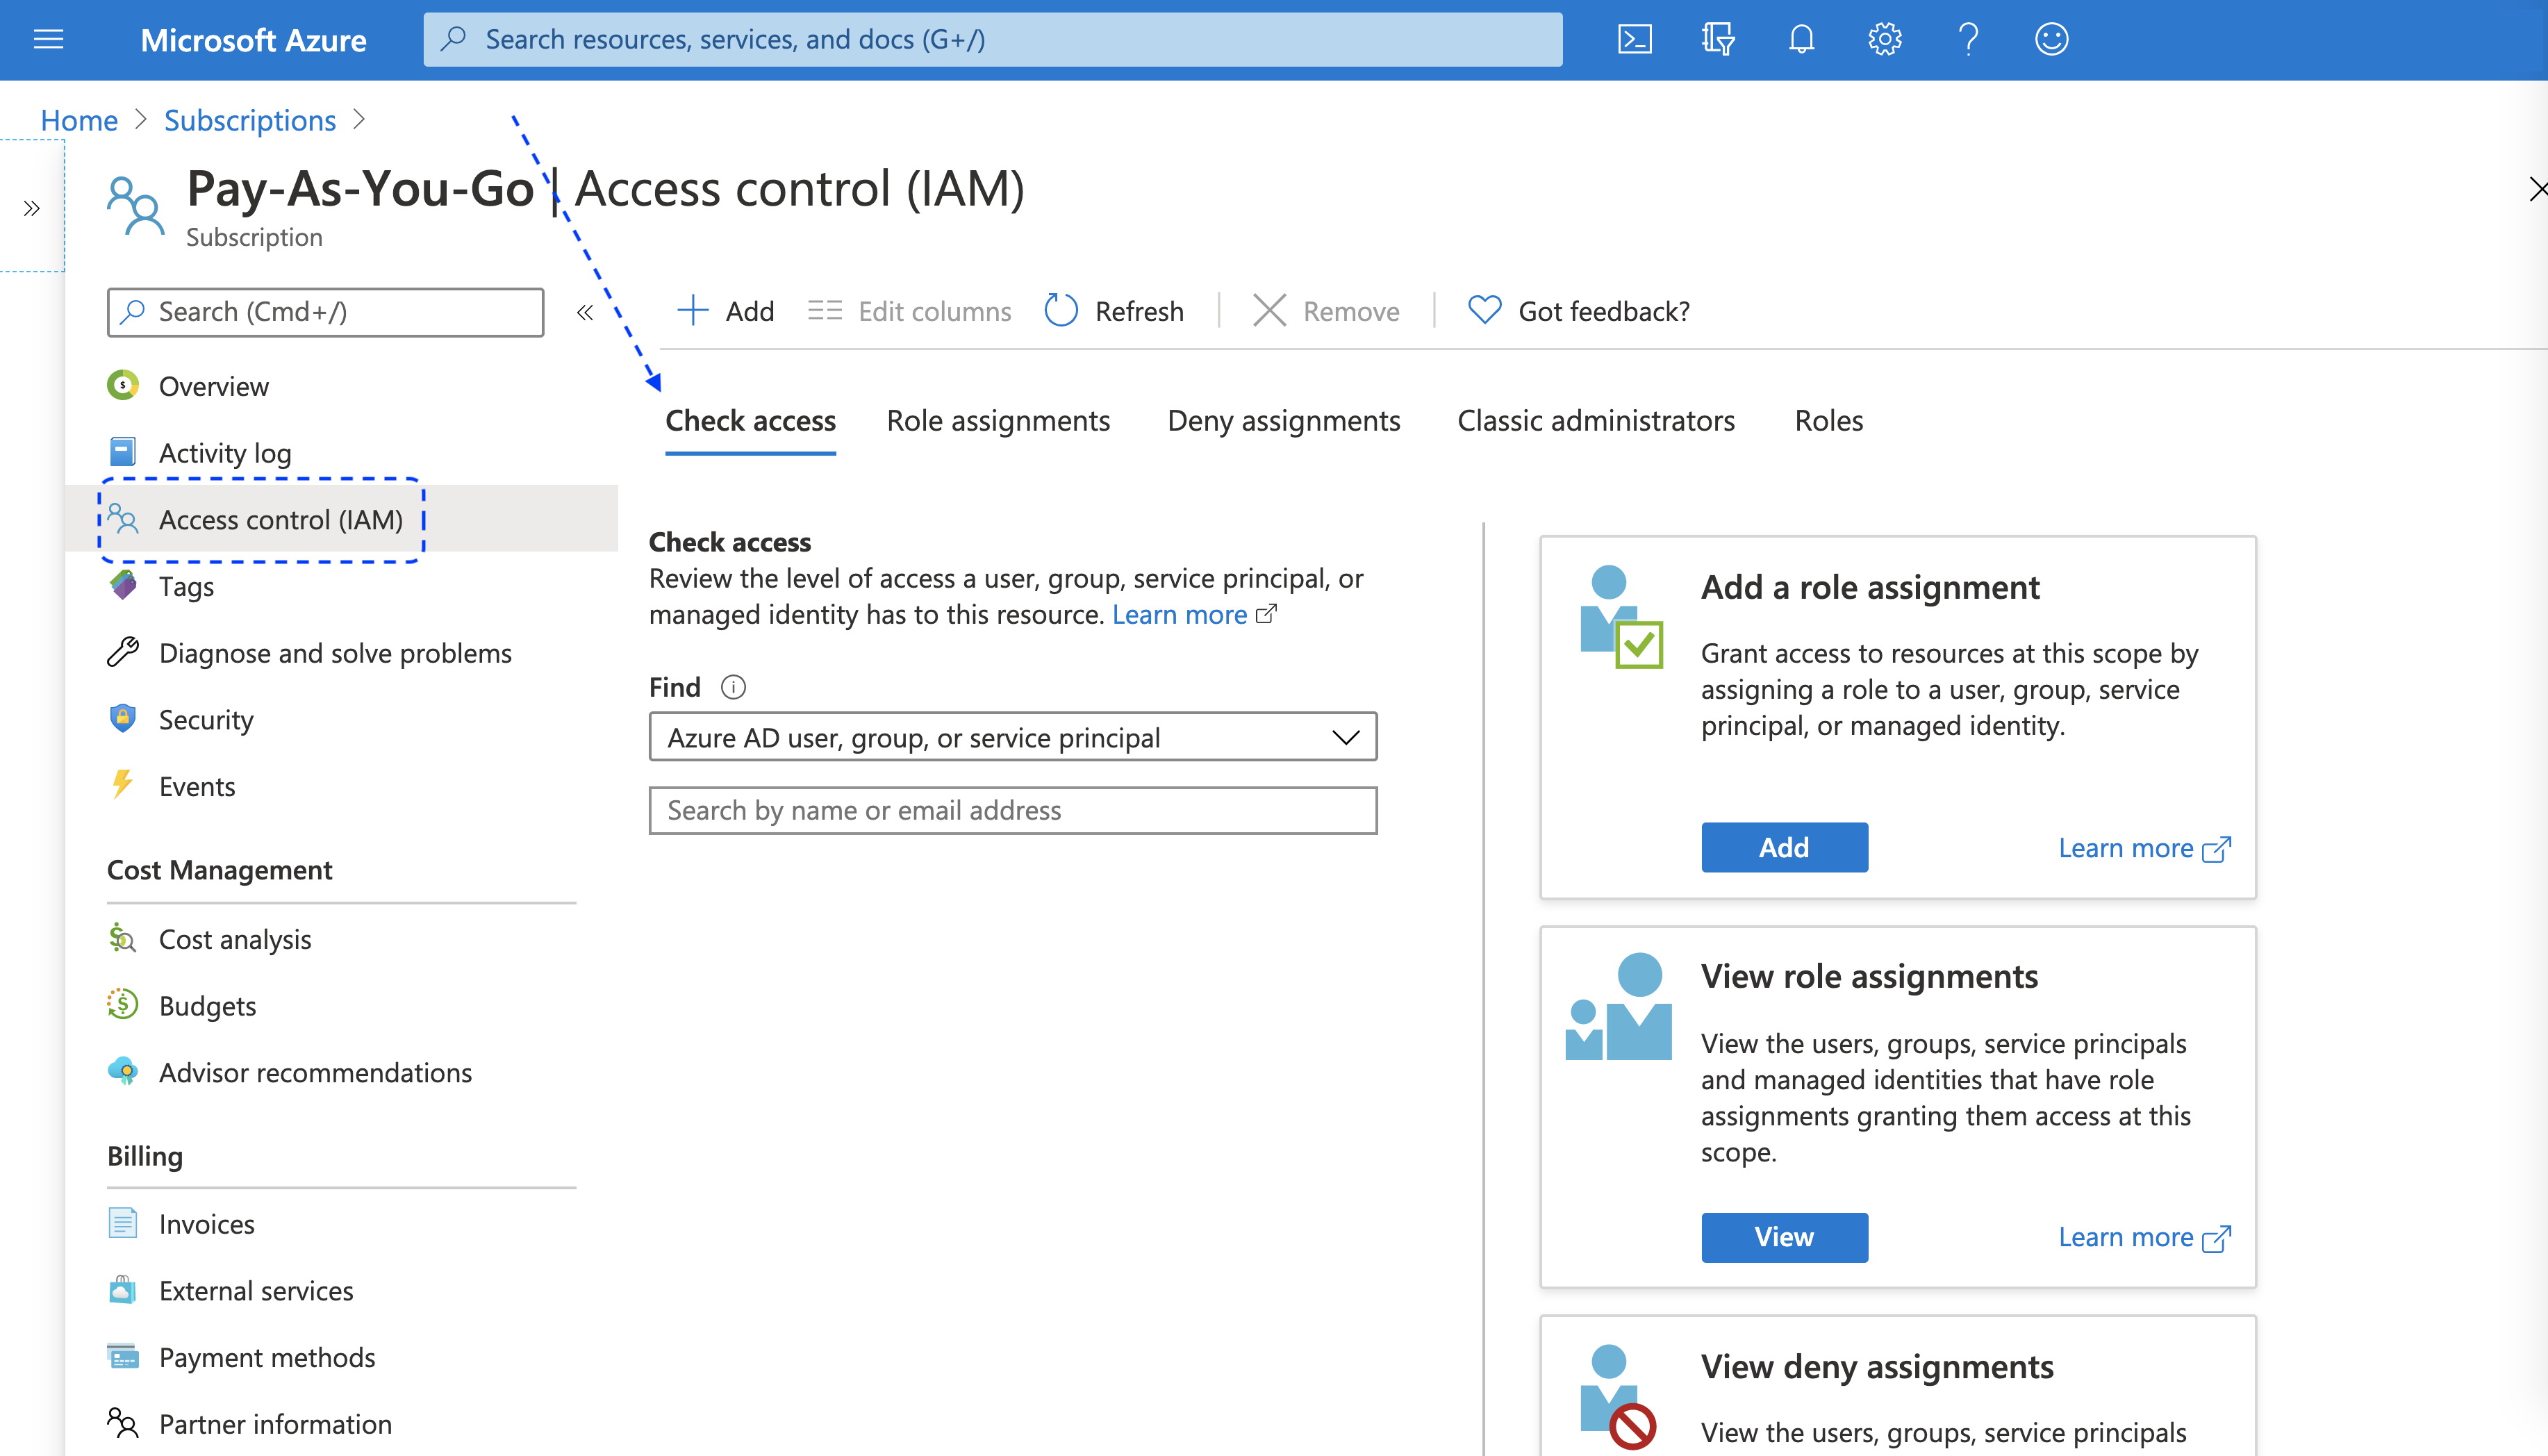
-
Select + Add > Add role assignment.
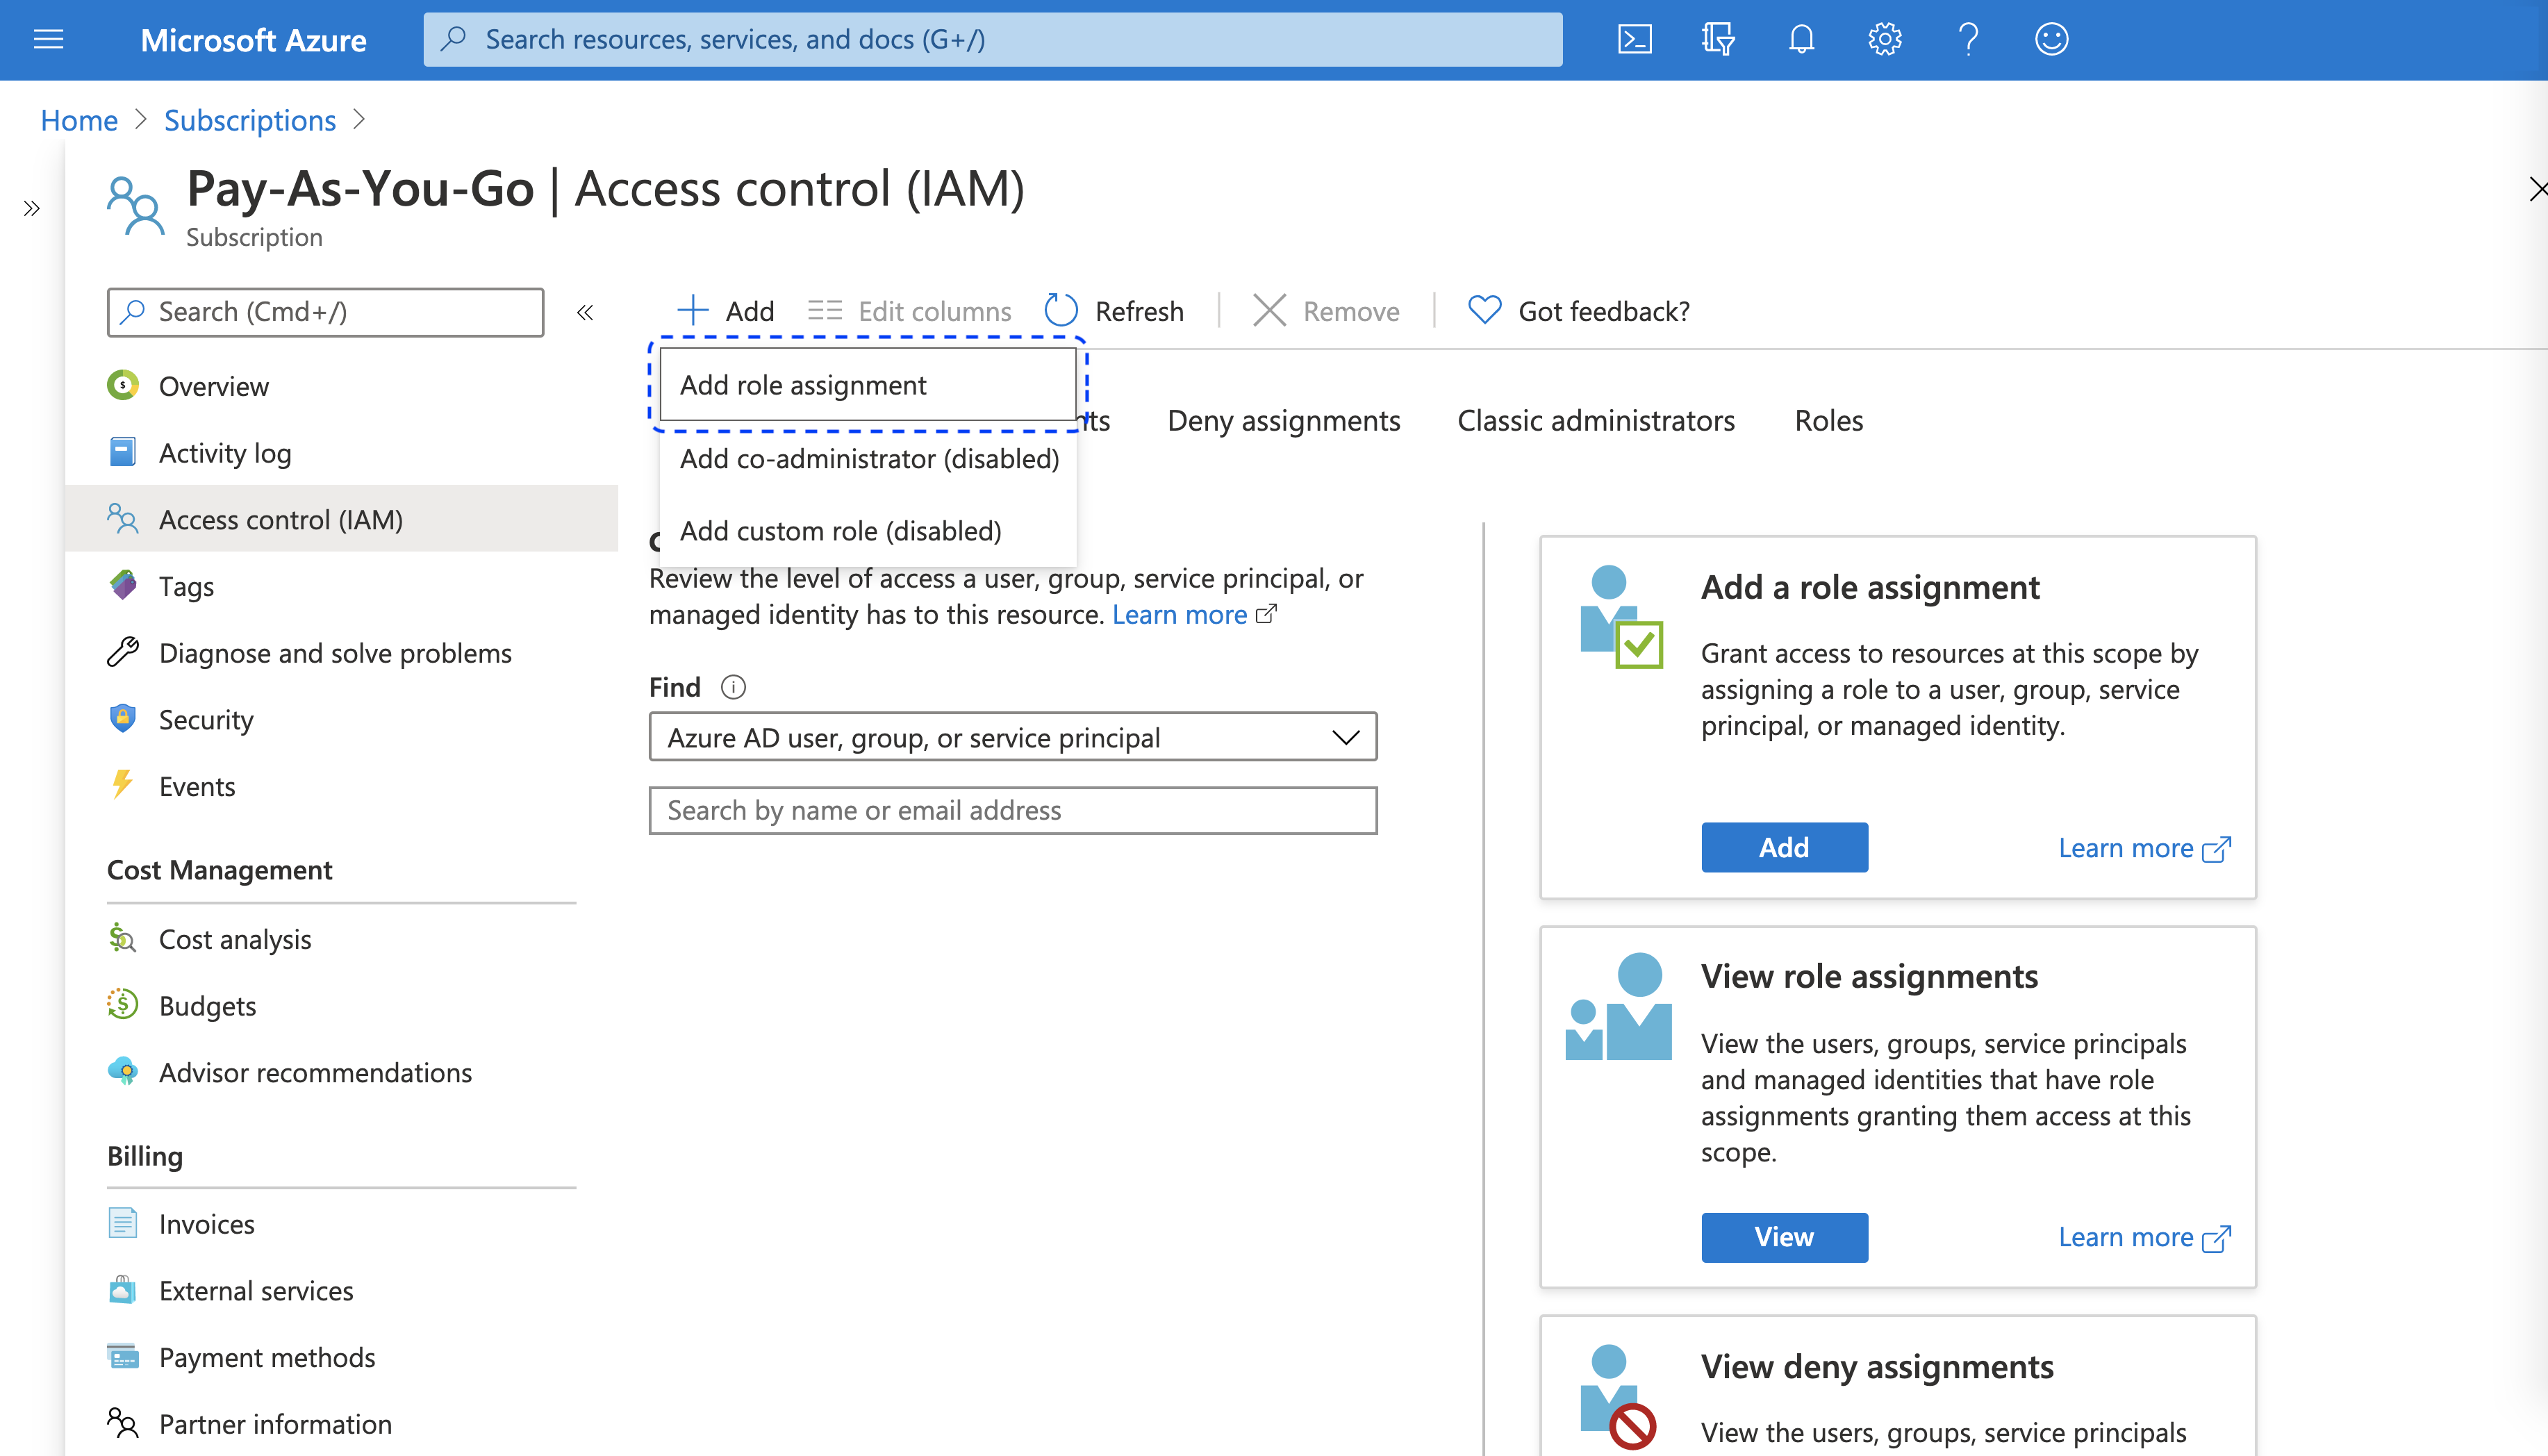
-
In the Add role assignment fly-out pane
-
Enter a name of the role into the Role field.
Required Roles
- API Management Service Contributor
- Website Contributor
-
Enter the name of your application into the Select field.
-
Select Save.
-
Result
You can check your role assignments in the Role assignments tab by entering the name of a role into the Role field.

Configure Cloudentity Authorizer
Create Function App
-
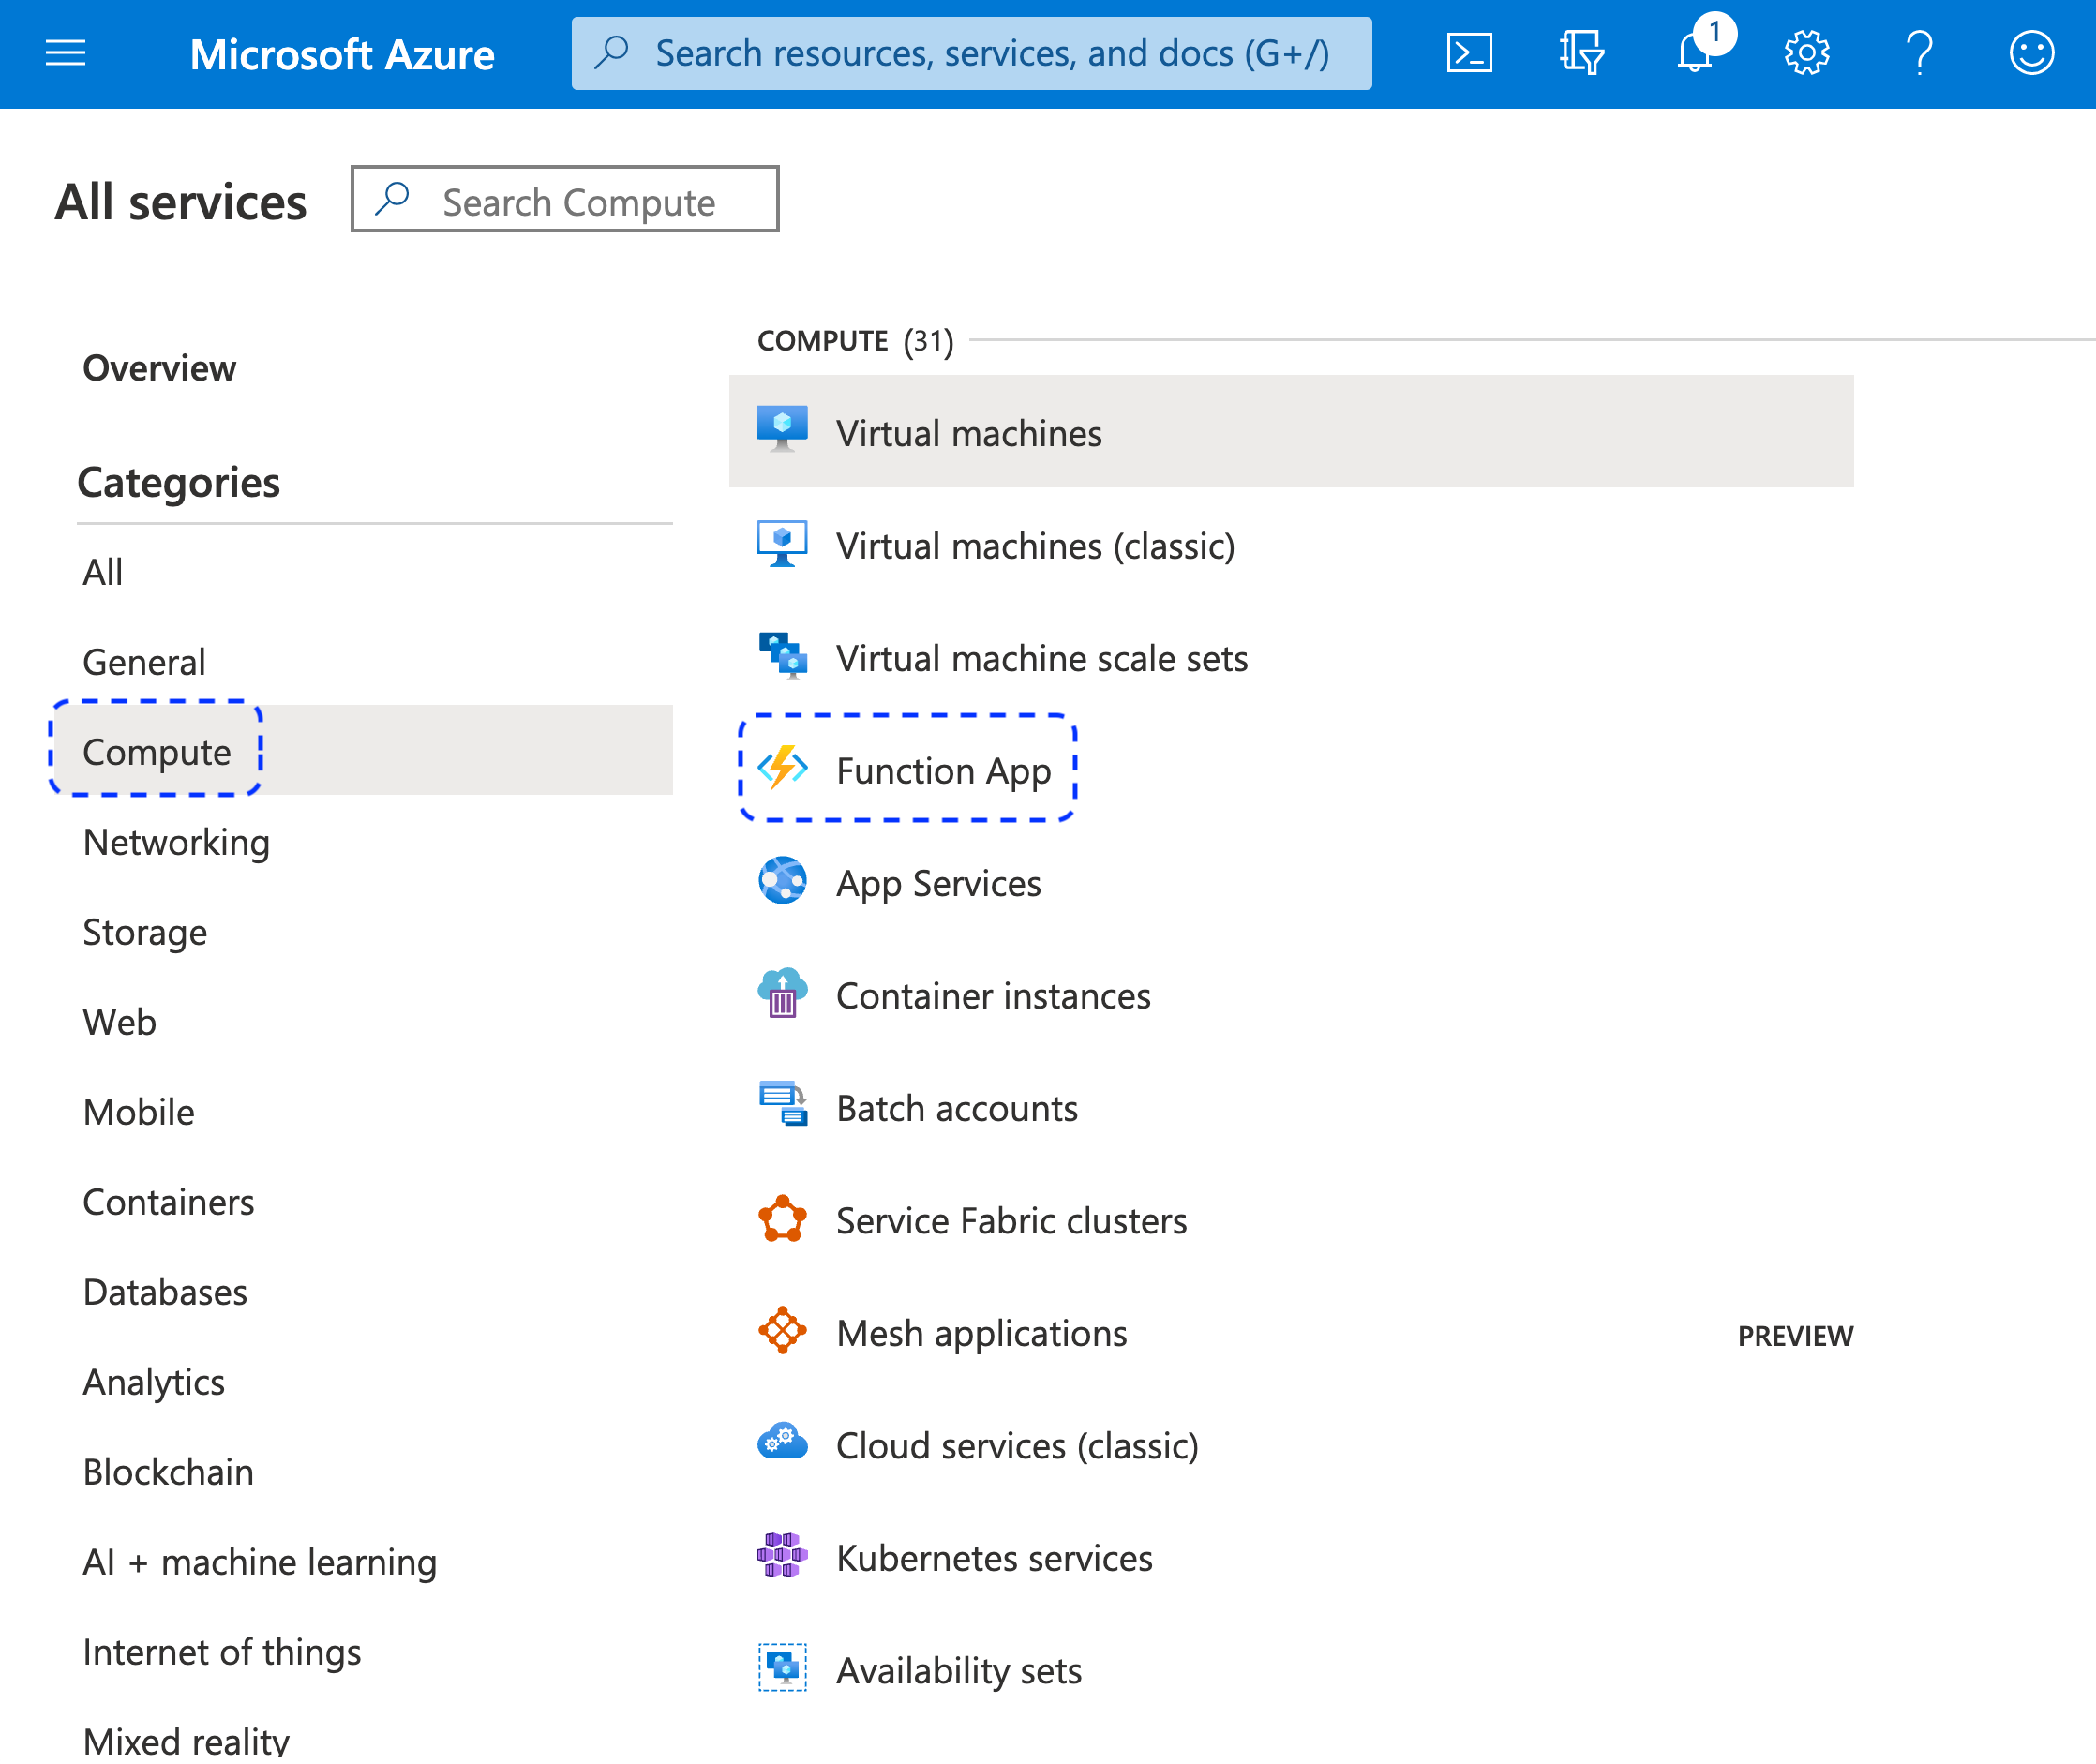
In the Microsoft Azure portal, go to All services > Compute > Function App.
-
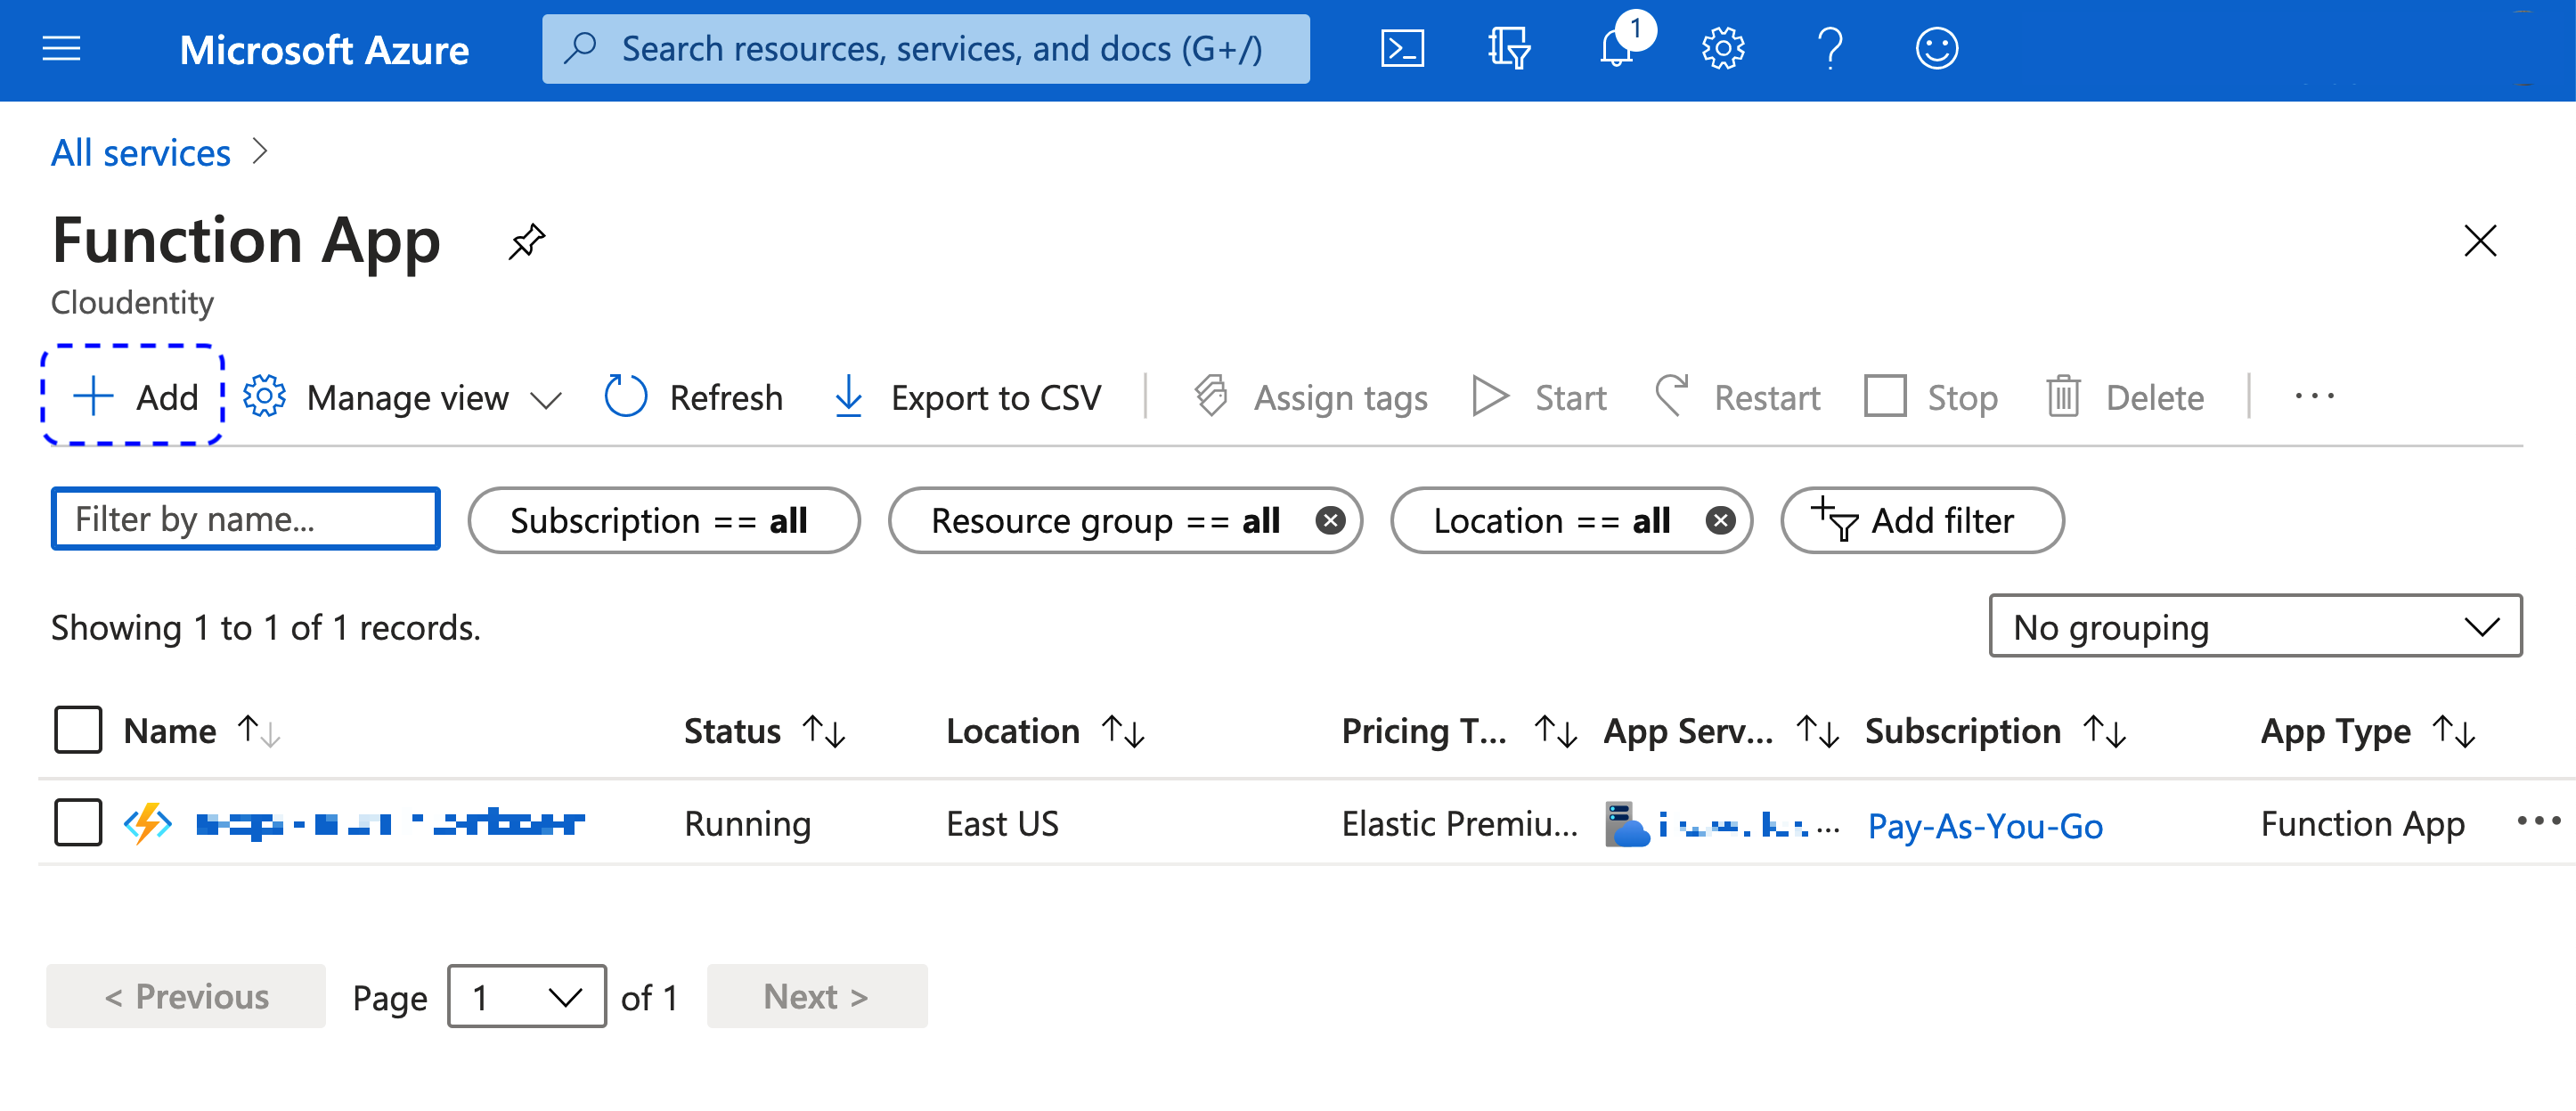
Select Add to create a new function.
-
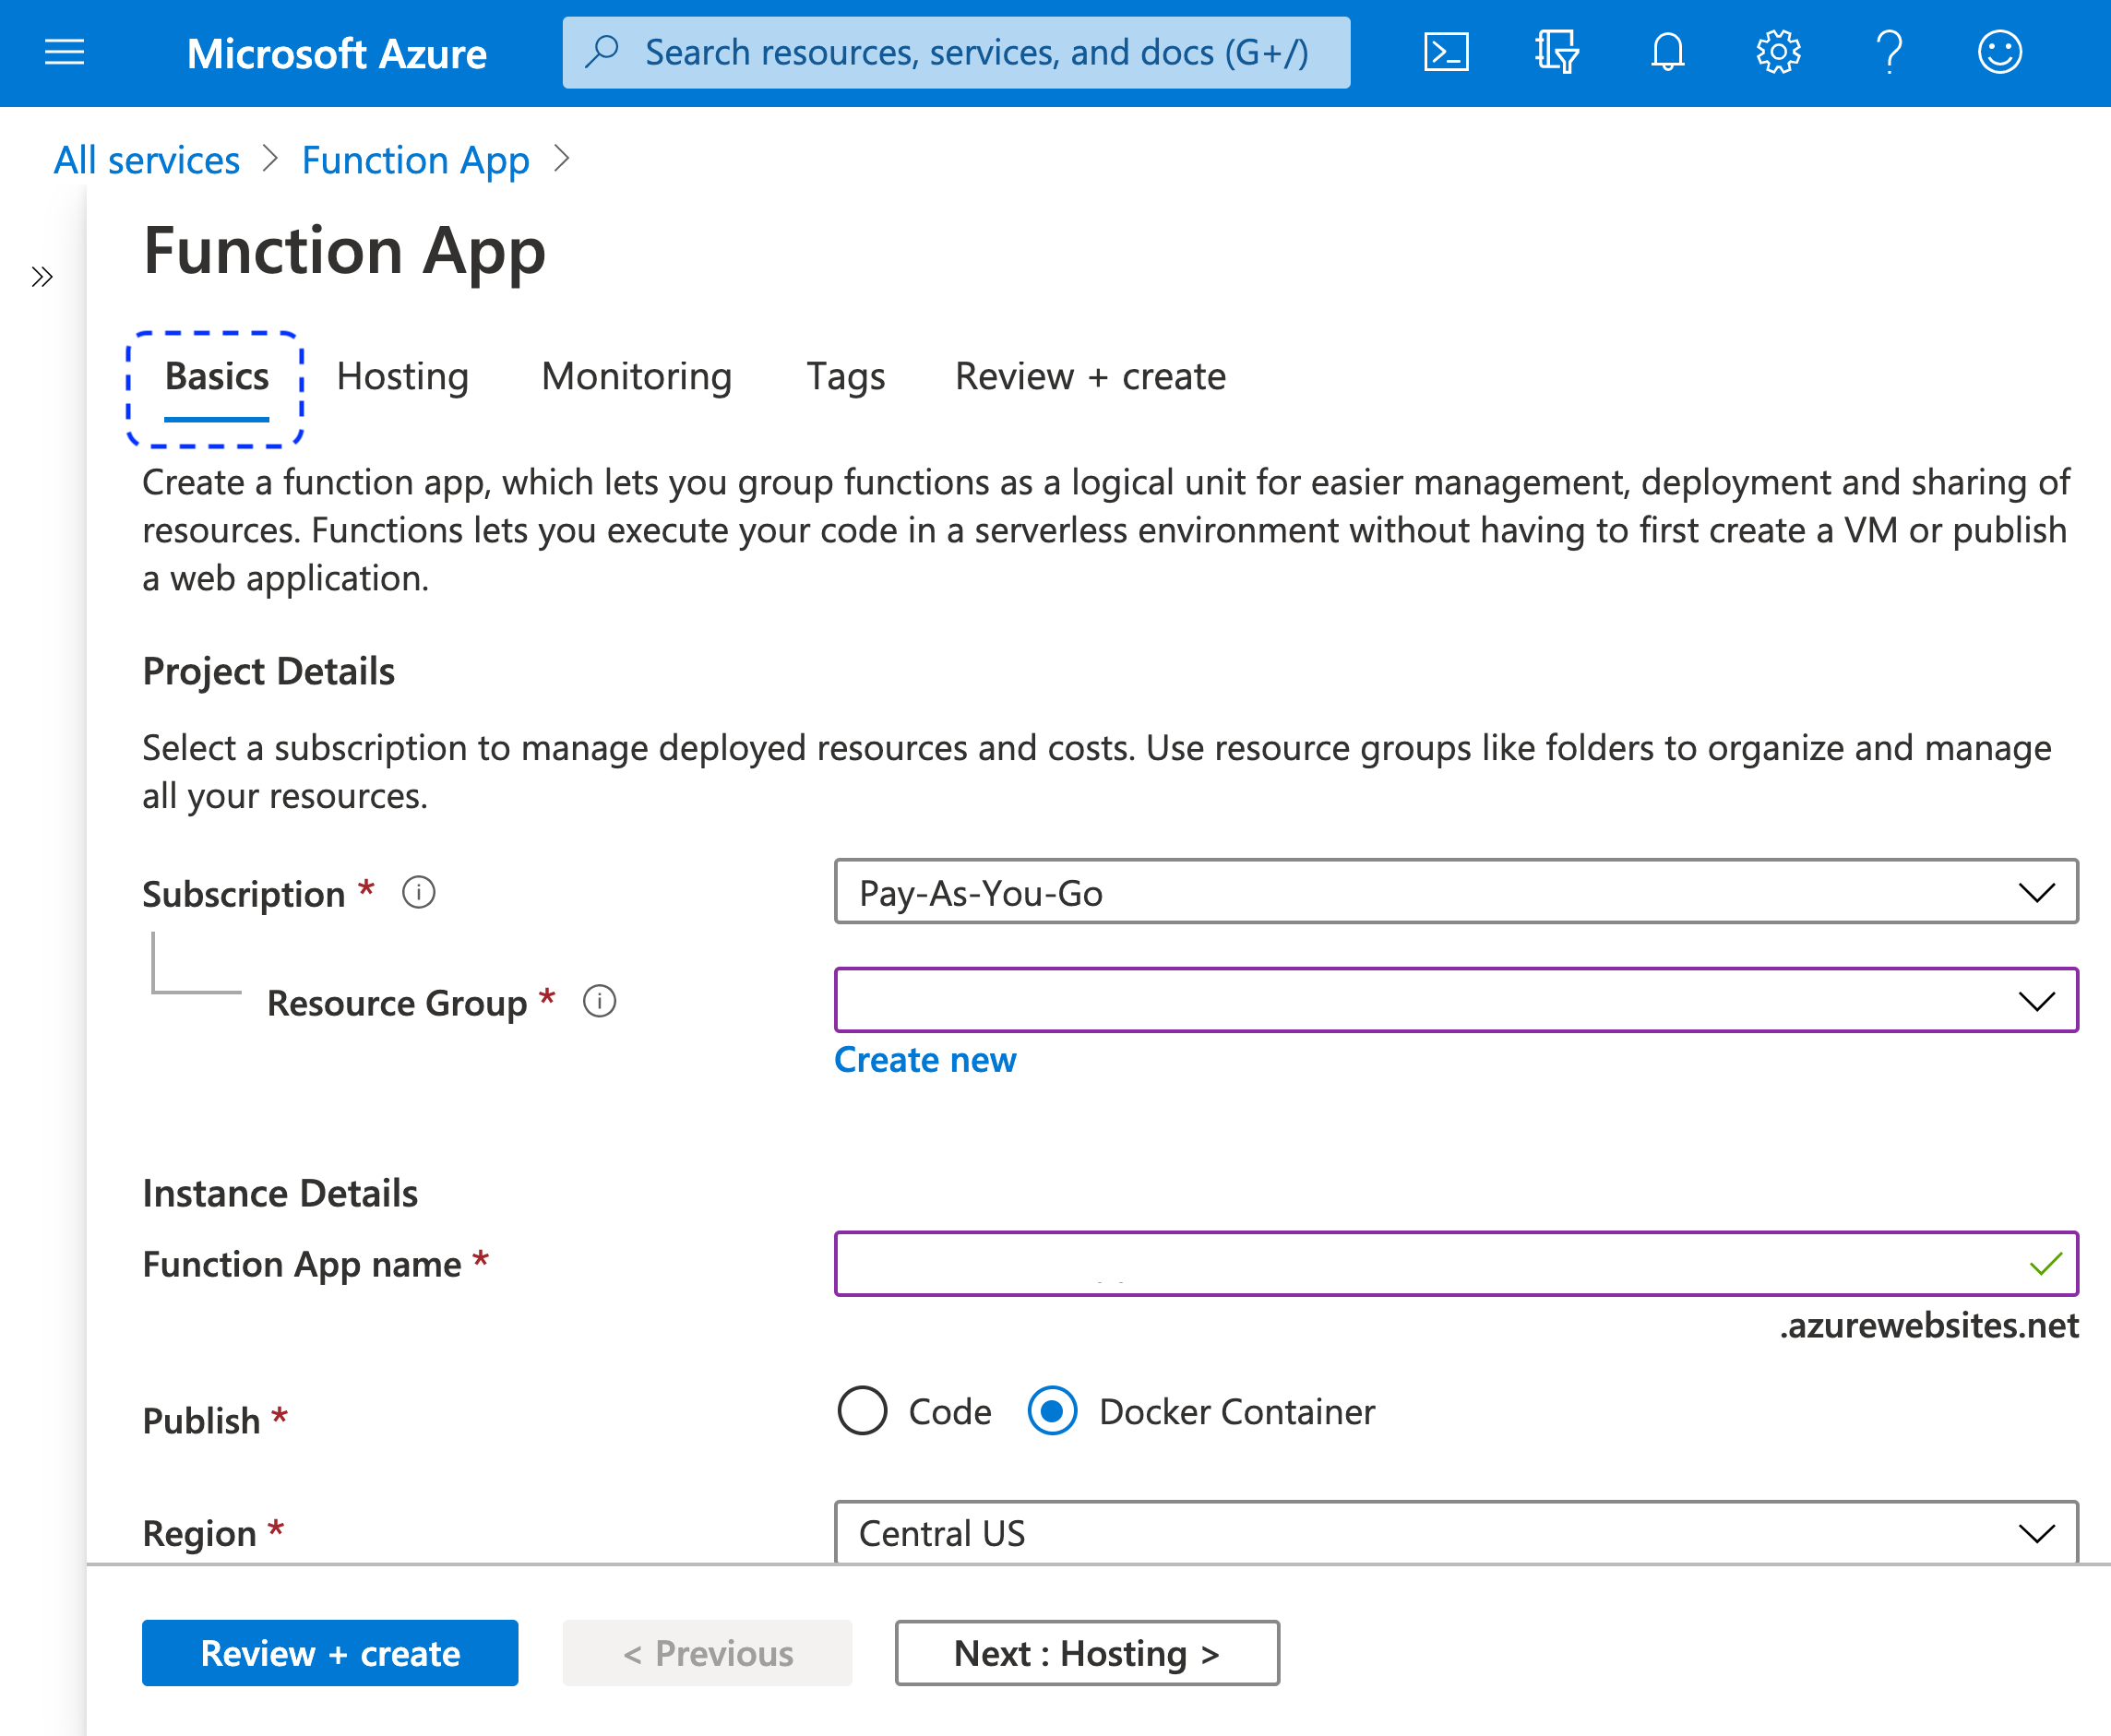
In the Function App view, go to the Basics tab and provide requested project and instance details.
-
For Subscription, select Pay-As-You-Go.
-
For Resource Group, select an existing group or create a new one.
-
For Function App name, provide a name of your preference.
-
For Publish, select Docker Container.
-
For Region, select a region of your preference from the dropdown list.
-
-
Select Next : Hosting > at the bottom of the page.
Result
The Hosting tab opens.
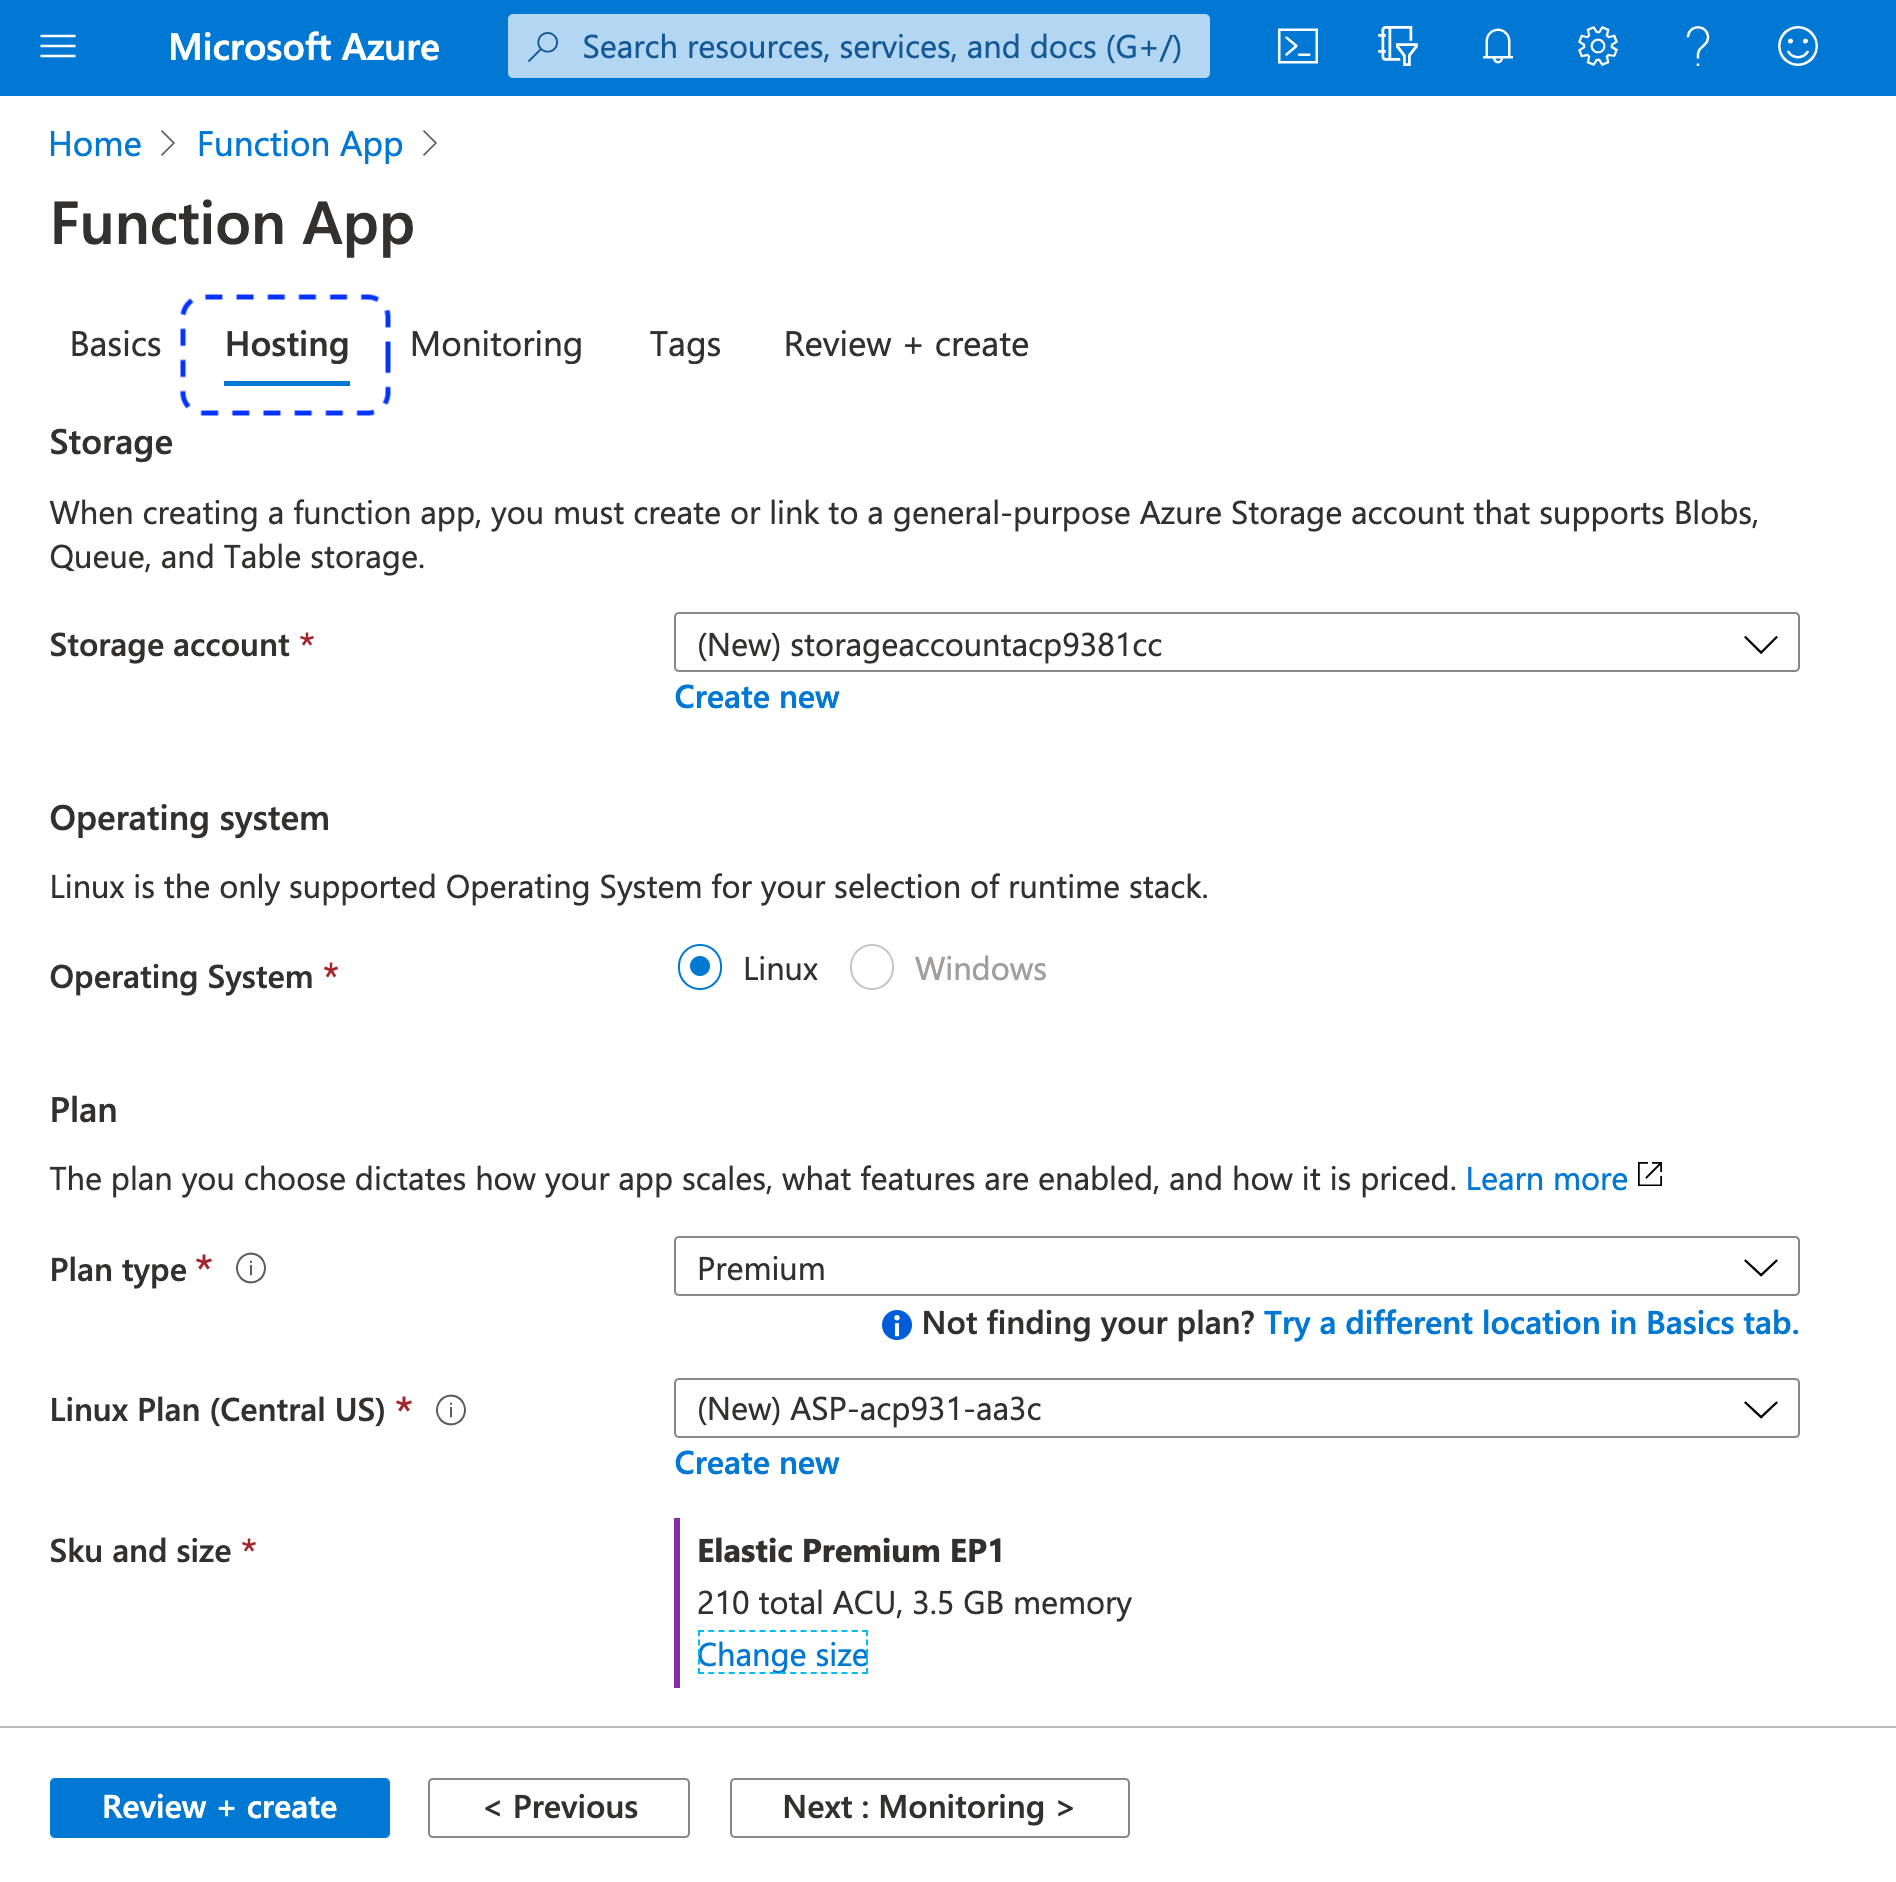
-
In the Hosting tab, provide information on your storage account and the application service plan. Modify the default values if needed.
-
Select Next : Monitoring > at the bottom of the page.
Result
The Monitoring tab opens.
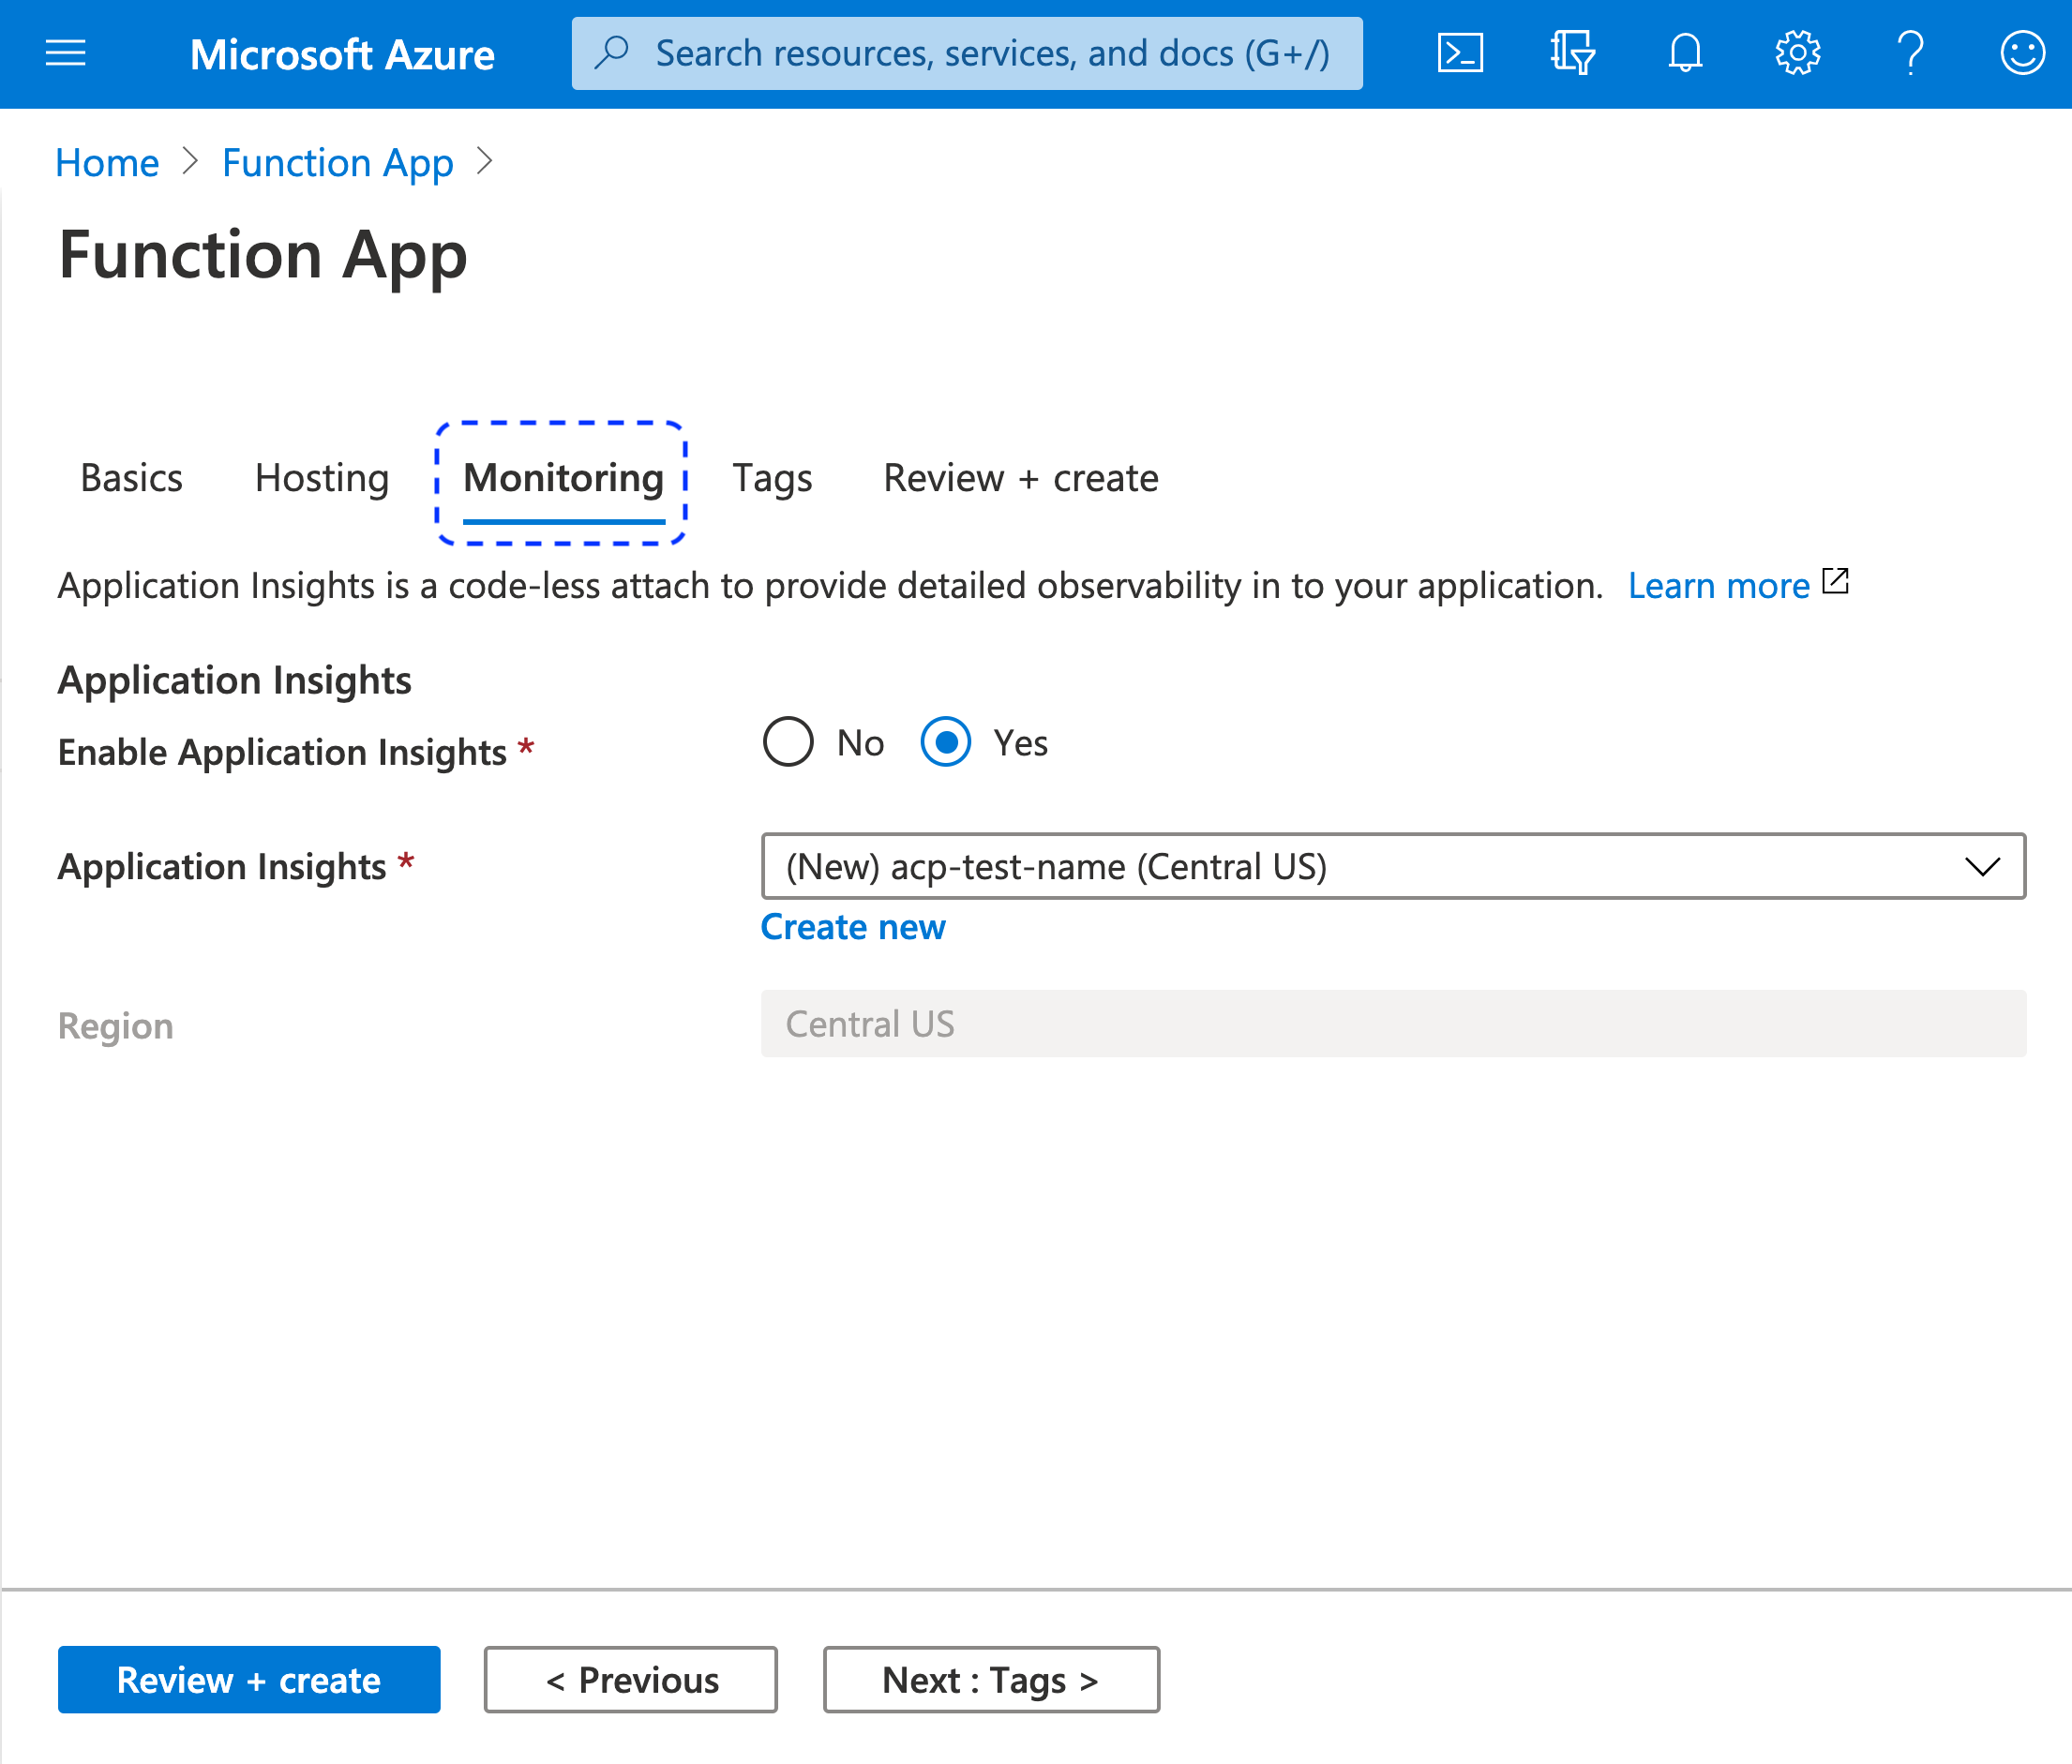
-
In the Monitoring tab, keep application insights enabled or disable them.
-
Select Next : Tags > at the bottom of the page.
Result
The Tags tab opens.
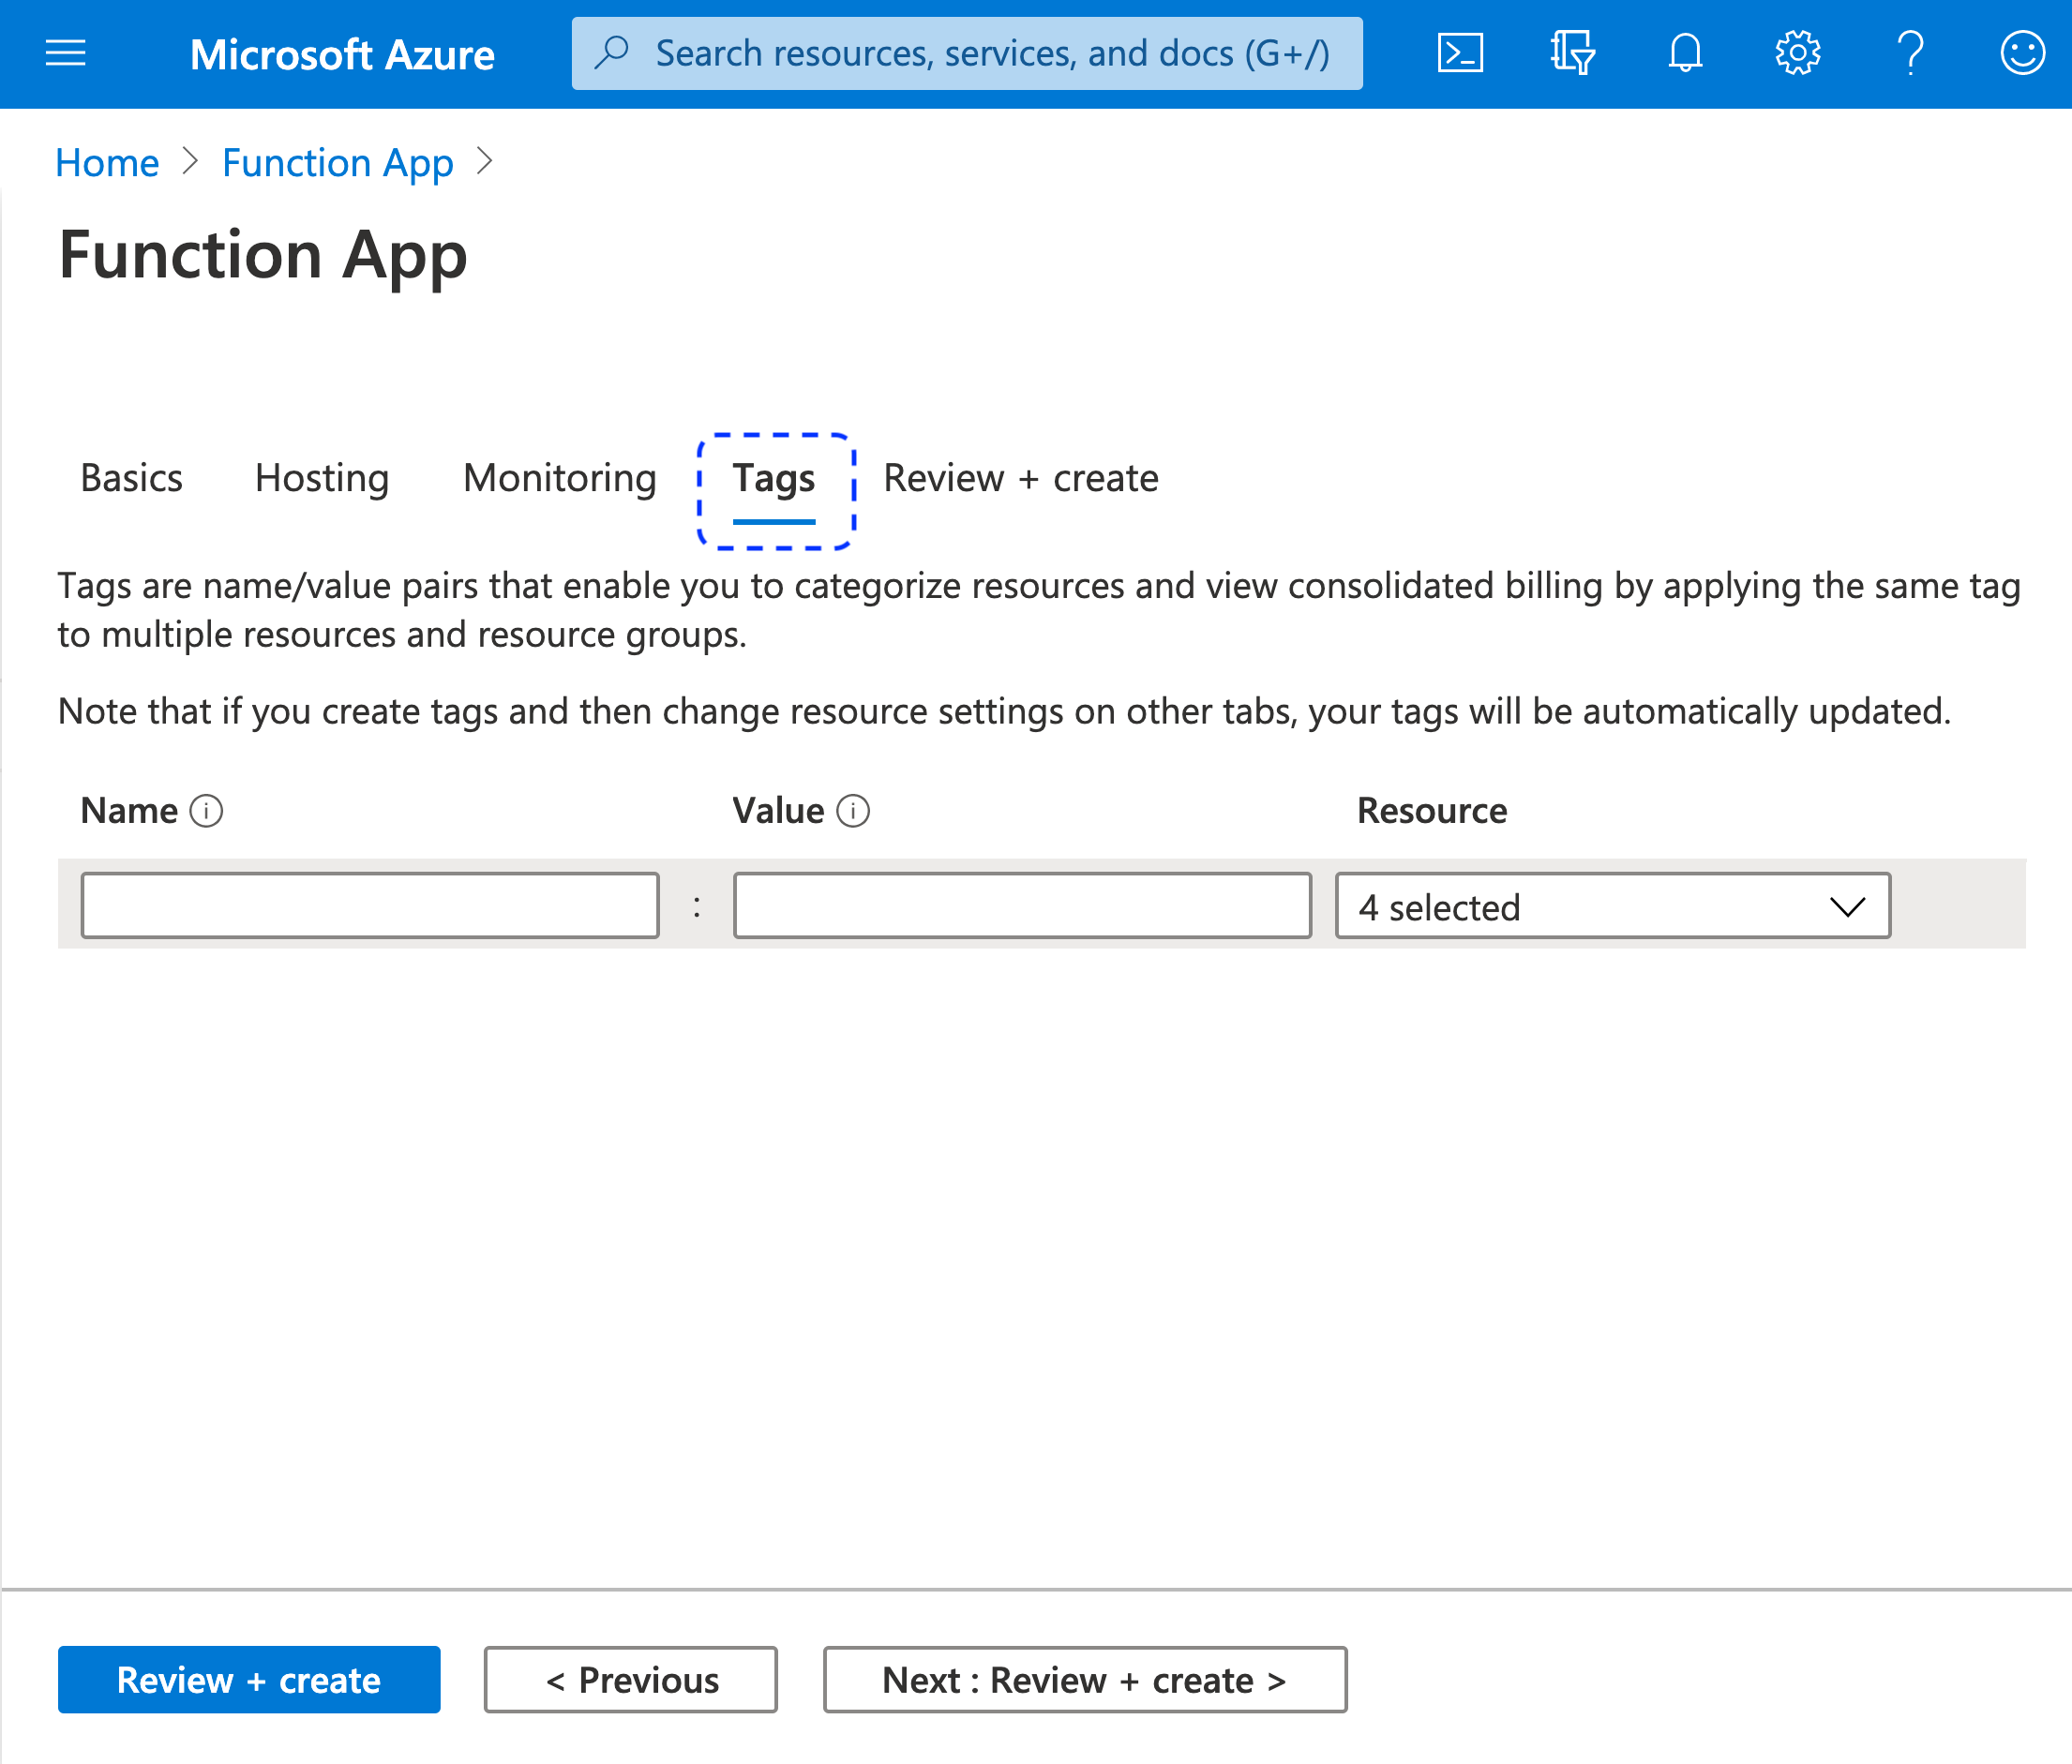
-
In the Tags tab, create tags for your resources.
-
Select Next : Review + create > at the bottom of the page.
Result
The provided data gets reviewed and, if verified as correct, the Review + create tab opens.
-
In the Review + create tab, check all the details on your function app and select Create if they are fine.
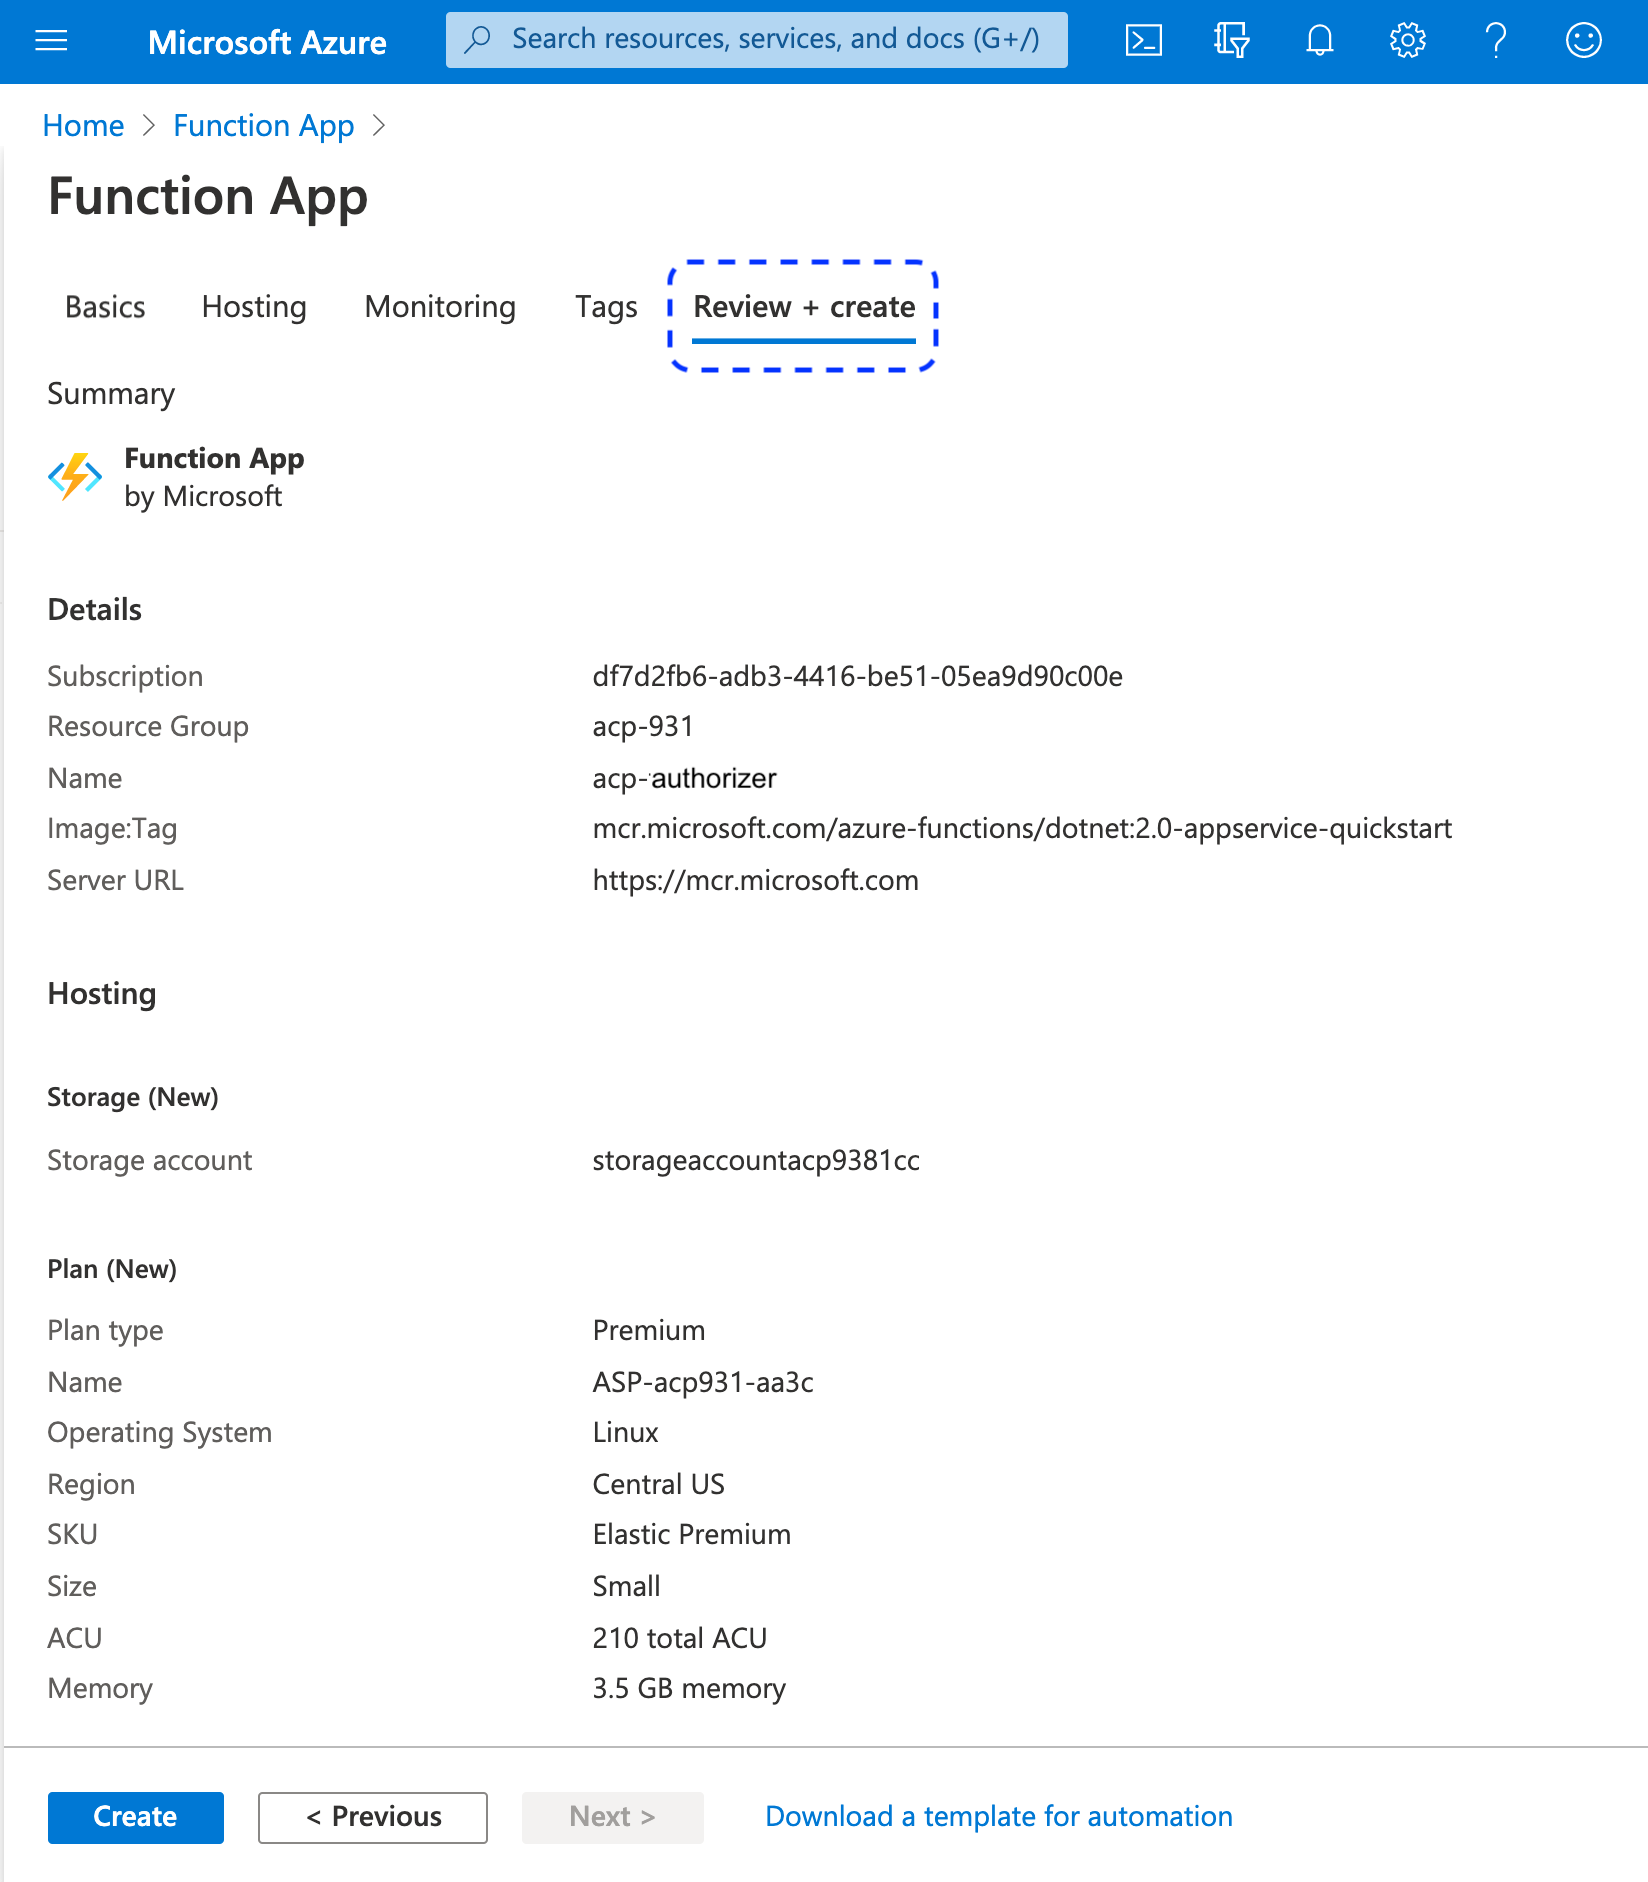
Result
Your function app is ready.

Set Environment Variables
-
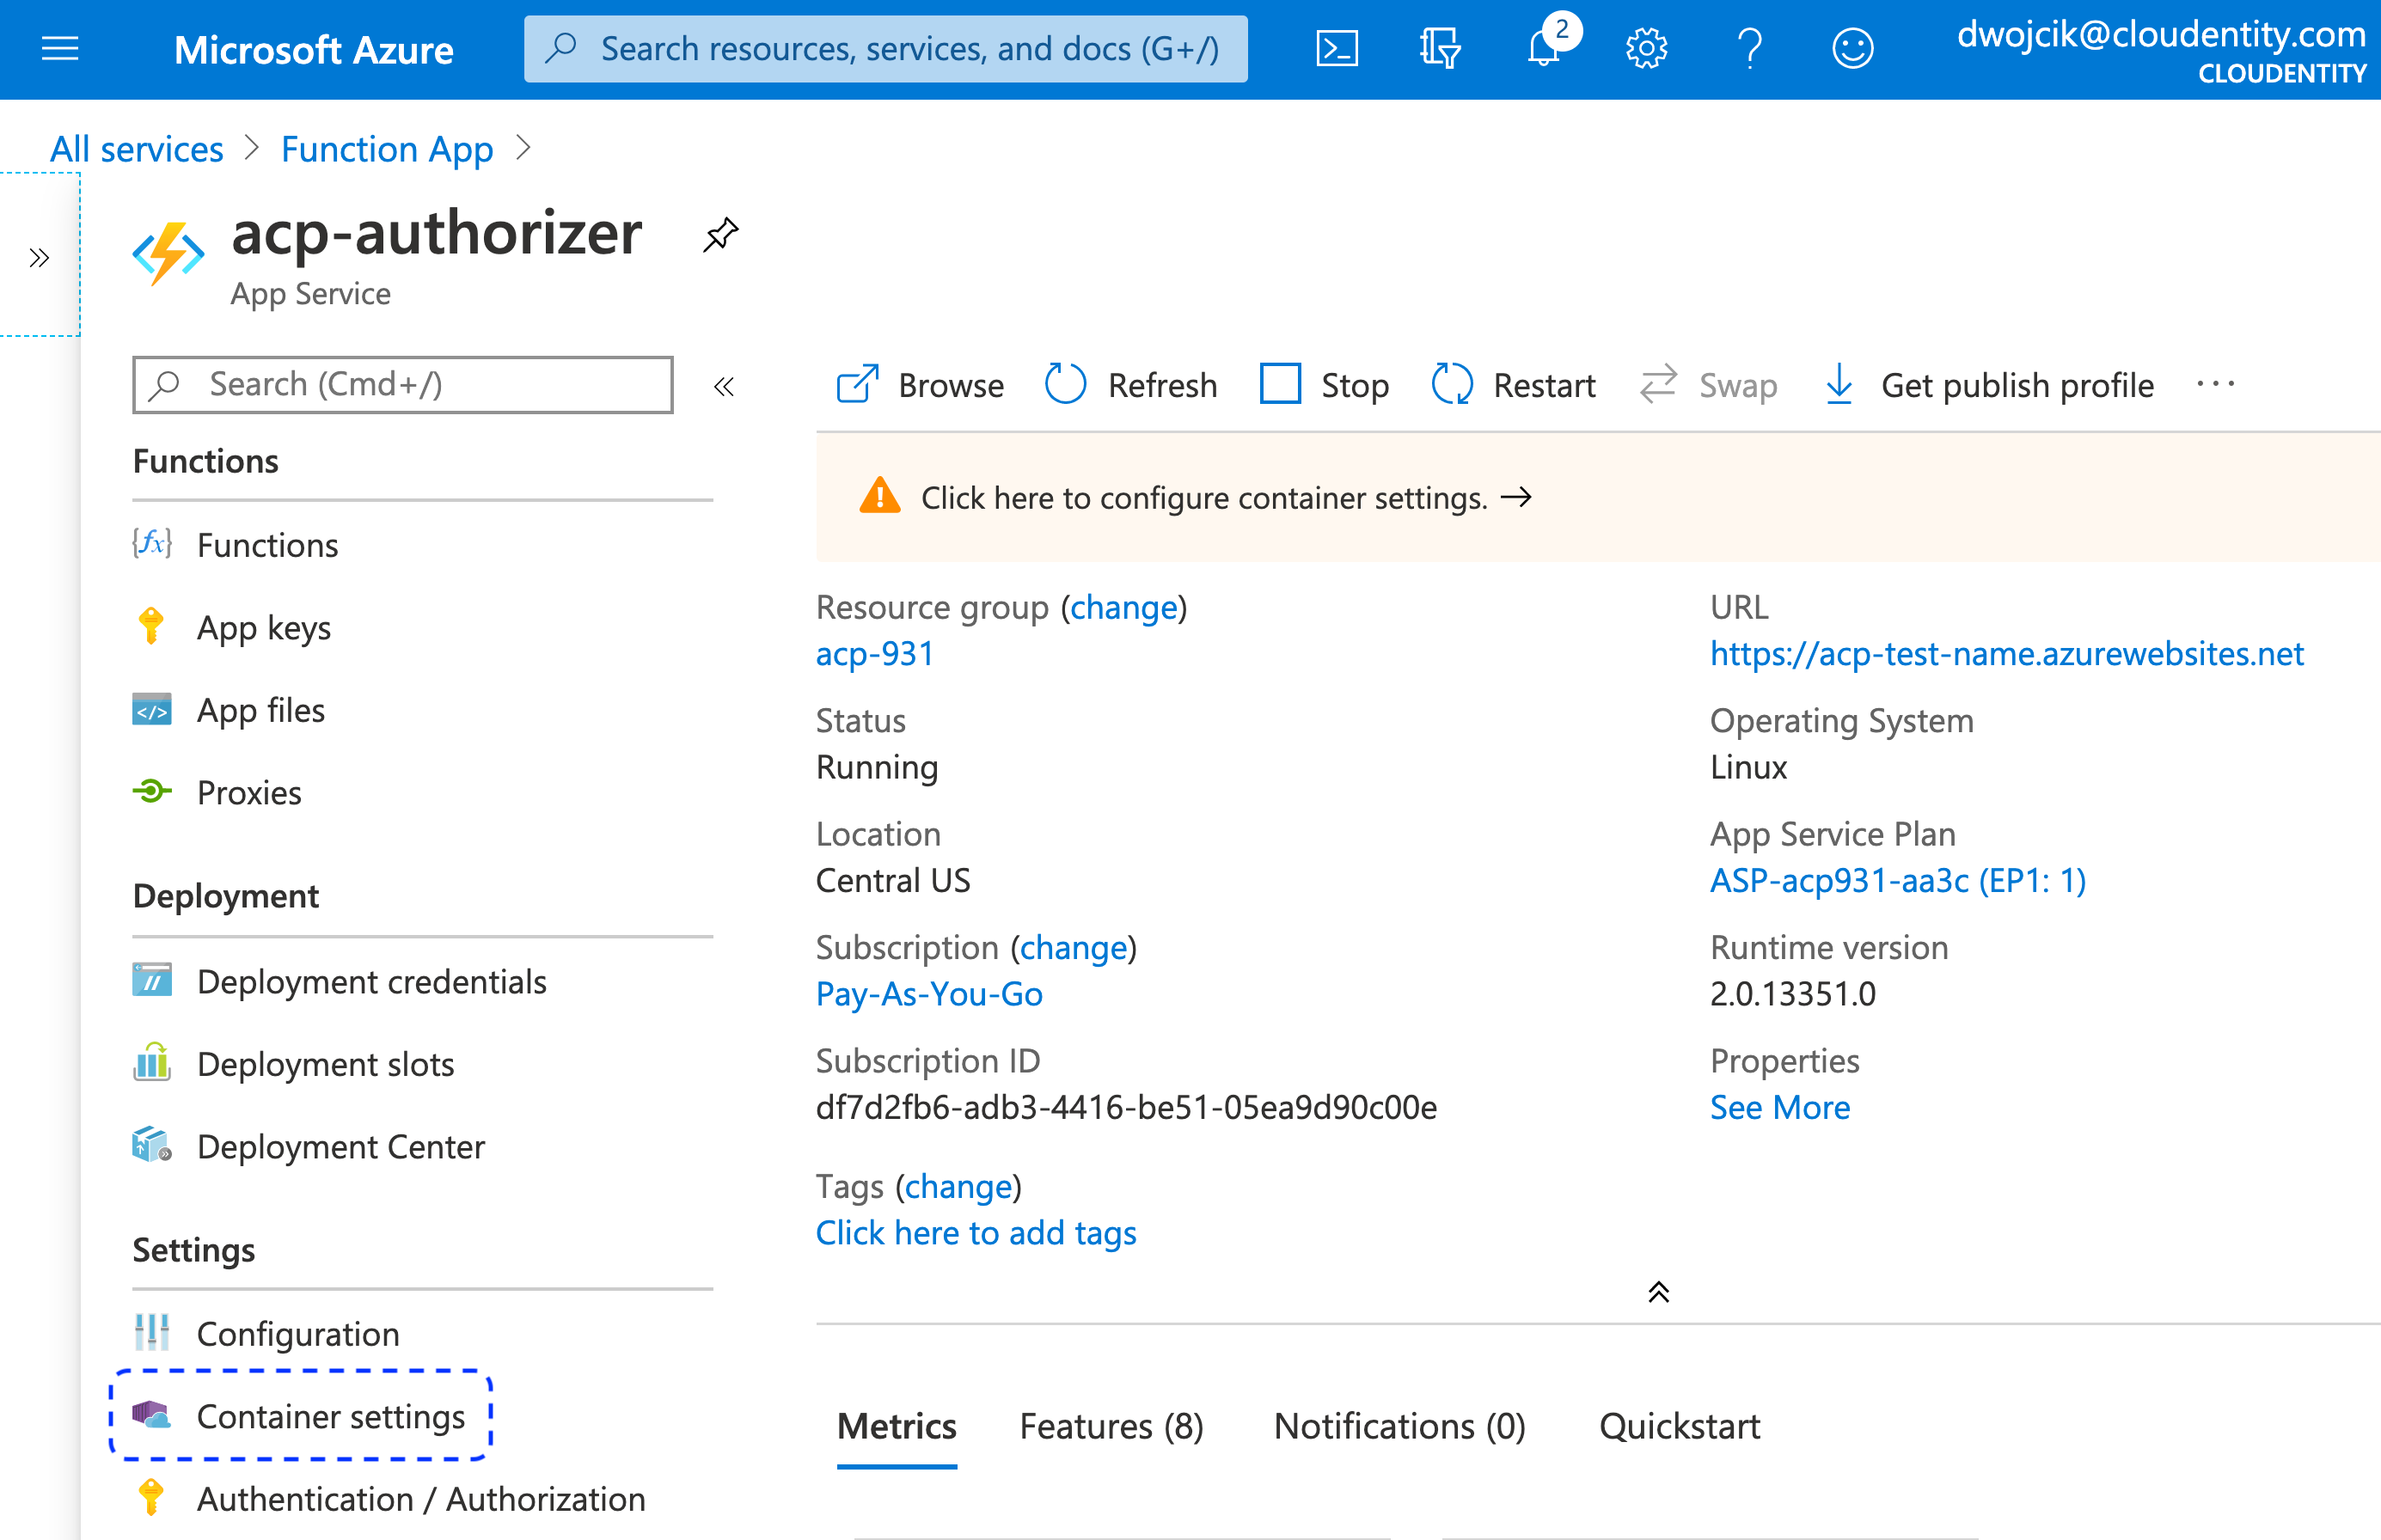
Go to an overview of your new function app by selecting Go to resources.

-
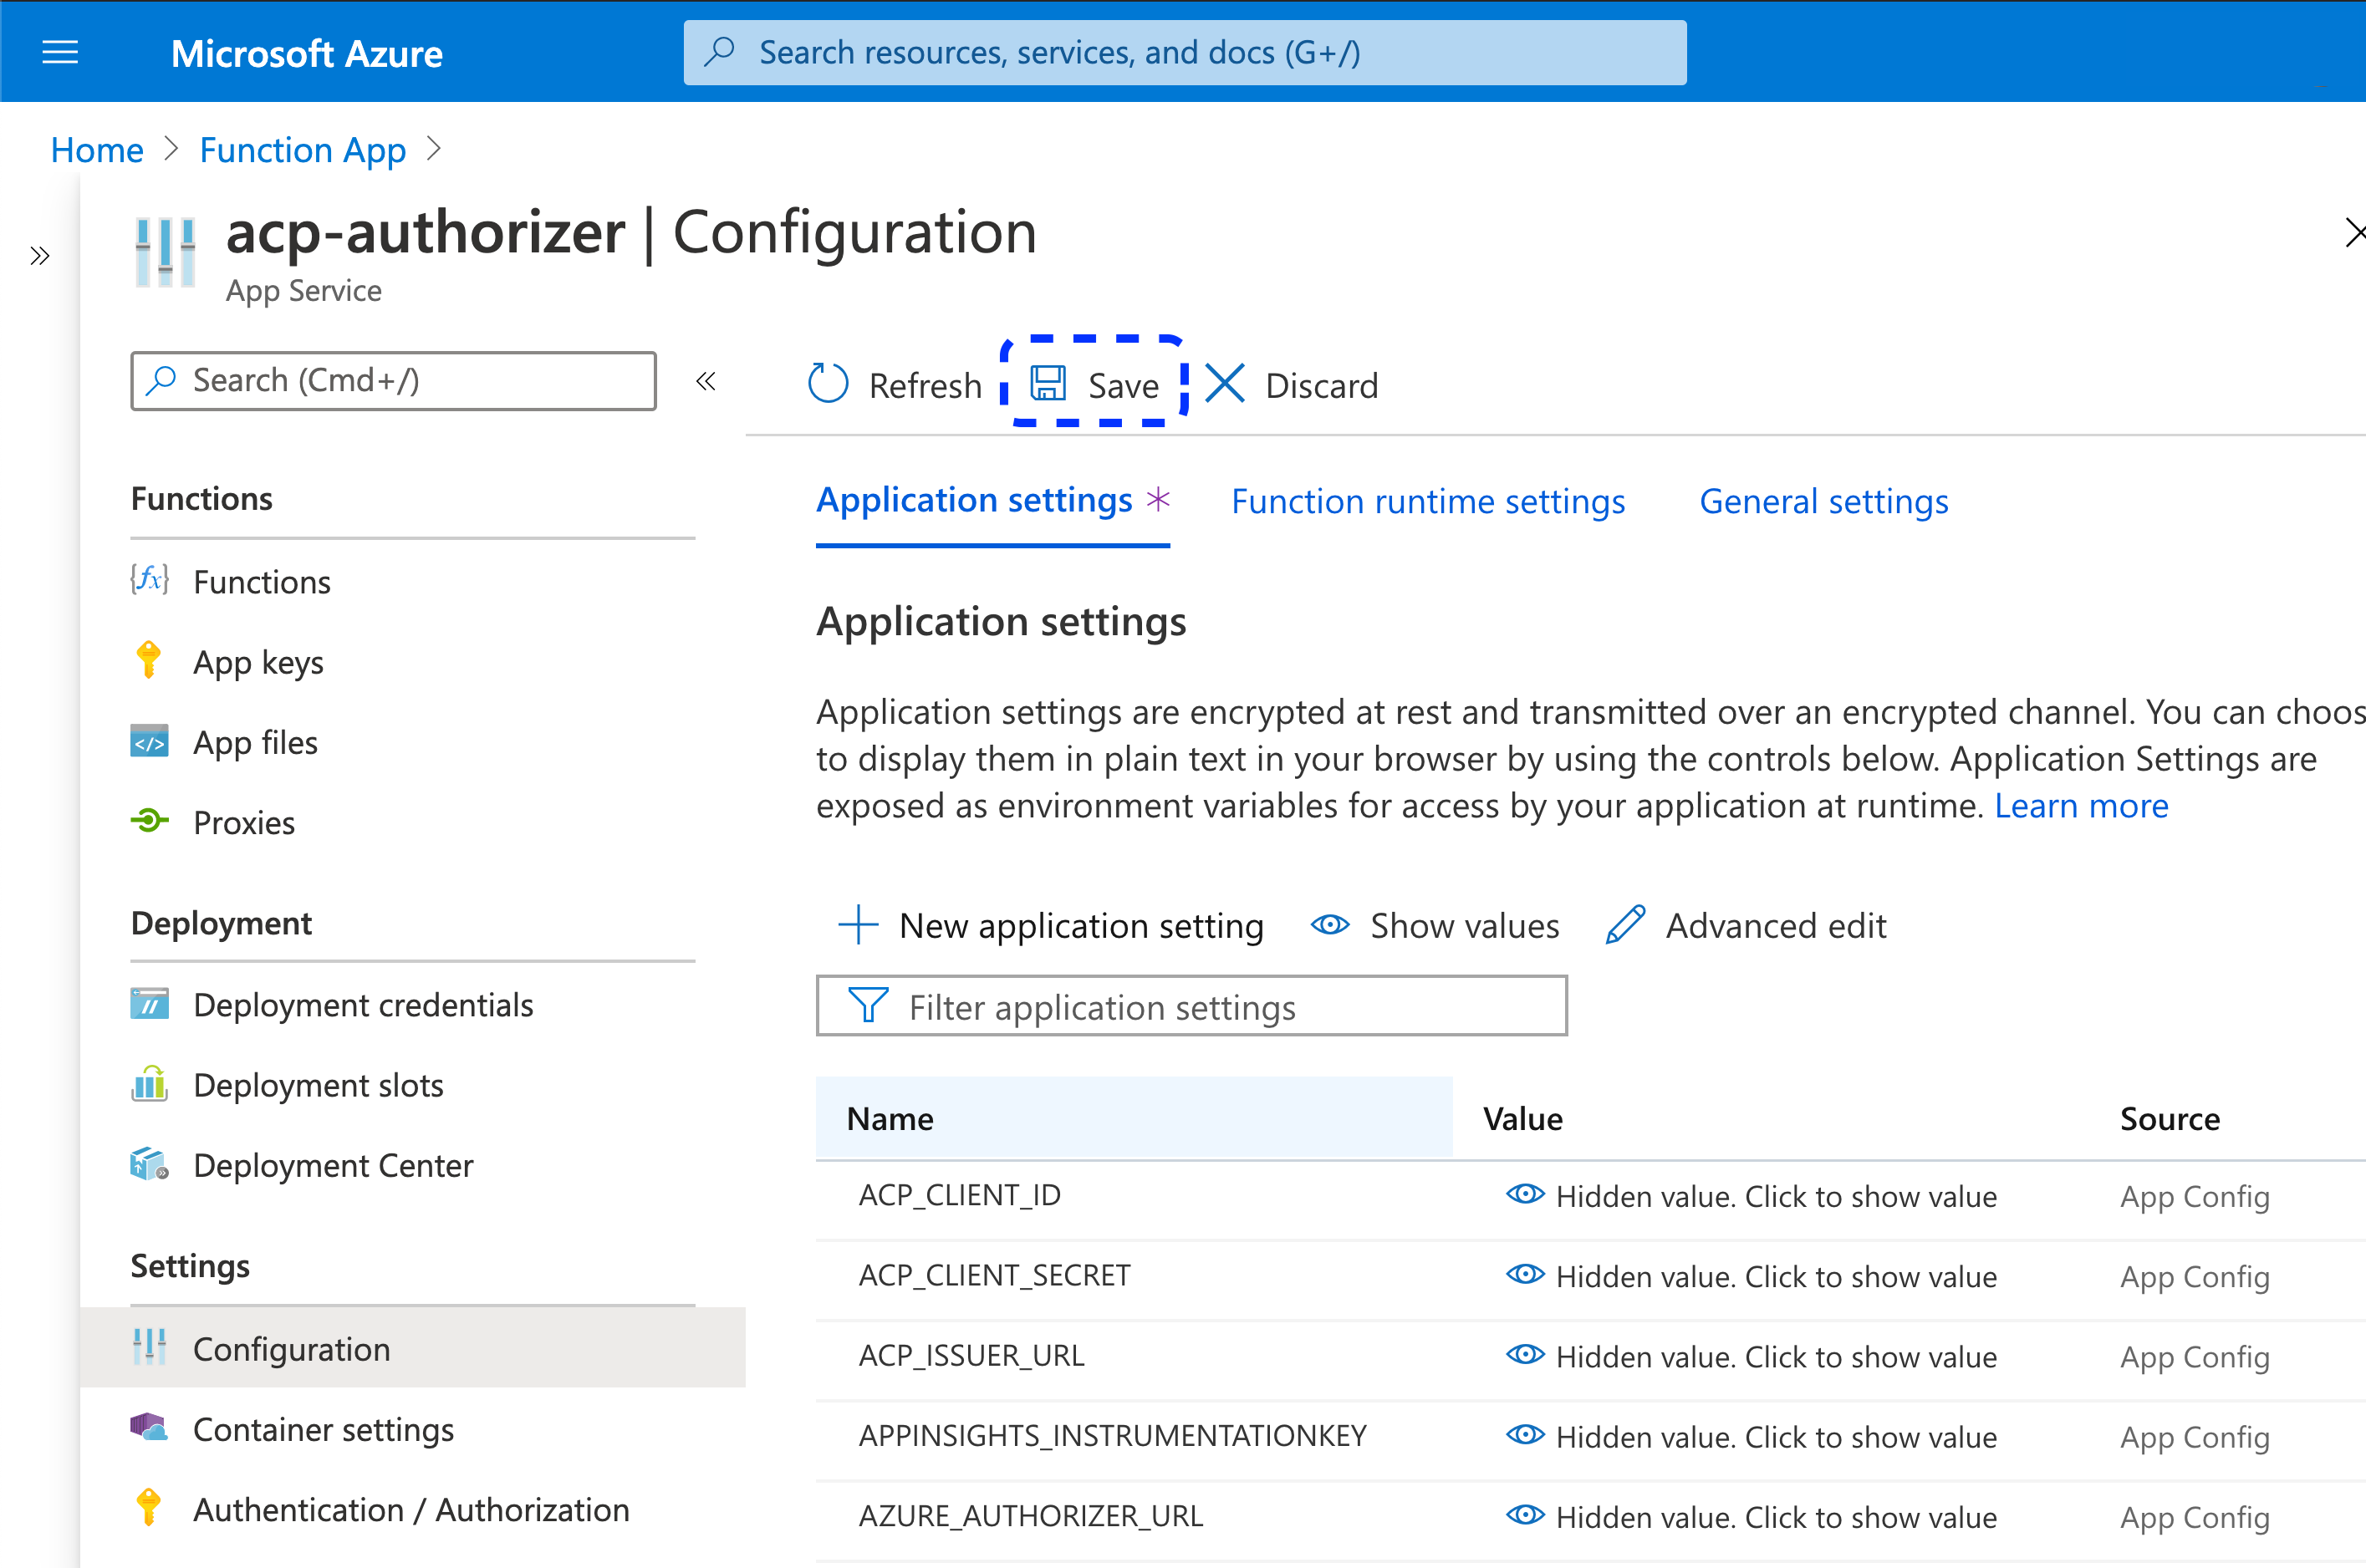
To access environment variables, select Configuration from the sidebar and go to the Application settings tab.
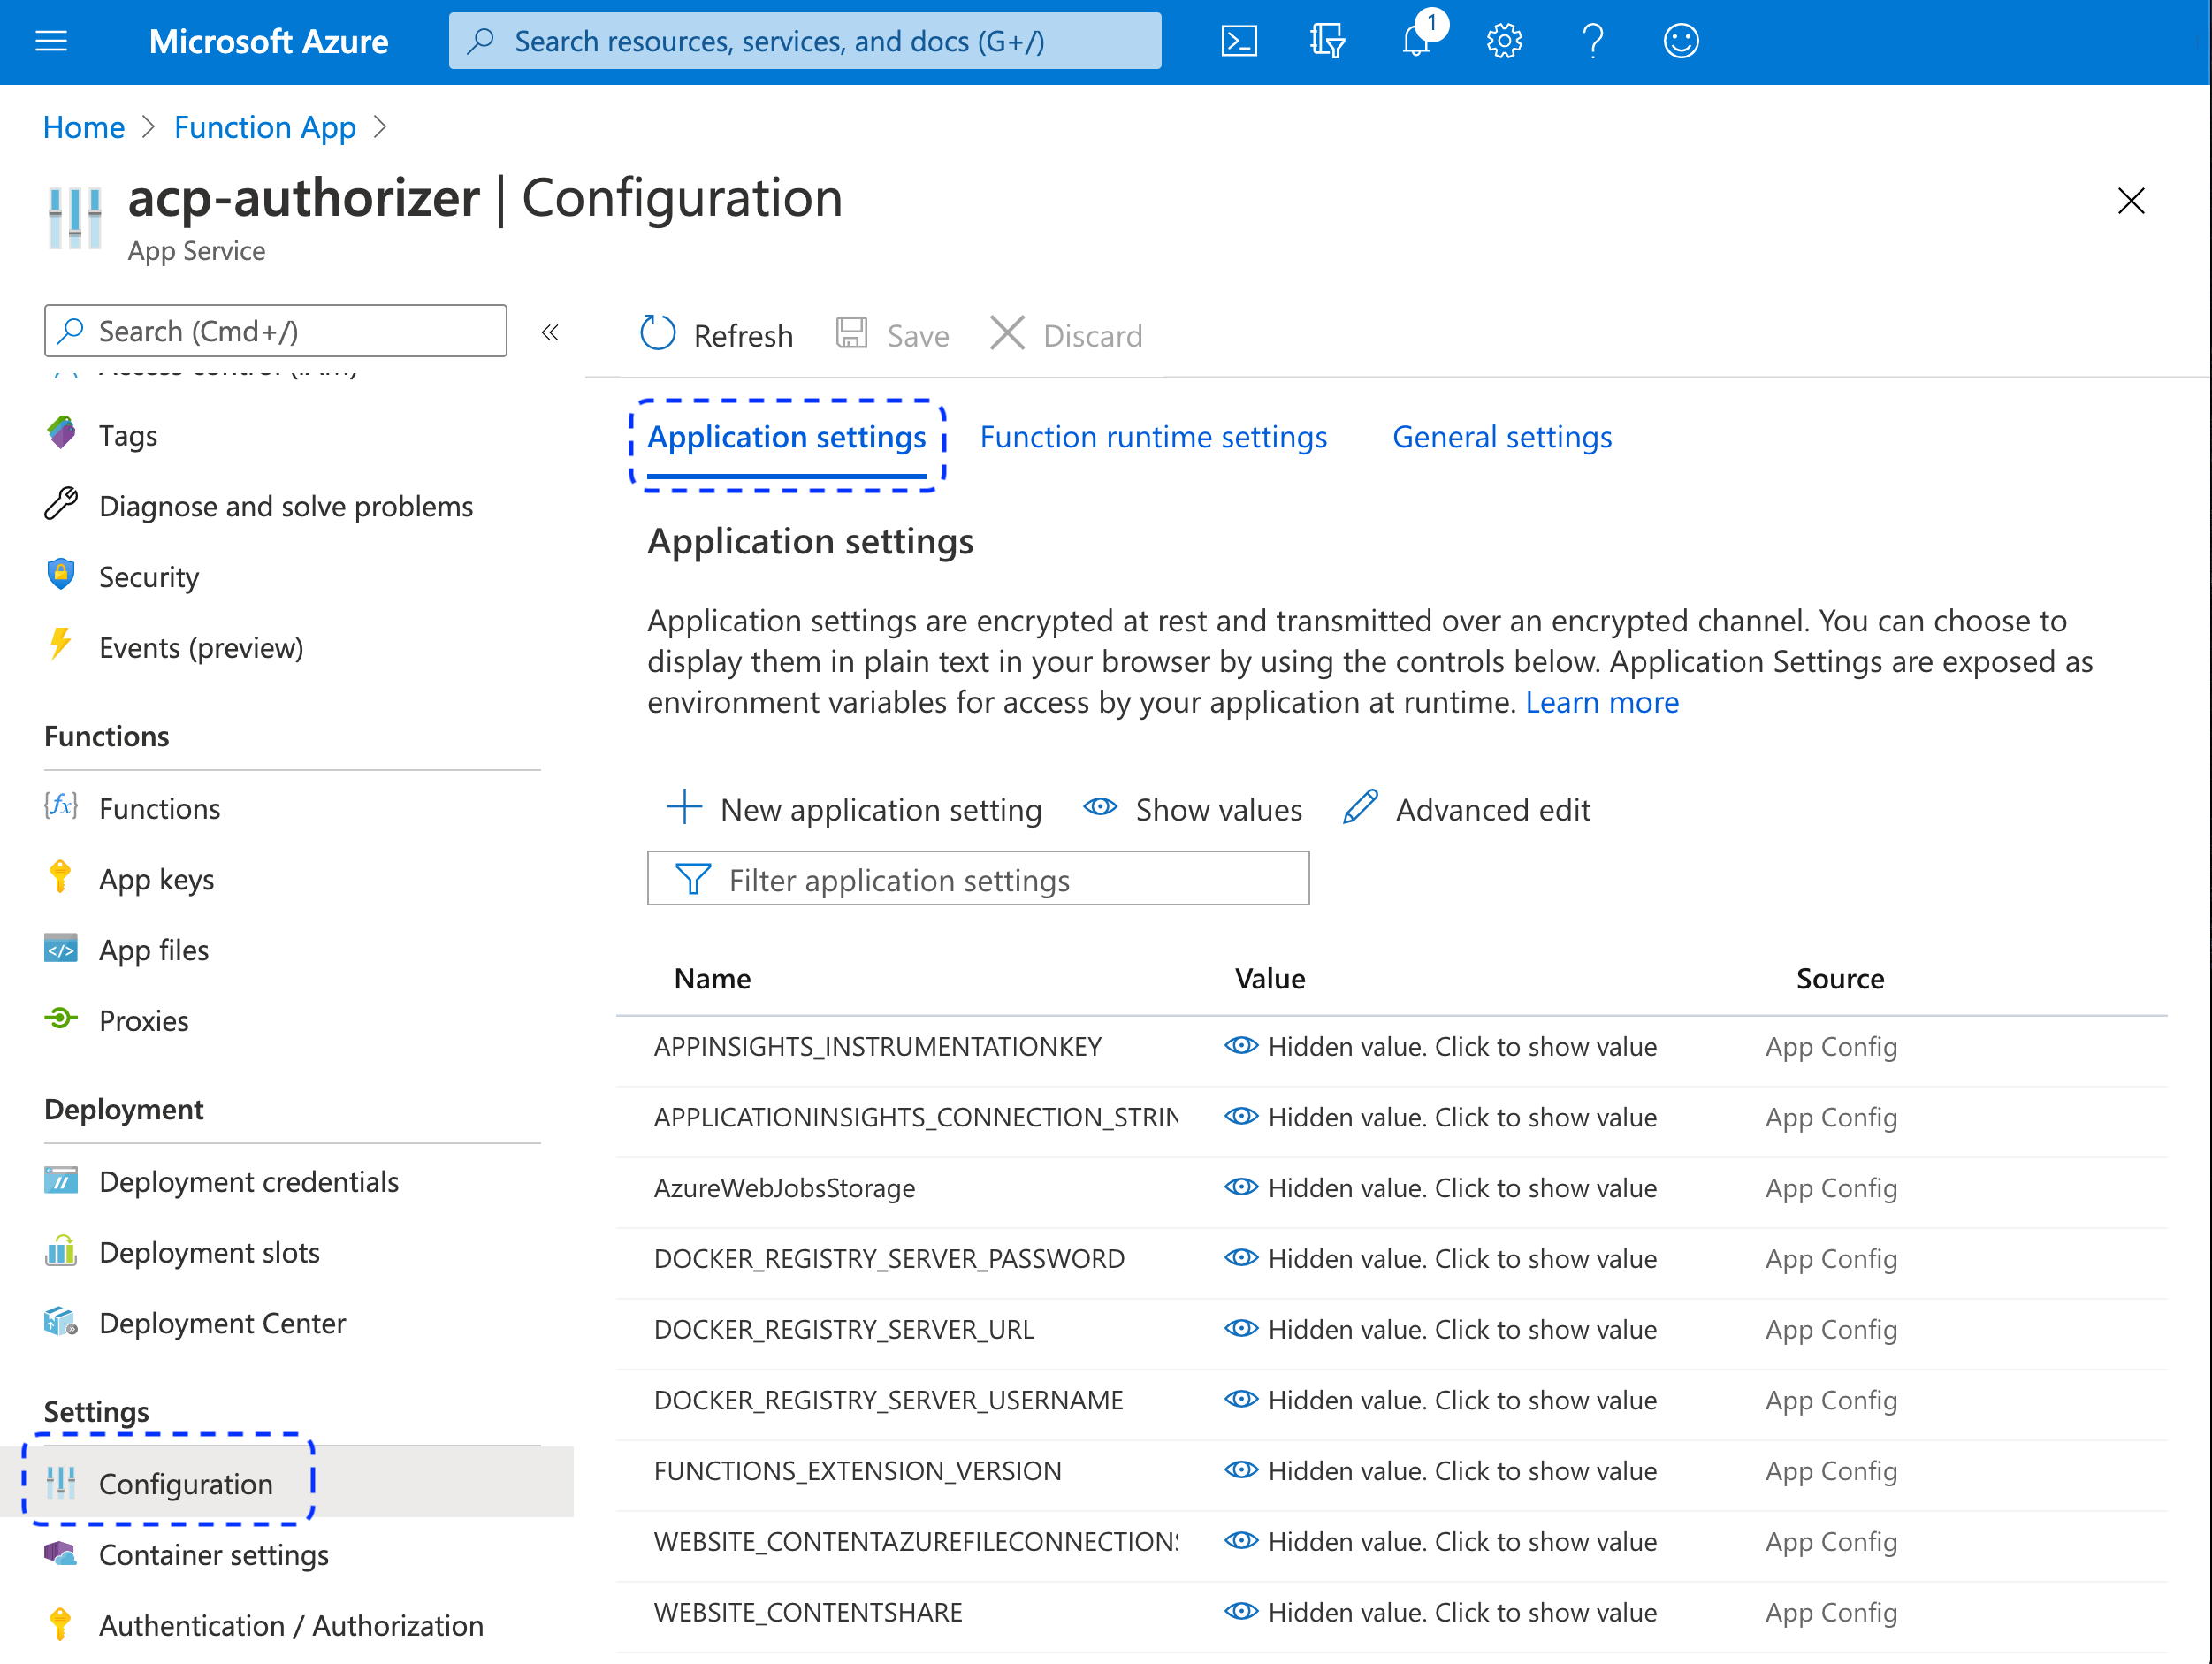
Result
The application settings list opens and shows multiple variables with no values set.

-
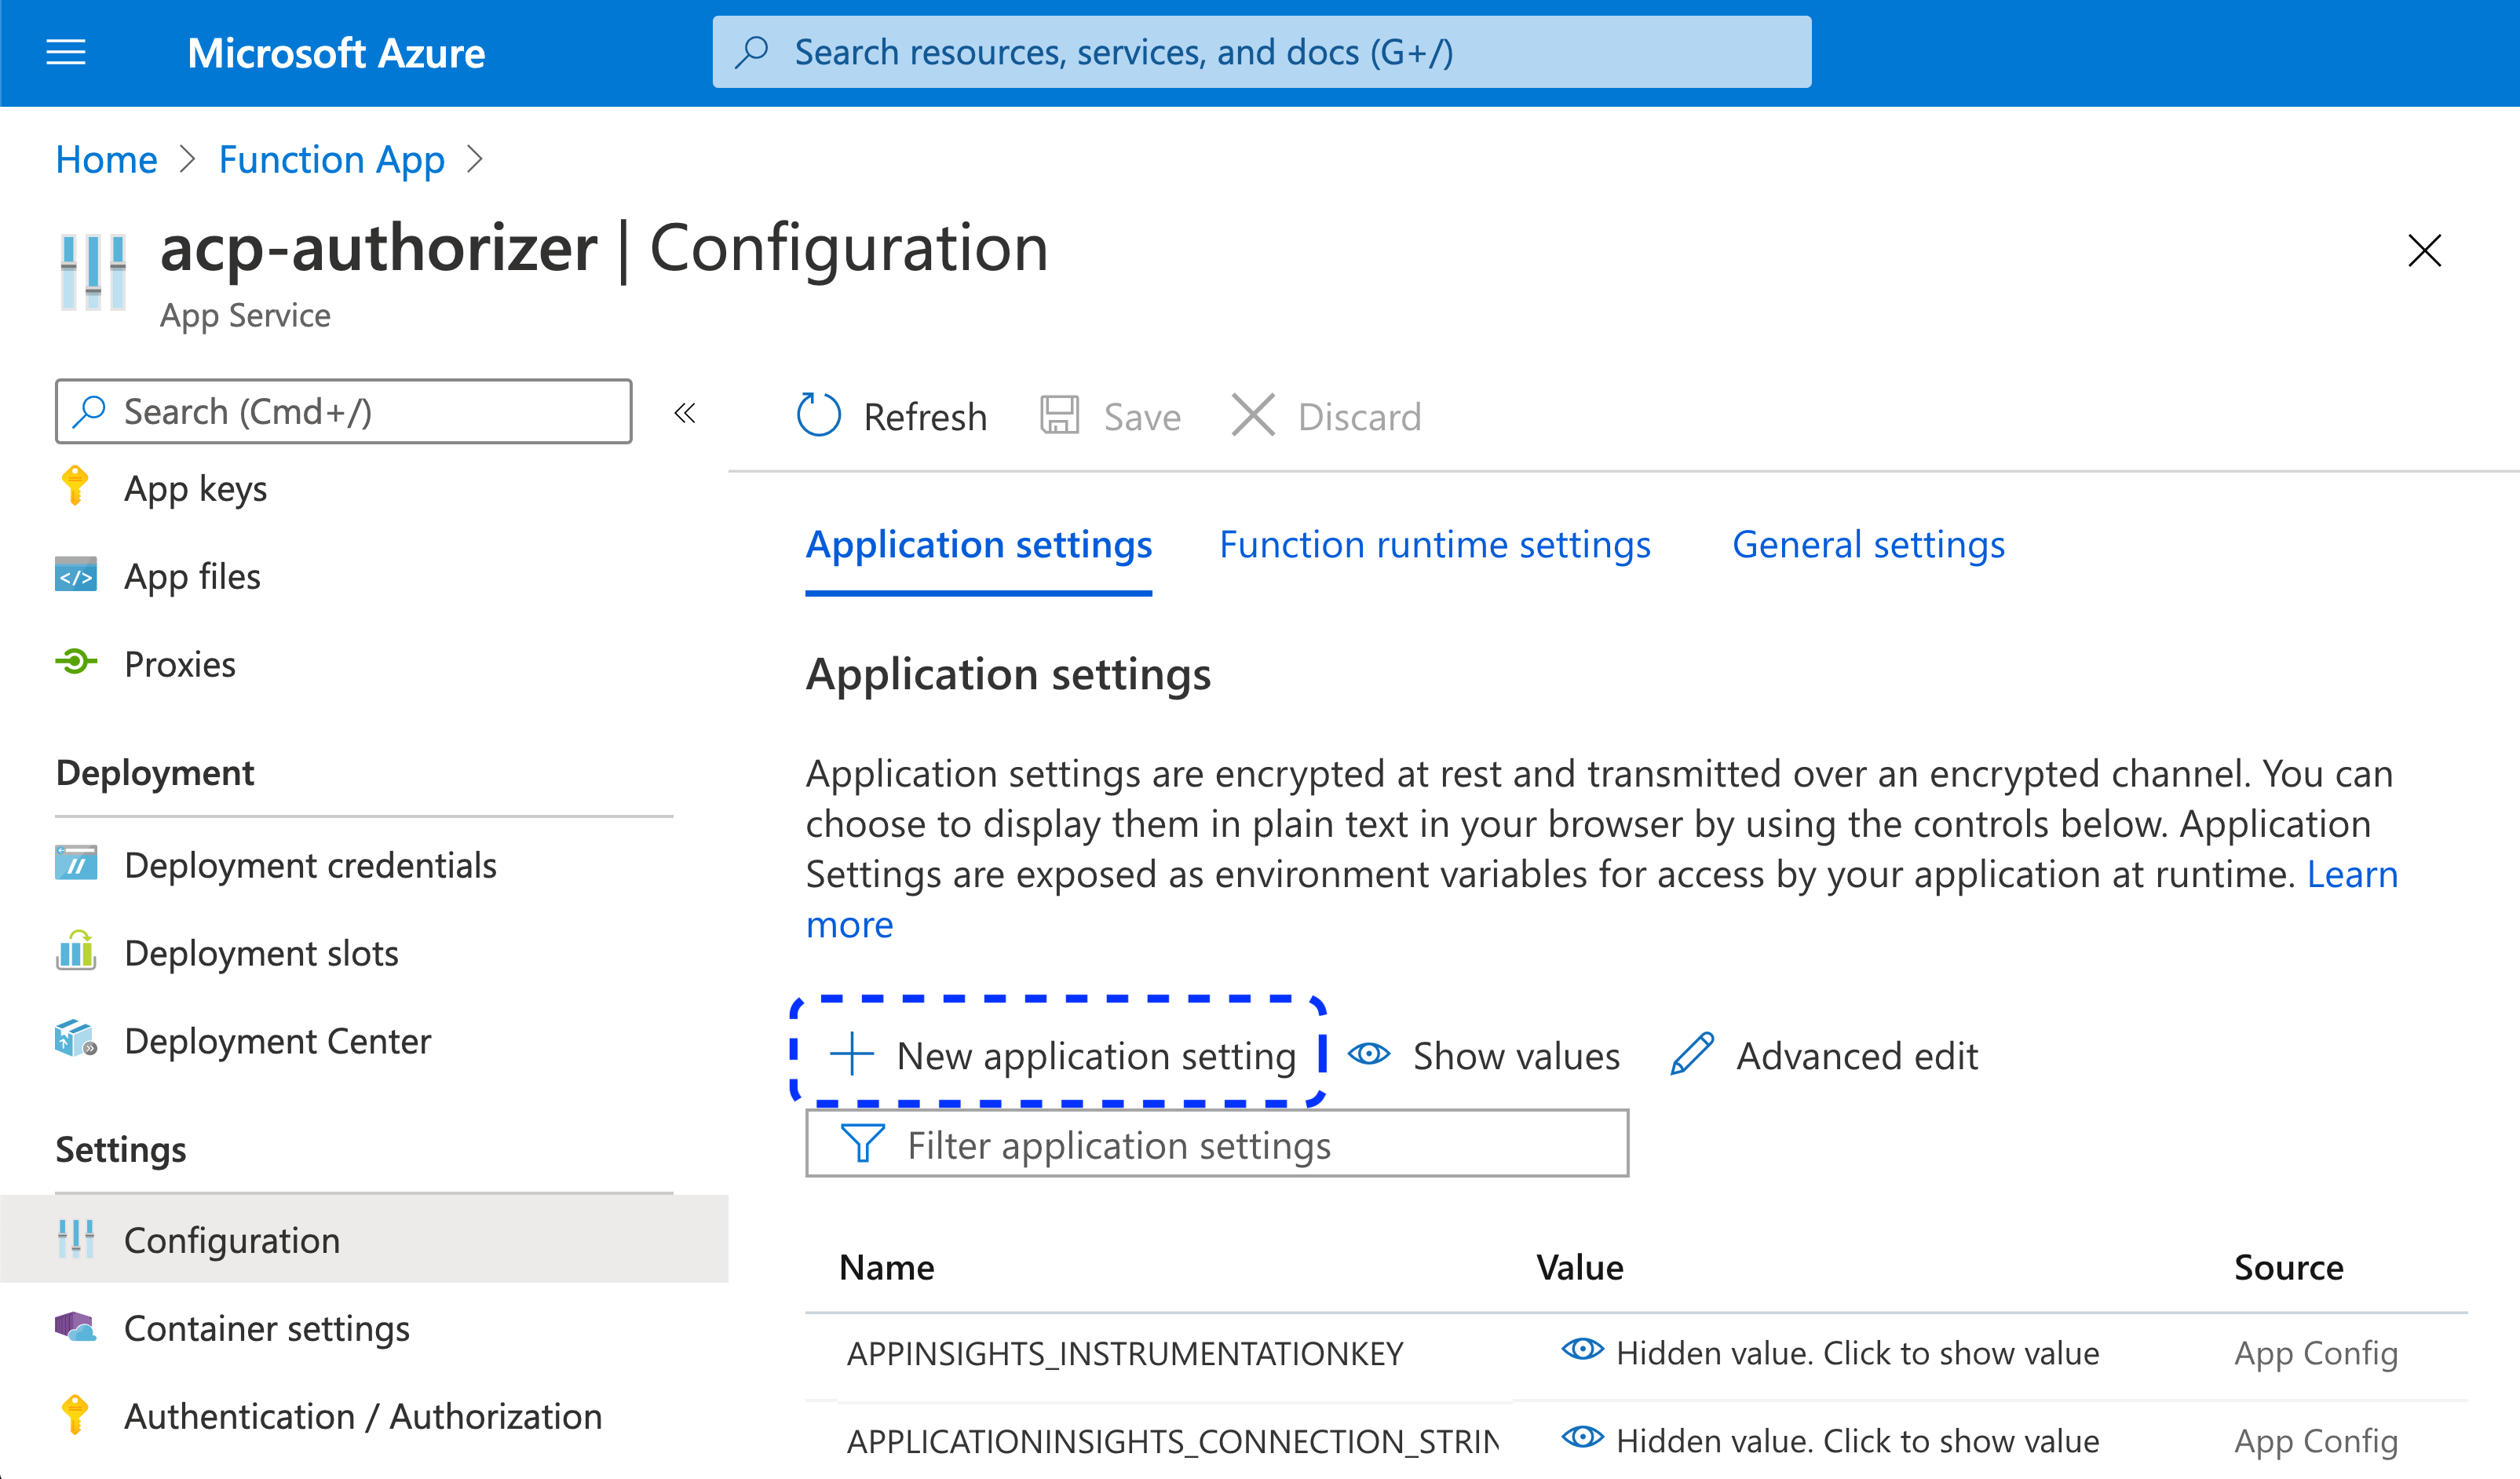
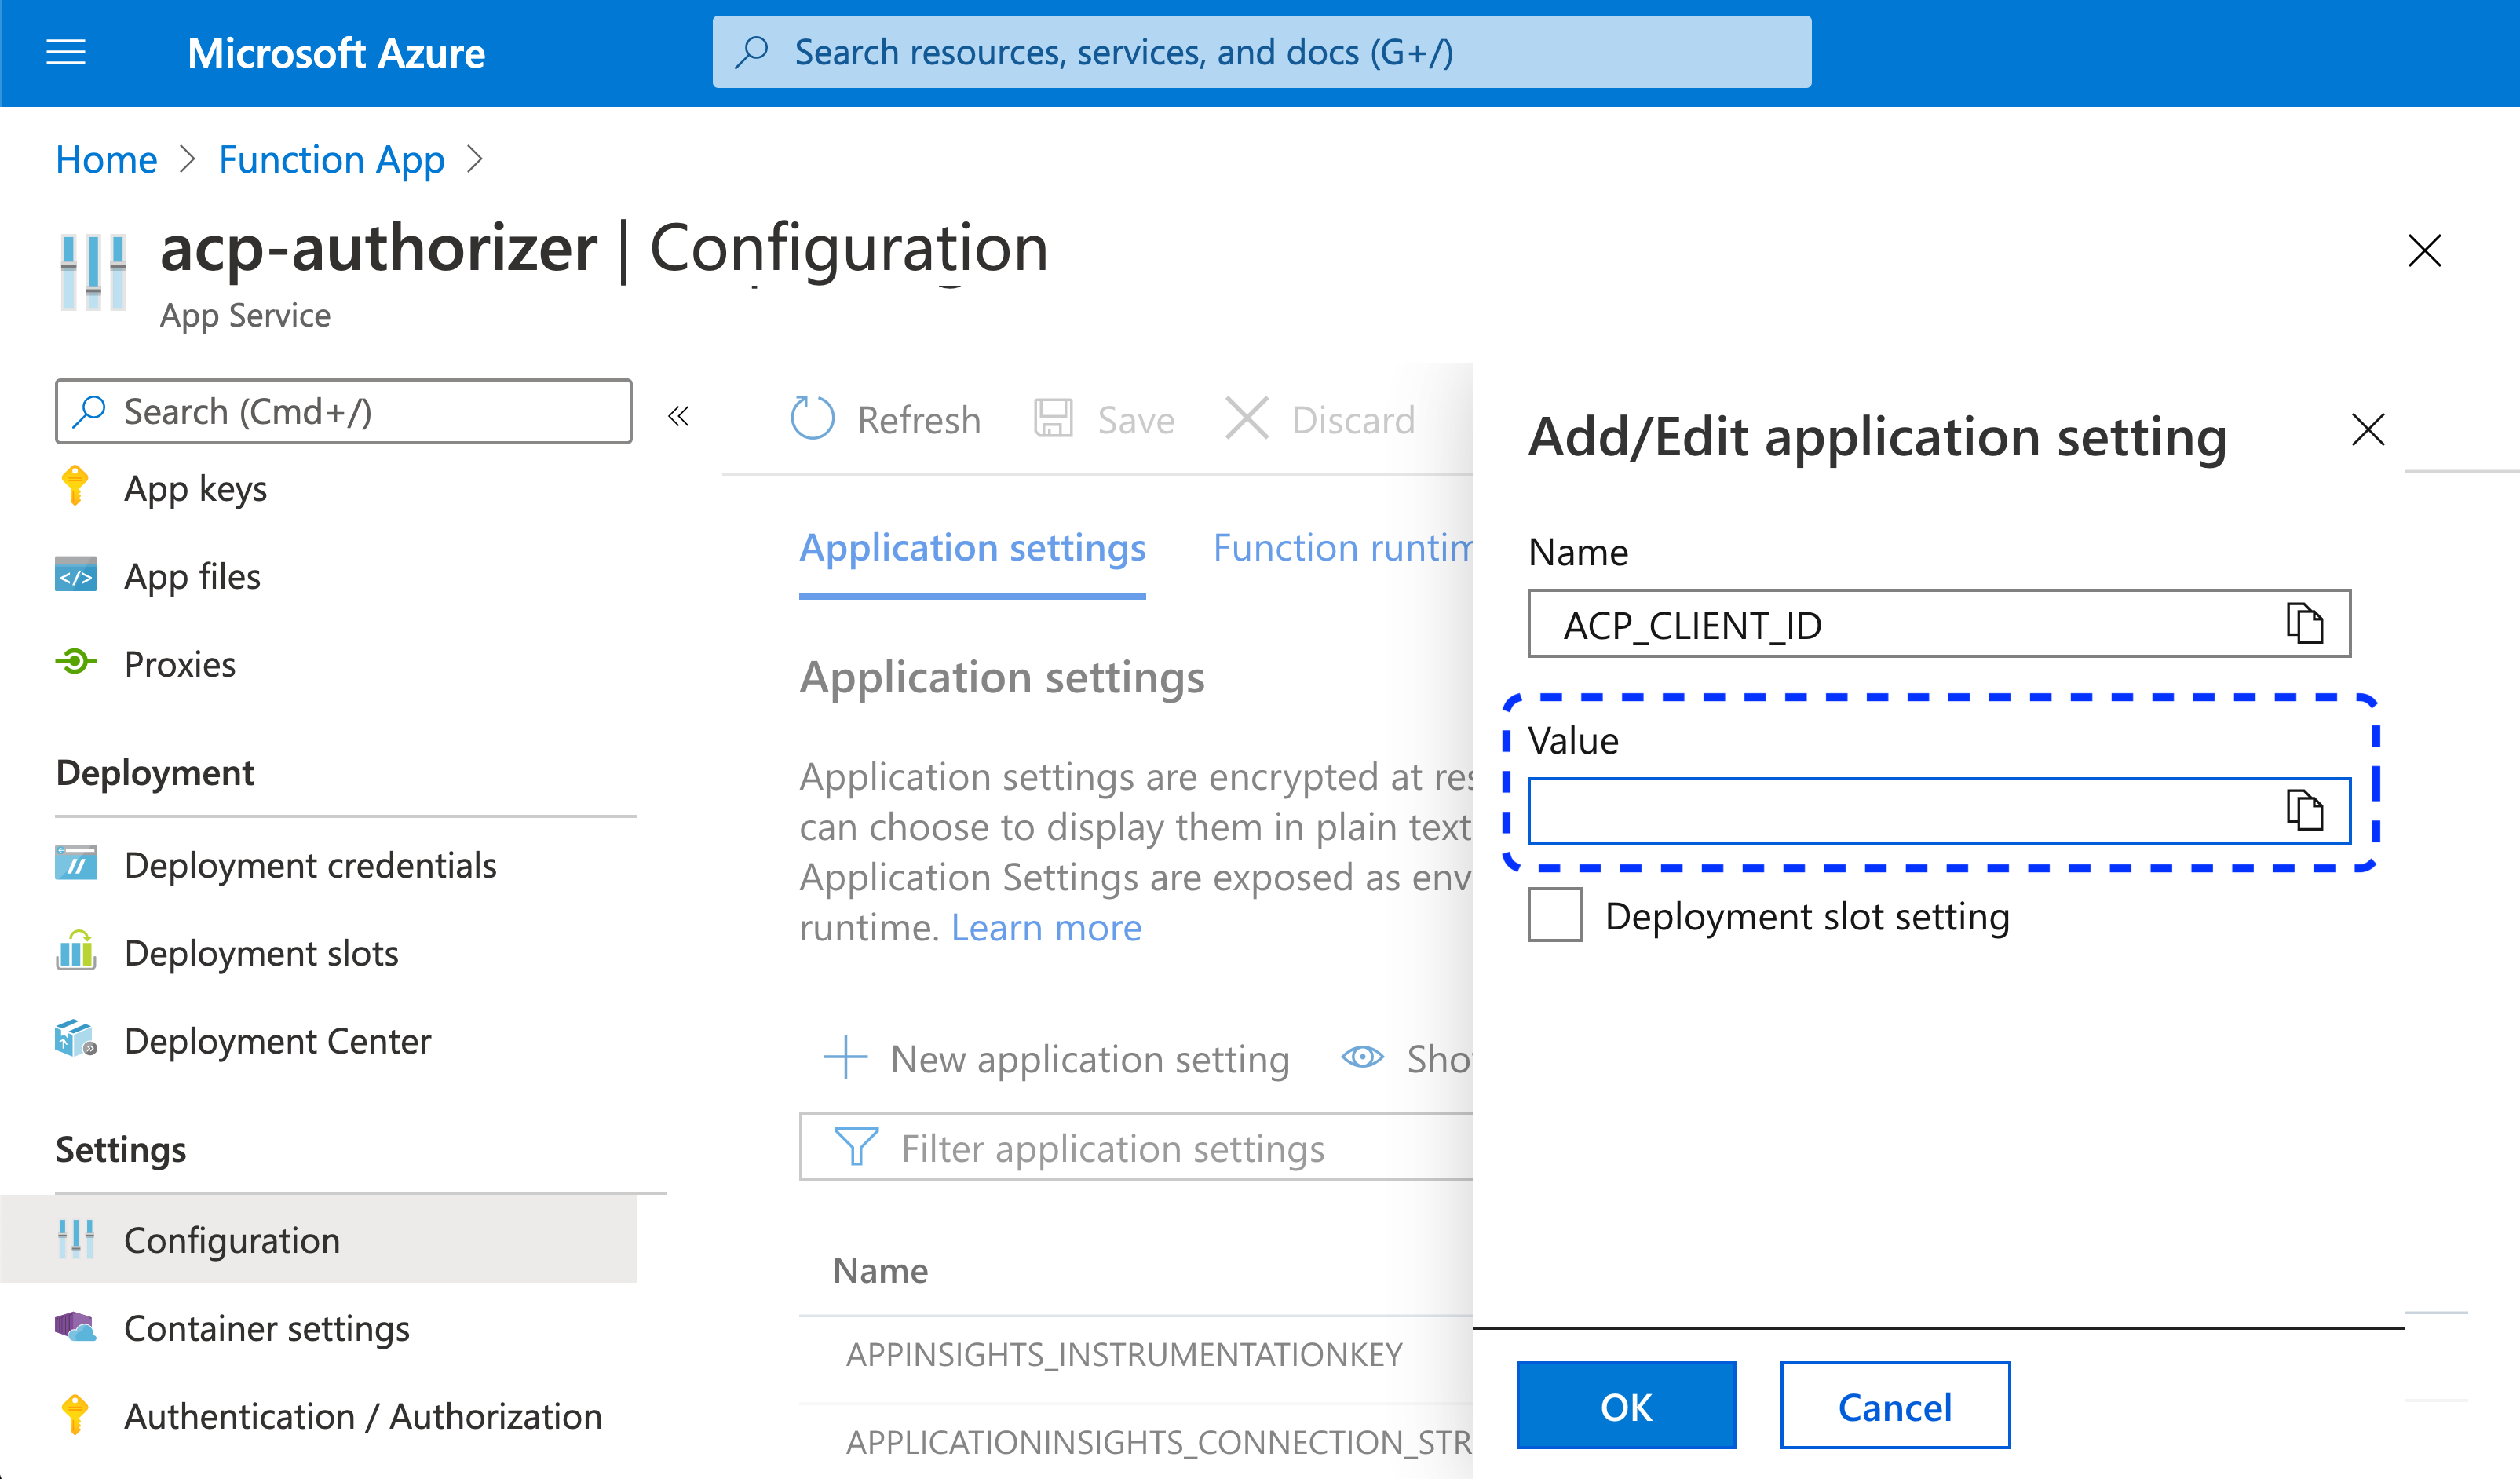
By selecting + New application setting, add three Cloudentity variables: ACP_CLIENT_ID, ACP_CLIENT_SECRET, and ACP_ISSUER_URL.
-
Enter values for the new variables.
Note
For ACP_CLIENT_ID, ACP_CLIENT_SECRET, and ACP_ISSUER_URL, paste the values generated for your new gateway in the Cloudentity administrator portal (step 8 in Create Azure GW.
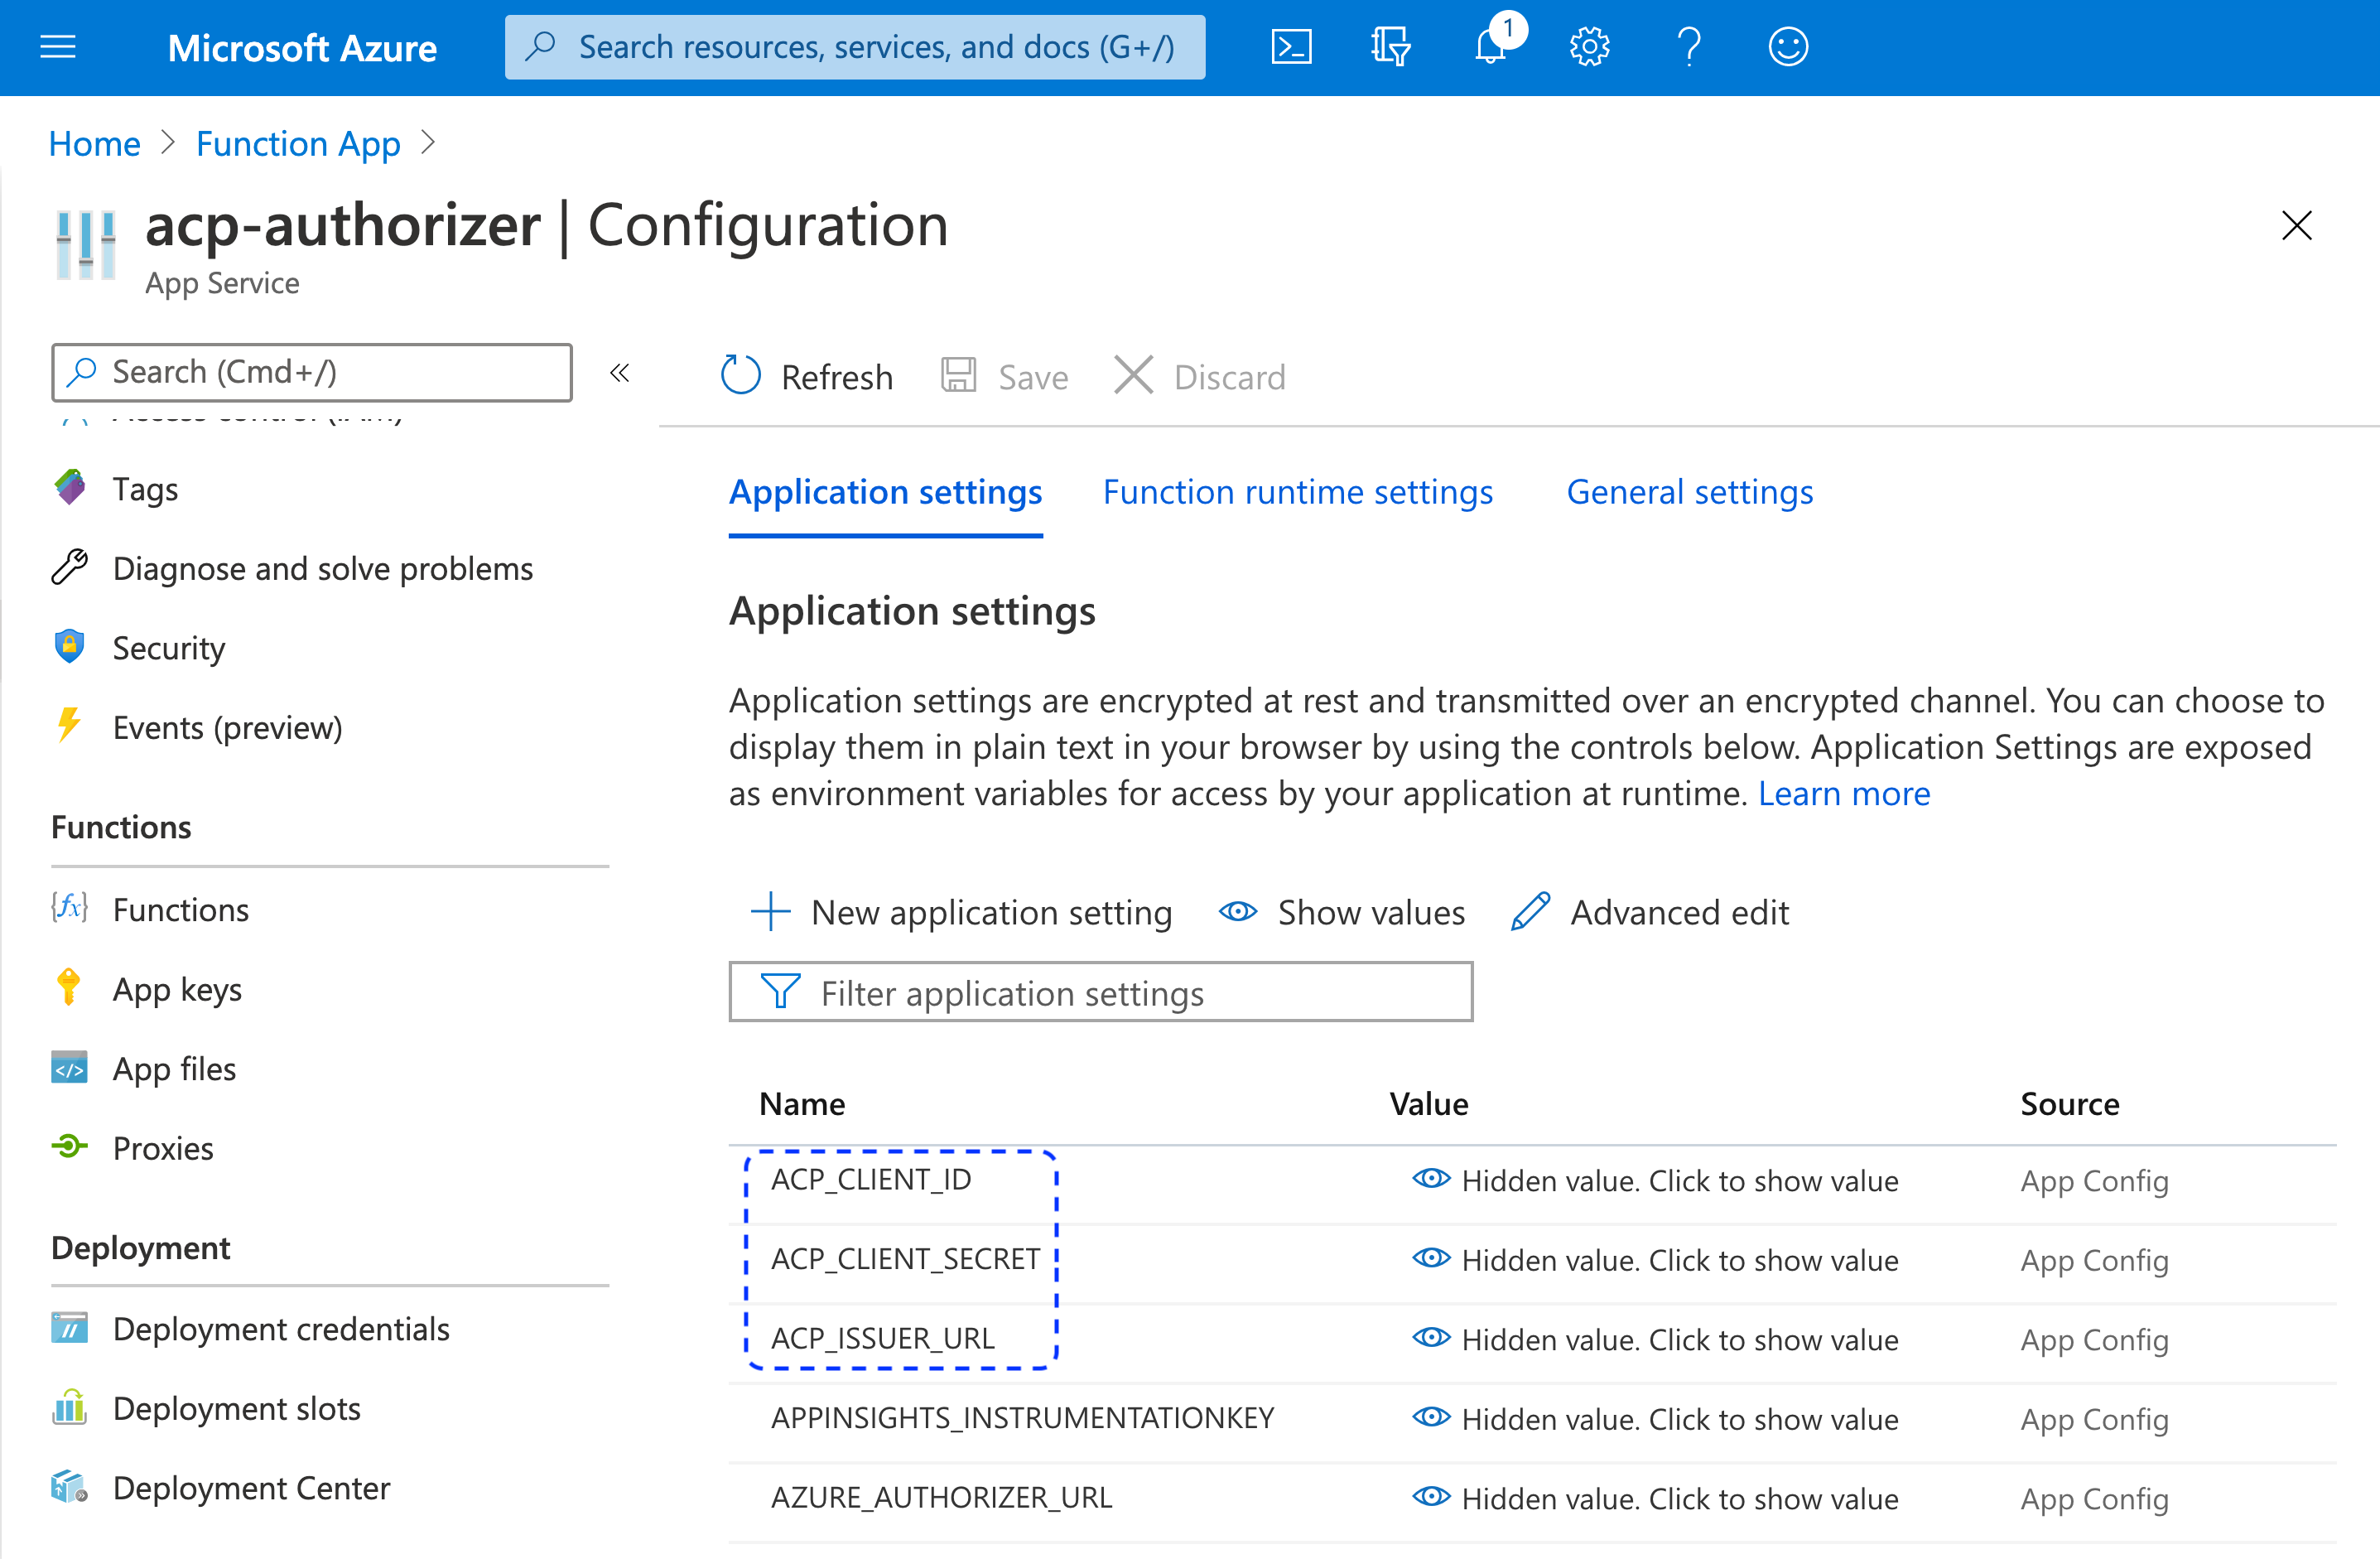
Result
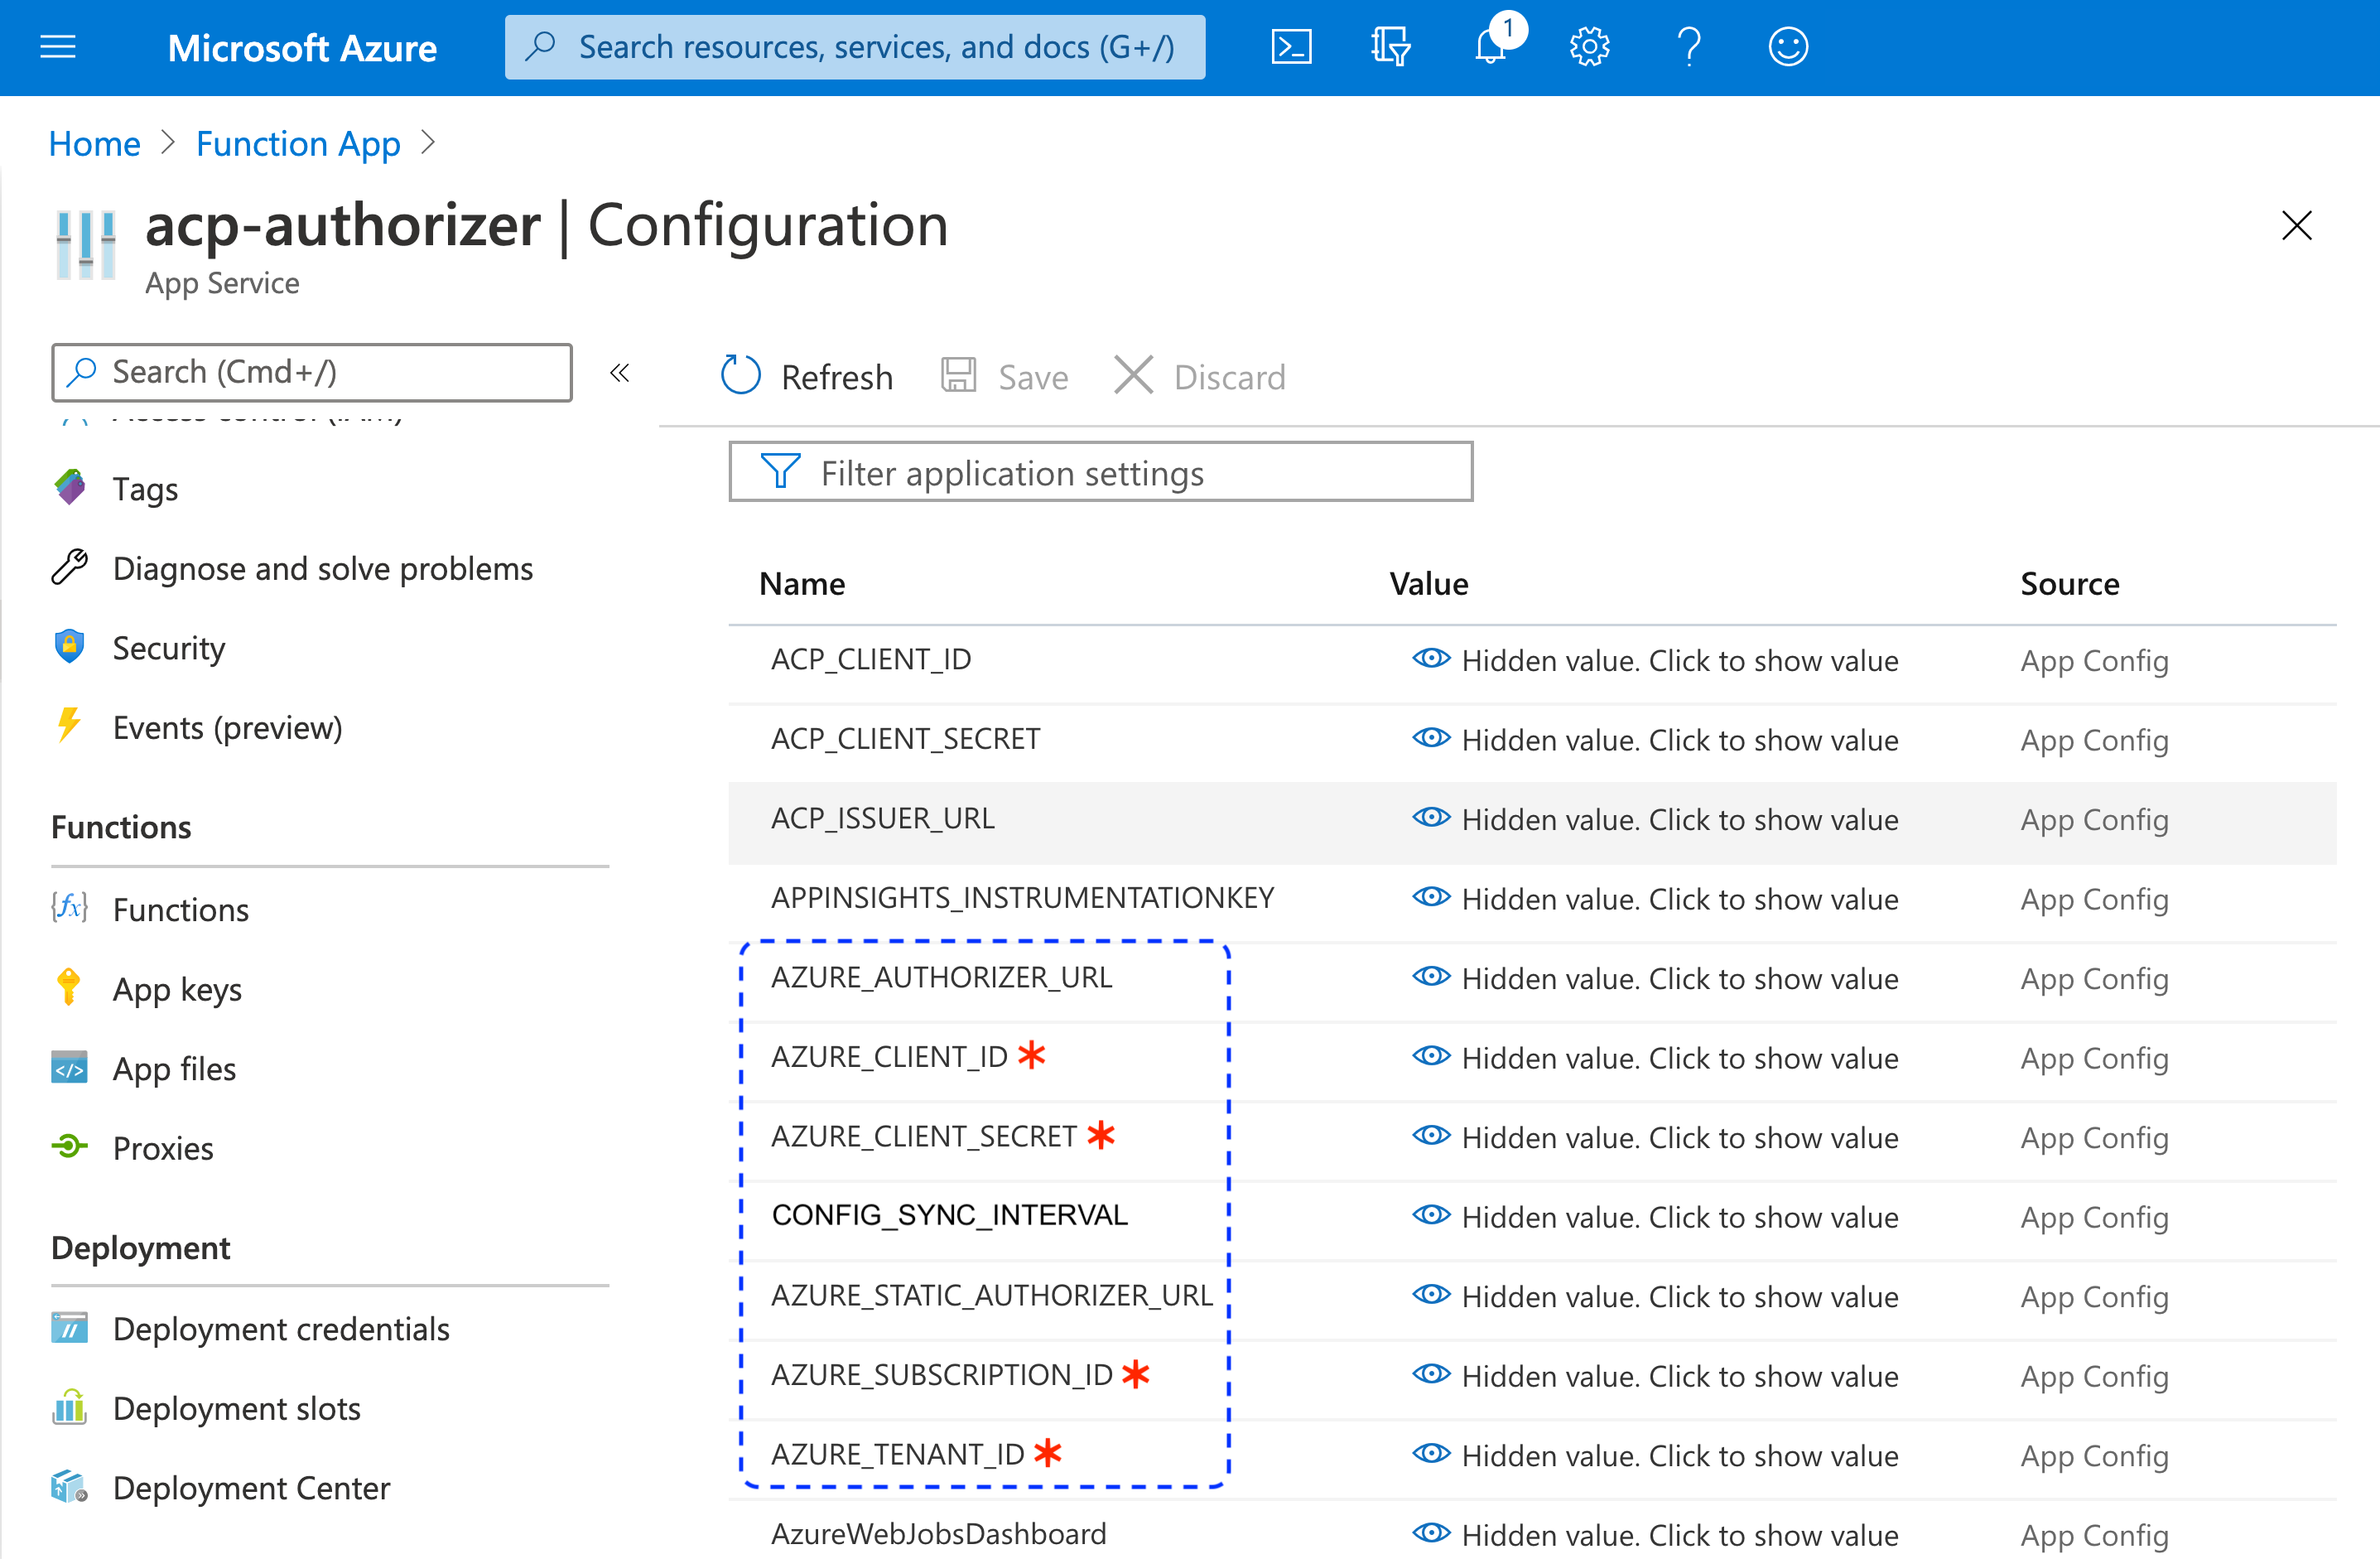
The new Cloudentity variables are visible on the Application settings list.
-
Similarly as for the Cloudentity variables, add Azure variables and specify their values.
-
Mandatory settings
-
AZURE_SUBSCRIPTION_ID (see step 2 in Assign roles)
-
AZURE_CLIENT_ID (see step 1 in Register an application)
-
AZURE_CLIENT_SECRET (see step 2 in Register an application)
-
AZURE_TENANT_ID (see step 1 in Register an application)
-
Configuration Reference
To get familiar with all settings for the Azure Authorizer, see its configuration reference article.
Result
The new Azure variables are visible on the Application settings list.
-
-
Select Save to apply the changes.
Result
By configuring all required environment variables, you’ve enabled Cloudentity Authorizer to call APIs and modify policies.
Deploy Function App
-
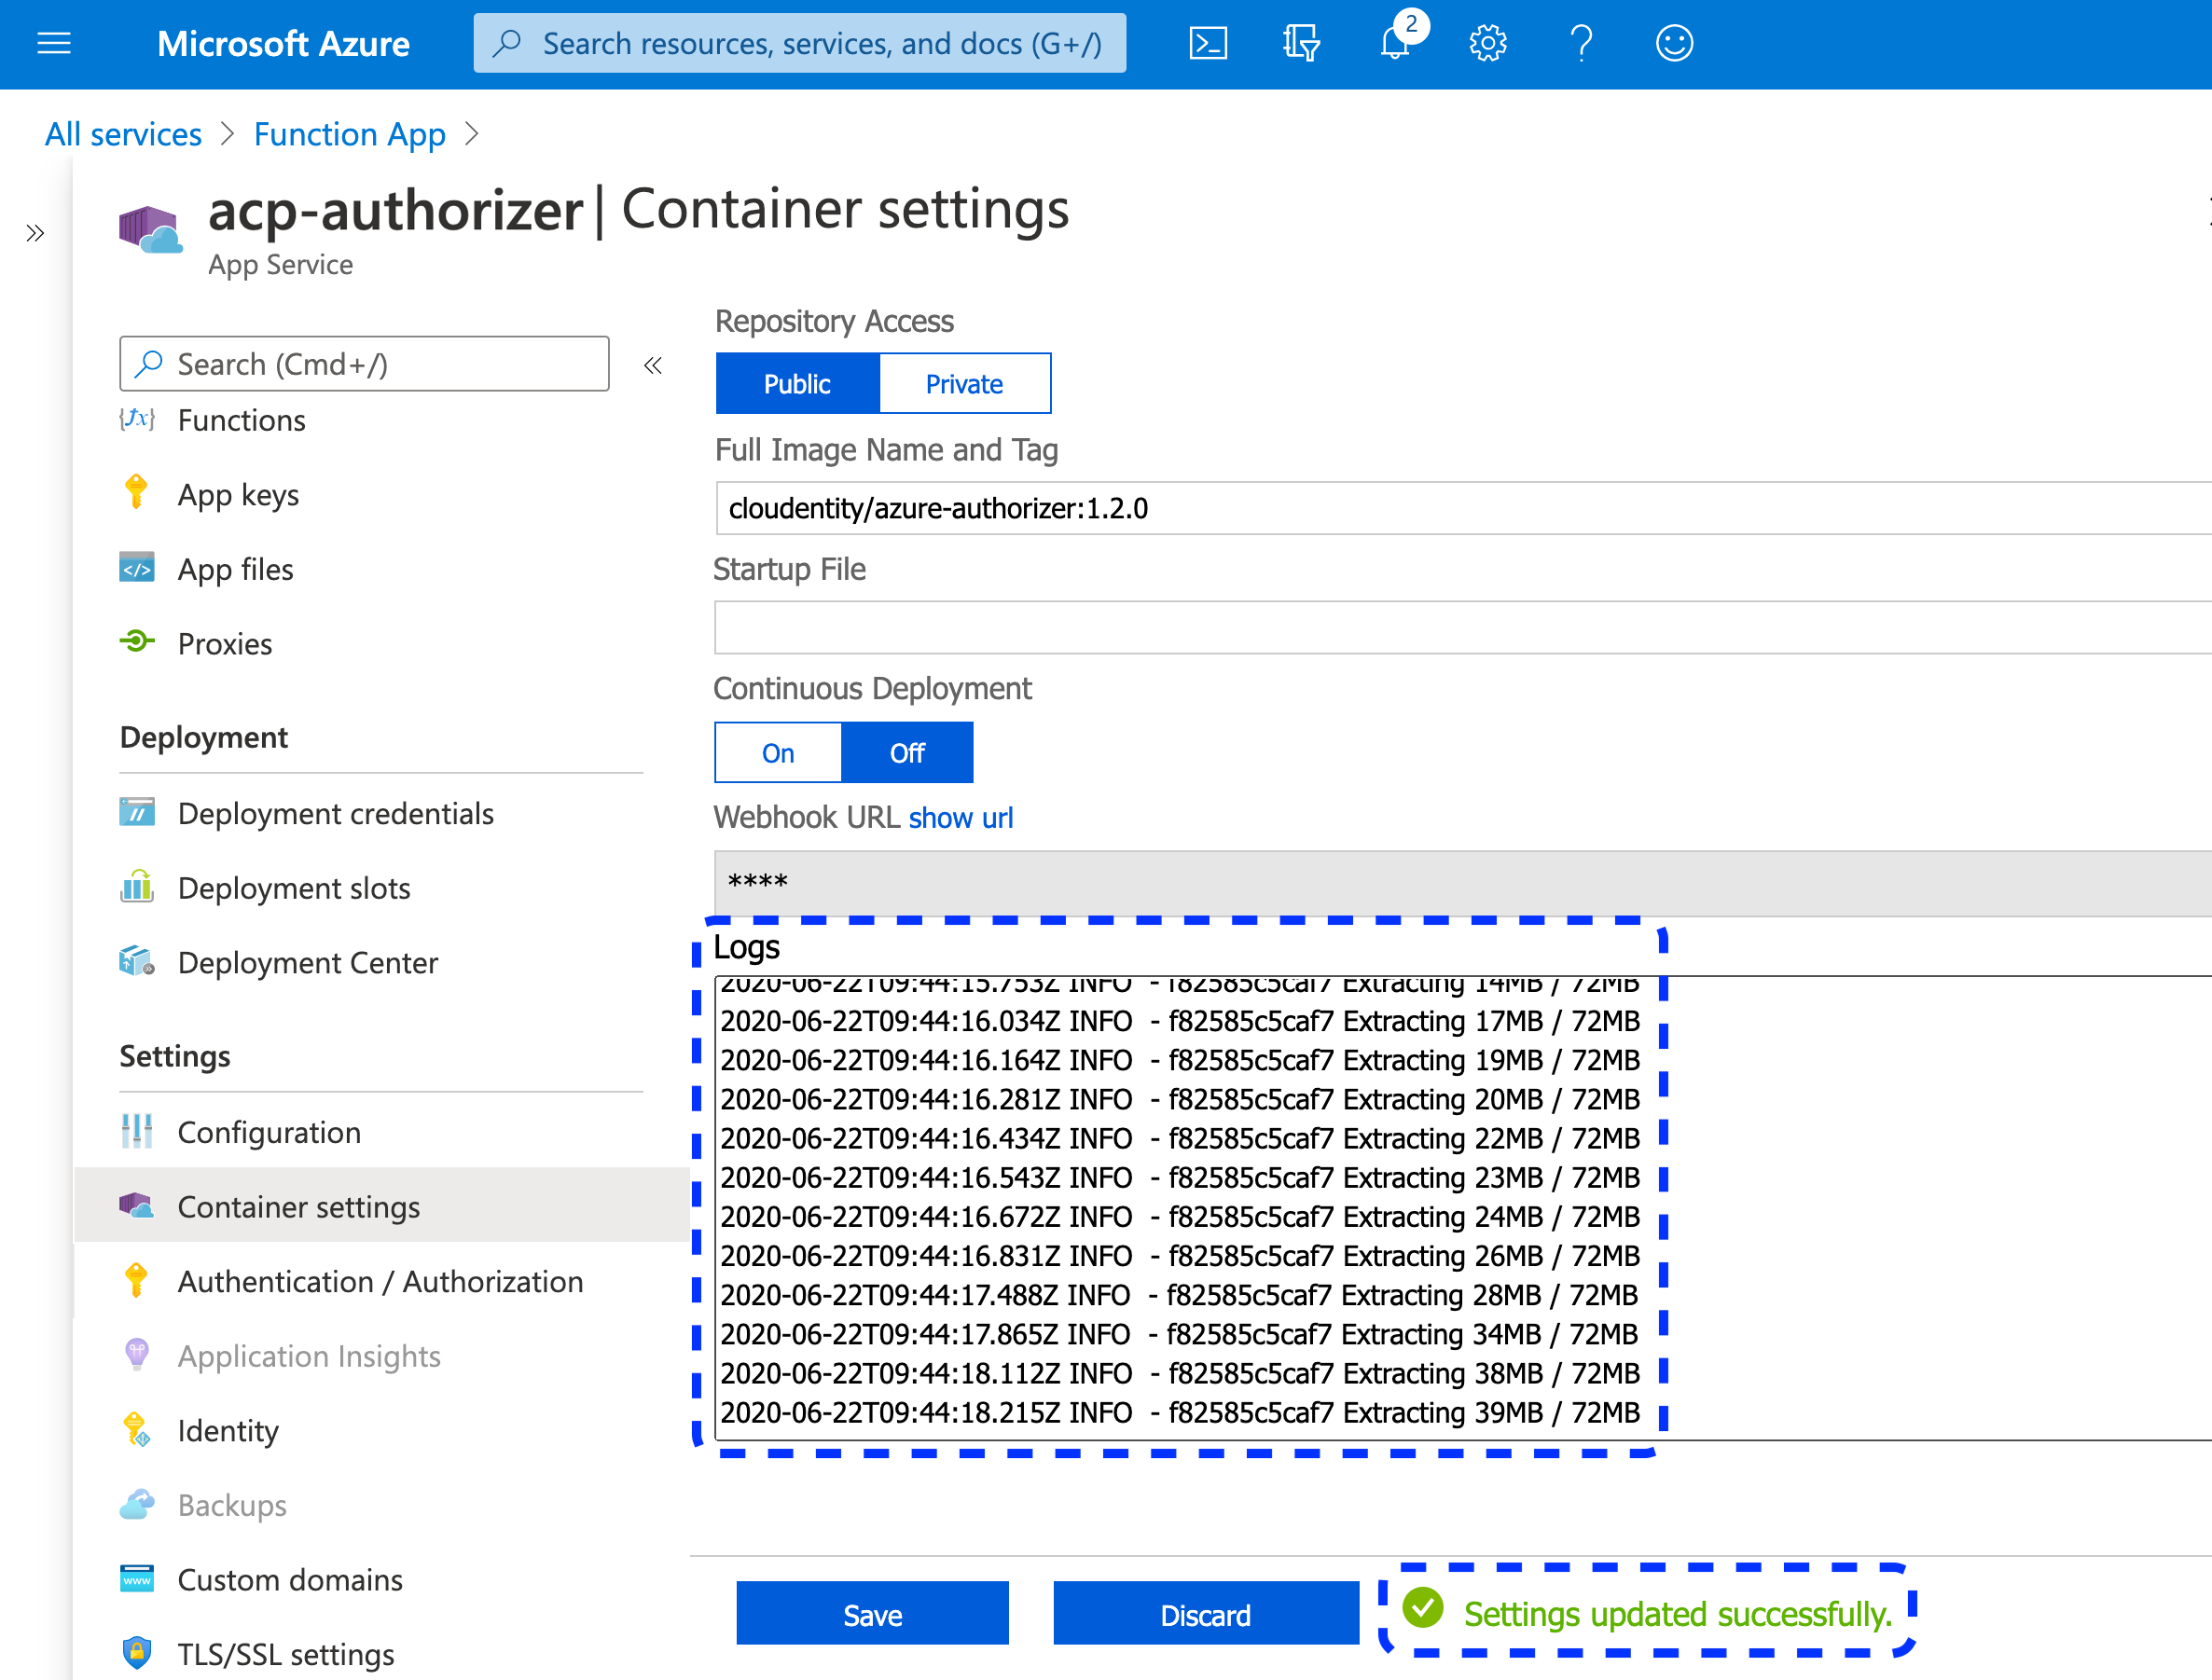
To deploy your Docker instance, select Container settings from the sidebar.
-
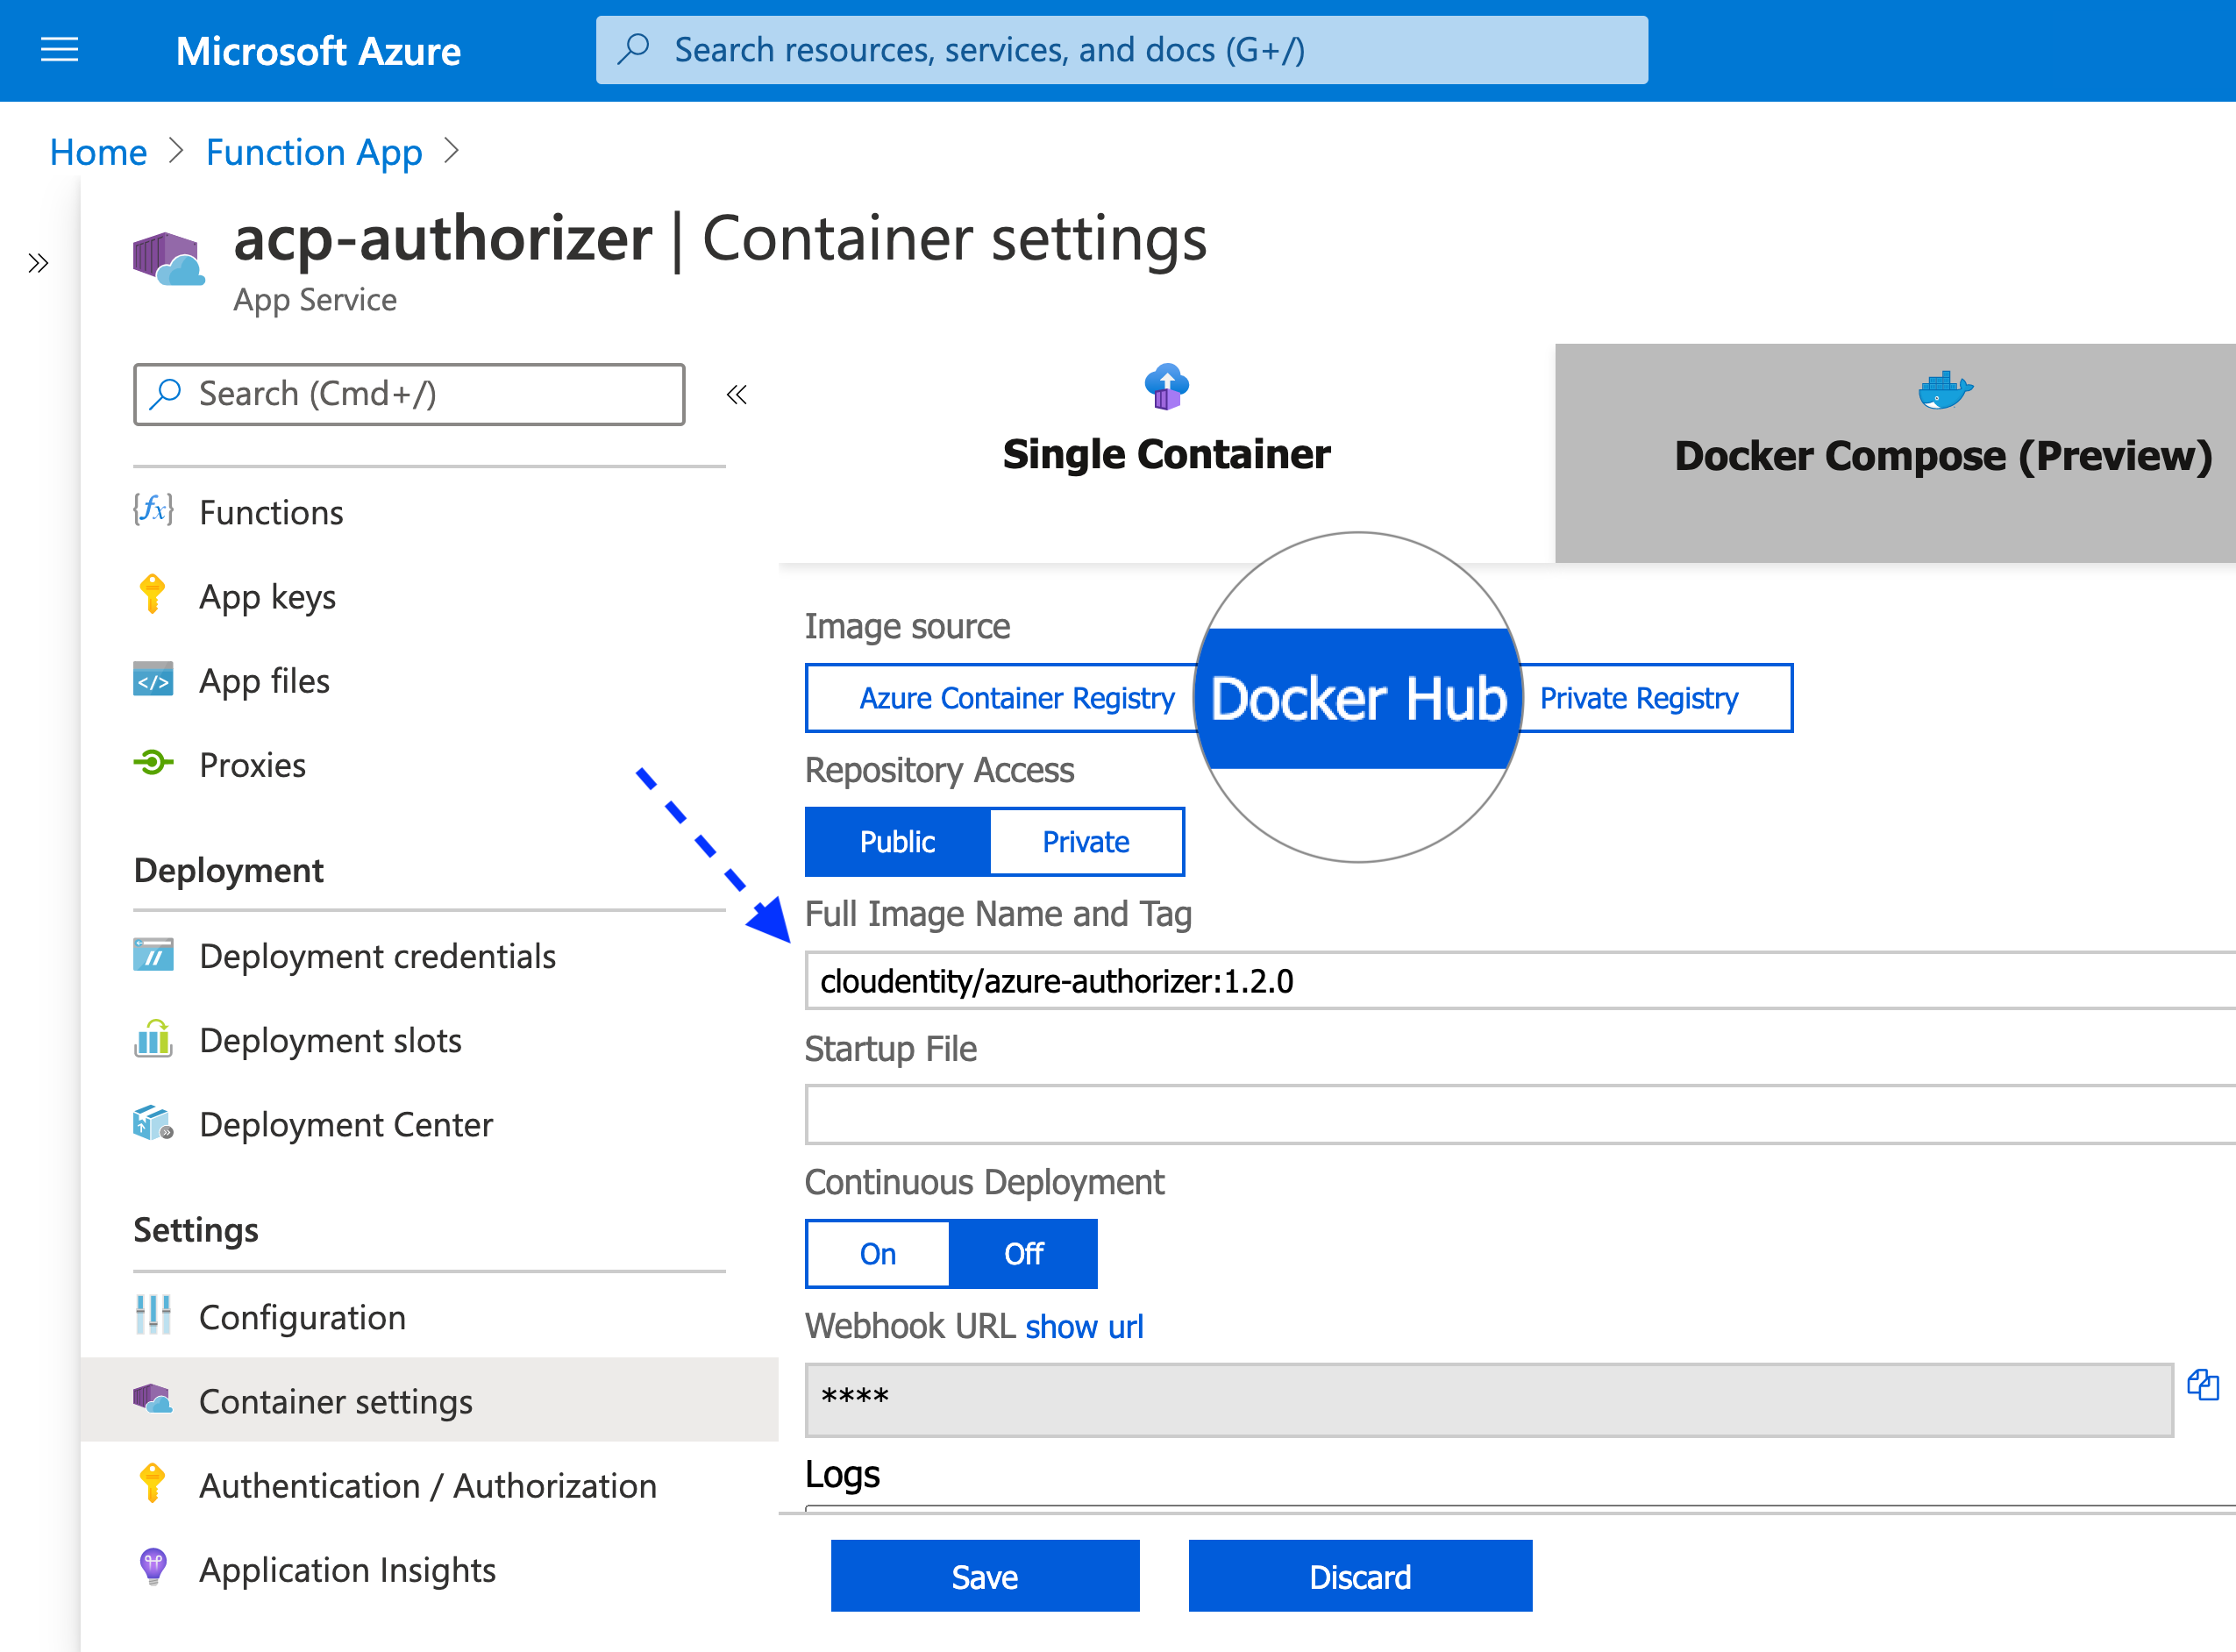
In the Container settings view
-
Select Docker Hub as an image source.
-
Enter Full Image Name and Tag, for example cloudentity/azure-authorizer:2.21.0.
-
Select Save and, next, Refresh.
Result
The Docker image gets downloaded. Check the logs and make sure that Settings updated successfully is displayed.
-
Connect Service
There are two ways to connect API groups to Cloudentity services: starting from the gateway to be connected or starting from the service that you want to connect.
From Gateway
-
From the list of available gateways, select your newly-created Azure gateway.
-
In the Gateway Management view, select the APIs tab.
Result
A list of imported API groups opens.
-
From the list of API groups available, select an API group and, from its drop-down menu, pick a service to which you’d like to connect the API group.
Note
You can connect an API group to an existing service or a new one you create, both options available from the same service drop-down menu.
From Service
-
Go to Enforcement > APIs.
-
Pick a service that you want to connect and select ADD GATEWAY API for the selected service.
-
In the Add Gateway API Group popup window, highlight an API group that you want to add and select CONNECT.
Result
In the APIs tab of the Gateway Management view, you can see specific API groups integrated to services.
Apply Sample Policy
-
Go to Enforcement > APIs.
-
Select a service protected by Azure to preview all the available APIs and click the Unrestricted button any API with no policy assigned.
-
In the popup window, select a Policy from the dropdown list and click Save.
Result
You’ve successfully applied a policy to the selected API.
Check If It Works
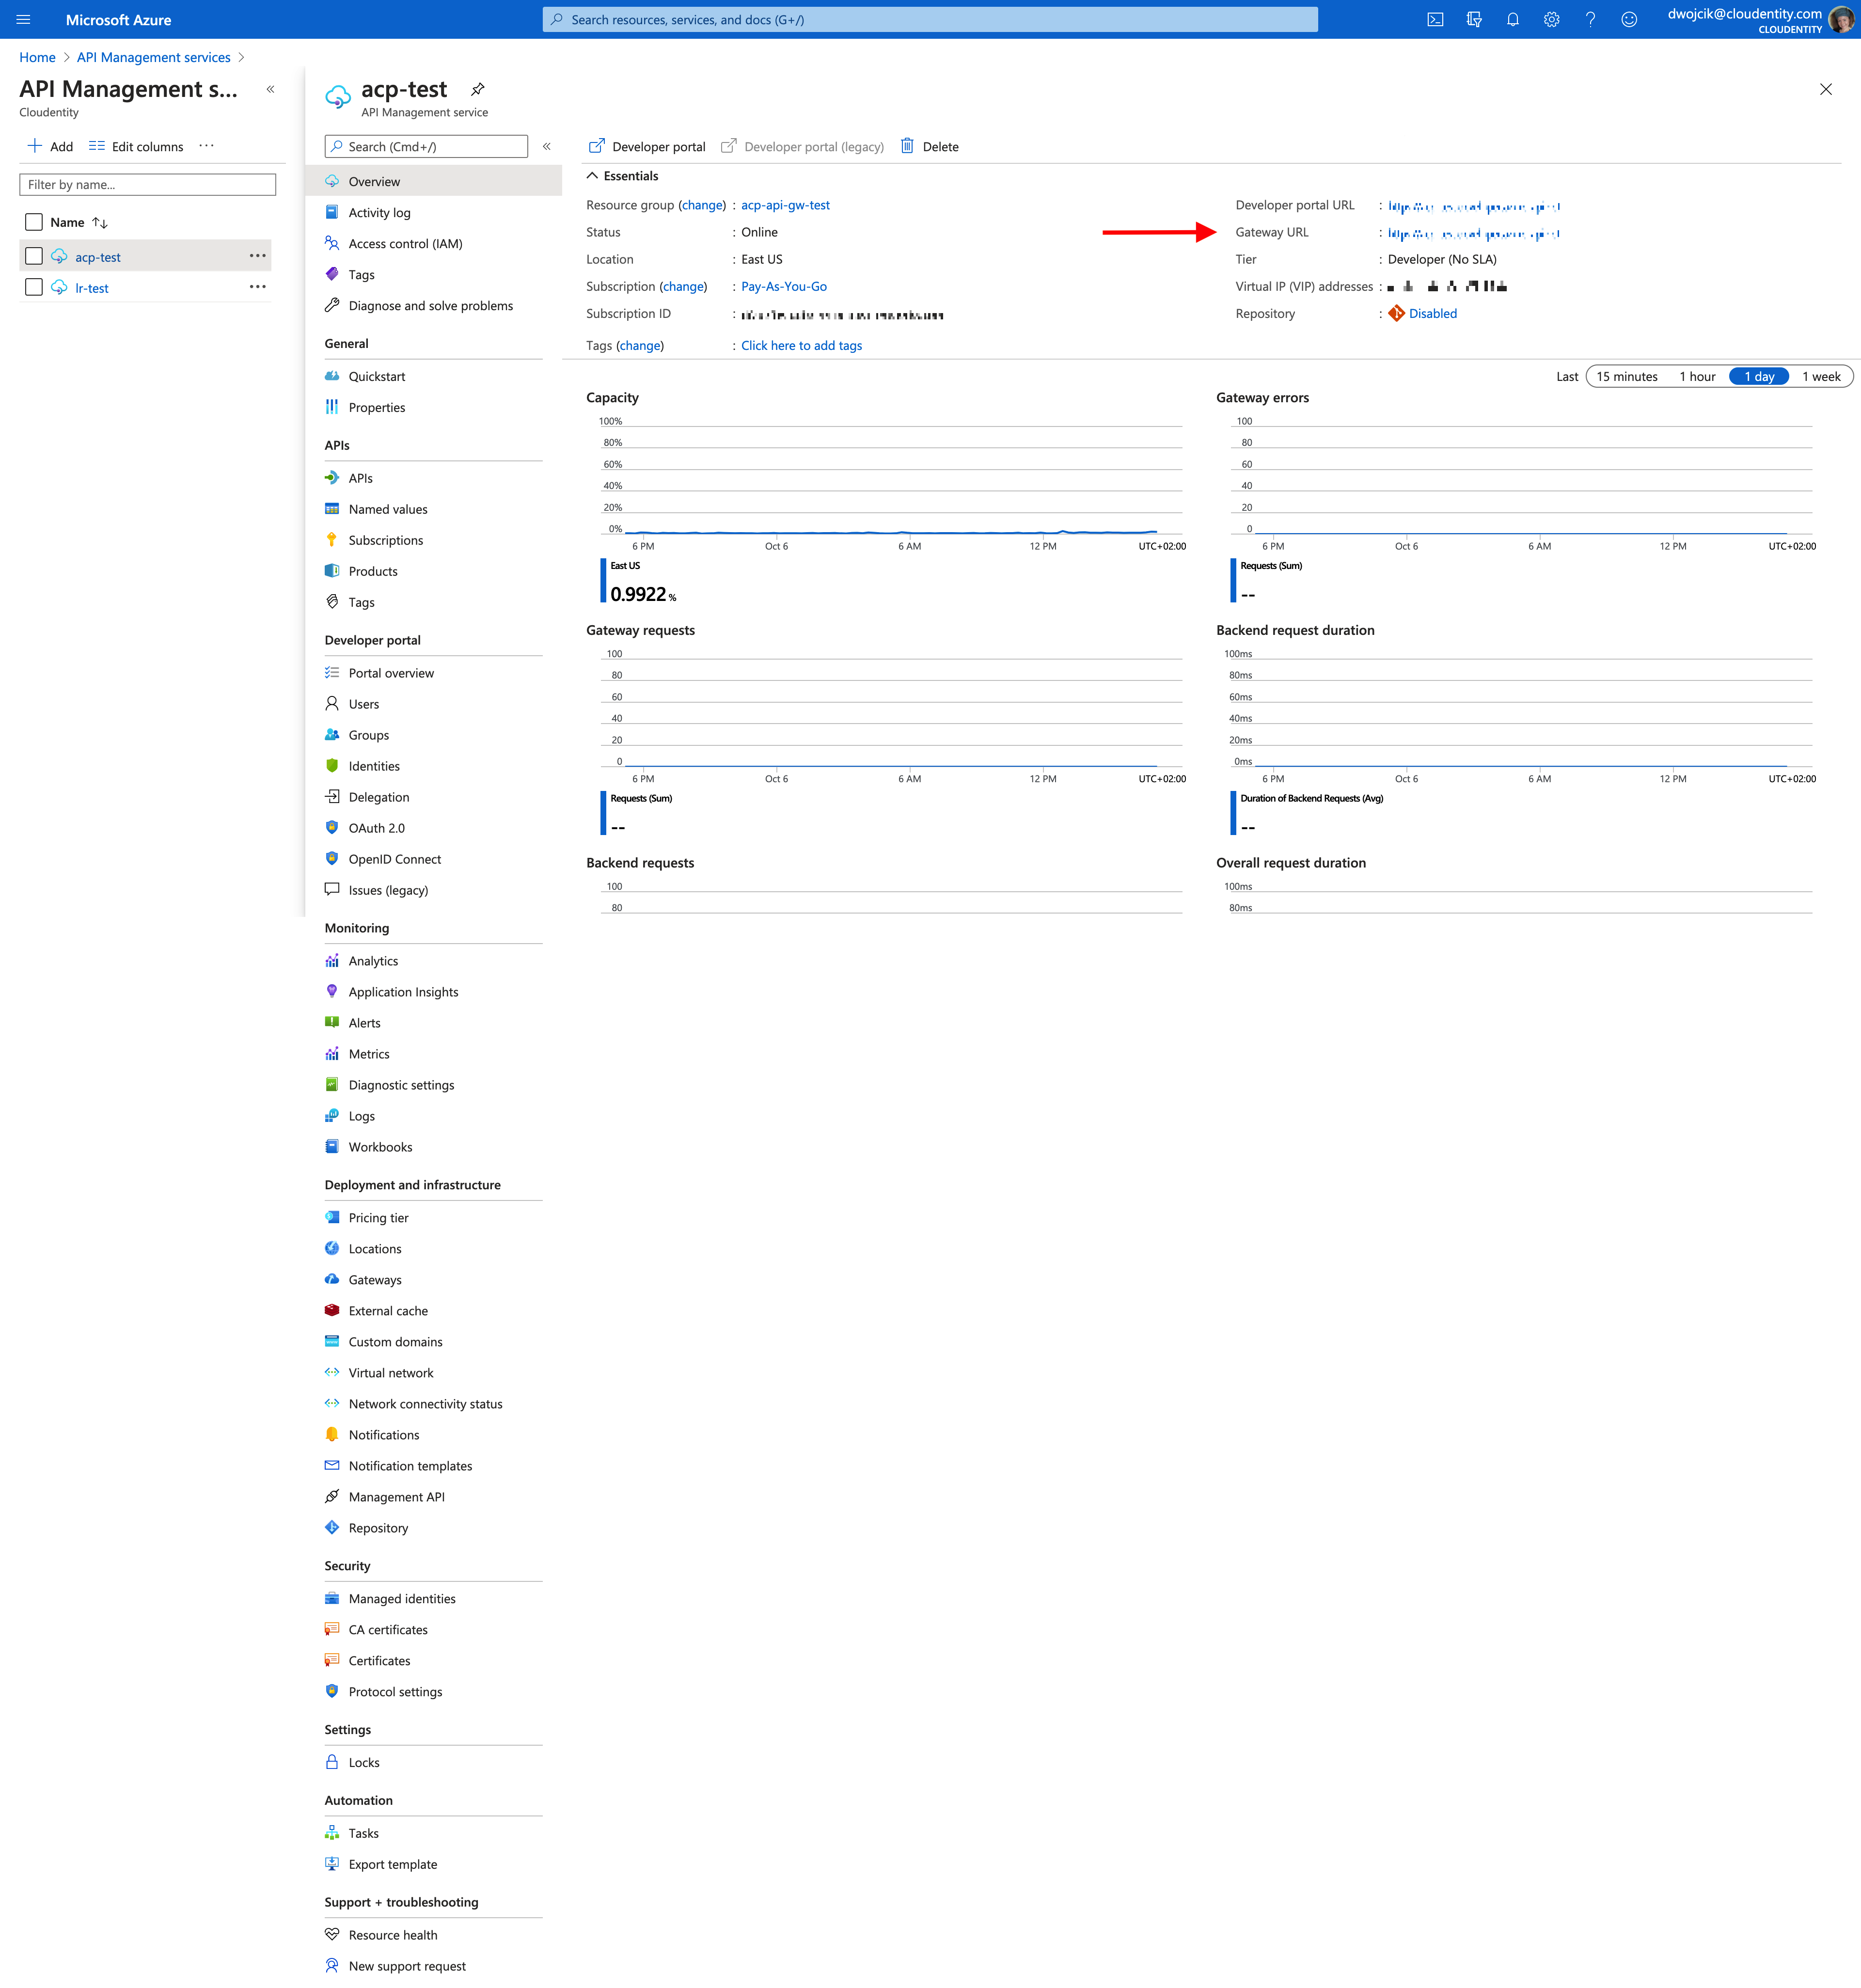
Call one of the APIs that your Azure API gateway hosts and note down the system’s response.
Note
For URL to perform your call to, navigate to Microsoft Azure > API Management services. Preview your service and copy Gateway URL.
Example
Visit
https://acp-test.azure-api.netin your browser.
If the policy applied in Cloudentity to the called API allows the access, you receive a response from a target service.
If your policy restricts the access, you receive a 403 error message.
Azure Authorizer Configuration Reference
For the Azure Authorizer, its configuration is adjusted by adding environment variables to your Cloudentity Azure Authorizer configuration in the Azure API Gateway portal. To know how to add environment variables for your authorizer, see the Setting environment variables section of the Protecting APIs on Azure API Gateway documentation.
Required Settings
| Setting | Type | Default | Description |
|---|---|---|---|
| ACP_ISSUER_URL | string | Defaults to the issuer URL for the workspace in which the authorizer is created | Your authorizer issuer URL |
| ACP_CLIENT_ID | string | Defaults to the client identifier of a client application that is created for your authorizer in the System workspace | Client identifier of your authorizer’s client application that is used for the purpose of authenticating your requests |
| ACP_CLIENT_SECRET | string | Defaults to the client secret of a client application that is created for your authorizer in the System workspace | Client secret of your authorizer’s client application that is used for the purpose of authenticating your requests |
| AZURE_SUBSCRIPTION_ID | string | - | Your Azure subscription identifier |
| AZURE_TENANT_ID | string | - | Your Azure tenant identifier |
| AZURE_CLIENT_ID | string | - | Client identifier for the Azure AD application that can access your resources. To learn more, see Creating an Azure ADD applications in Azure documentation and Registering an application section of the Protecting APIs on Azure API Gateway article. |
| AZURE_CLIENT_SECRET | string | - | Client secret for the Azure AD application that can access your resources. To learn more, see Creating an Azure ADD applications in Azure documentation and Registering an application section of the Protecting APIs on Azure API Gateway article. |
Optional Settings
| Setting | Type | Default | Description |
|---|---|---|---|
| LOGGING_LEVEL | string | info | Possible values from the most strict levels to the ones that give the most detailed information: error, warn, info, debug, trace. |
| CONFIG_SYNC_INTERVAL | time.Duration | 60s | Represents the frequency of fetching APIs from the Azure API Gateway and synchronizing it with Cloudentity. |
| ACP_RELOAD_INTERVAL | time.Duration | 30s | Represents the frequency of retrieving policies from Cloudentity by the authorizer. |
| ANALYTICS_ENABLED | bool | true | If true, turnes off the analytics for the Lambda Authorizer in Cloudentity’s Admin Panel Analytics. |
| ENFORCEMENT_ALLOW_UNKNOWN | bool | false | If set to false, the authorizer blocks every API request that does not match the provided criteria. |
| HTTP_CLIENT_ROOT_CA | string | - | Path to the root certificate for your authorizer’s client application. |
| HTTP_CLIENT_INSECURE_SKIP_VERIFY | bool | false | Disables certificate verification |
| AZURE_AUTHORIZER_TIMEOUT | int | 5s | Timeout for the authorizer’s HTTP client application |
| AZURE_STATIC_AUTHORIZER_URL | string | By default, the authorizer URL used in policies is discovered automatically. | Points to your authorizer domain if you use custom domains and non-standard deployment. |
| AZURE_WEBSITE_RESOURCE_GROUP | string | - | Specifies your Azure resource group. |
| AZURE_WEBSITE_HOSTNAME | string | - | Azure hostname for your website |