Feature flag
Post Authentication applications must be explicitly enabled in your tenant using the
custom_appsfeature flag. To enable the feature, contact Cloudentity Sales Team.
Register Application in Cloudentity
-
Go to Extensions > Custom Apps.
-
Click + Custom Application.
-
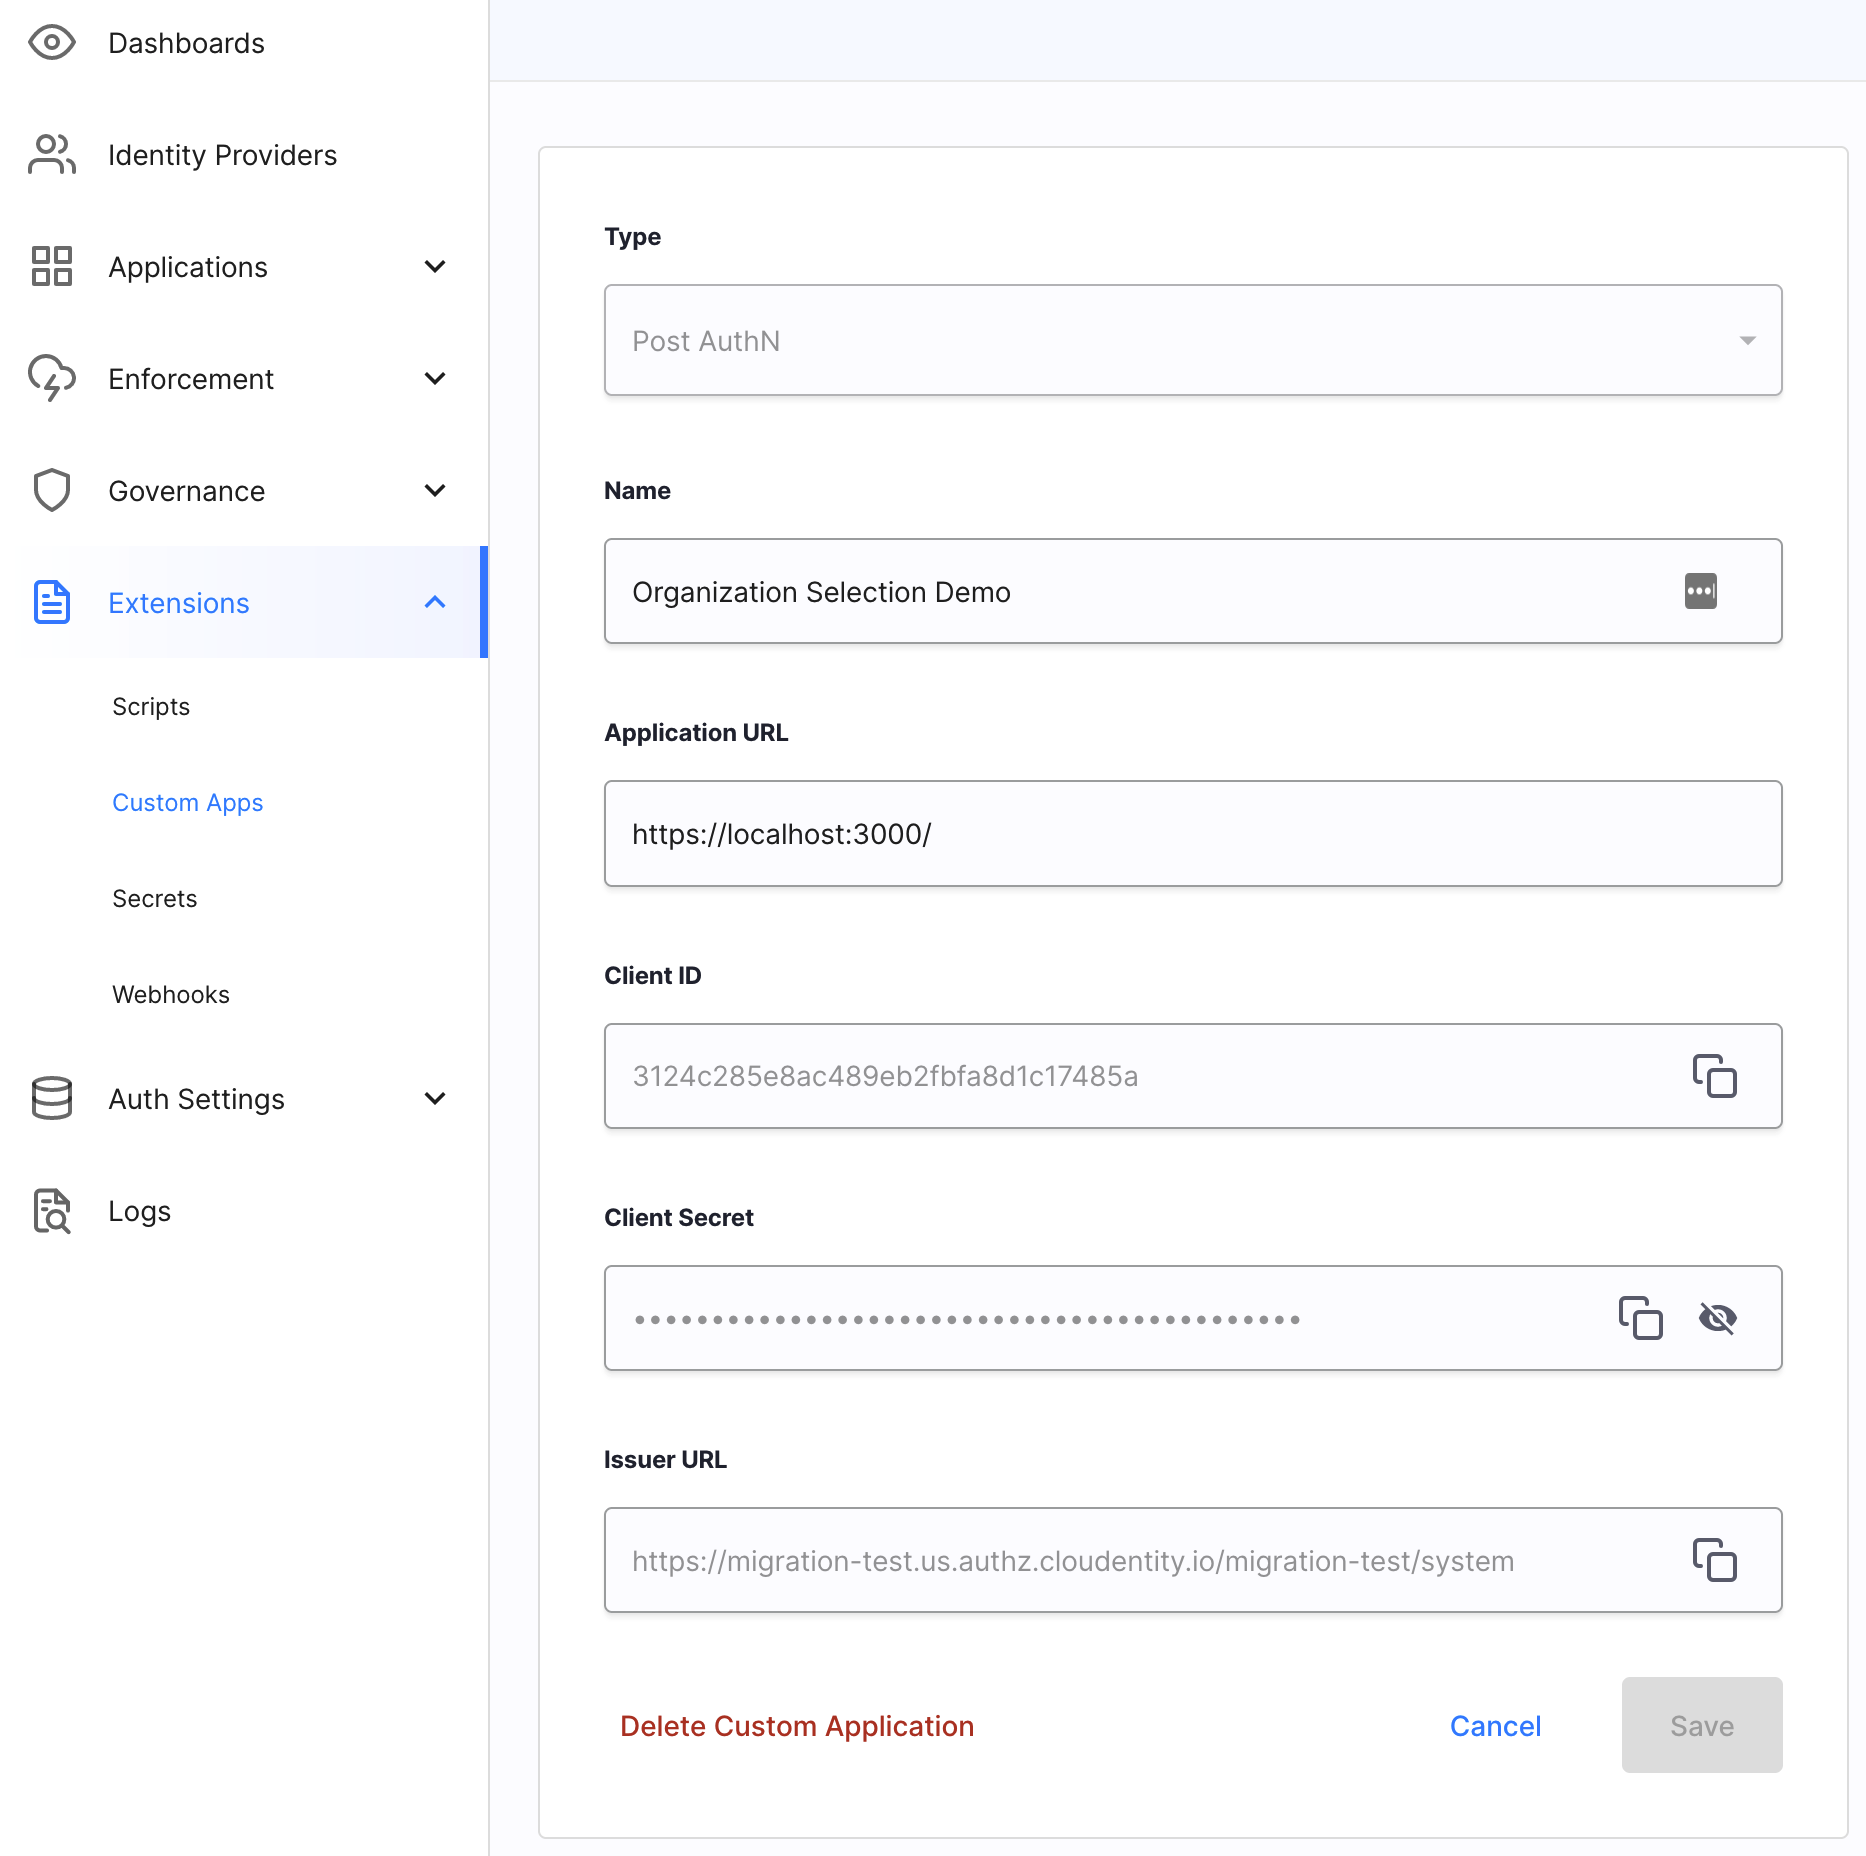
Fill in the application data.
Field Description Type Application type Name Name to identify this application Application URL Your third-party application URL that Cloudentity will redirect the user to during the authentication process -
Click Create.
Your application is now added to Cloudentity as a client in the system workspace. It generates a Client ID and Client Secret so that your application can authenticate with Cloudentity to perform various operations.
Example Third-party Application registration
Associate Application to IDP
-
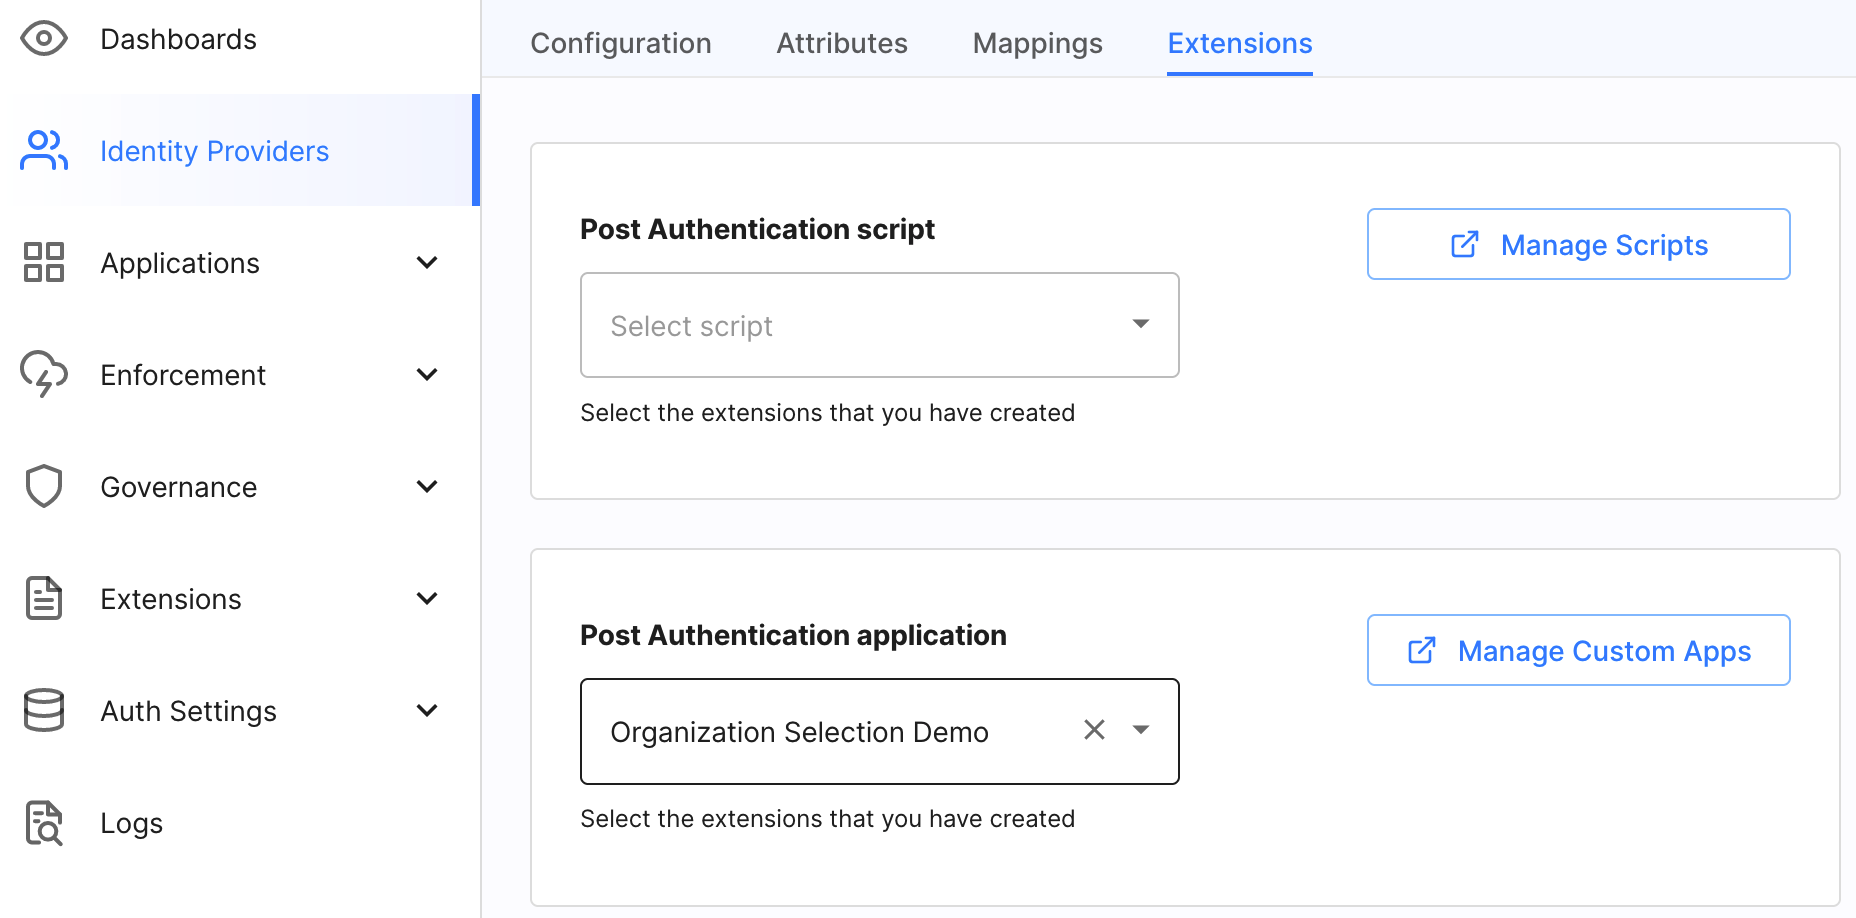
Go to Authentication » Providers » IDP of your choice » Extensions.
-
In the Post Authentication application field, select your application. Once selected, users will be redirected to the application after login.
Example Third-party Application association
Post-Authn Success Flow
Use case: After authentication, the Post-Authn Third-party Application prompts the user for additional information and that information is added to the user’s authentication context.
Abstract Flow
Add Post-AuthN Success Flow
-
Cloudentity Authenticates the user
-
Cloudentity redirects to the
Application URLspecified in your Custom App configuration and adds a query string with login_id and login_state.https://myapplication.com?login_id=REDACTED&login_state=REDACTED-
The Third-party Application receives the redirect with the query string.
-
Authenticate to Cloudentity using
client_secret_basicmethod with the generated credentials from registering the Third-party Application (Client ID, Client Secret) POST Authn-client-secret-basic. -
Retrieve the user’s current session GET post-authn-session.
-
Retrieve additional information from Third-Party datastore.
-
Display options to user.
-
User selects an option and clicks Submit.
-
Construct the Authn Complete JSON and put the user selected values into the authentication_context
{ "authentication_context":{ # User's authentication context "organizationId":"6502", # Additional attributes "organizationName":"Acme Inc.", "permissions":[ "acme:ViewDashboard", "acme:CreateOrder", "acme:ViewOrder" ] }, "id":"REDACTED", # Required login_id "login_state":"REDACTED" # Required login_state } -
Send post-auth Complete with the authentication_context POST post-authn-complete.
-
Receive Cloudentity response containing redirect.
{ "redirect_to":"https://my-tenant.us.authz.cloudentity.io/my-tenant/my-workspace/oauth2/authorize?..." } -
Execute the
redirect_tocontained in the Cloudentity response.
-
-
Cloudentity proceeds to the next step in the Authentication process.
Post-Authn Abort Flow
Use case: After authentication, the Post-Authn Third-party Application process failed.
-
Cloudentity authenticates the user.
-
Cloudentity redirects to the
Application URLspecified in your Custom App configuration and adds a query string withlogin_idandlogin_state:https://myapplication.com?login_id=qwerty&login_state=asdfg-
The Third-party Application receives the redirect with the query string.
-
Authenticate to Cloudentity using
client_secret_basicmethod with the generated credentials from registering the Third-party Application (Client ID, Client Secret) POST Authn-client-secret-basic. -
Retrieve the user’s current session via GET post-authn-session.
-
Retrieve additional information from Third-Party datastore.
-
An error occurs or the user lacks permission, organization, etc.
-
Construct the abort JSON.
{ "status":403, "error":"AccessDenied", "error_description":"User denied access", "id":"REDACTED", "login_state":"REDACTED" } -
Send post-auth Abort with the abort JSON via POST post-authn-abort.
-
Receive Cloudentity response containing redirect
{ "redirect_to":"https://my-tenant.us.authz.cloudentity.io/my-tenant/my-workspace/oauth2/authorize?..." } -
If the Cloudentity error page is desired, execute the
redirect_tocontained in the Cloudentity response. -
Else, display third-party error page. The Third-party Application does not return to Cloudentity in this case.
-
-
If redirected back to Cloudentity, Cloudentity displays a generic authentication failure message.