Consent Page for Open Banking UK
The consent page is a website displaying a consent form in which the end user can specify what data to share with the Fintech app from the bank.
For banks operating in the Open Banking ecosystem, it’s essential to to provide the consent page that complies to the Open Banking specifications.
There are a number of guidelines defining how the consent page needs to work to be Open-Banking-compliant. OB standards specify how the consent page needs to be built in terms of its backend and frontend.
Read More
For more information on the OB requirements see the following:
Consent page UI/UX, see Account Information Consent.
Consent page APIs, see Account Access Consents documentation in the Open Banking UK documentation.
How Consent Pages Work
Open Banking consent page needs to display the user’s accounts and permissions that the Fintech application requests. To make the custom consent page display all the essentials for a particular user, the bank developer needs to create a page that
-
Integrates with/calls bank-internal APIs for the list of user’s accounts
-
Integrates with/calls Cloudentity-internal APIs for details on the access consent of the requested account (provided as JSON).
Consent-page Flow
-
The user logs in and gets authenticated.
-
Cloudentity redirects the user to the custom consent page.
Result
login_idandlogin_stateare sent to the custom consent page. -
The custom consent page calls Cloudentity to acquire details on the access consent of the requested account.
curl "https://authorization.cloudentity.com:8443/api/system/default/open-banking/account-access-consent/43579ea6860f6" \
-H "Authorization: Bearer PUT-CLIENT-CREDENTIALS-ACCESS-TOKEN-HERE"
{ "consent_id":"bumh9la8sbs8k5btpqmg", "creation_date_time":"2020-11-11T10:56:21.087Z", "creation_date_time":"2020-11-12T10:56:21.087Z", "permissions":[ "ReadAccountsBasic" ], "requested_scopes":[ { "authorization_server_id":"openbanking", "description":"This scope value requests access to the sub claim which uniquely identifies the user.", "display_name":"OpenID", "id":"bugkg8q3g9kregtu04ng", "name":"openid", "params":[ ], "requested_name":"openid", "tenant_id":"default", "with_service":true, "service":{ "audience":"spiffe://localhost/default/openbanking/bugkg8q3g9kregtu04l0", "authorization_server_id":"openbanking", "id":"bugkg8q3g9kregtu04l0", "name":"Profile", "system":true, "tenant_id":"default" } }, { "authorization_server_id":"openbanking", "description":"Ability to read Accounts information", "display_name":"Accounts", "id":"bugkg8q3g9kregtu04tg", "name":"accounts", "params":[], "requested_name":"accounts", "tenant_id":"default", "with_service":true, "service":{ "audience":"spiffe://localhost/default/openbanking/bugkg8q3g9kregtu04t0", "authorization_server_id":"openbanking", "id":"bugkg8q3g9kregtu04t0", "name":"Openbanking", "system":true, "tenant_id":"default" } } ], "status":"AwaitingAuthorisation", "status_update_date_time":"2020-11-12T11:56:21.087Z", "subject":"user", "transaction_from_date_time":"2020-11-11T10:43:39.398Z", "transaction_to_date_time":"2020-11-12T10:43:39.398Z" }Response
As a response, the developer receives a JSON file including information on
-
Permissions requested by the application
-
List of requested scopes
-
User’s identifier (
subject).
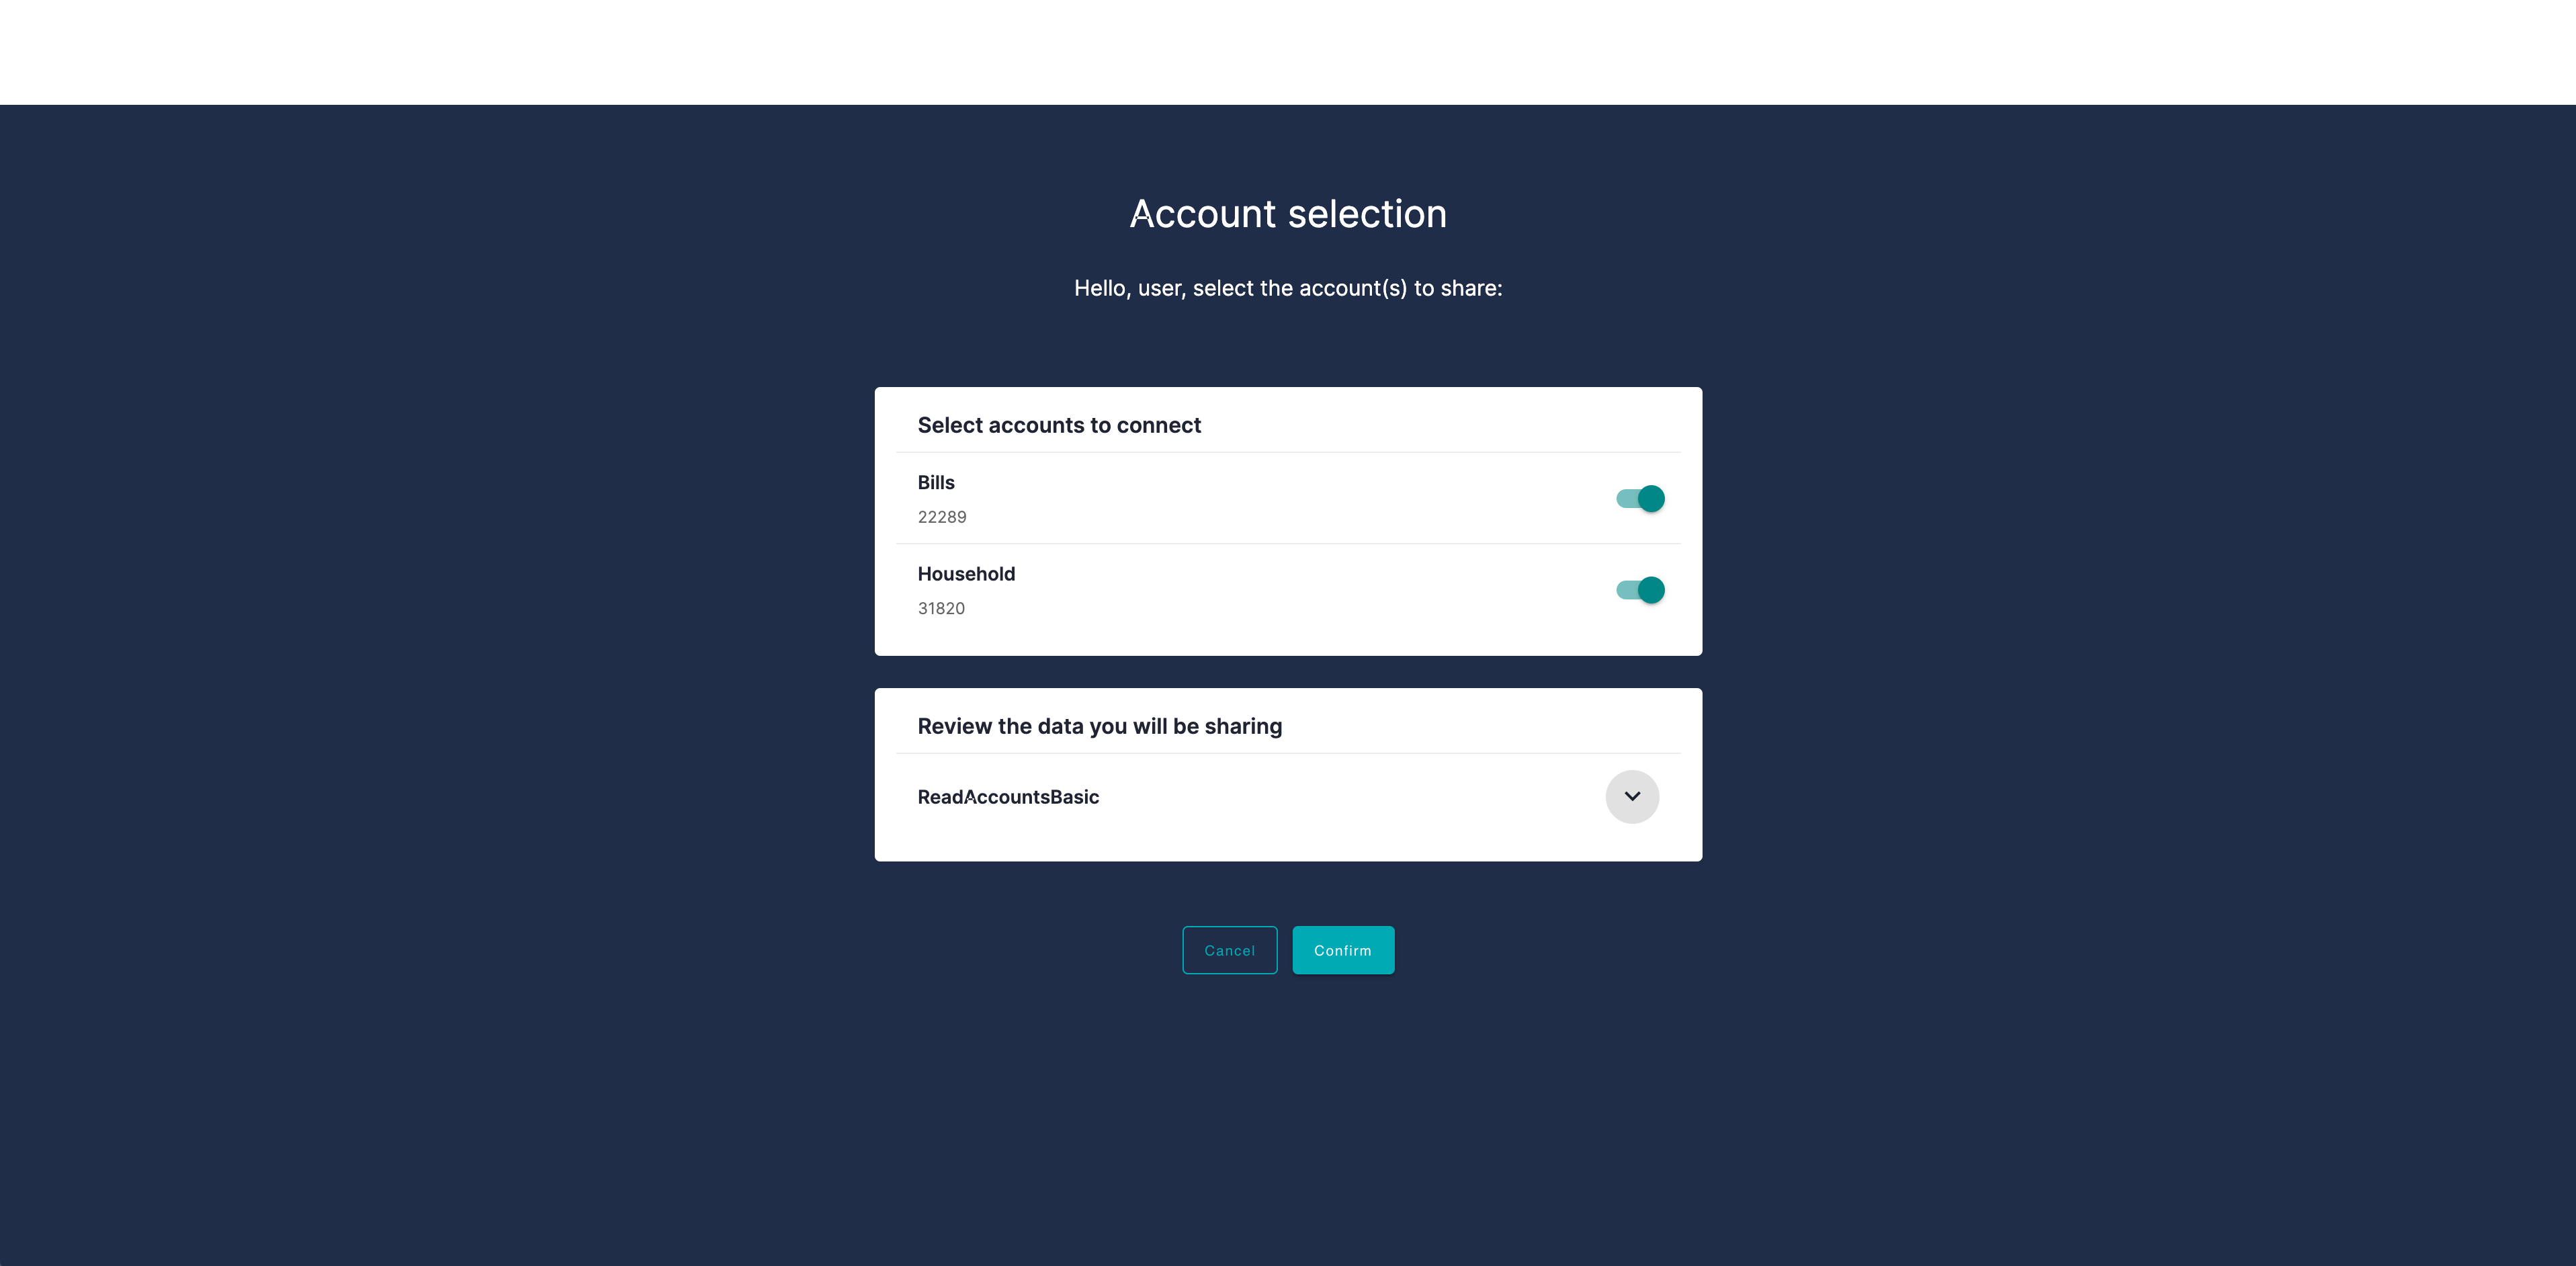
The Consent Page Displays
- List of accounts that belong to the user, which is bank-specific and, hence, excluded from this article.
- List of permissions.
-
-
The consent page calls Cloudentity to approve or deny the account access consent and redirects the user to the returned redirect URL.
More Information On The Consent Page
The consent page needs to pass
login_statefrom query parameters to the body of the accept account consent request and uselogin_idfrom query parameters aslogin_idin the path to the accept account access consent request.The consent page is to provide
-
Account IDs that the user agrees to share. They are available as
account_idsin the body of the accept account access consent request. -
Scopes to be granted. The list of requested scopes is available in the get account access consent response body. They are available as
granted_scopesin the body of the accept account access consent request.
curl -X POST "https://authorization.cloudentity.com:8443/api/system/default/open-banking/account-access-consent/43579ea6860f6/accept" \ -d '{ "login_state": "29n93", account_ids": ["1234", "5678"], "granted_scopes": ["openid", "accounts"]}' \ -H "Authorization: Bearer PUT-CLIENT-CREDENTIALS-ACCESS-TOKEN-HERE" {"redirect_to": "https://authorization.cloudentity.com:8443/default/default/oauth2/authorize?..."} -
Open Banking Quickstart
You can see see how the custom consent page works in the Open Banking environment by visiting the Cloudentity Open Banking Quickstart. This project is an artificial bank environment where you can go through mock banking-Fintech scenarios and check how a sample application produces the custom consent page. The OB scenarios cover the flow of custom consents, which enables you to explore the technical details on the consent page provided in the quickstart.
Check out the Cloudentity OB Quickstart here
In the quickstart, you can try TPP SAMPLE APP (Fintech application) at https://localhost:8090/, which
can give you a good idea of how the custom consent works and looks like.
Note
For details on how to set up the sandbox environment and run a sample Fintech app, see Get the sandbox and Check the backend in Open Banking flow of actions powered by Cloudentity.
After running TPP SAMPLE APP in the quickstart and logging in with the IDP, you are redirected to the custom consent page.
Note
You can specify URL for redirection to the custom consent page in Cloudentity.
Build the Consent Page with Cloudentity
Prerequisites
-
Enable the custom consent page and add the consent URL in your workspace settings in the Cloudentity portal.
More information
See Enabling the custom consent page in Cloudentity for information on how to set up your workspace to use the custom consent page.
-
In the system workspace, create an application that
-
Uses the client credentials flow to authorize to internal APIs of Cloudentity.
-
Has the
openbanking_manage_consentsscope assigned.
Note
It’s recommended to use mTLS as a token authentication method.
-
Set Up the Consent Page in Cloudentity
In Cloudentity, you can configure where the end user is redirected after being logged in.
Read More
For the instruction on how to configure consent page settings in Cloudentity, see Enabling the custom consent page in Cloudentity.
Use Specific Cloudentity APIs
To learn how to create your custom consent page, visit Cloudentity OB Quickstart and explore TPP SAMPLE APP (
https://localhost:8090/). The TPP-SAMPLE-APP scenario helps you understand how the custom consent page is build.
You need to build and configure your consent page so that it communicates with Cloudentity. For this purpose, Cloudentity provides three system APIs that you need to use while developing your application:
- GET
/api/system/{tenant_id}/open-banking/account-access-consent/{login_id}for getting the account access consent - POST
/api/system/{tenant_id}/open-banking/account-access-consent/{login_id}/acceptfor accepting the account access consent - POST
/api/system/{tenant_id}/open-banking/account-access-consent/{login_id}/rejectfor rejecting the account access consent.
Note
login_idis provided as a query parameter when the user gets redirected to the consent page.
Read More
For information on how to integrate your custom consent page with Cloudentity, see Integrating the custom consent page with Cloudentity.
Comply to OB Standards
Configure your custom consent page using the information in the JSON returned from
Cloudentity
after calling GET
/api/system/{tenant_id}/open-banking/account-access-consent/{login_id}.
-
Retrieve and display the accounts list
Use the value of
subjectto integrate with the bank so that your consent page can display a list of accounts for a specific user who is logged in.subjectis an identifier of the logged-in user. If you integrate with the bank using a specificsubject, the bank can identify the user whose list of accounts is requested. -
Display the permissions list
Make your consent page display the list of permissions so that the end user can see what the Fintech app requests for, for example
ReadAccountBasic.