Enable SSO
-
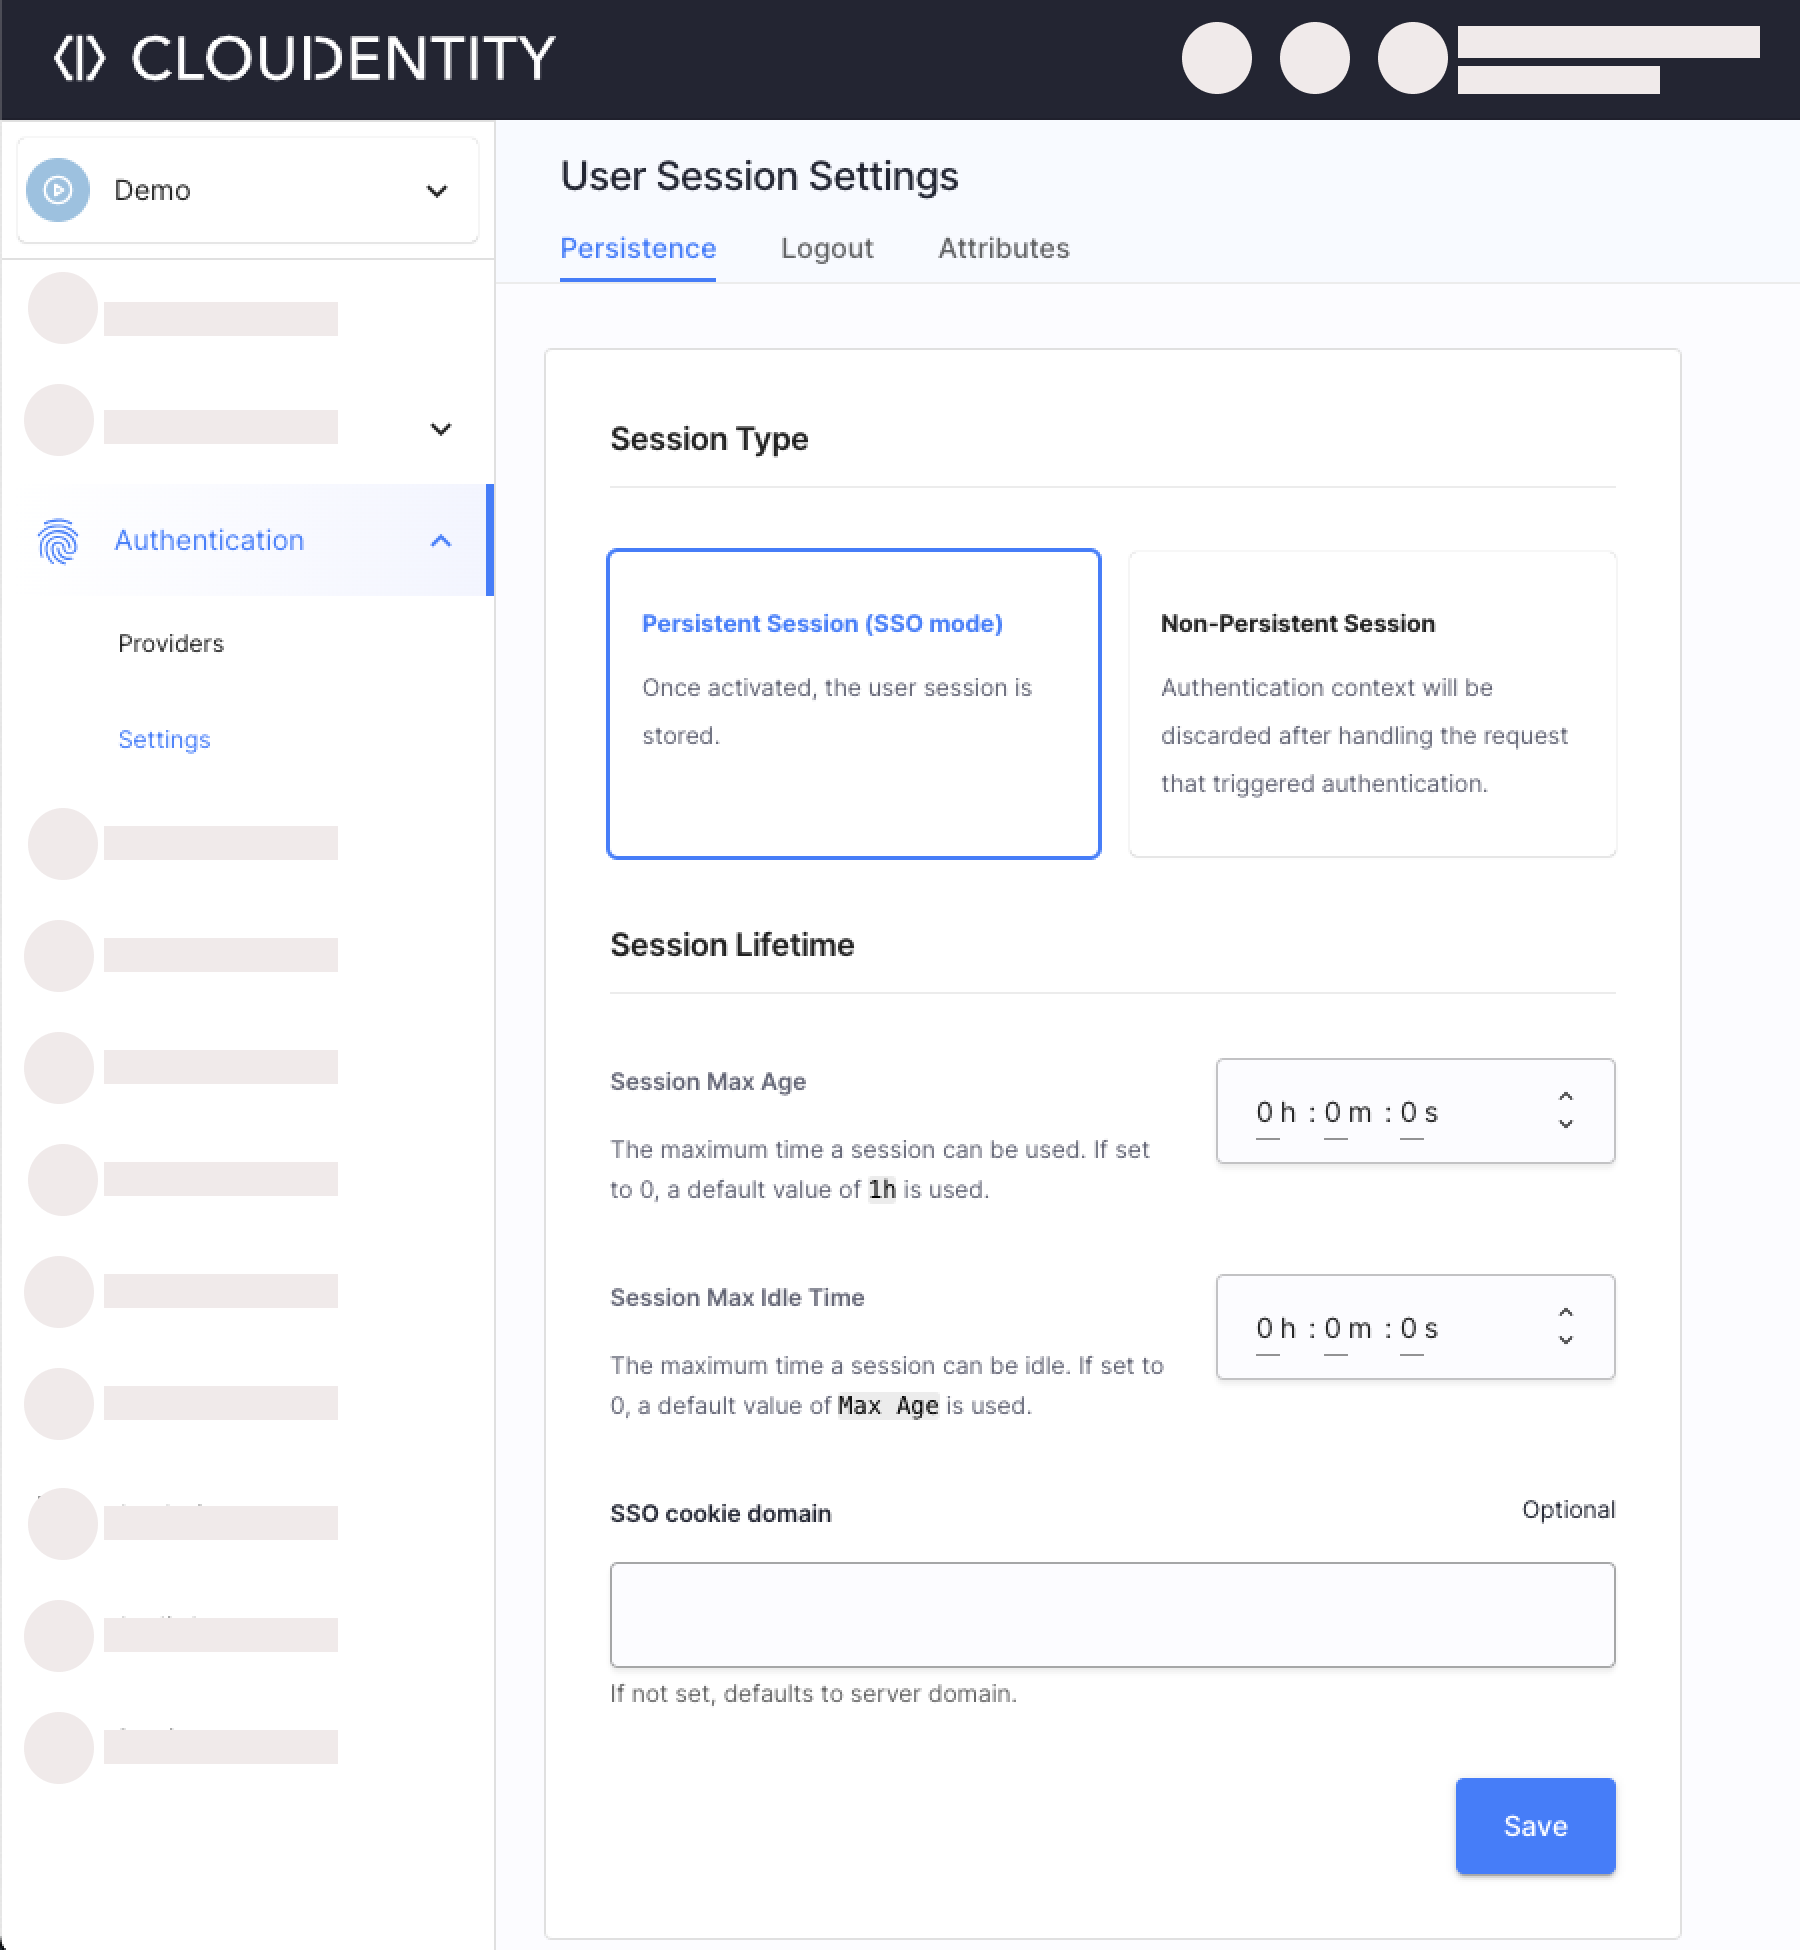
Select Authentication » Settings » Persistence in a workspace of your choice.
-
Enable the Persistent Session (SSO mode) option.
Result
Once logged into an application linked to Cloudentity, users can use that session to access all applications in the workspace without re-authenticating, as long as the session remains valid.
-
Configure the SSO-related settings:
Setting Description Session Max Age Time after which the authenticated user’s session expires, requiring them to reauthenticate. Session Max Idle Time Time after which an inactive user’s session expires, requiring them to reauthenticate. SSO cookie domain Domain where the SSO cookie is stored for authenticated users. Defaults to the authorization server’s domain if unspecified. If included, the SSO Cookie Domain is automatically added as the allowed logout redirect domain (see below). Allowed Logout Redirect Domains Allowed domains that applications can use to redirect users to after they log out from the application. Those domains are valid only if the redirect_toparameter is included as the part of a request to the/authorizeendpoint.Post-Logout Redirect URL A default logout URL where user gets redirected to after they are logged out and no redirect_toparameter value is provided in the application’s request.