Prerequisites
-
Third-party Identity Provider connected and configured.
If you wish to provision users signing in to regular web applications, connect the Identity Provider in the same workspace your application is added.
If you wish to provision users that will administer your Cloudentity tenant/workspace(s), make sure you connect the IDP in the Admin workspace of your tenant. If you do not have access to the Admin workspace, contact Cloudentity Sales Team.
For testing purposes, you may use Identity Pools or Sandbox IDP.
-
You can create a separate Identity Pool for only provisioned users or reuse any of the pools you created before.
Enable Just-in-Time (Automated) Provisioning
-
In a workspace of your choice, select Authentication » Providers and pick the Identity Provider from which you want to provision users to Identity Pool.
-
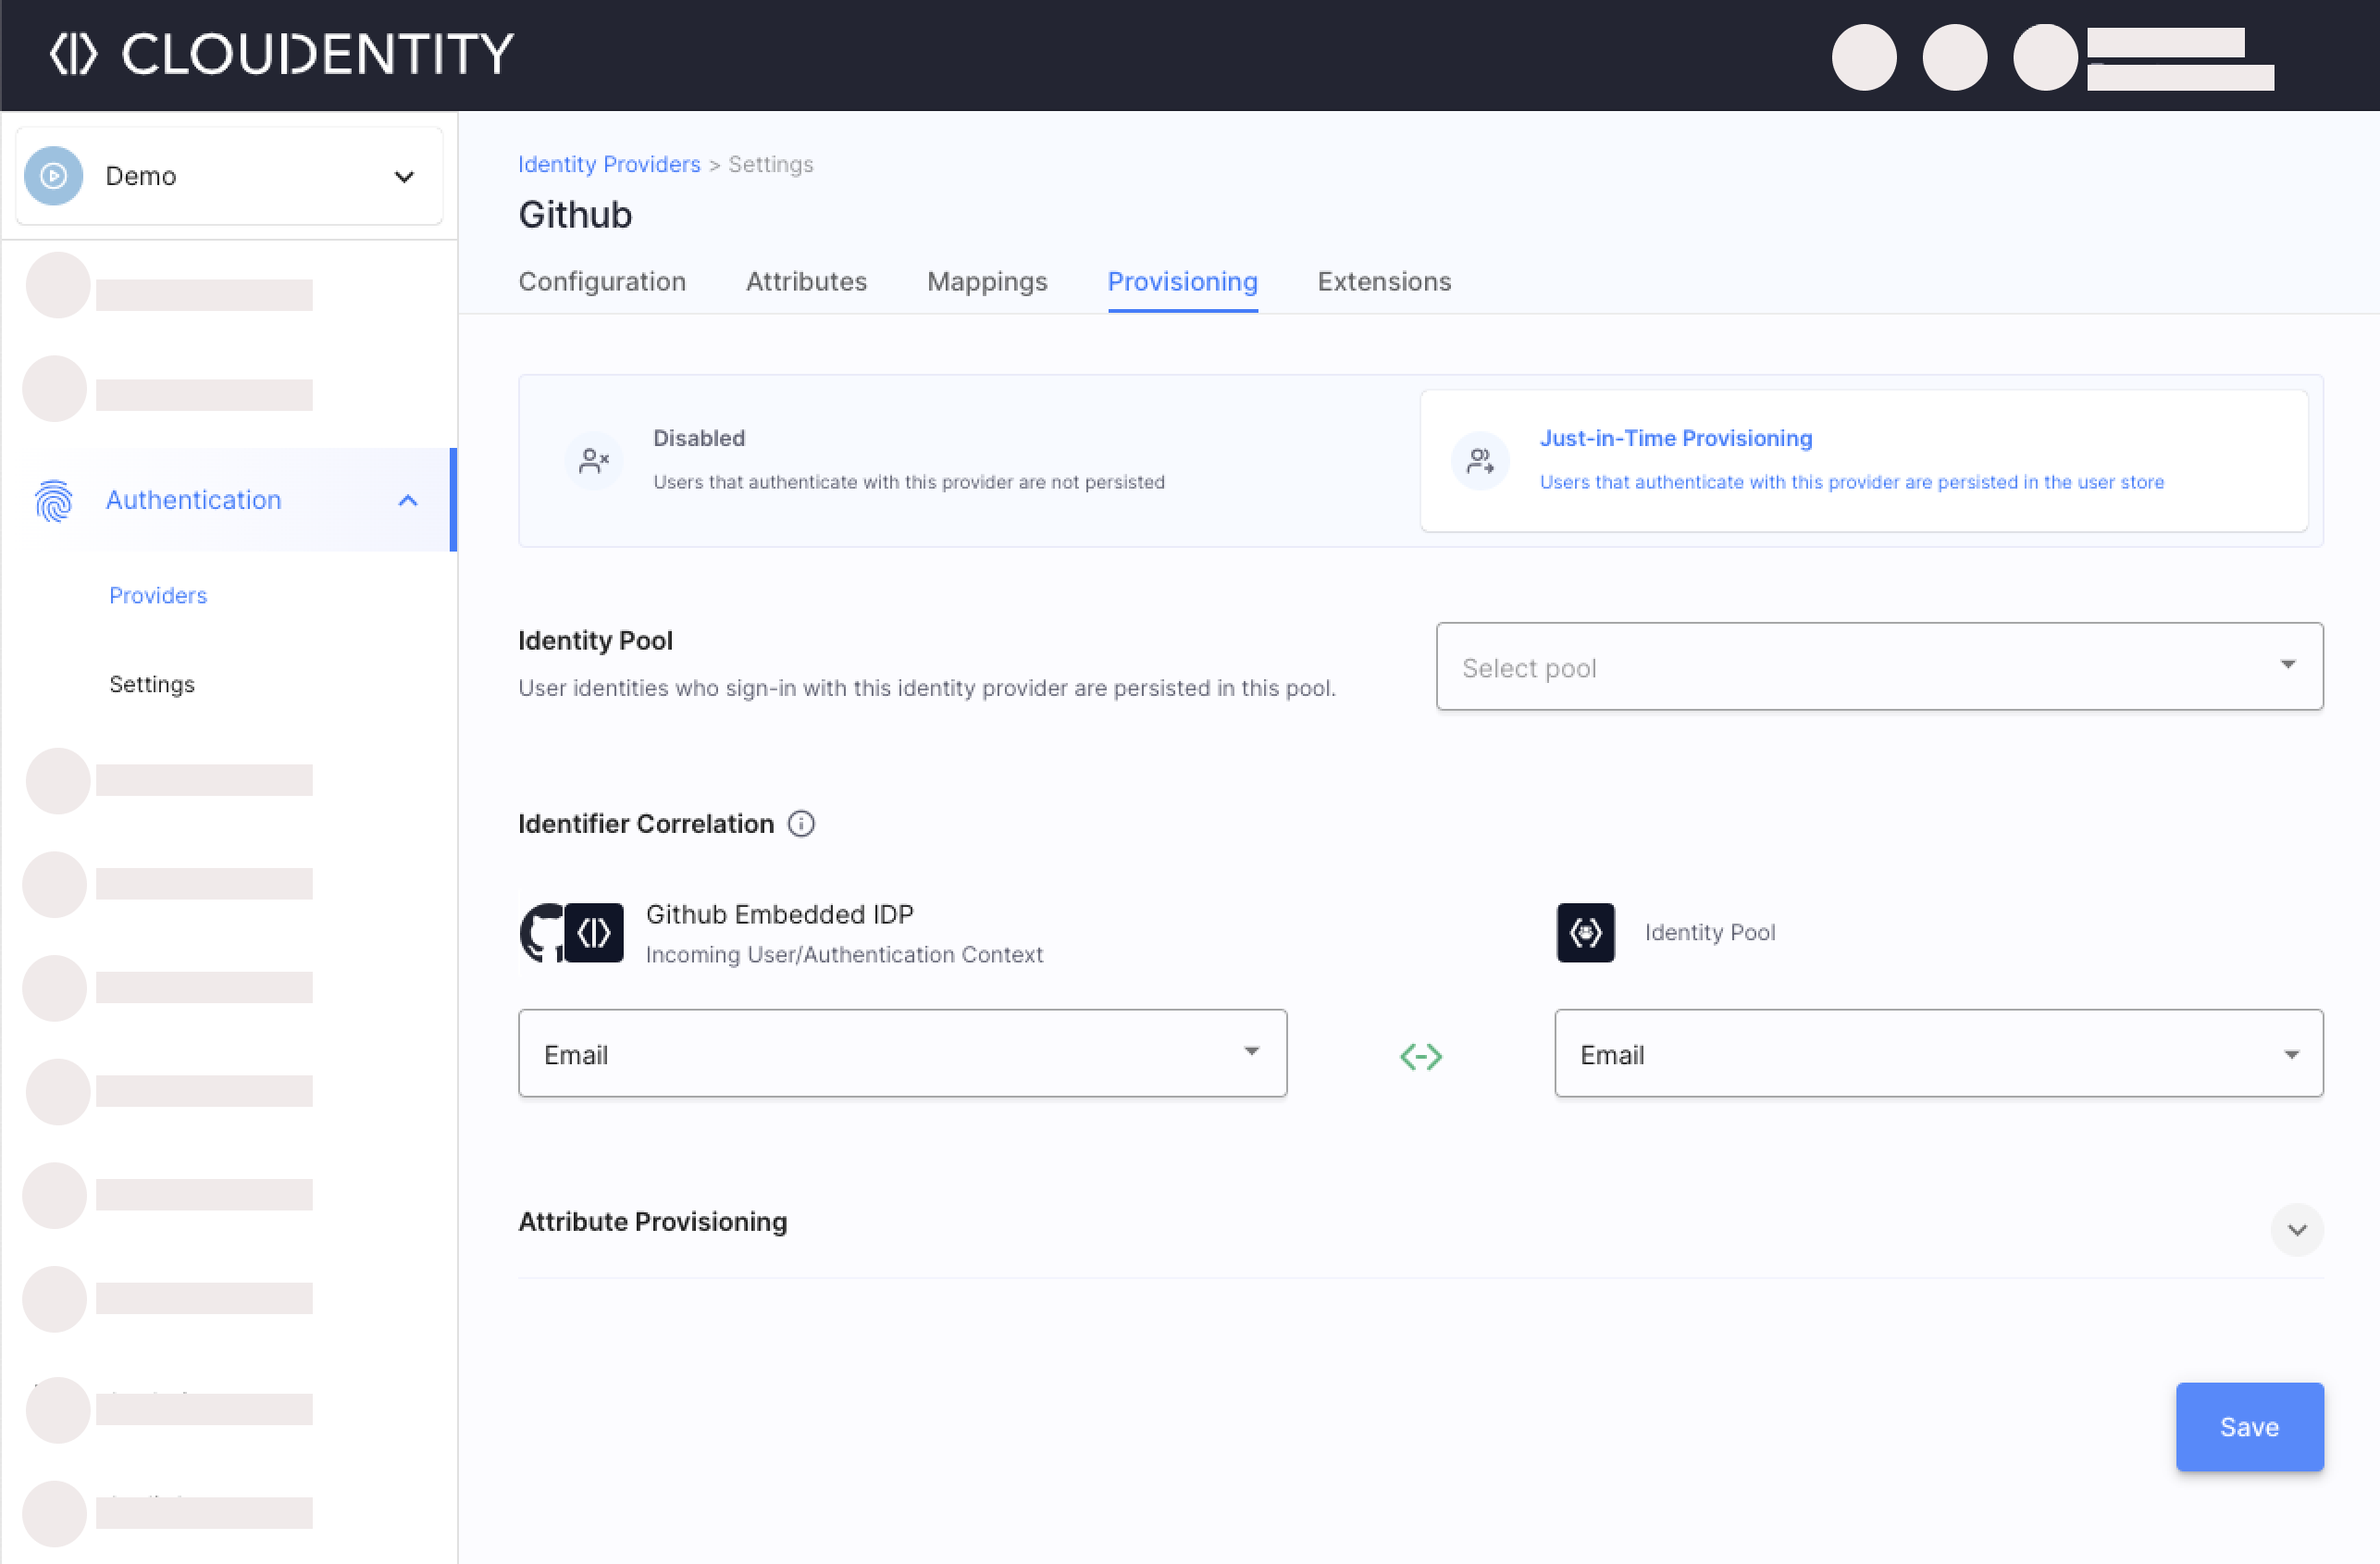
Select the Provisioning tab and enable the Just-in-Time Provisioning option.
-
Pick the pool where the provisioned users are going to be stored.
-
Save.
Result
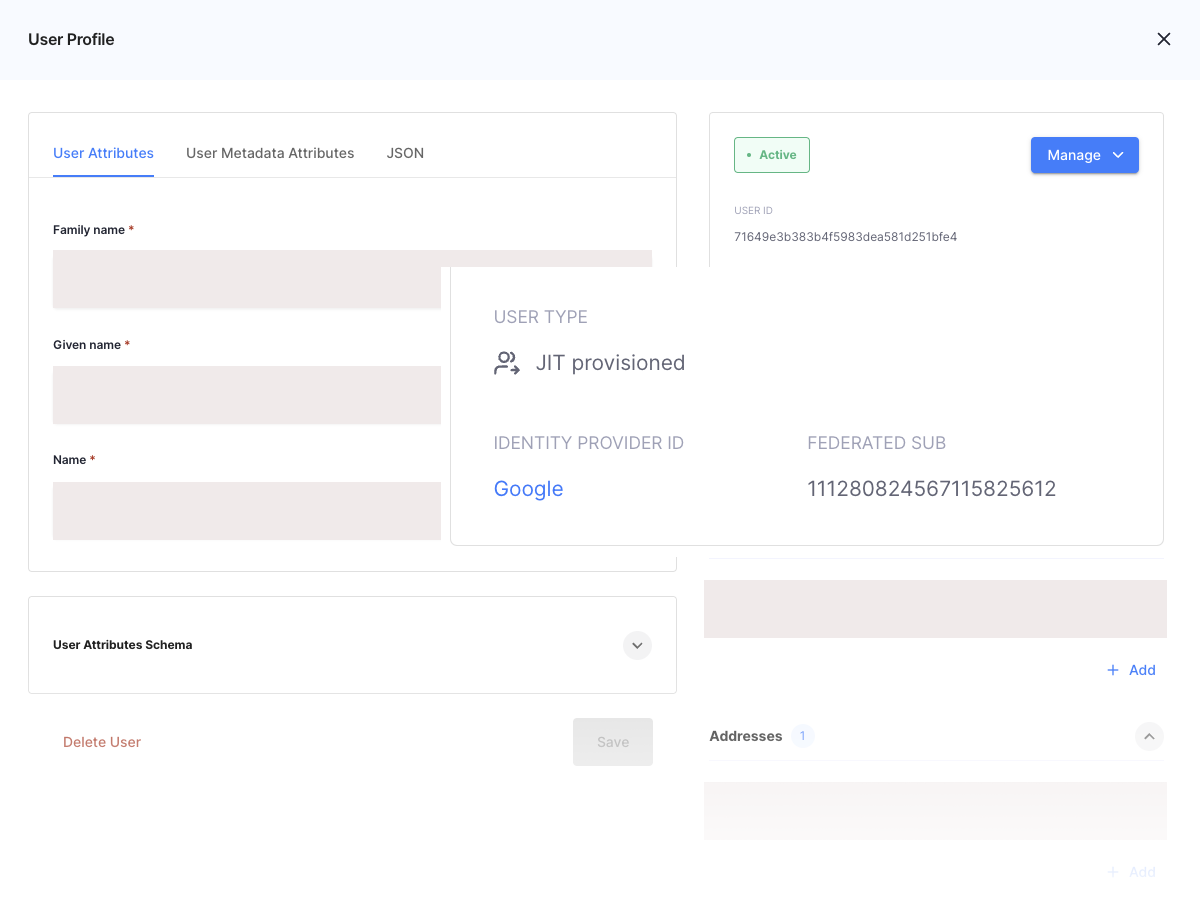
Upon login to applications protected by Cloudentity authorization server or upon login to the Cloudentity platorm itself, the user from the third-party Identity Provider with provisioning enabled and configured is now stored in the Identity Pool of your choice.
Automated Provisioning Quickstart
-
Create a Demo Workspace with Demo Application enabled.
The Demo Workspace will have two adventages:
-
It has an Embedded Google IDP configured out-of-the-box.
-
It will have a Demo Application that we will use to test the provisioning flow.
-
-
Create an Identity Pool or reuse one you created before.
-
Select Dashboards and launch the Demo Portal.

-
Authenticate with the Google IDP.
-
Back in the Cloudentity platform, go to the Identity Pool you configured to store the users and check for the provisioned user.
Correlate Identifiers Between IDP and Identity Pool
-
Go to the Identity Provider’s Provisioning tab.
-
Pick the incoming User/Authentication Context attribute from the provisioned IDP.
-
Pick the identity pool’s identifier.
-
Save.
Provision Attributes from TPP to Identity Pool User
-
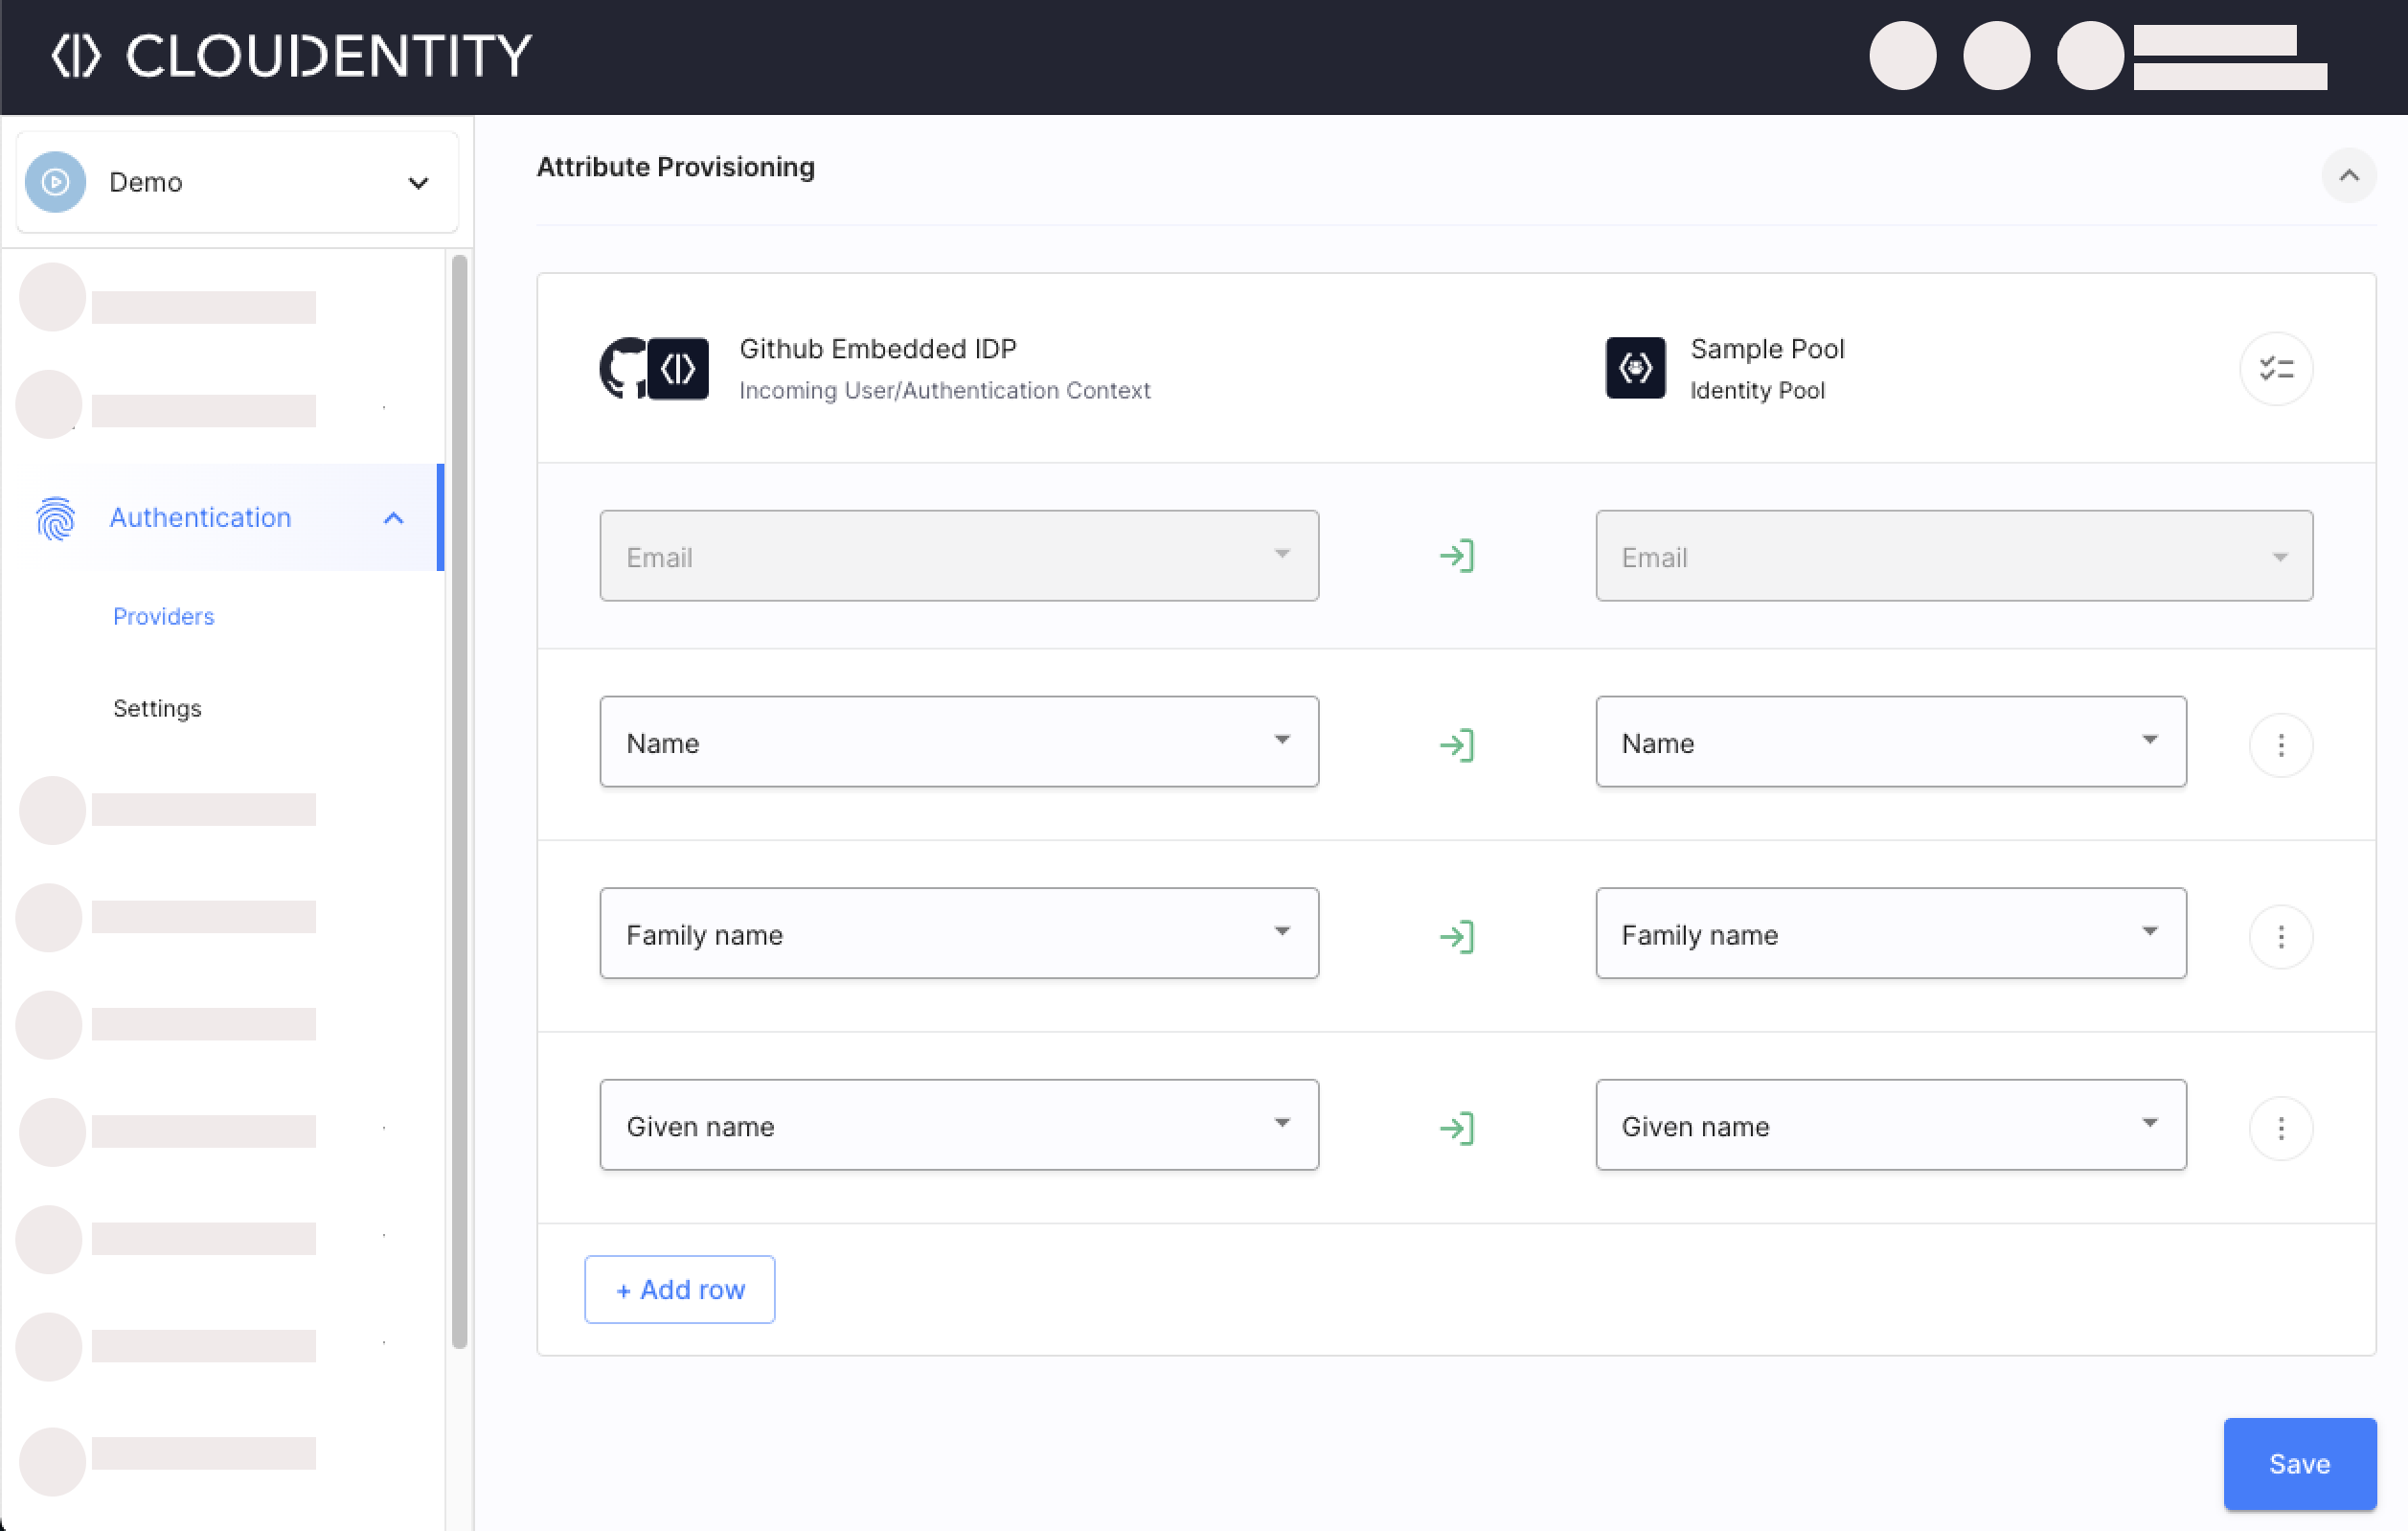
Go to the provisioned Identity Provider’s Provisioning tab.
-
Expand the Attribute Provisioning dropdown.
The list of predefined attributes is displayed.
-
Select Add row to define additional provisioned attributes.
-
Pick the incoming User/Authentication Context Attribute.
IDP Attributes and Authentication Context
It is only possible to provision the attributes from the user’s authentication context. If you do not see an attribute you expect, make sure you added the IDP attributes during the process of connecting an IDP and then mapped them to the authentication context.
-
Pick the Identity Pool user attribute to which the attribute from TPP is provisioned for the user.
You can:
-
Pick out of Identity Pool Schema Attributes (both the payload and the metadata)
-
Identity Pool addresses and identifiers. Learn more about email/phone number verification.
-
-
-
Select the Three Dots next to a row to:
-
Delete a row – the attributes will no longer be provisioned.
-
Enable/Disable attribute update on each user sign-in
-
Select one or more rows to be cleared/updated on sign-in/deleted.
-
-
Save.