How-tos

5 mins read

Creating and Configuring Dynamic Scopes

Instructions on how to configure dynamic scopes and use them as an authorization asset, for example, in the transactional authorization.

Dynamic scope concept

Building a client application that uses the OAuth-based authorization, you need to limit the access that the client application have. The typical way to restrict that access is to utilize the concept of scopes represented as a special access token claim that has a set of governance and privacy workflows connected to it.

The API or application owner usually defines scopes as simple nouns or verbs describing actions that the client application can perform using the so-called “dot” notation.

Examples of scopes using the dot notation

  • accounts.list
  • transactions.manage
  • users.delete

Such scopes are perfect if you want to control access at the coarse-grained level. However, what can pose a challenge for the client application developer is restricting access to a specific object or intent. If the developer is aware that the next set of operations relates to a single item, such as a specific account or user, they might want to restrict the authorization access token to this action or intent. It can be done by including a reference to the object as a part of the scope. Example:

Examples of scopes using the dot notation and the object identifier

  • account.list.05542
  • transaction.manage.433212
  • user.delete.2321

To facilitate this type of scenarios, Cloudentity supports the mechanism of dynamic scopes enabling the wildcard-based definition of scopes in addition to defining them one-by-one with their explicit authorization request.

Dynamic scope purpose

With dynamic scopes, your authorization flows get fine-grained and simplified, so does your access to the clients. The use of dynamic scopes not only speeds up and facilitates the process of defining scopes but also enables you to build your policies more efficiently.

Combining this capability with the Cloudentity intelligent policy-based scope governance enables a shift of the authorization logic from the application code to your Cloudentity authorization server offloading your developers and accelerating the application creation.

How it works

Here’s a basic authorization flow using dynamic scopes:

  1. Cloudentity administrator defines a dynamic scope in wildcard form account.* as part of the protected service/resource.

  2. Client asks for scope account.1234.

  3. Cloudentity matches the requested scope to the wildcard (dynamic) one defined by the administrator.

  4. Cloudentity applies the scope governance policies attached to the account.*.

  5. Optionally consent screen displays account.1234 to the users so that they know what account the client requested access to.

Dynamic scope syntax

The syntax for dynamic-scope names uses dot notation with generic form templates including scope parameters, for example account.*, where * represents a wildcard allowing multiple scope-name interpretations.

There are two elements in the scope name template:

  1. Scope root, which is a fixed core of the dynamic scope name, for example account or users

  2. Scope wildcard (*), which is an adjustable extension to the scope root allowing to retrieve a specific requested scope.

scopes[user.*].params[1] returns the first parameter matched by the user.* scope that comes in the access token.

Dynamic scopes matching

See the logic behind the dynamic scopes matching in Cloudentity:

accounts.* matches accounts.read.

accounts.* matches accounts.read.foo.

accounts.read matches accounts.read.

accounts does not match accounts.read.

accounts.read.* does not match accounts.read.

accounts.*.* does not match accounts.read.

accounts.*.* matches accounts.read.own.

accounts.*.* matches accounts.read.own.other.

accounts.read.* matches accounts.read.own.

accounts.read.* matches accounts.read.own.other.

accounts.write.* does not match accounts.read.own.

accounts.*.bar matches accounts.baz.bar.

accounts.*.bar does not accounts.baz.baz.bar.

Scope validators in policies

Scope parameters that match wildcard parameters in the scope name are available in policy validators.

Example

If the administrator defines scope account.*.* and the client requests account.read.1234, the scope policy has access to wildcard-matched scope properties read and 1234, as well as the whole scope name.

Dynamic scope validators have at least three attributes:

  • Parameters available in policy validators

    Note

    The number of parameters matches the number of wildcards in the scope name, for example, {{users..}} has two parameters available: {{params.0}} and {{params.1}}.

  • Requested scope name, for example, {{users.1234}}

  • Scope name, for example, {{users.*}}.

Purpose

Speed up and facilitate the process of defining scopes by setting up scopes dynamically.

In addition to defining and requesting scopes one-by-one with their explicit names, now Cloudentity enables you to define and request scopes dynamically. Dynamic-scope names are based on a generic form template, for example account.*, where * represents a wildcard allowing multiple scope-name interpretations.

Prerequisites

  • You have login credentials to the Cloudentity administrator portal.
  • You have at least one service created in the Cloudentity administrator portal.
  • You have an application created in Cloudentity.

Add Scope

  1. In the workspace, select Applications > Services from the sidebar.

  2. In the Services view, select a service that you want to set up a scope for and go to Scopes.

  3. In the Scopes page, select ADD SCOPE.

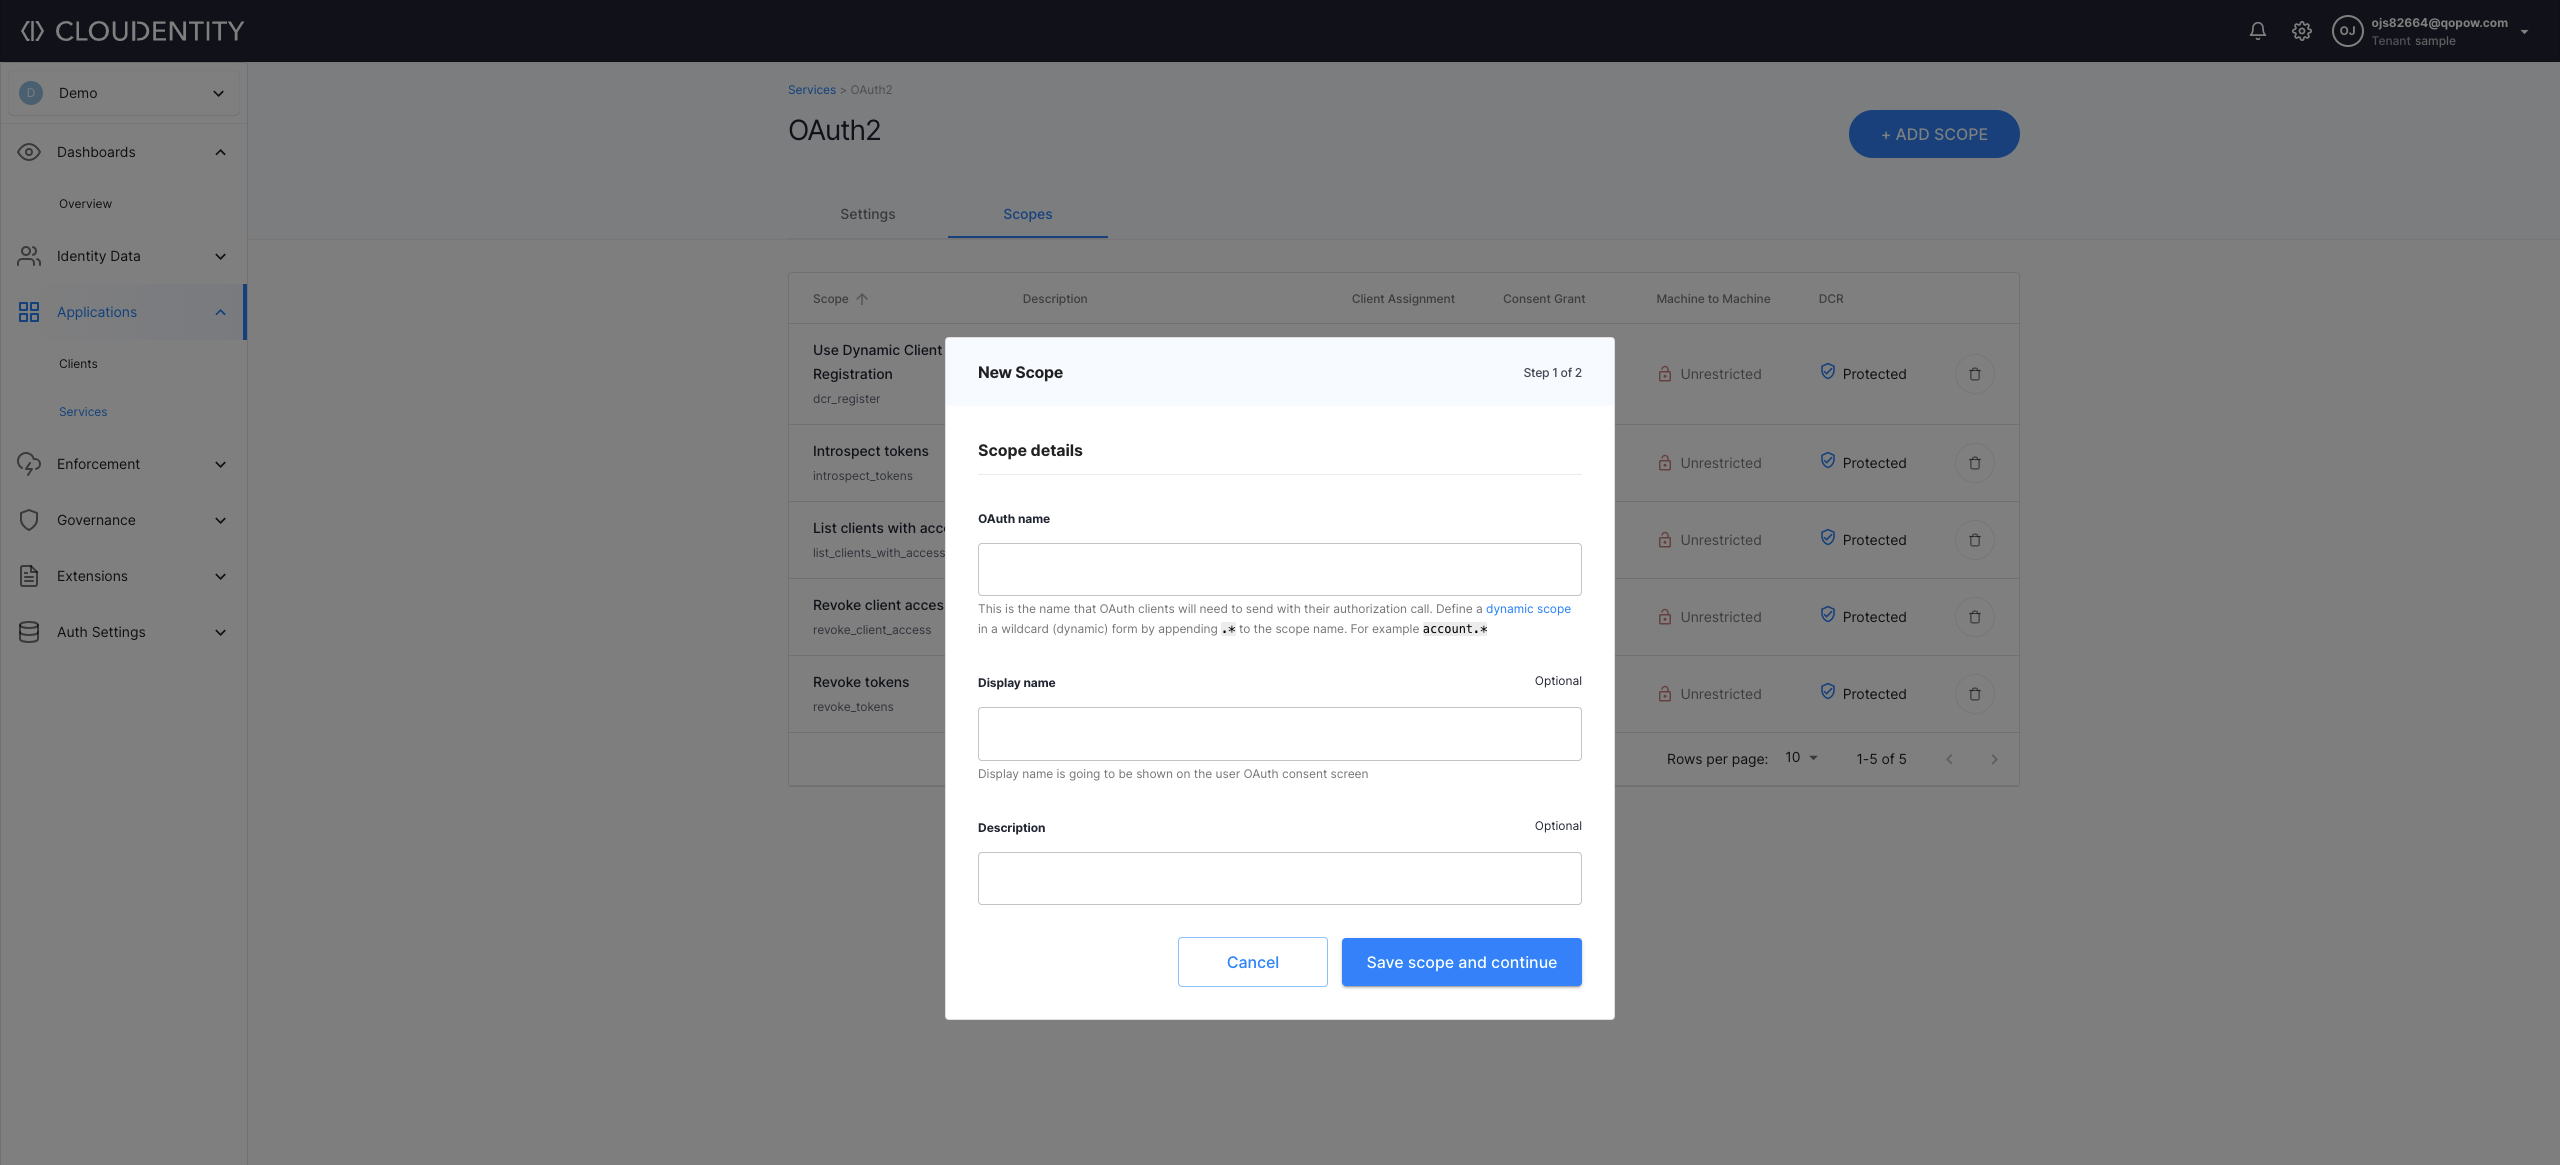
  4. In step 1 of the New Scope view, enter an OAuth name and a display name for your scope. Next, select Save scope and continue to proceed.

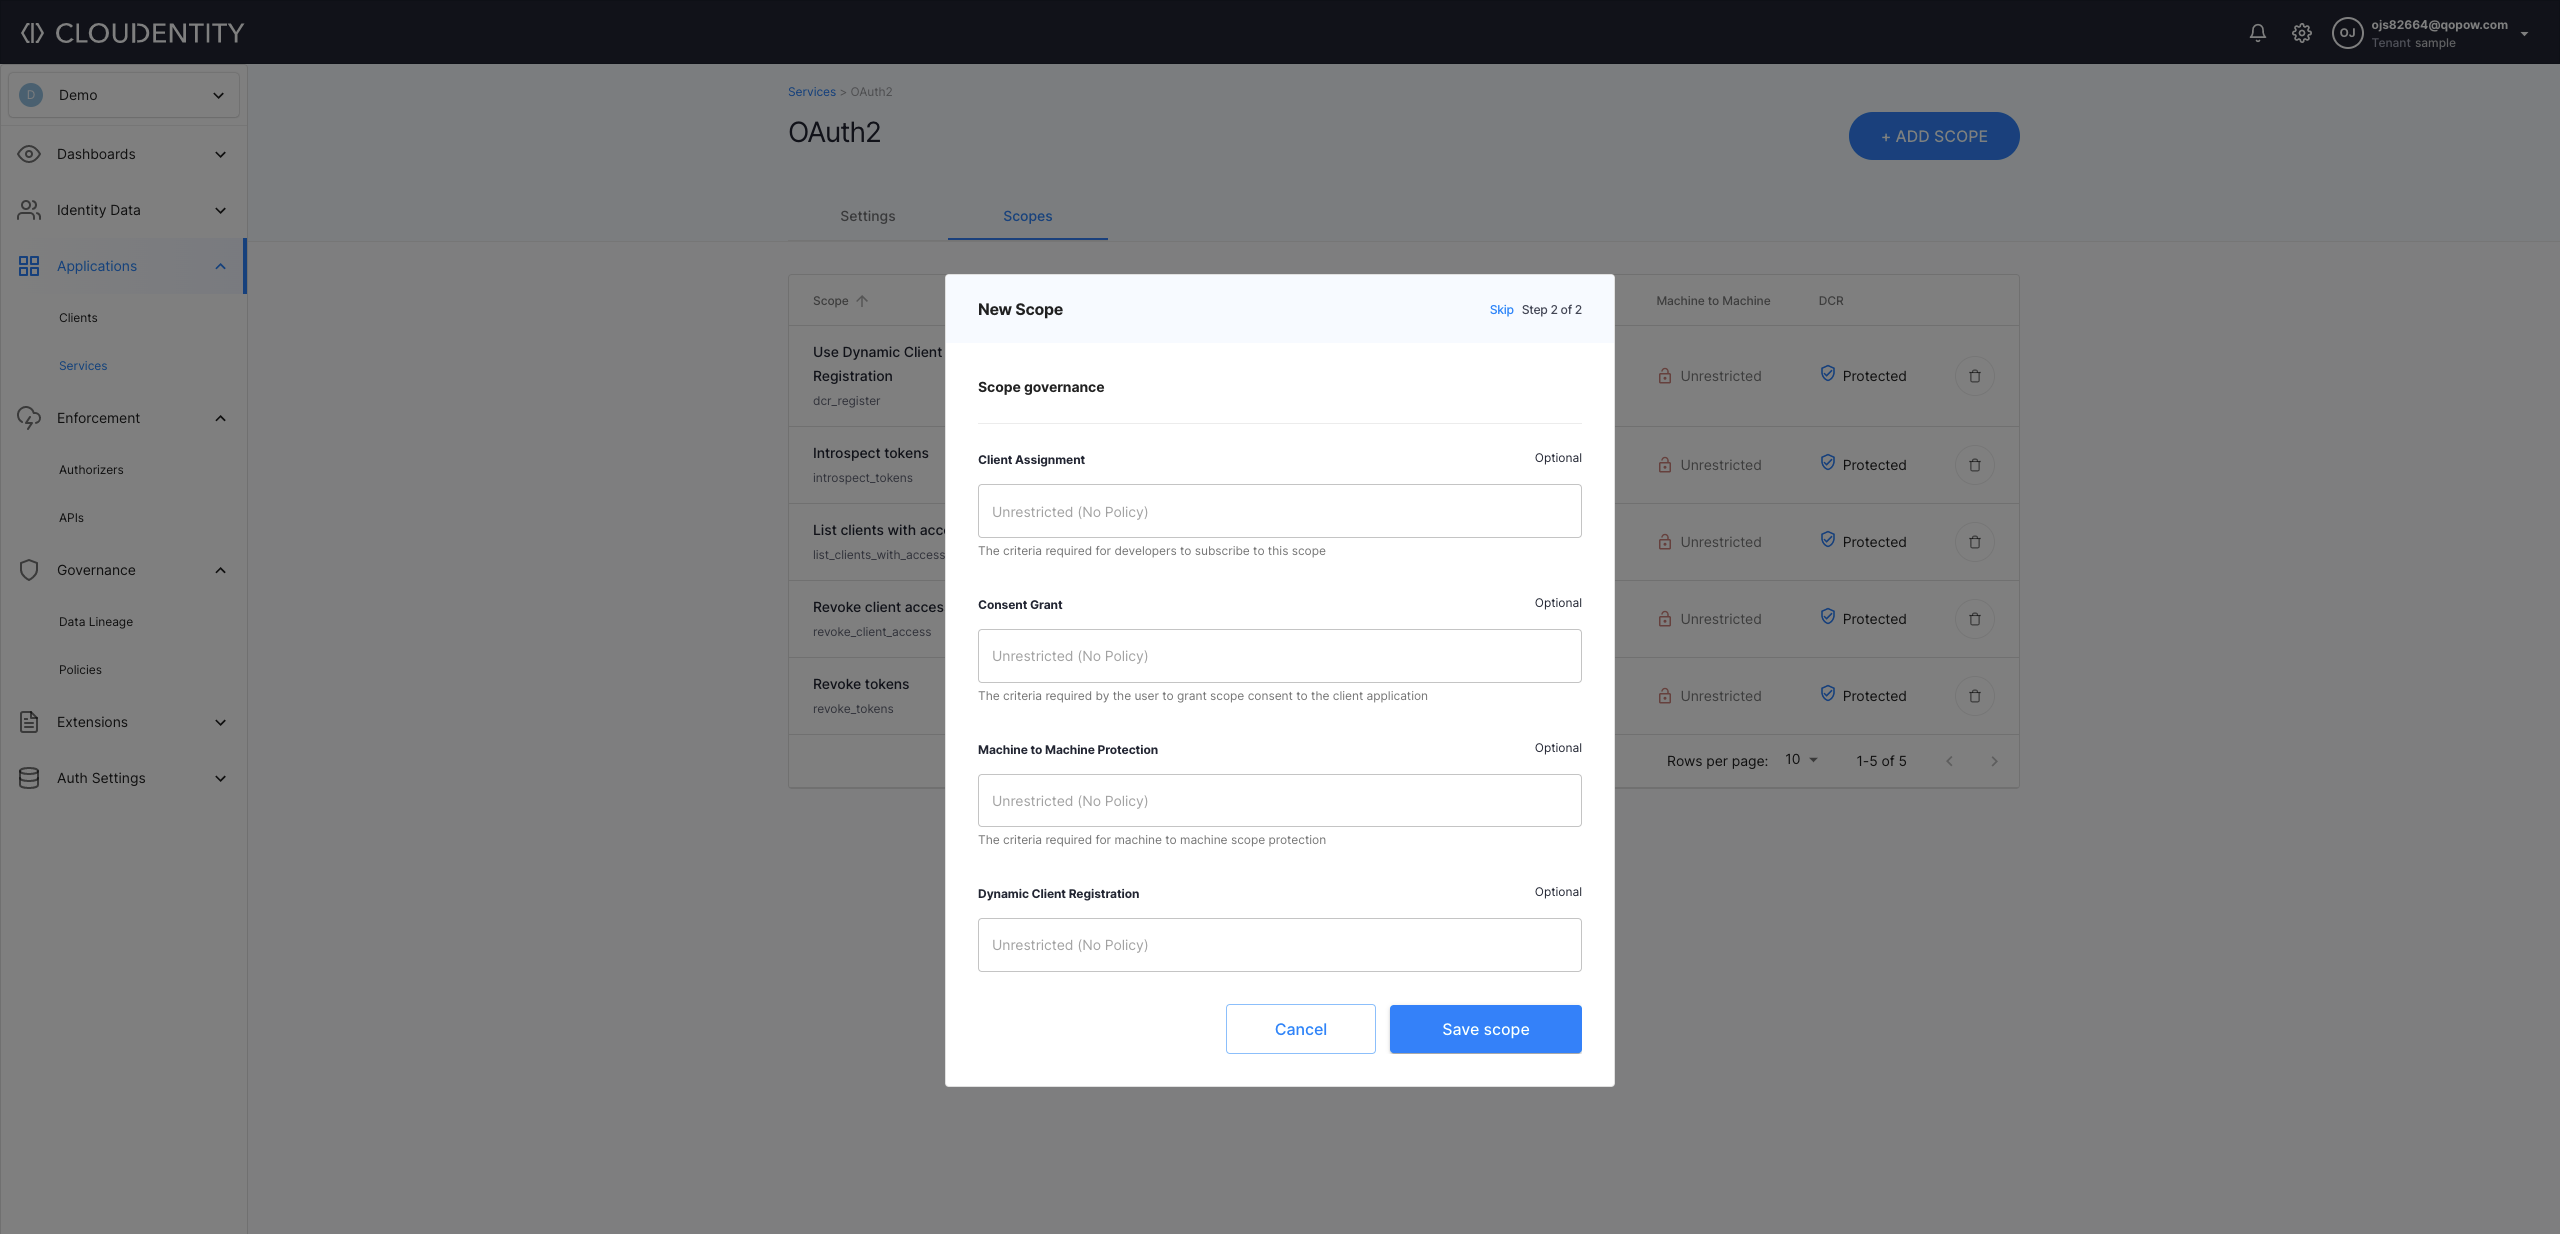
  5. In step 2 of the New Scope view

    • Either select policies to set up criteria for client assignment, consent grant, and machine-to-machine protection and close the wizard with Save scope

    • Or select Skip to omit this step and proceed to the list of scopes with your new scope already included.

Enable Scope for an App

  1. In the workspace, go to Applications > Clients.

  2. In the Clients view, select an application that you want to enable the scope for.

  3. In your application view, select the Scopes tab.

  4. In the Scopes tab, select the service that you want to configure and enable your new dynamic scope using the toggle switch.

Check if it Works

To test your new dynamic-scope setup

  1. Make sure that your application has a dynamic scope (for example, account.*) enabled.

  2. Make your application request a specific instance of your dynamic scope, for example account.1.

    Example

    Make an authorization call to https://localhost:8443/default/default/oauth2/authorize?client_id=bu27qd10vc42d9kkisp0&redirect_uri=https://example.com&response_type=token&scope=email%20account.1

  3. Log in to the application.

Result

The consent page opens and shows the application requesting access to dynamic scope account.* resolved to account.1.

Updated: Jul 11, 2022