CDR Quickstart
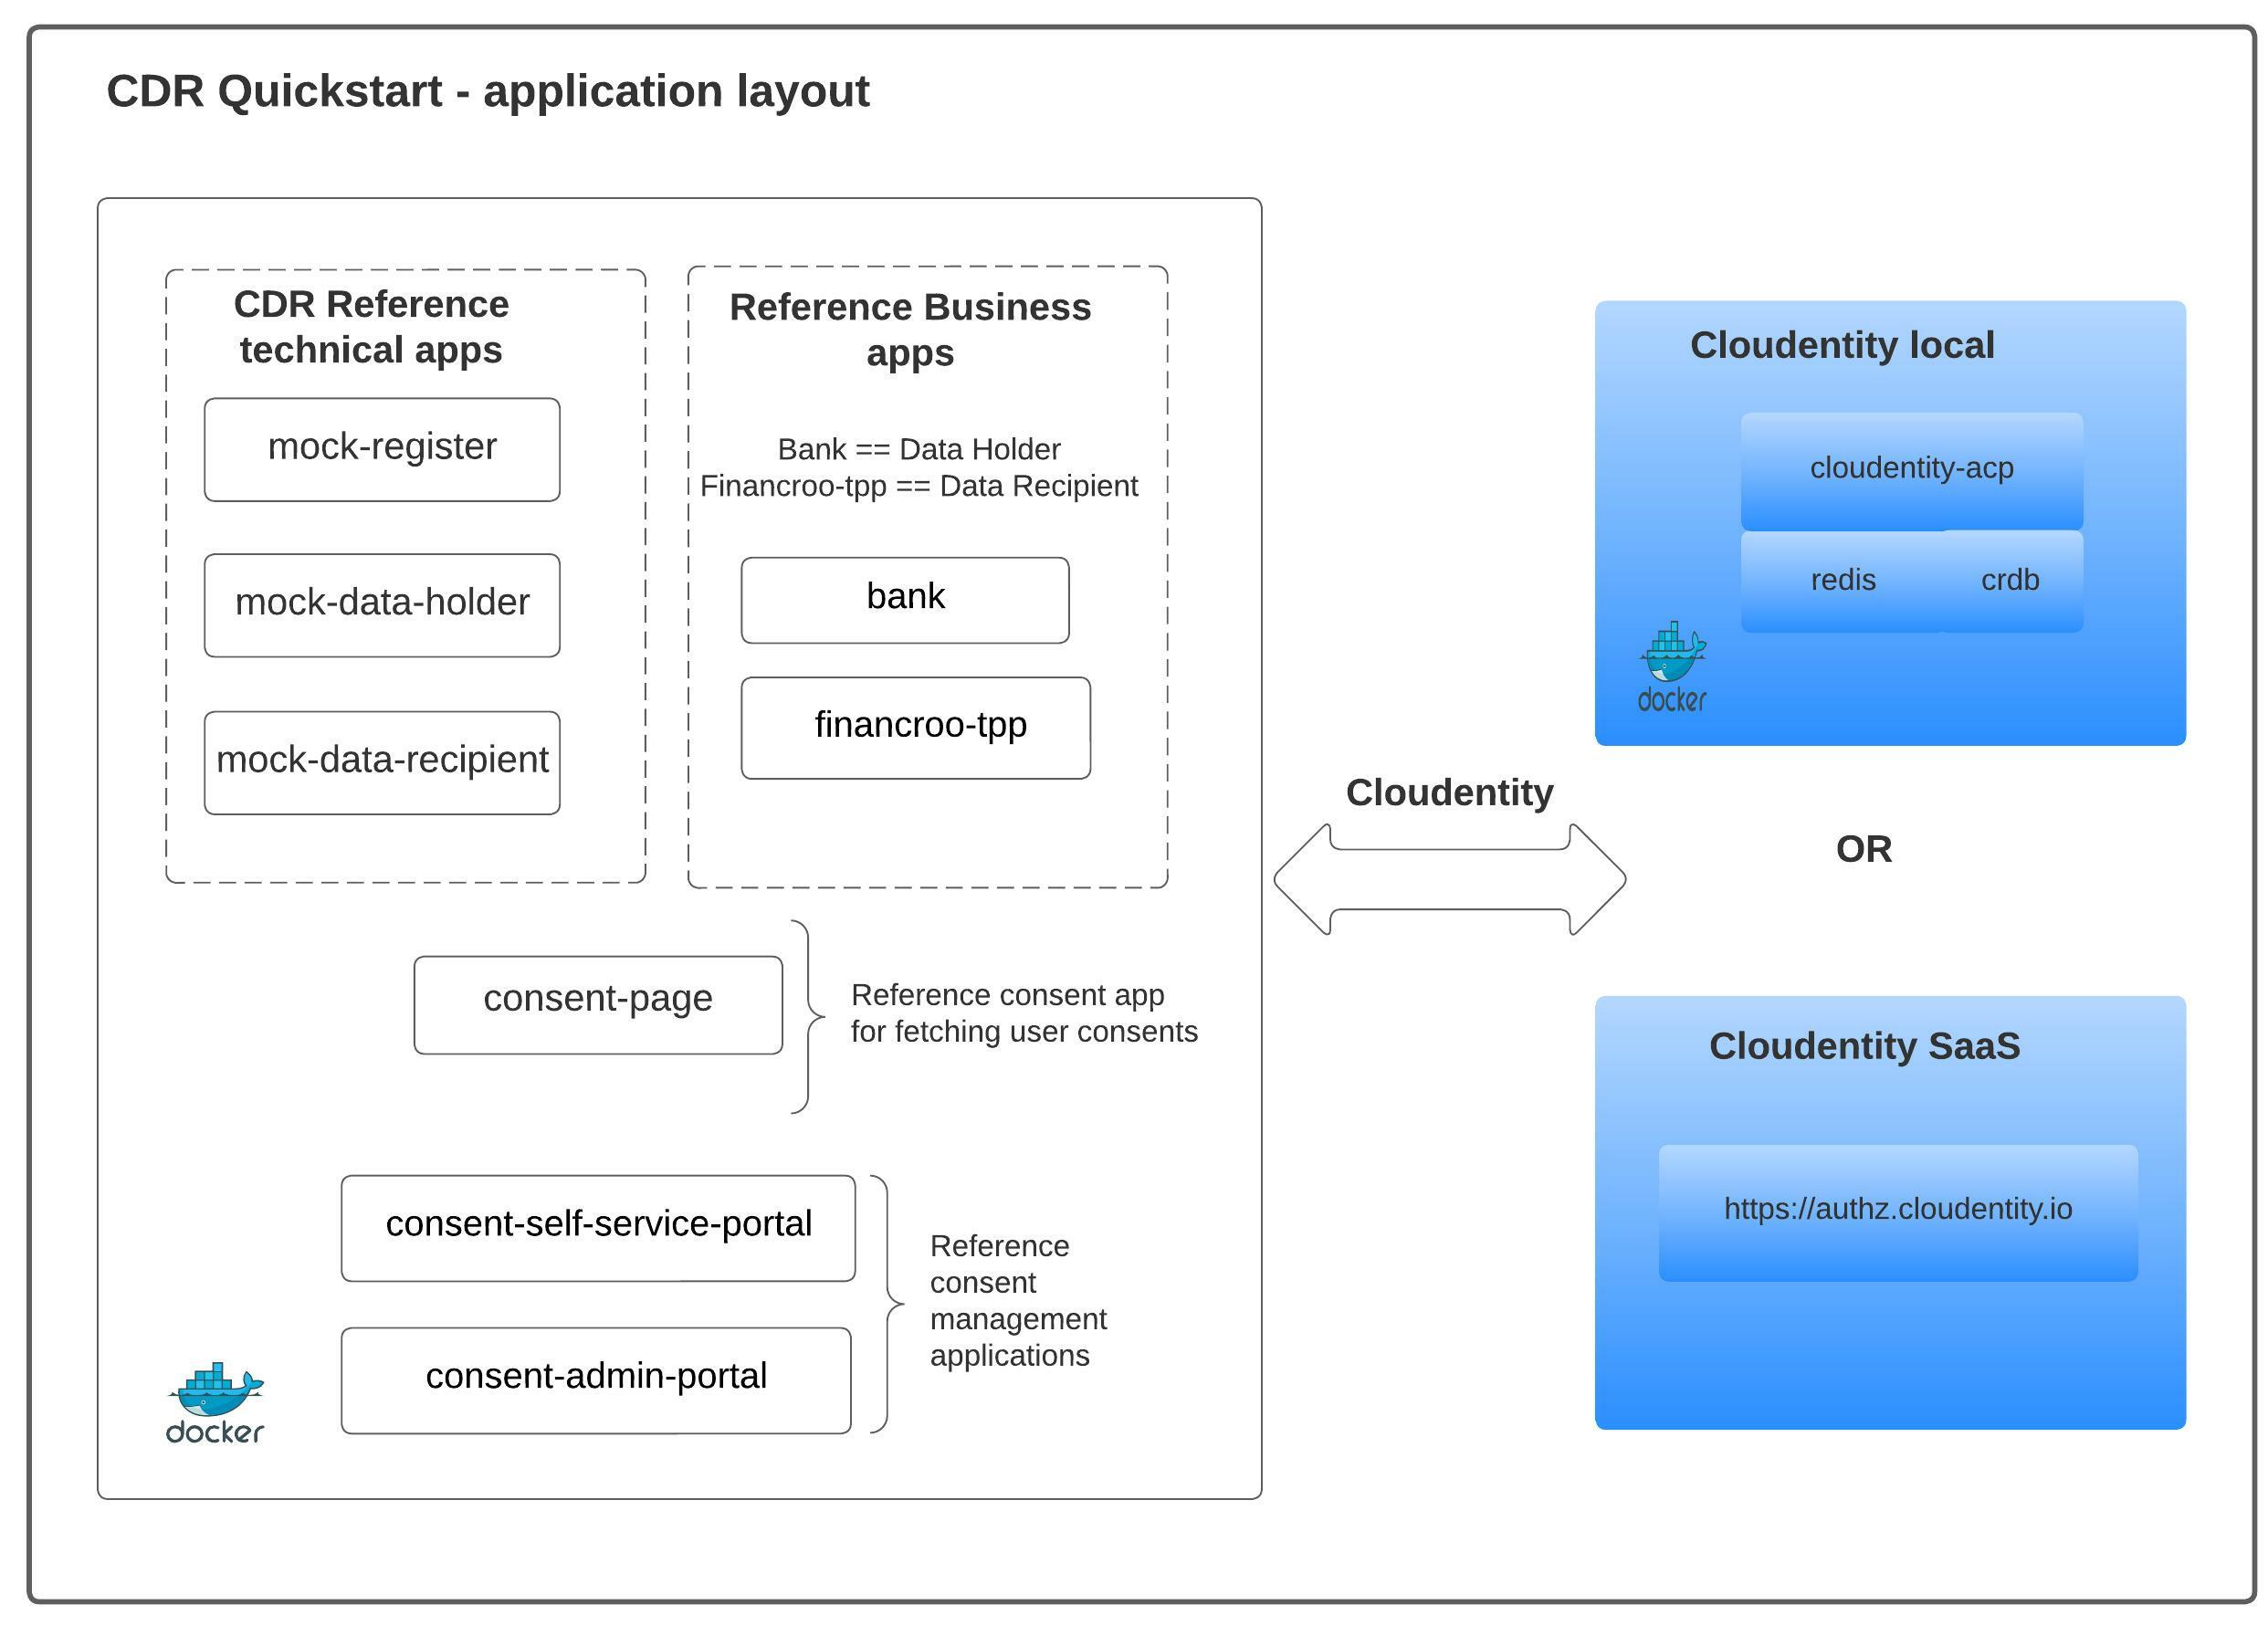
Cloudentity has created a reference Open Banking Quickstart GitHub project that helps to understand different CDR actors and workflows and how all these are integrated with the Cloudentity platform. Cloudentity Open Banking Quickstart is built to showcase multiple open data initiatives across the world and CDR is one of such initiatives riding on top of FAPI standards for secure API interaction with consumer consent.
This quickstart allows you to either quickly spin up a local dockerized version of Cloudentity solution or connect to a SaaS tenant. You may choose and proceed with one of the option for quick verification of the platform capabilities.
For the demonstration purposes, this article contains references to artifacts created as reference apps by CDR regulators:
Above reference applications have a built in Identity Server implementation but, as a part of this article, you will swapp that out with Cloudentity solution that offers more powerful, flexible and dynamic authorization for CDR & FAPI compliance.
Clone the Repo
Git clone the Cloudentity repo with Open Banking Quickstart artifacts. There is a README within the project to quickly set up the required pre-requisites.
git clone git@github.com:cloudentity/openbanking-quickstart.git
Cloudentity SaaS vs Local
Before proceeding further, decide on whether you want to utilize Cloudentity platform in SaaS(preferred) or deploy Cloudentity solution in a machine locally.
Note
To access Cloudentity solution in local deployment, make a host entry in local file system for
127.0.0.1 authorization.cloudentity.com. All the components are auto configured to use Cloudentity in a local mode.
Tip
To use the Cloudentity SaaS platform, signup for a free tenant and utilize the tenant url and endpoints in the configuration for your environment.
Connect apps with Cloudentity
All the references application must be able to connect/consume Cloudentity for various workflows as shown below.
Tip
Below configurations are already in place for running these locally. Attached configurations and instructions are for educational purposes or in case you need to point to a different environment/location for Cloudentity services.
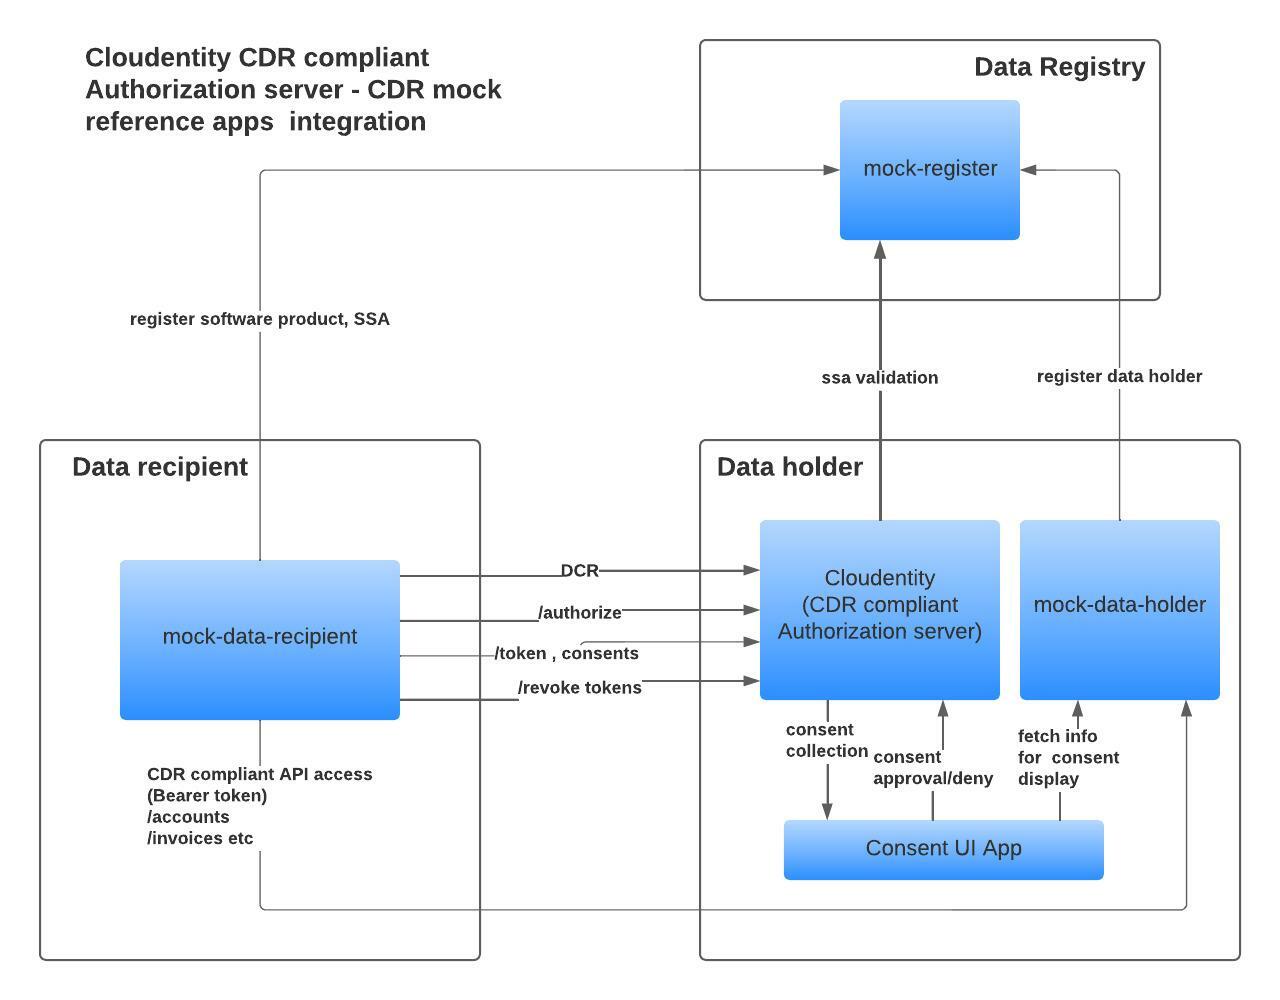
Configure Data Recipient
Data recipients must register with the registry first to register their software product.
Once registered, recipients are issued a software statement assertion and are accredited.
We will refer to these as accredited data recipients (ADR).
In this reference application, mock-data-recipient takes the role of ADR and is registered with
mock-register for accreditation. Once that is done, it needs to interact with
Cloudentity to perform DCR to register itself to obtain data from Data Holder.
Cloudentity is part of Data Holder ecosystem and provides
the security profile implementation, so all the Oauth & FAPI related endpoints are exposed
by Cloudentity that need to be consumed by ADR to obtain consumer consent and
access tokens to access data APIs.
In the Quickstart environment, it is possible to configure the mock-data-recipient by adjusting
the environment variables in the additional_configuration.sh
script. The script generates a recipient.json file out of
the recipient.template
and mounts it as the configuration for the mock recipient when running make run-cdr-local command.
Configure Data Holder
Data Holder application requires configuration of the CDR security profile provider(aka Cloudentity).
In the Quickstart environment, it is possible to configure the mock-data-holder by adjusting
the environment variables in the additional_configuration.sh
script. The script generates a holder.json file out of
the holder.template
and mounts it as the configuration for the mock holder when running make run-cdr-local command.
Deploy Applications
To run the reference applications, there are certain pre-requisites and the details can be found in the repo README.
make run-cdr-local
Application Access
Once the applications are deployed and running, you can access the following components at below mentioned urls.
- Cloudentity admin portal:
https://authorization.cloudentity.com:8443/app/default/adminadmin / admin - CDR data recipient:
https://localhost:9001/
ADR Configurations
Now that you have all the applications deployed and connected to the Cloudentity authorization platform, you need to get into the reference data recipient application.
-
Verify configuration.
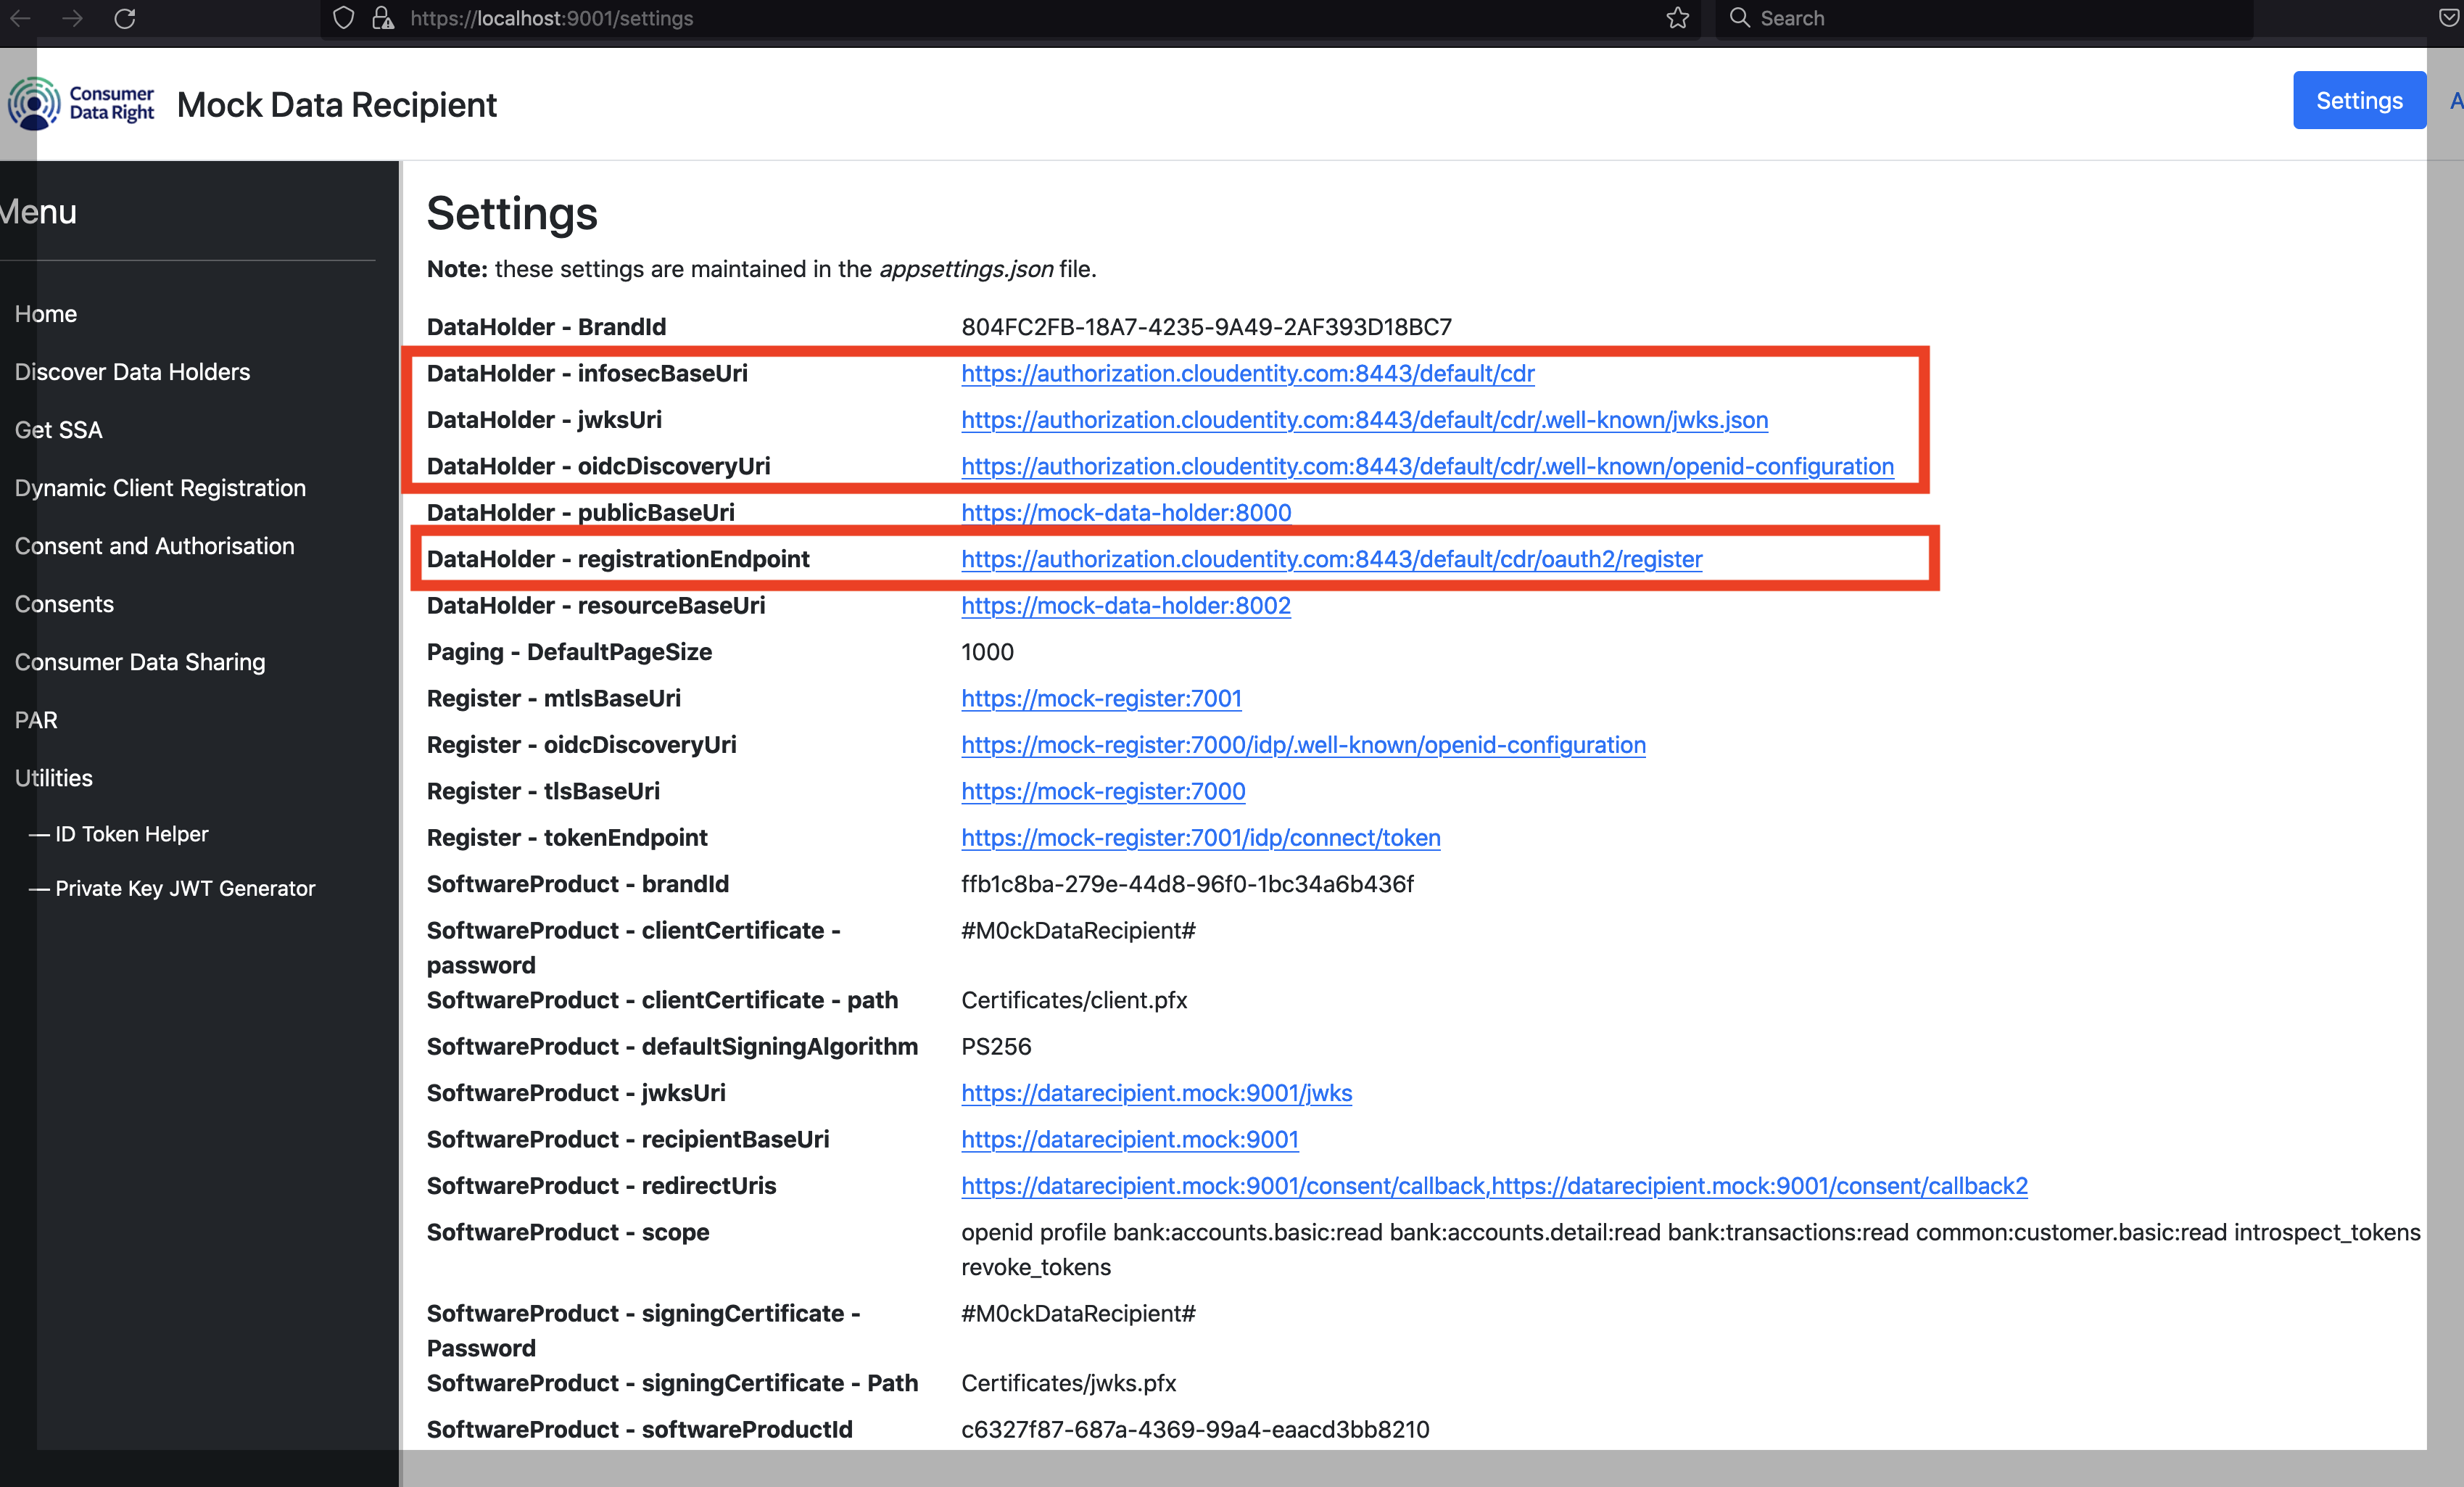
The reference
mock-data-recipientapplication has screens that shows integration configurations withmock-registryandmock-data-holdercomponents. Let’s quickly verify the application settings are accuratelly configured to talk to the Cloudentity authorization platform.Navigate to
https://localhost:9001/settings. The following settings should be pointing to the Cloudentity authorization platform:-
DataHolder - infosecBaseUri -
DataHolder - jwksUri -
DataHolder - oidcDiscoveryUri -
DataHolder - registrationEndpoint
-
-
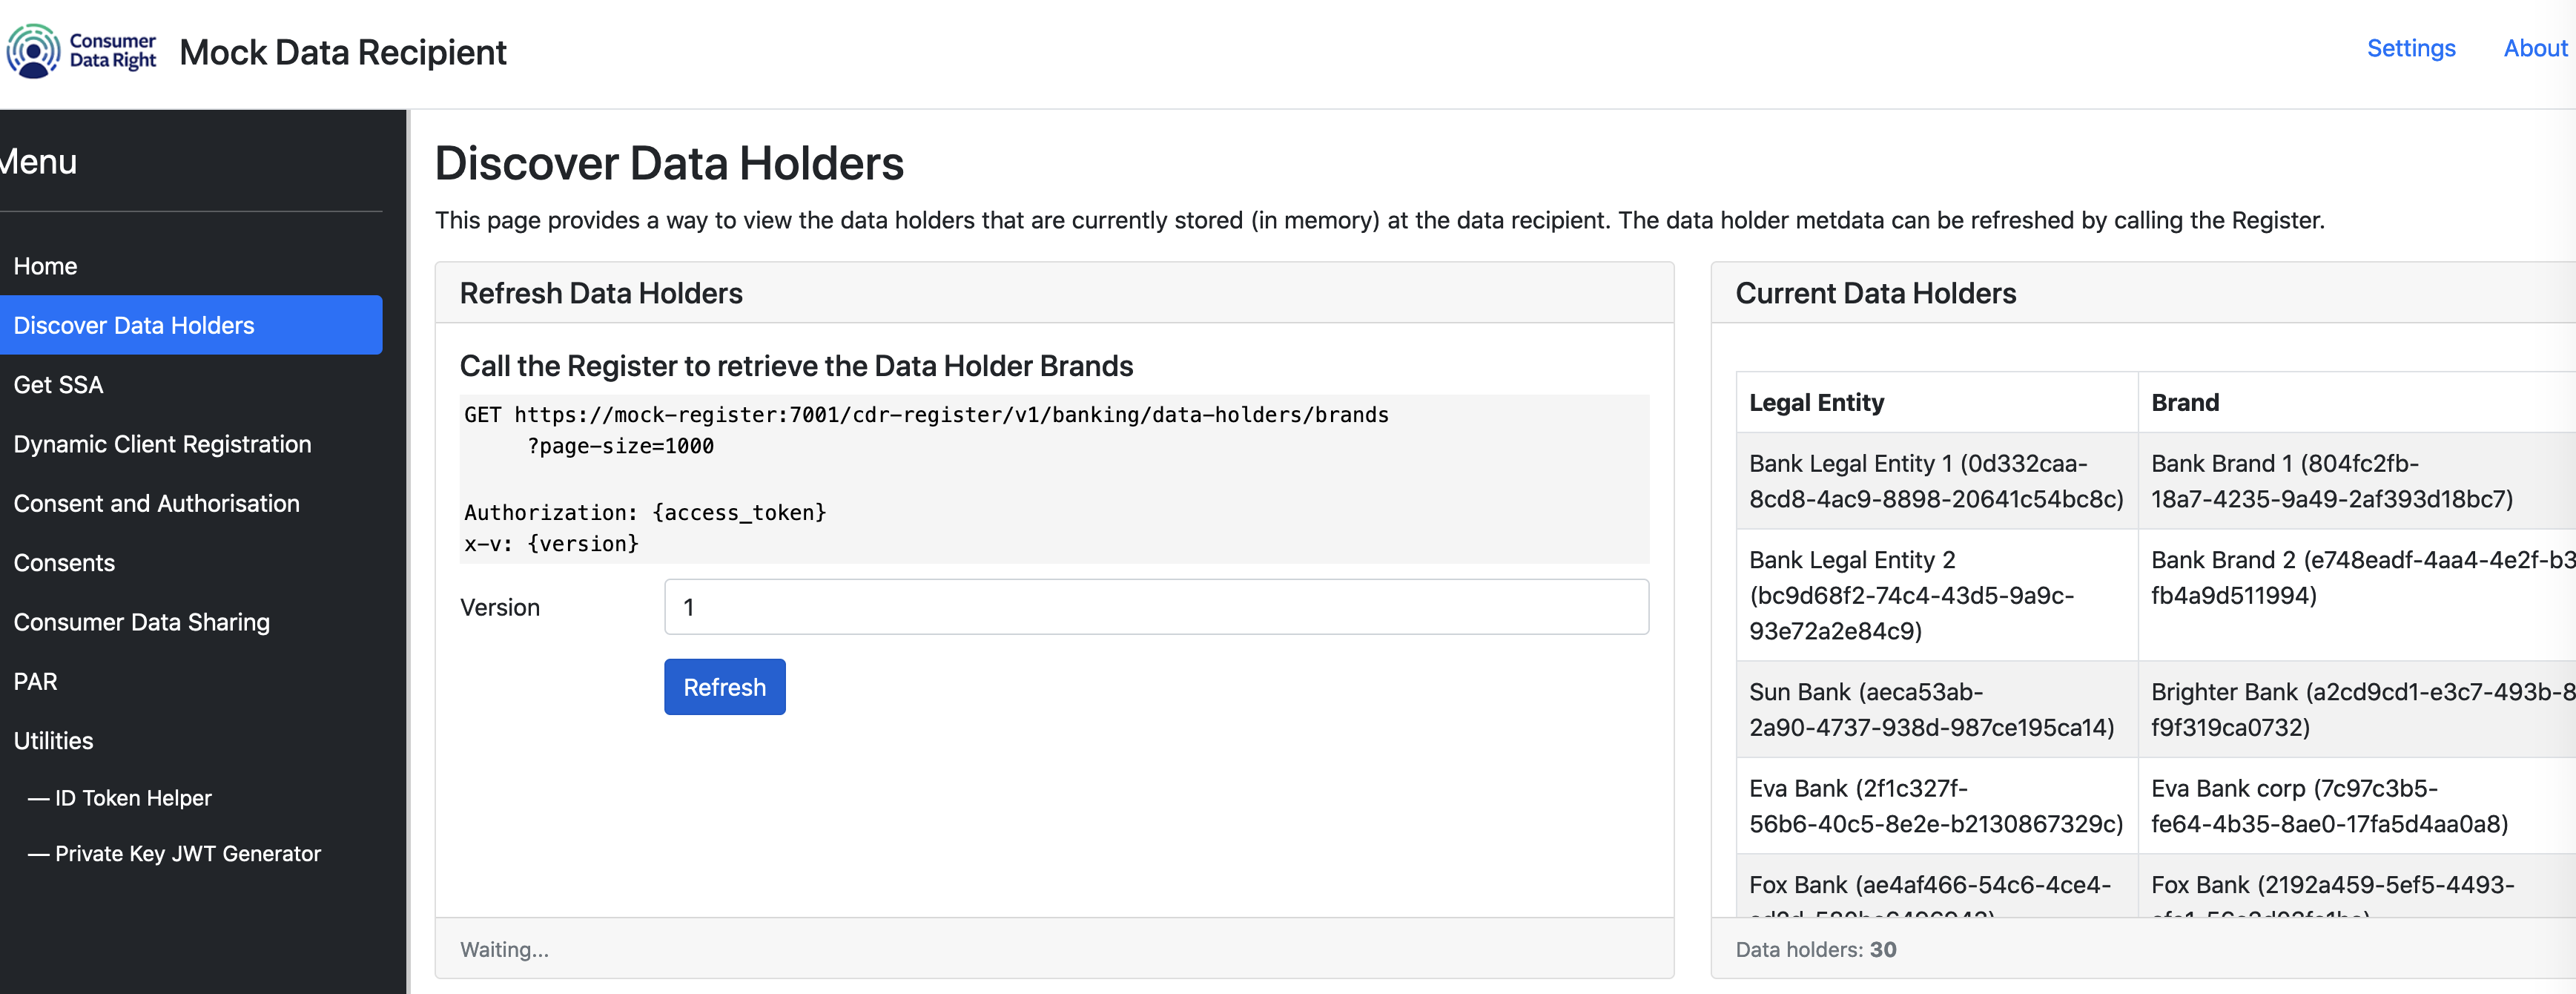
Load data holder registrations
Now, let’s load the data holder registrations seeded from registry onto this app. Click on Refresh within the Discover Data Holders panel.
ADR Client Registration
-
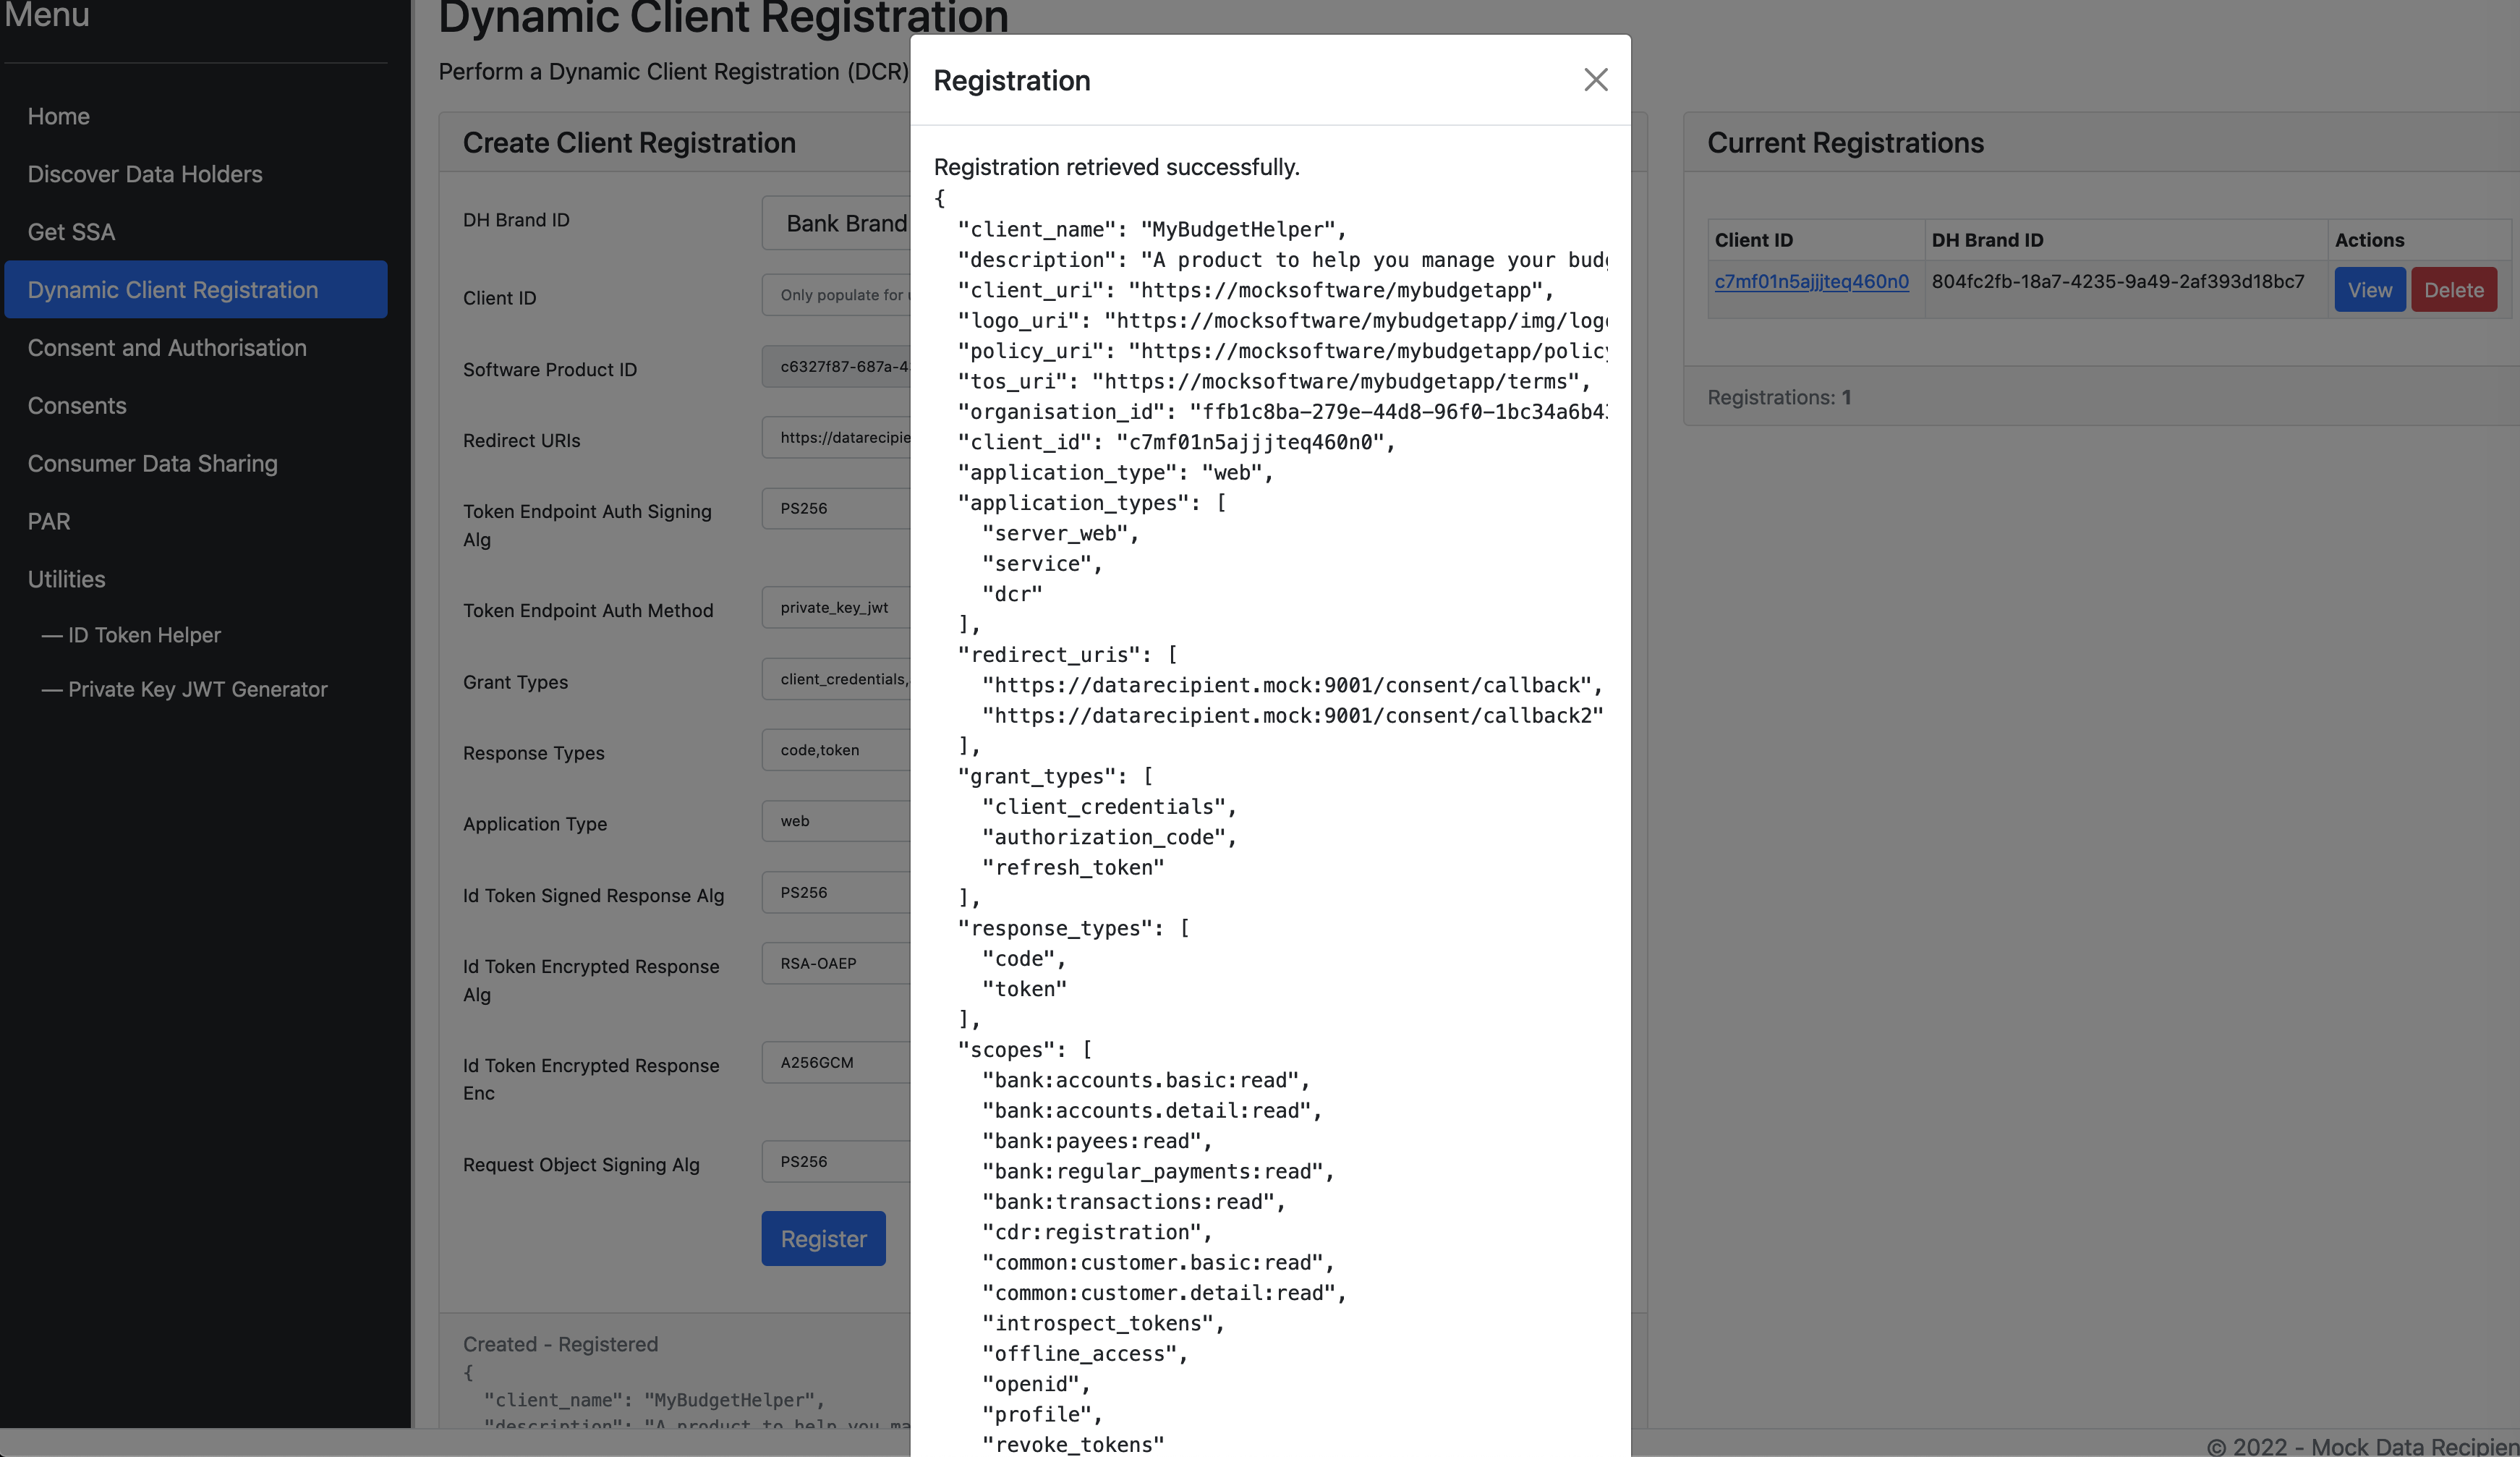
Register client using DCR
This action registers a client application (representing ADR) in Cloudentity. Initiate the app registration process in the
mock-data-recipientapplication.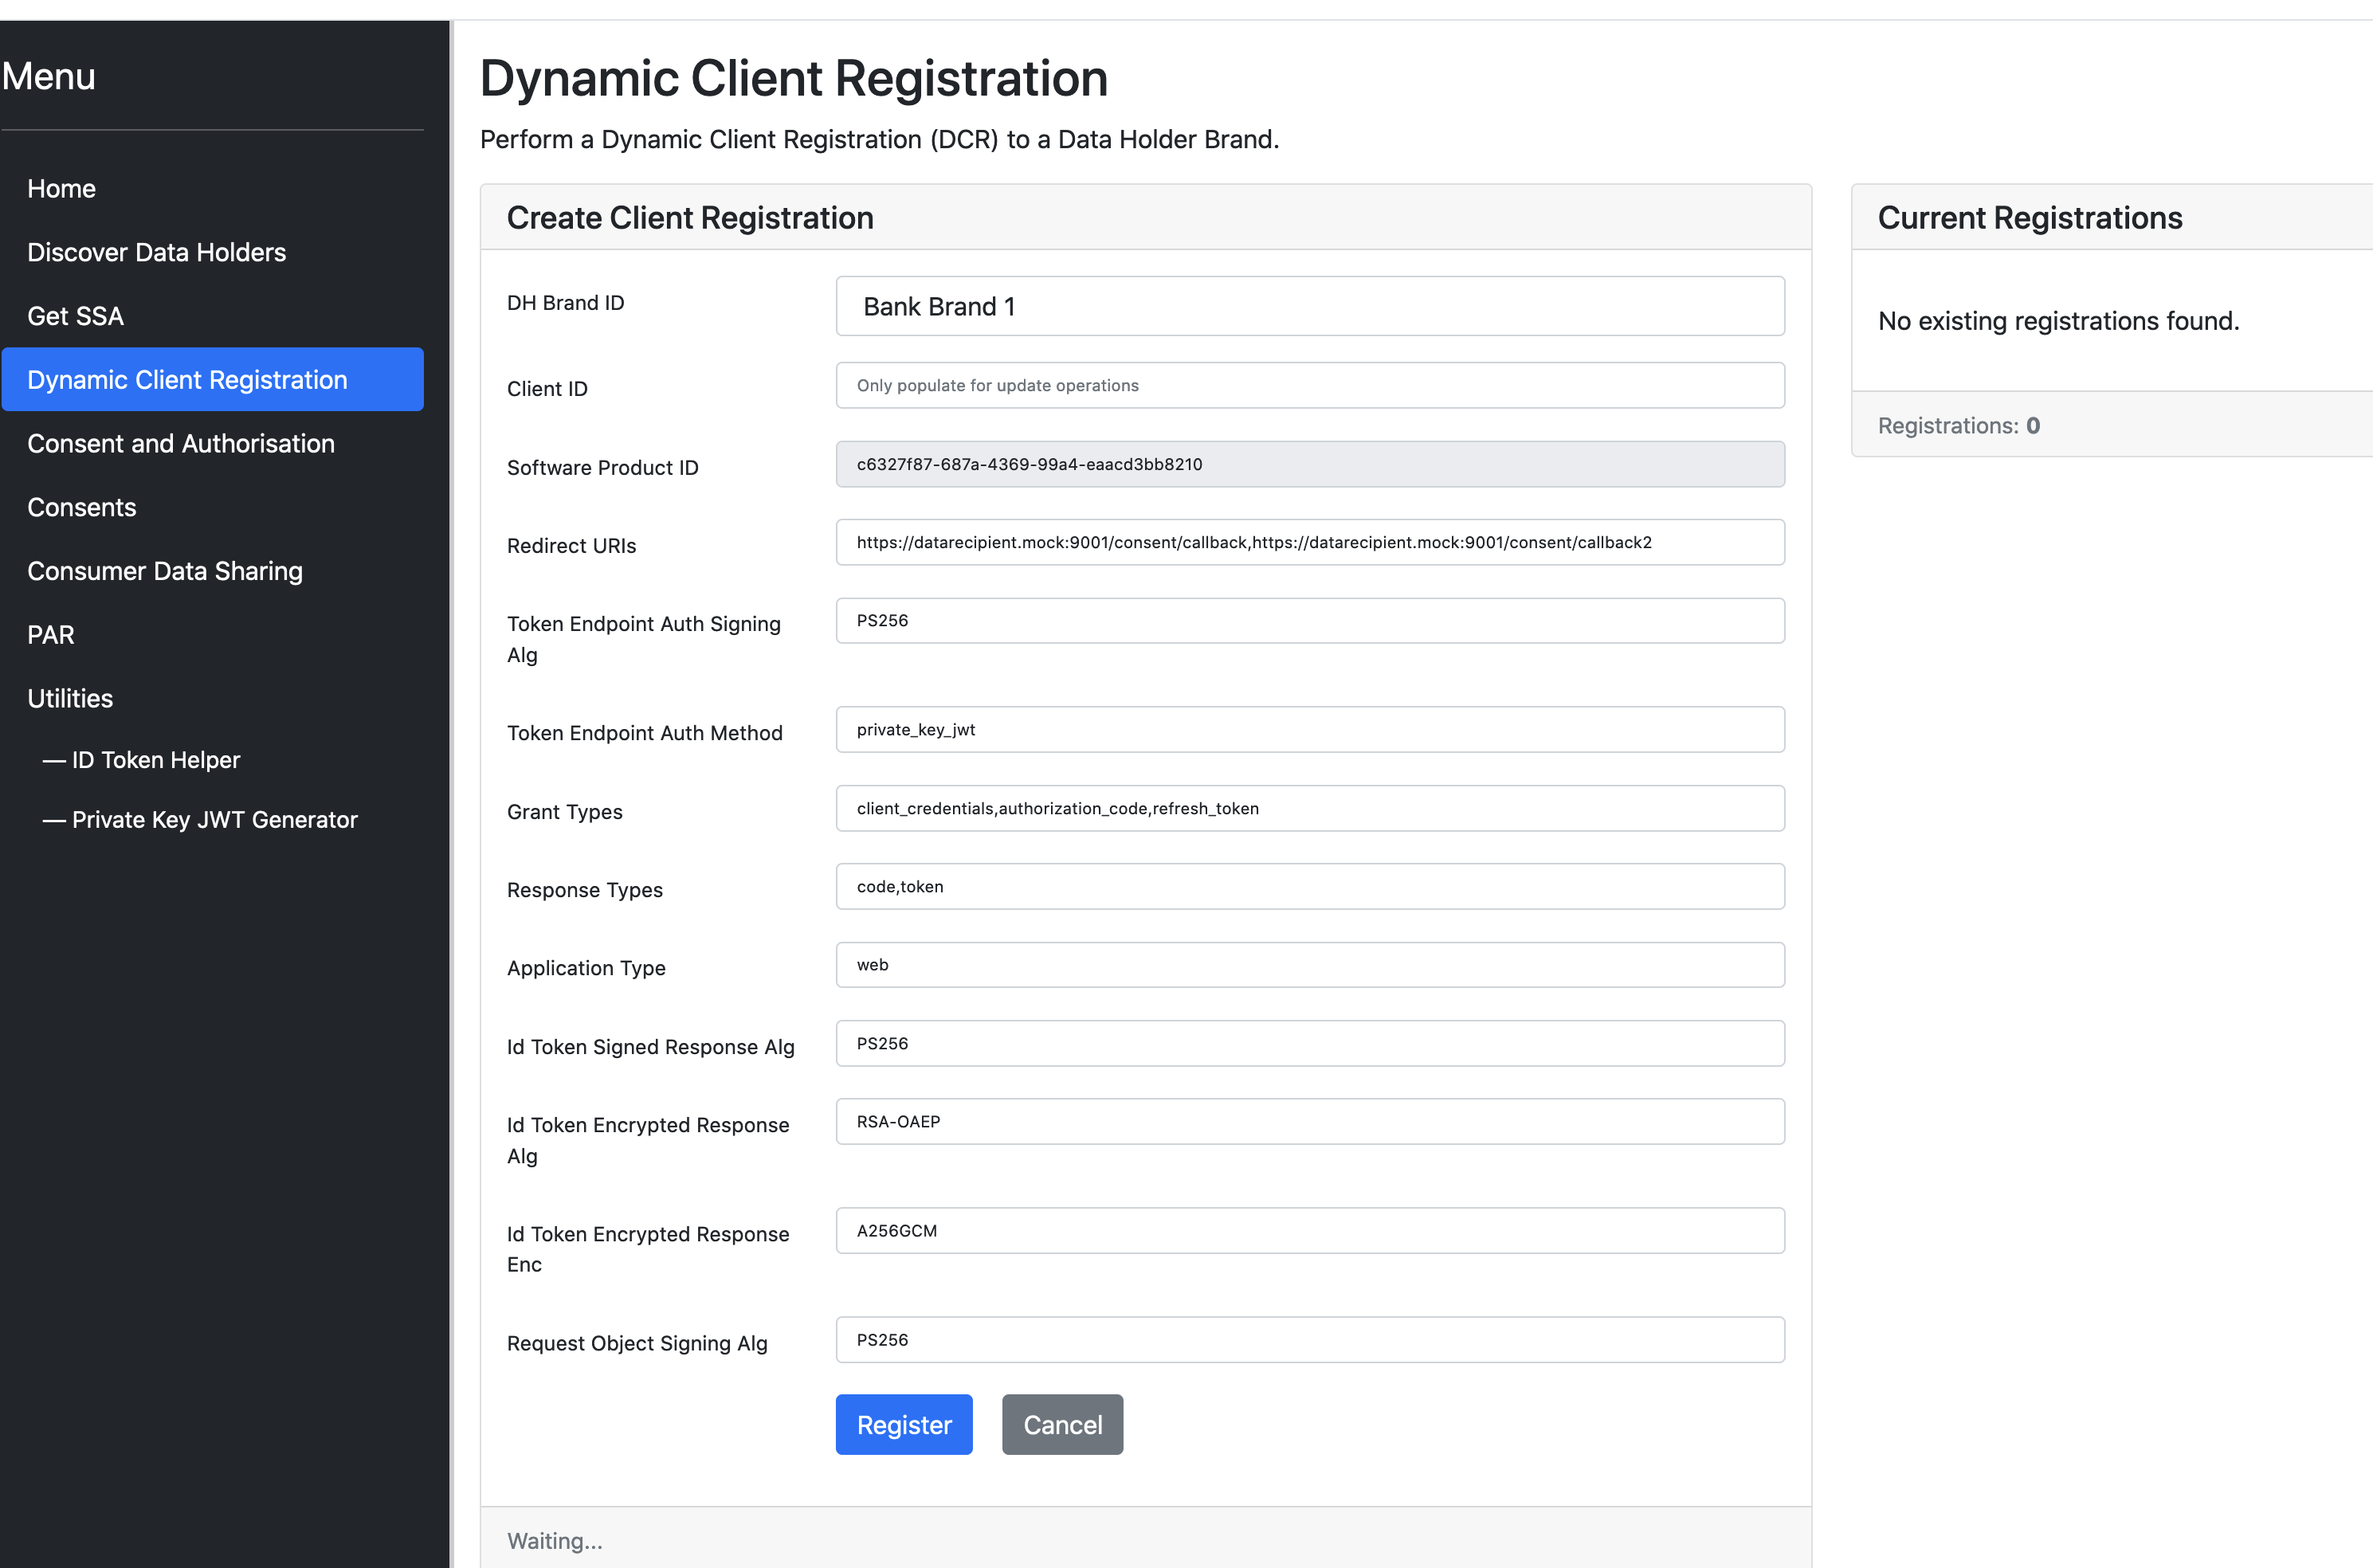
Tip
In real implementation, ADR registers against your Cloudentity tenant. Cloudentity CDR workspace has DCR enabled by default, more details about DCR capability in Cloudentity can be found here
-
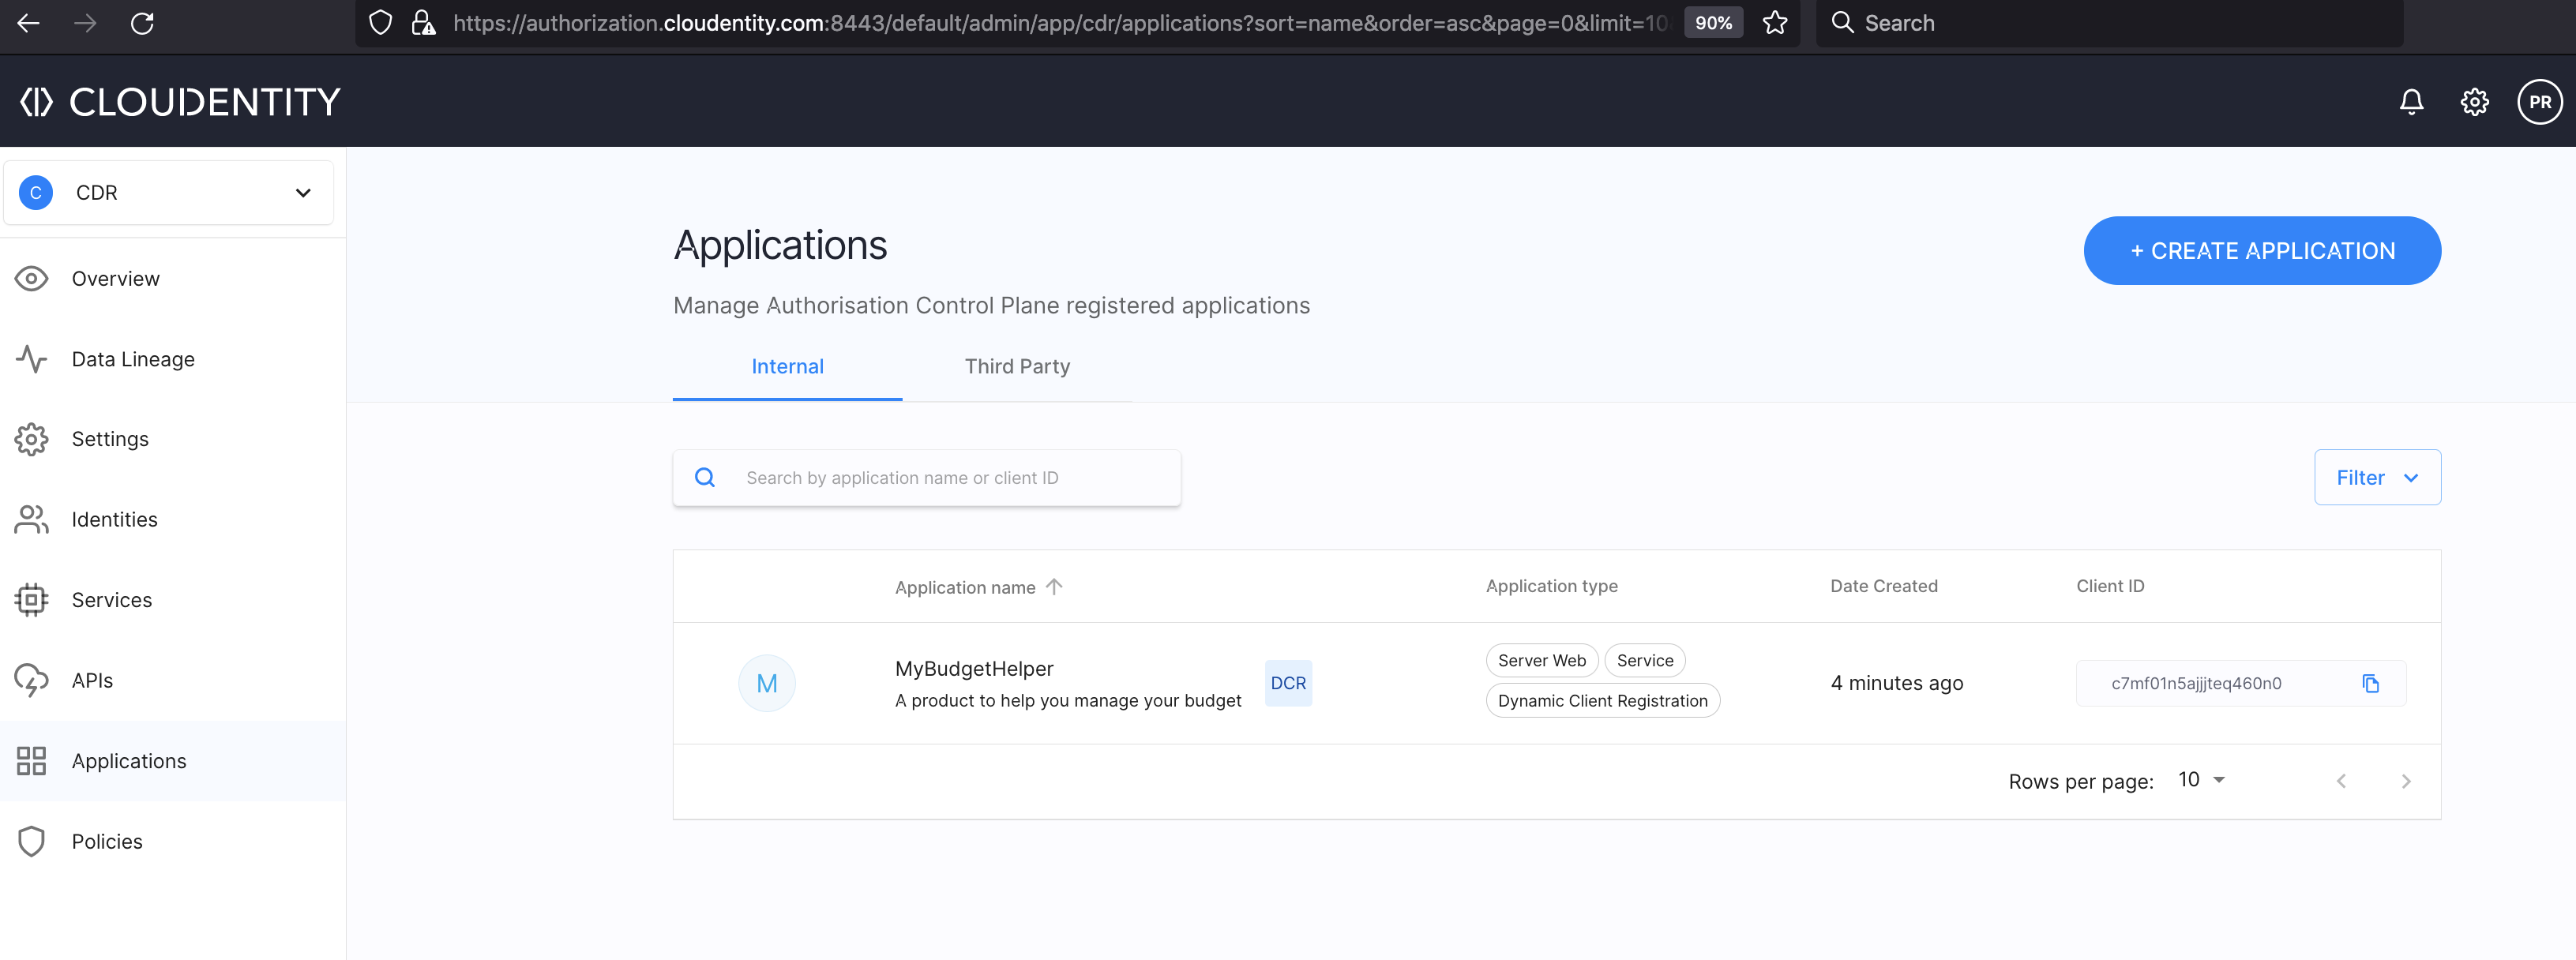
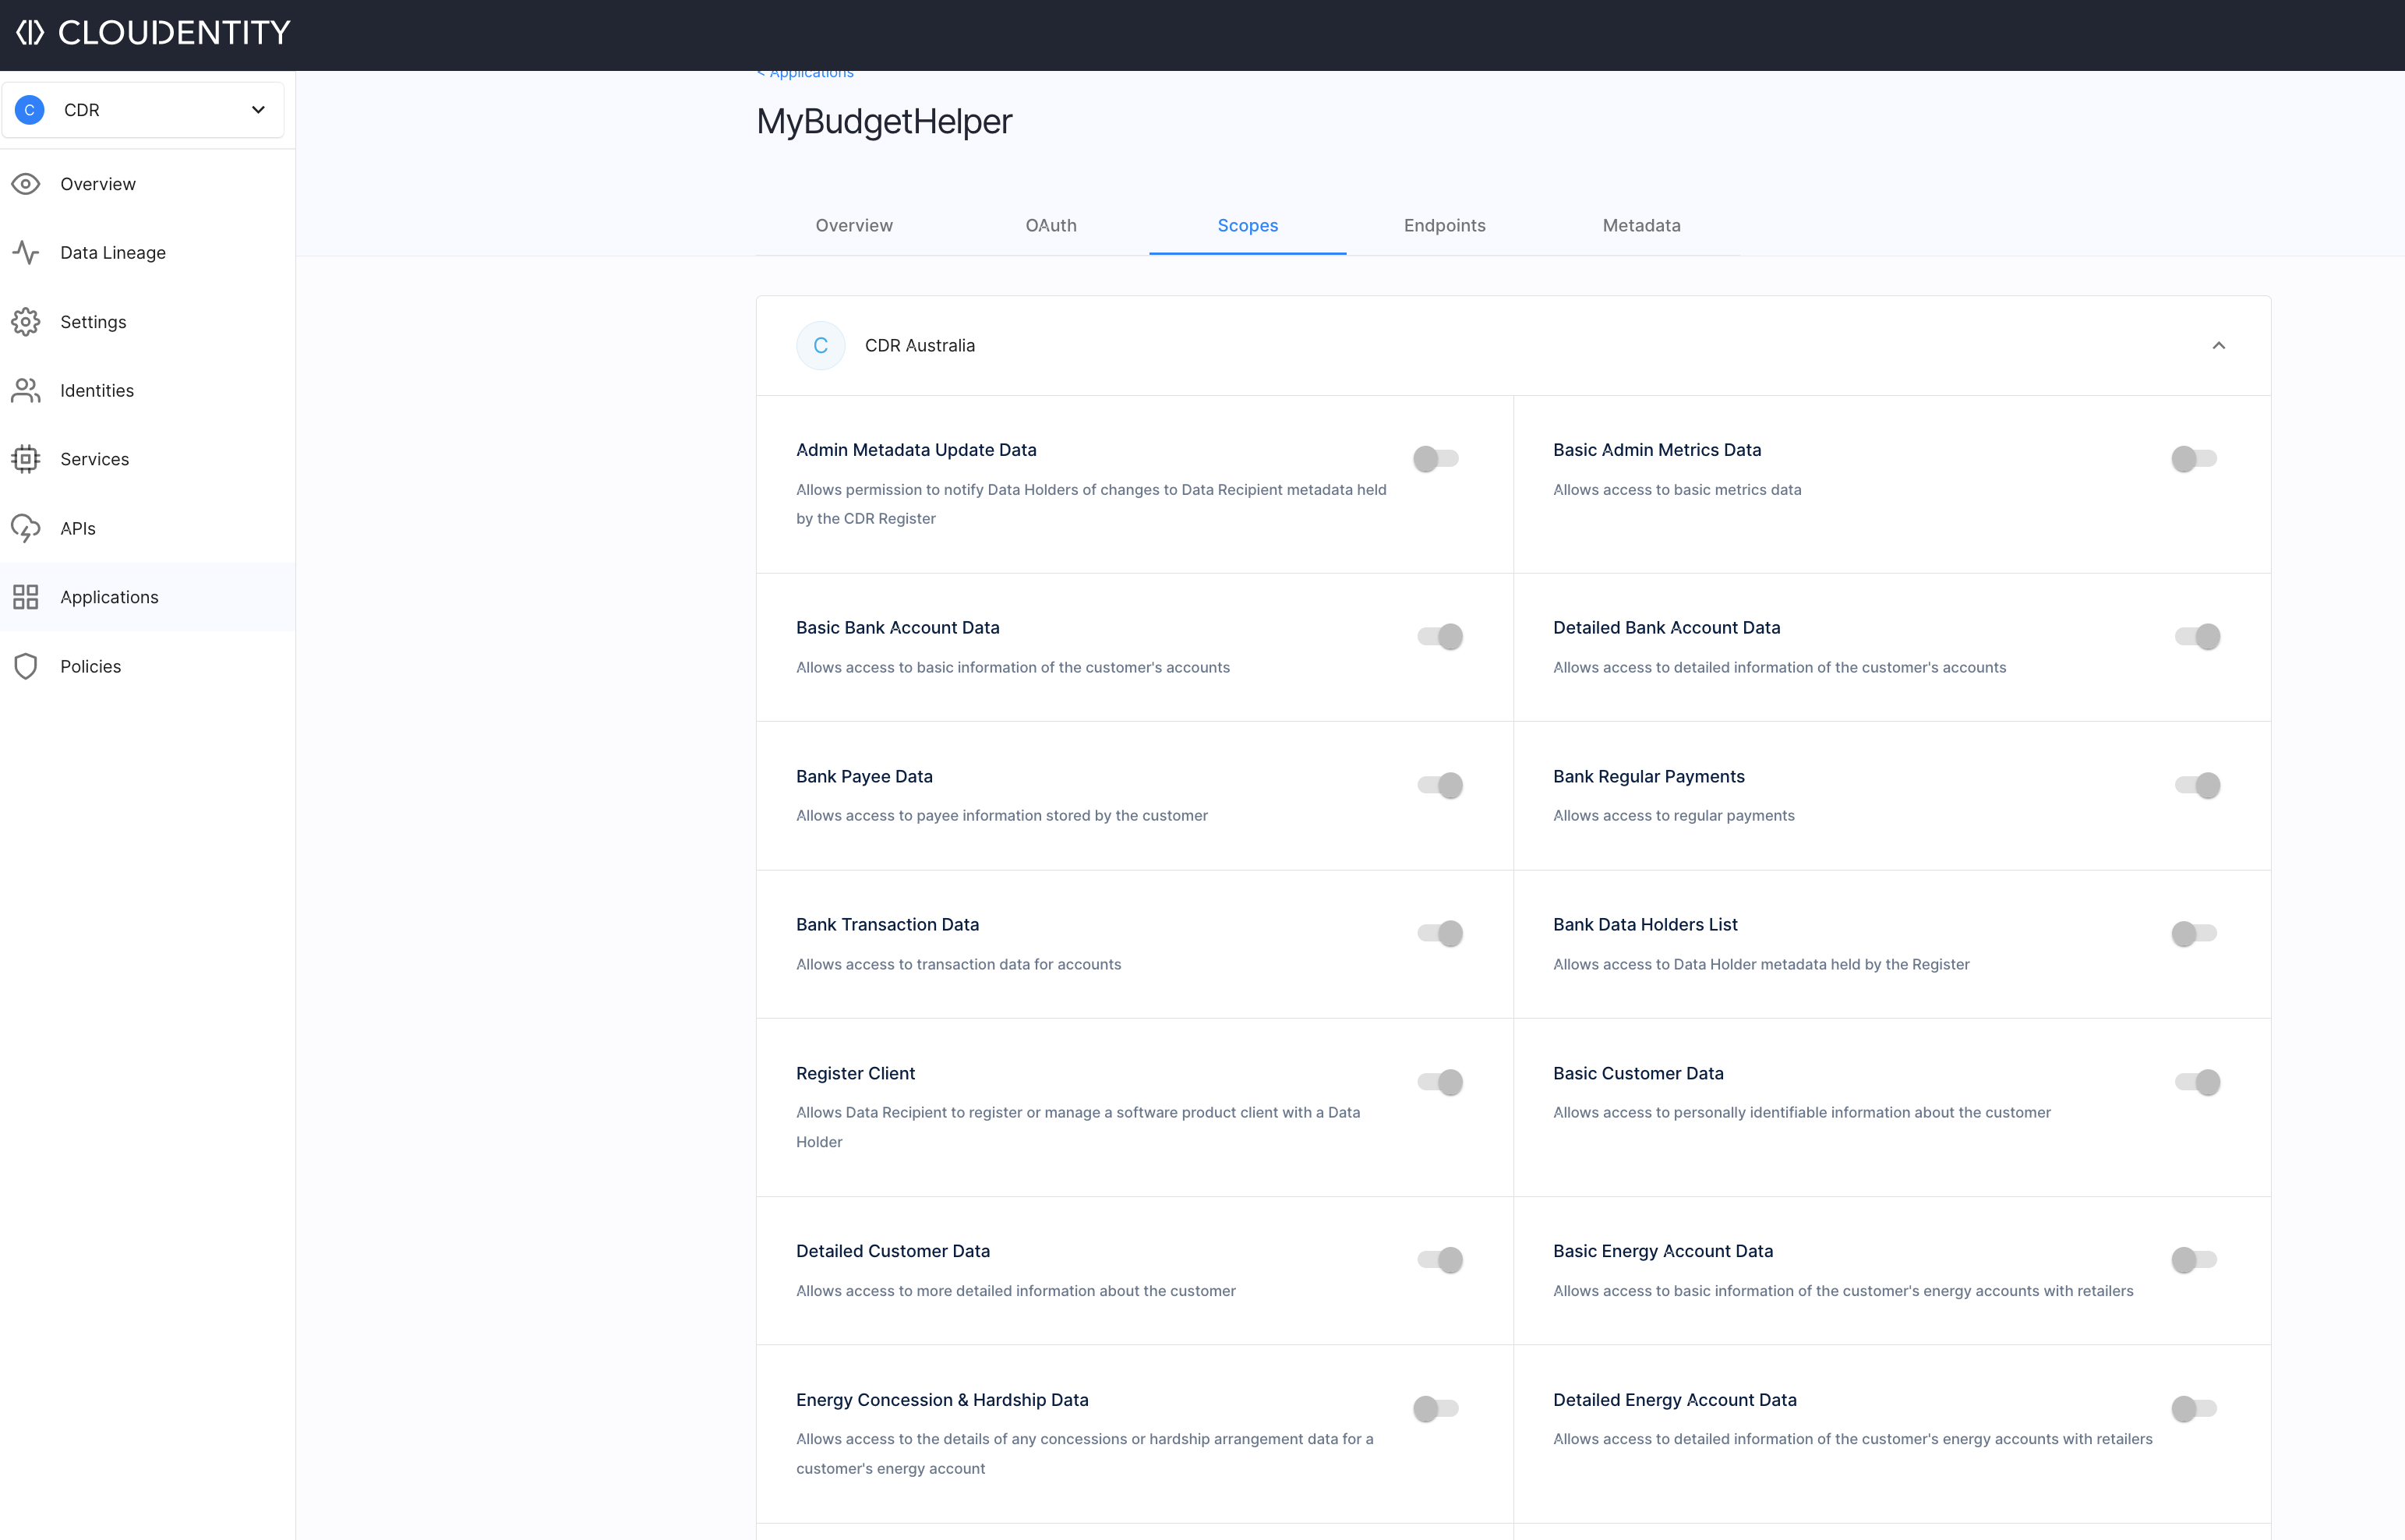
Check client registration in Cloudentity
Navigate to the Cloudentity tenant and choose the CDR workspace profile. Navigate to Applications. You will see a client application that is registered and all appropriate CDR scopes assigned to the application.
ADR Initiate Consumer Consent Authorization
-
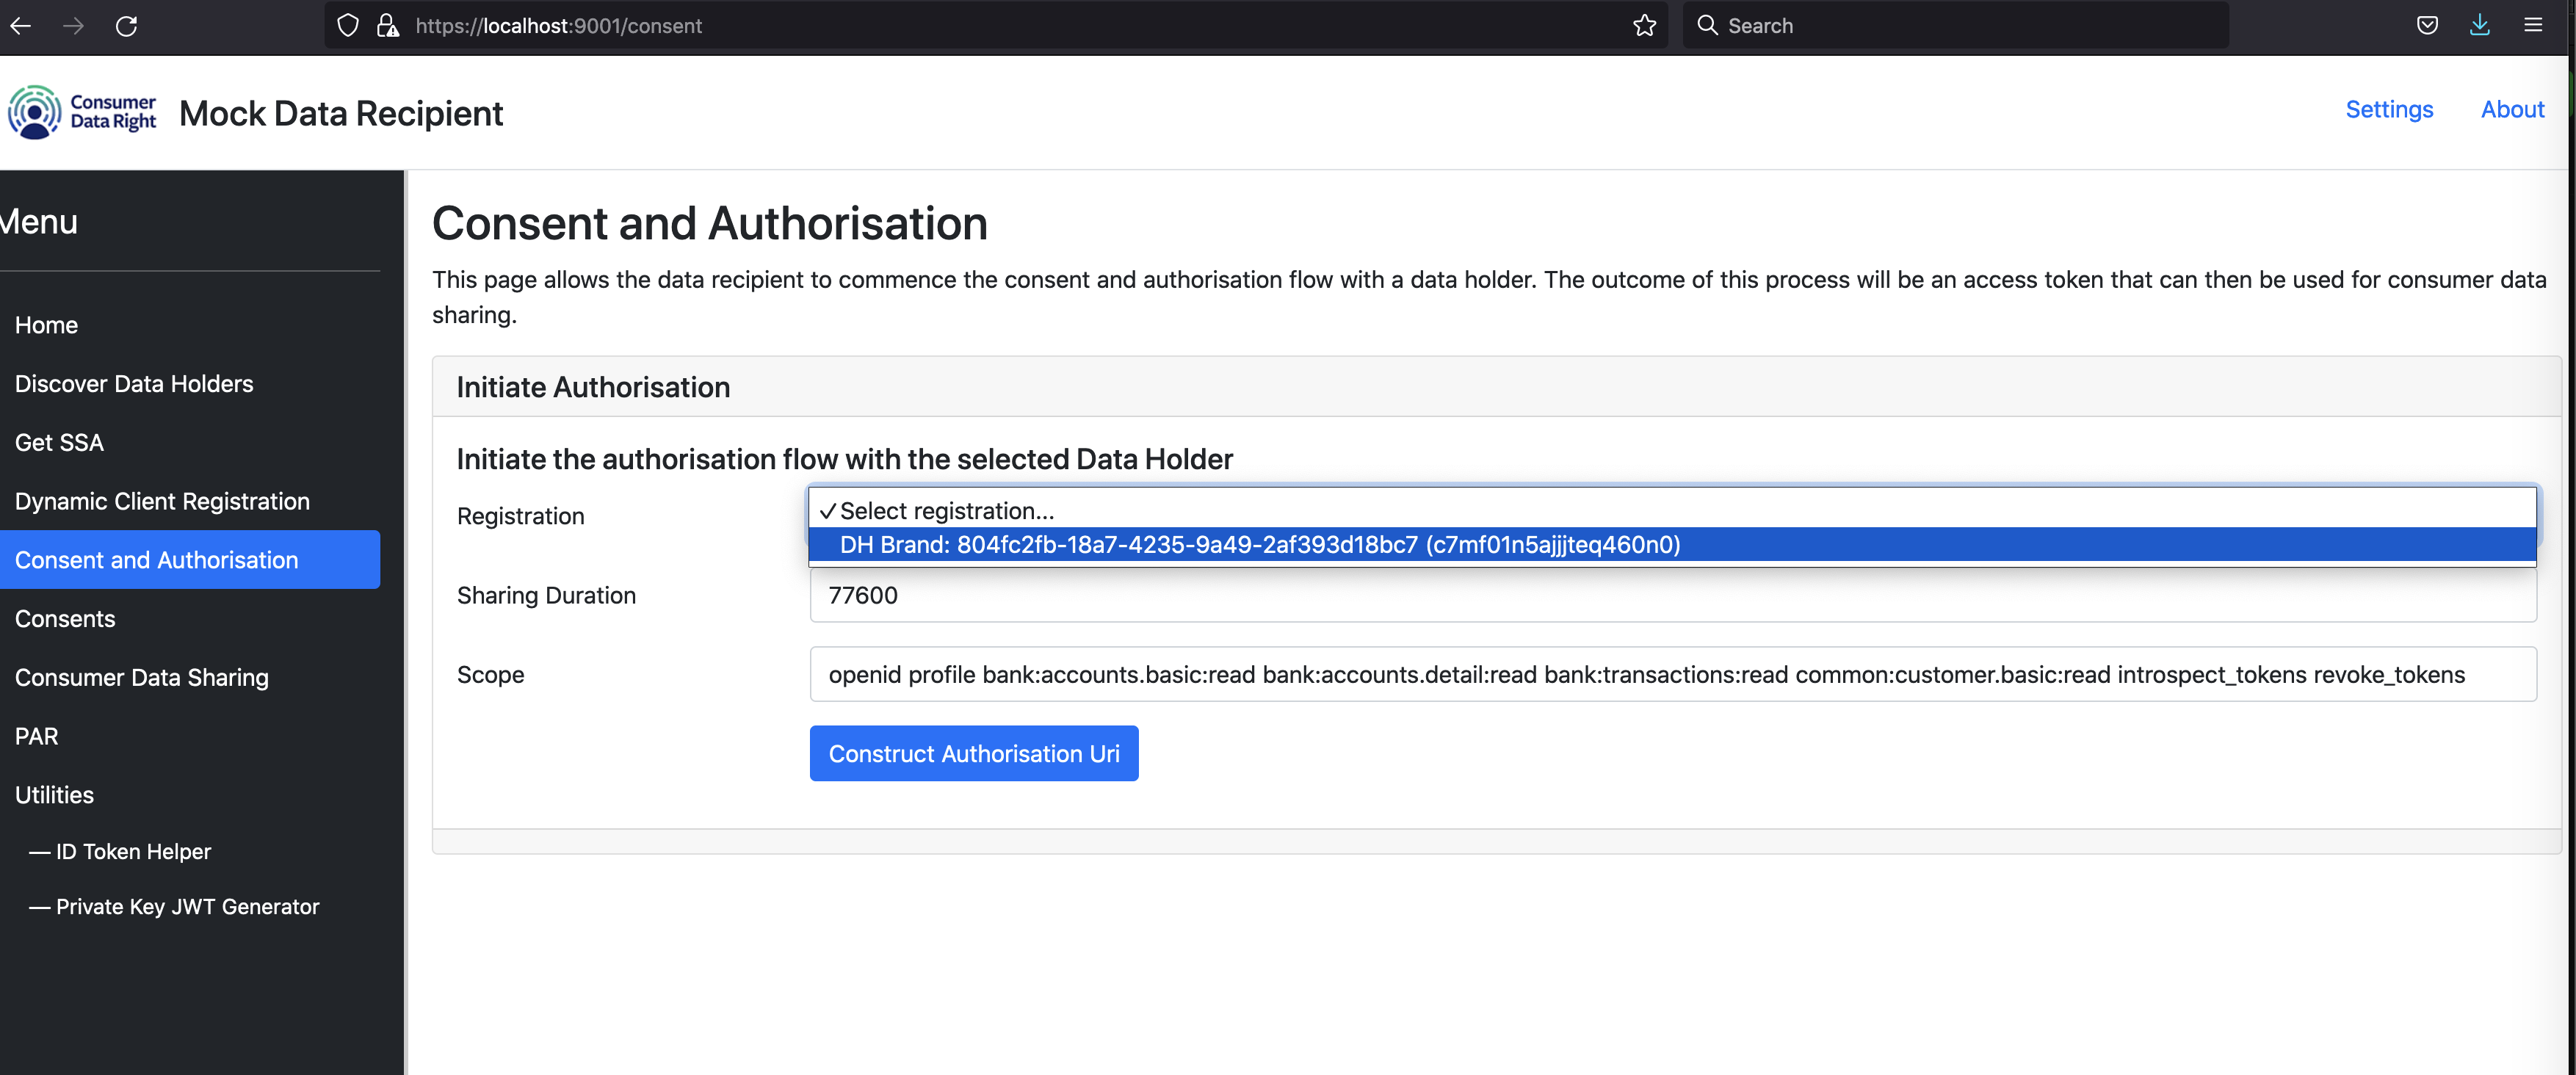
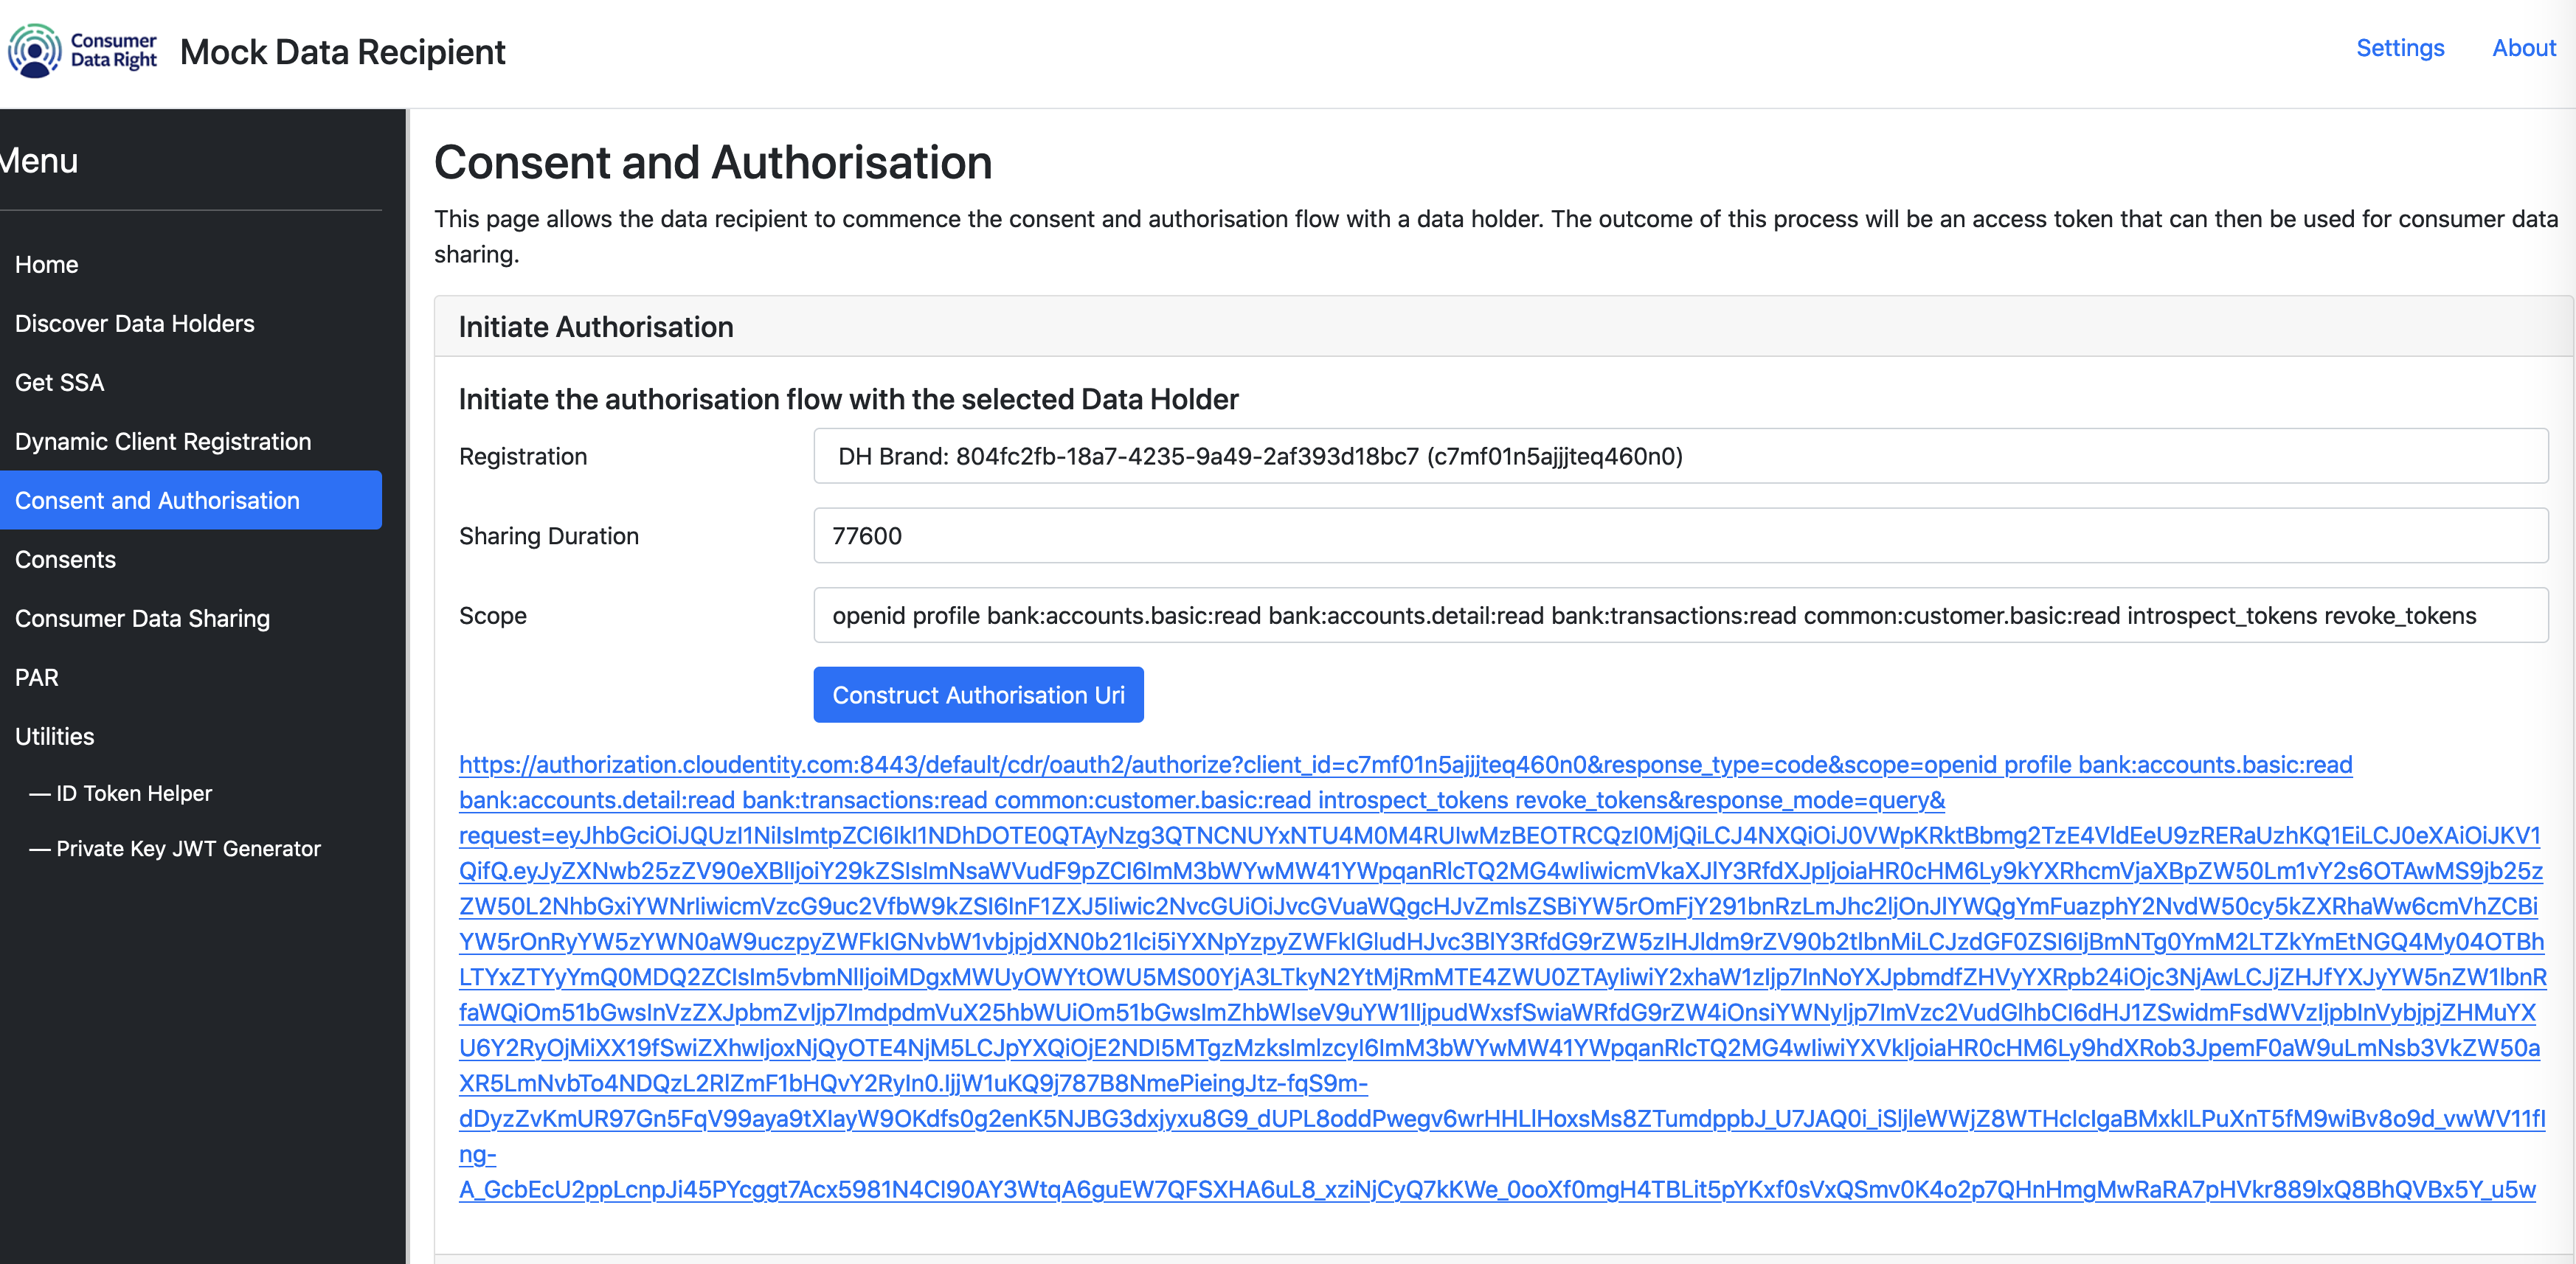
Construct consumer authorization
Accredited Data Recipients(ADR) must initiate an OAuth authorization request with the client application registered above to get required consumer consents to fetch consumer data from Data Holder. To construct the OAuth authorization URL, navigate manually to Consent screen in Data Recipient application and choose the Data Holder against which the authorization needs to be trigerred.
-
Initiate consumer authorization
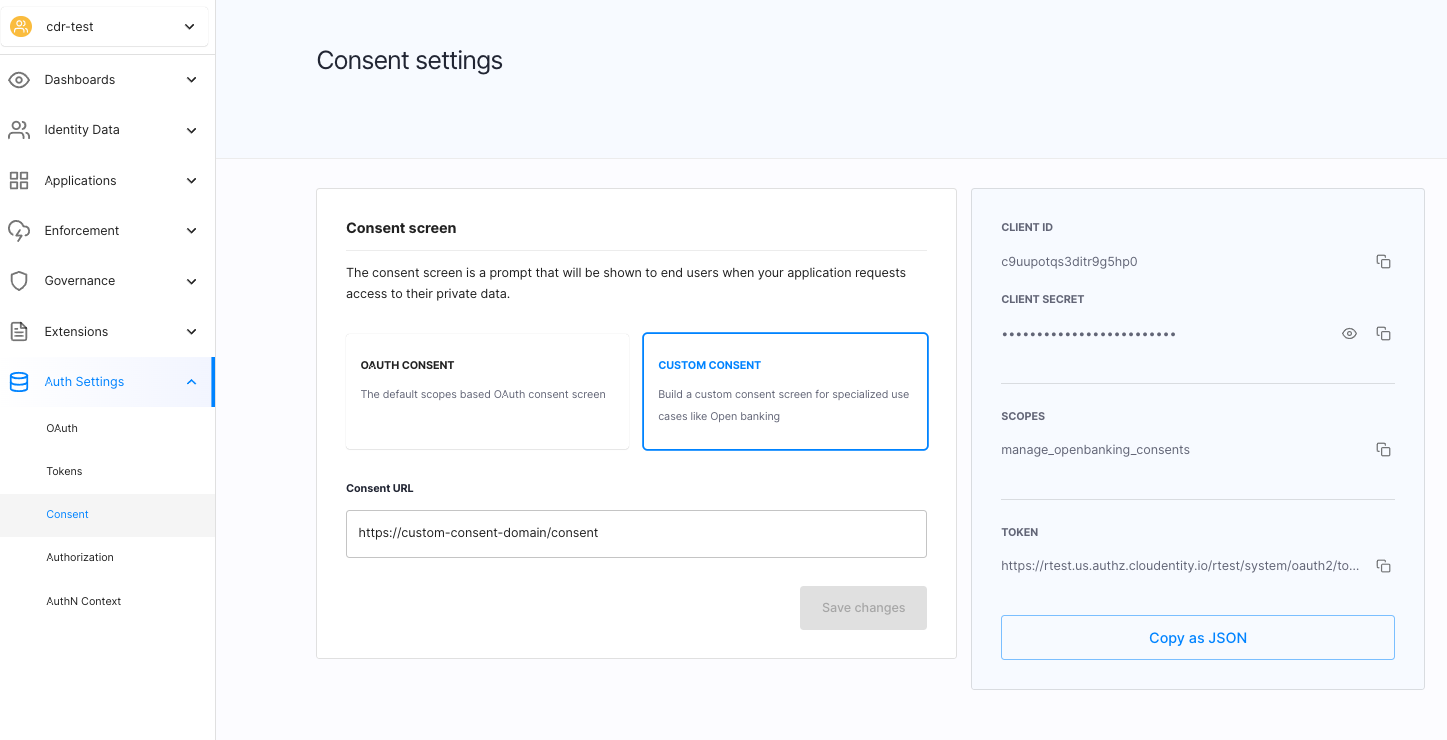
Now that we have the authorization url, data recipient ideally would redirect user to the authorization URL. Since this is a technical reference app, you will just copy the URL from above screen and paste into a browser. This call will initiate an OAuth authorization request to the Cloudentity authorization platform. Cloudentity platform redirects the user to the Data holder authentication provider. By default, we have configured a mock identity provider in Cloudentity, so the user can login. (use
user/p@ssword!as credentials). Once authenticated, the Cloudentity platform serves the consent application to the user. Consent application is served based on the Cloudentity authorization server setting, for example based on default setting, it redirects the user tohttp://localhost:7080.
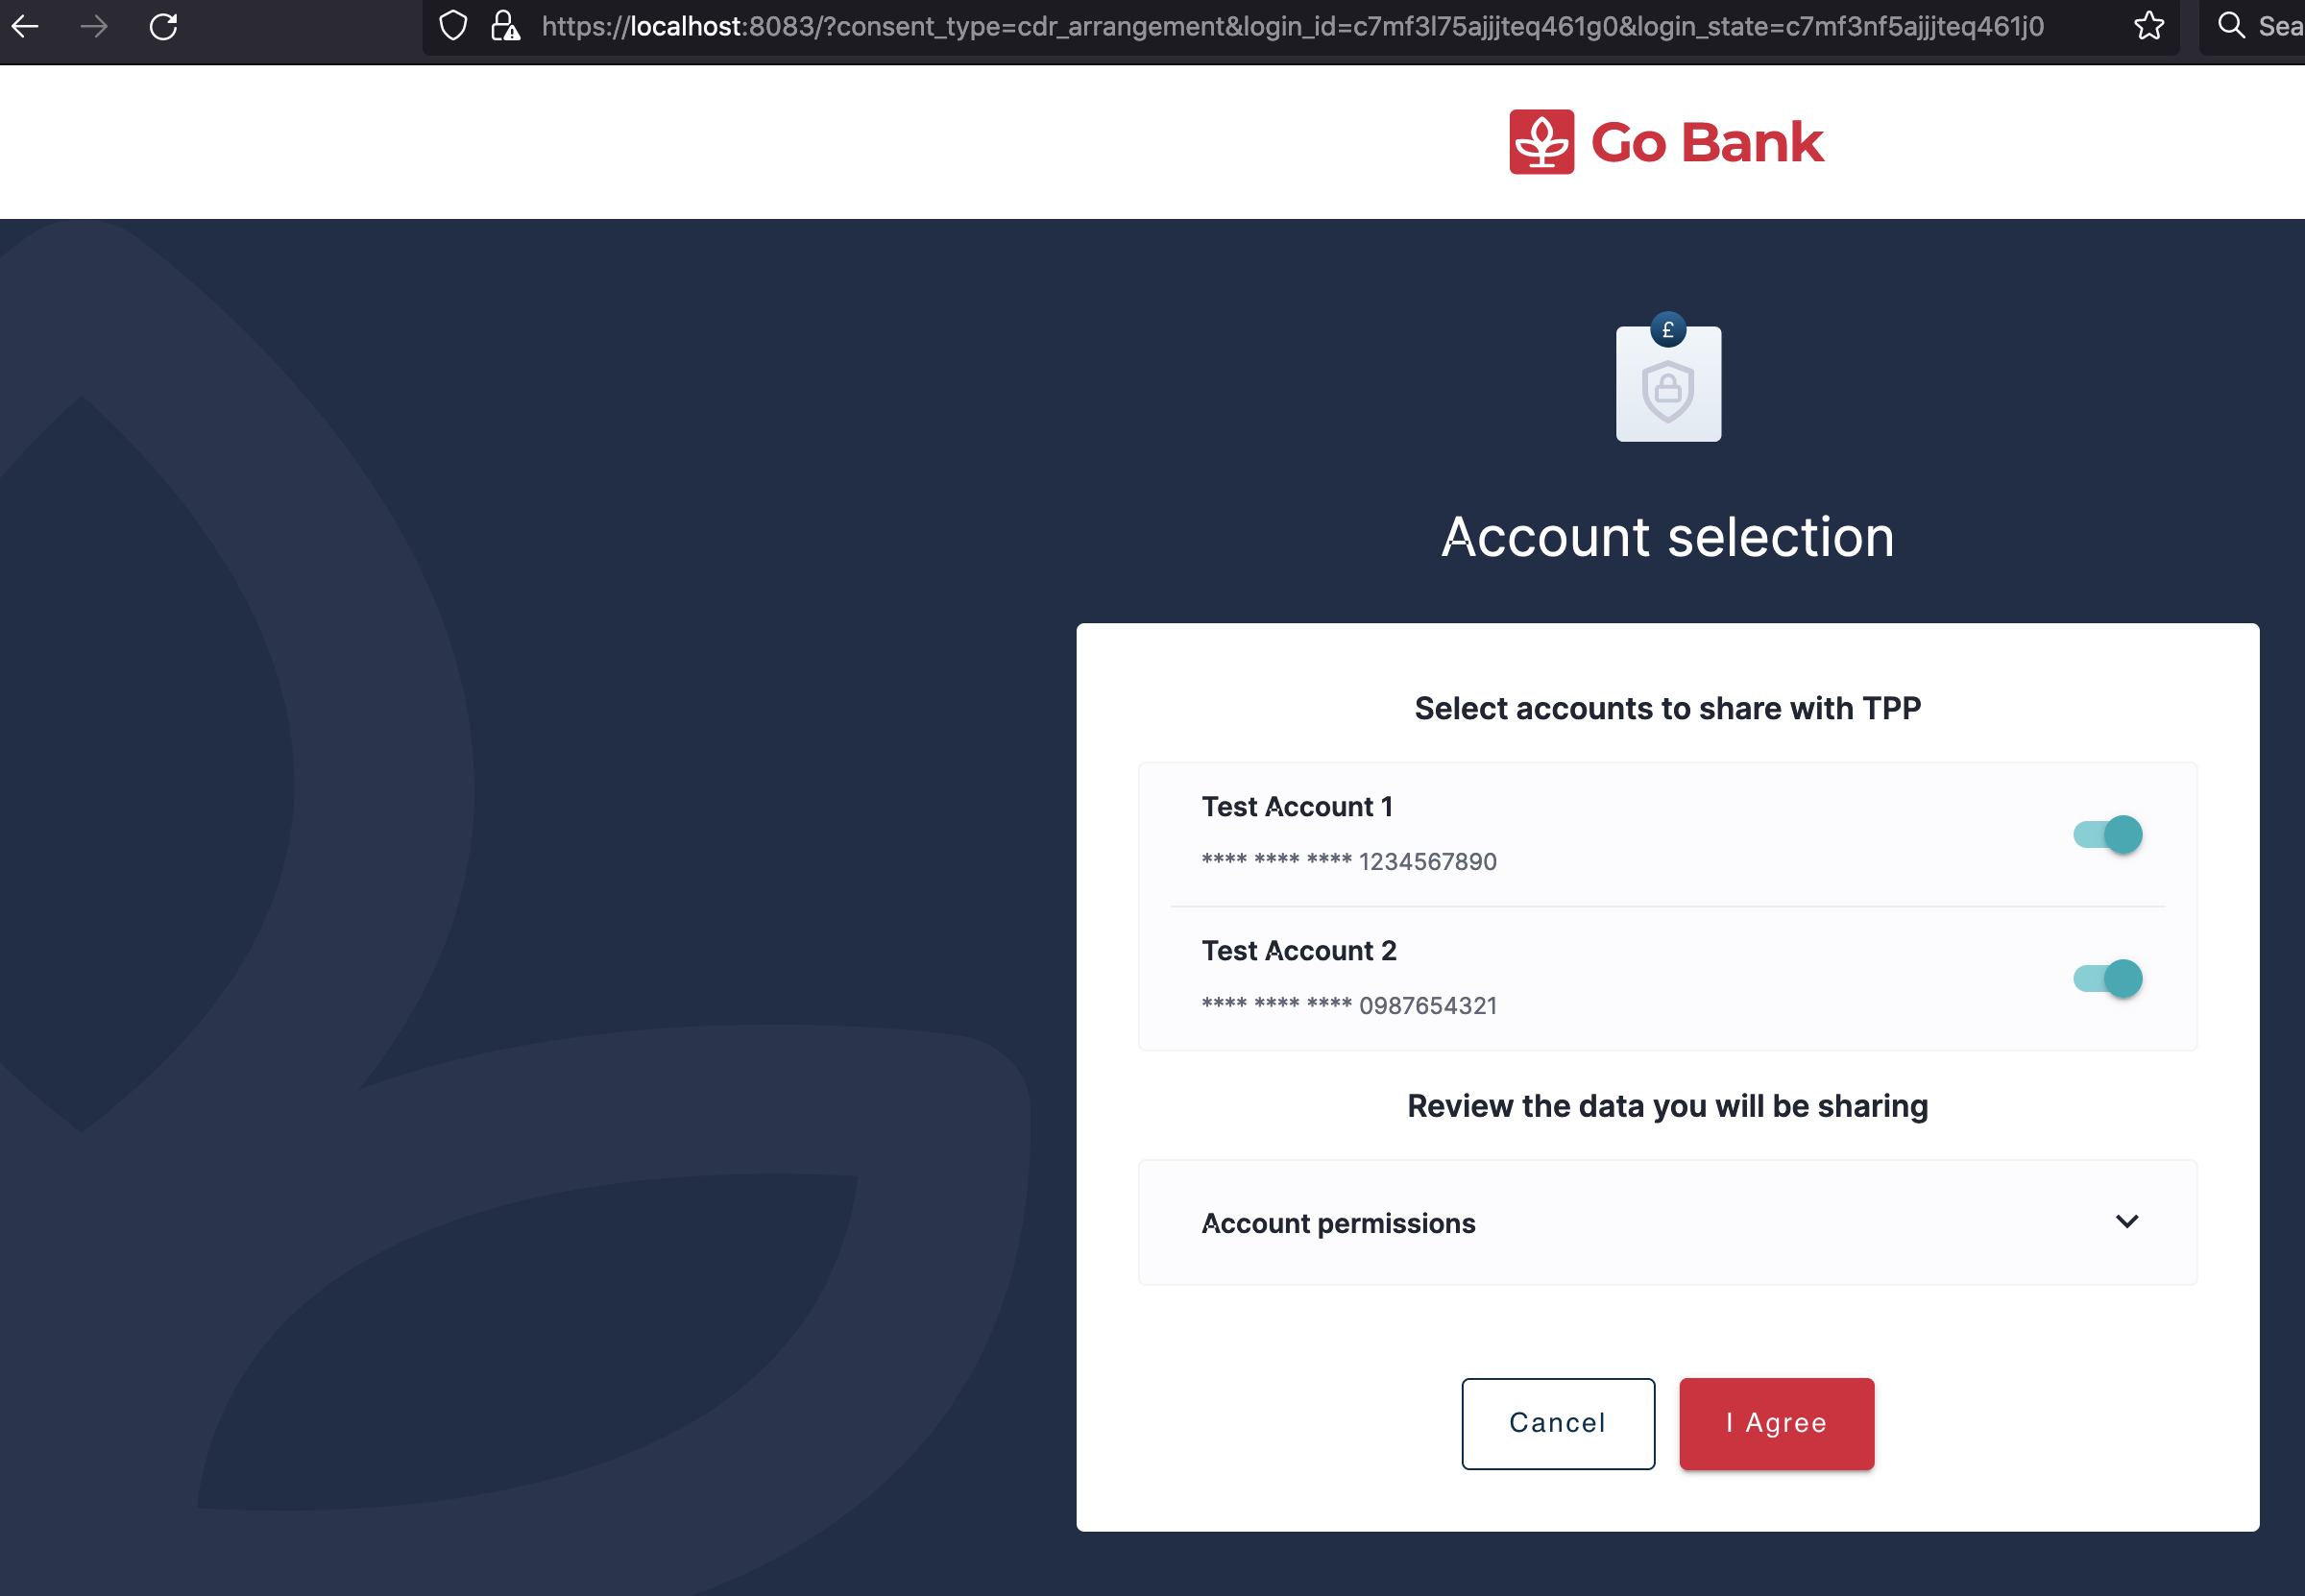
Once user consents to the application, Cloudentity platform stores the consents and
issues relevant authorization tokens back to Data Recipient application.
The user is redirected back to the mock-data-recipient application.
Tip
Keep in mind the consent app is just a reference application and we recommend you to build your own consent application with rich user and customer journery experiences. To build you own consumer consent application, follow these articles:
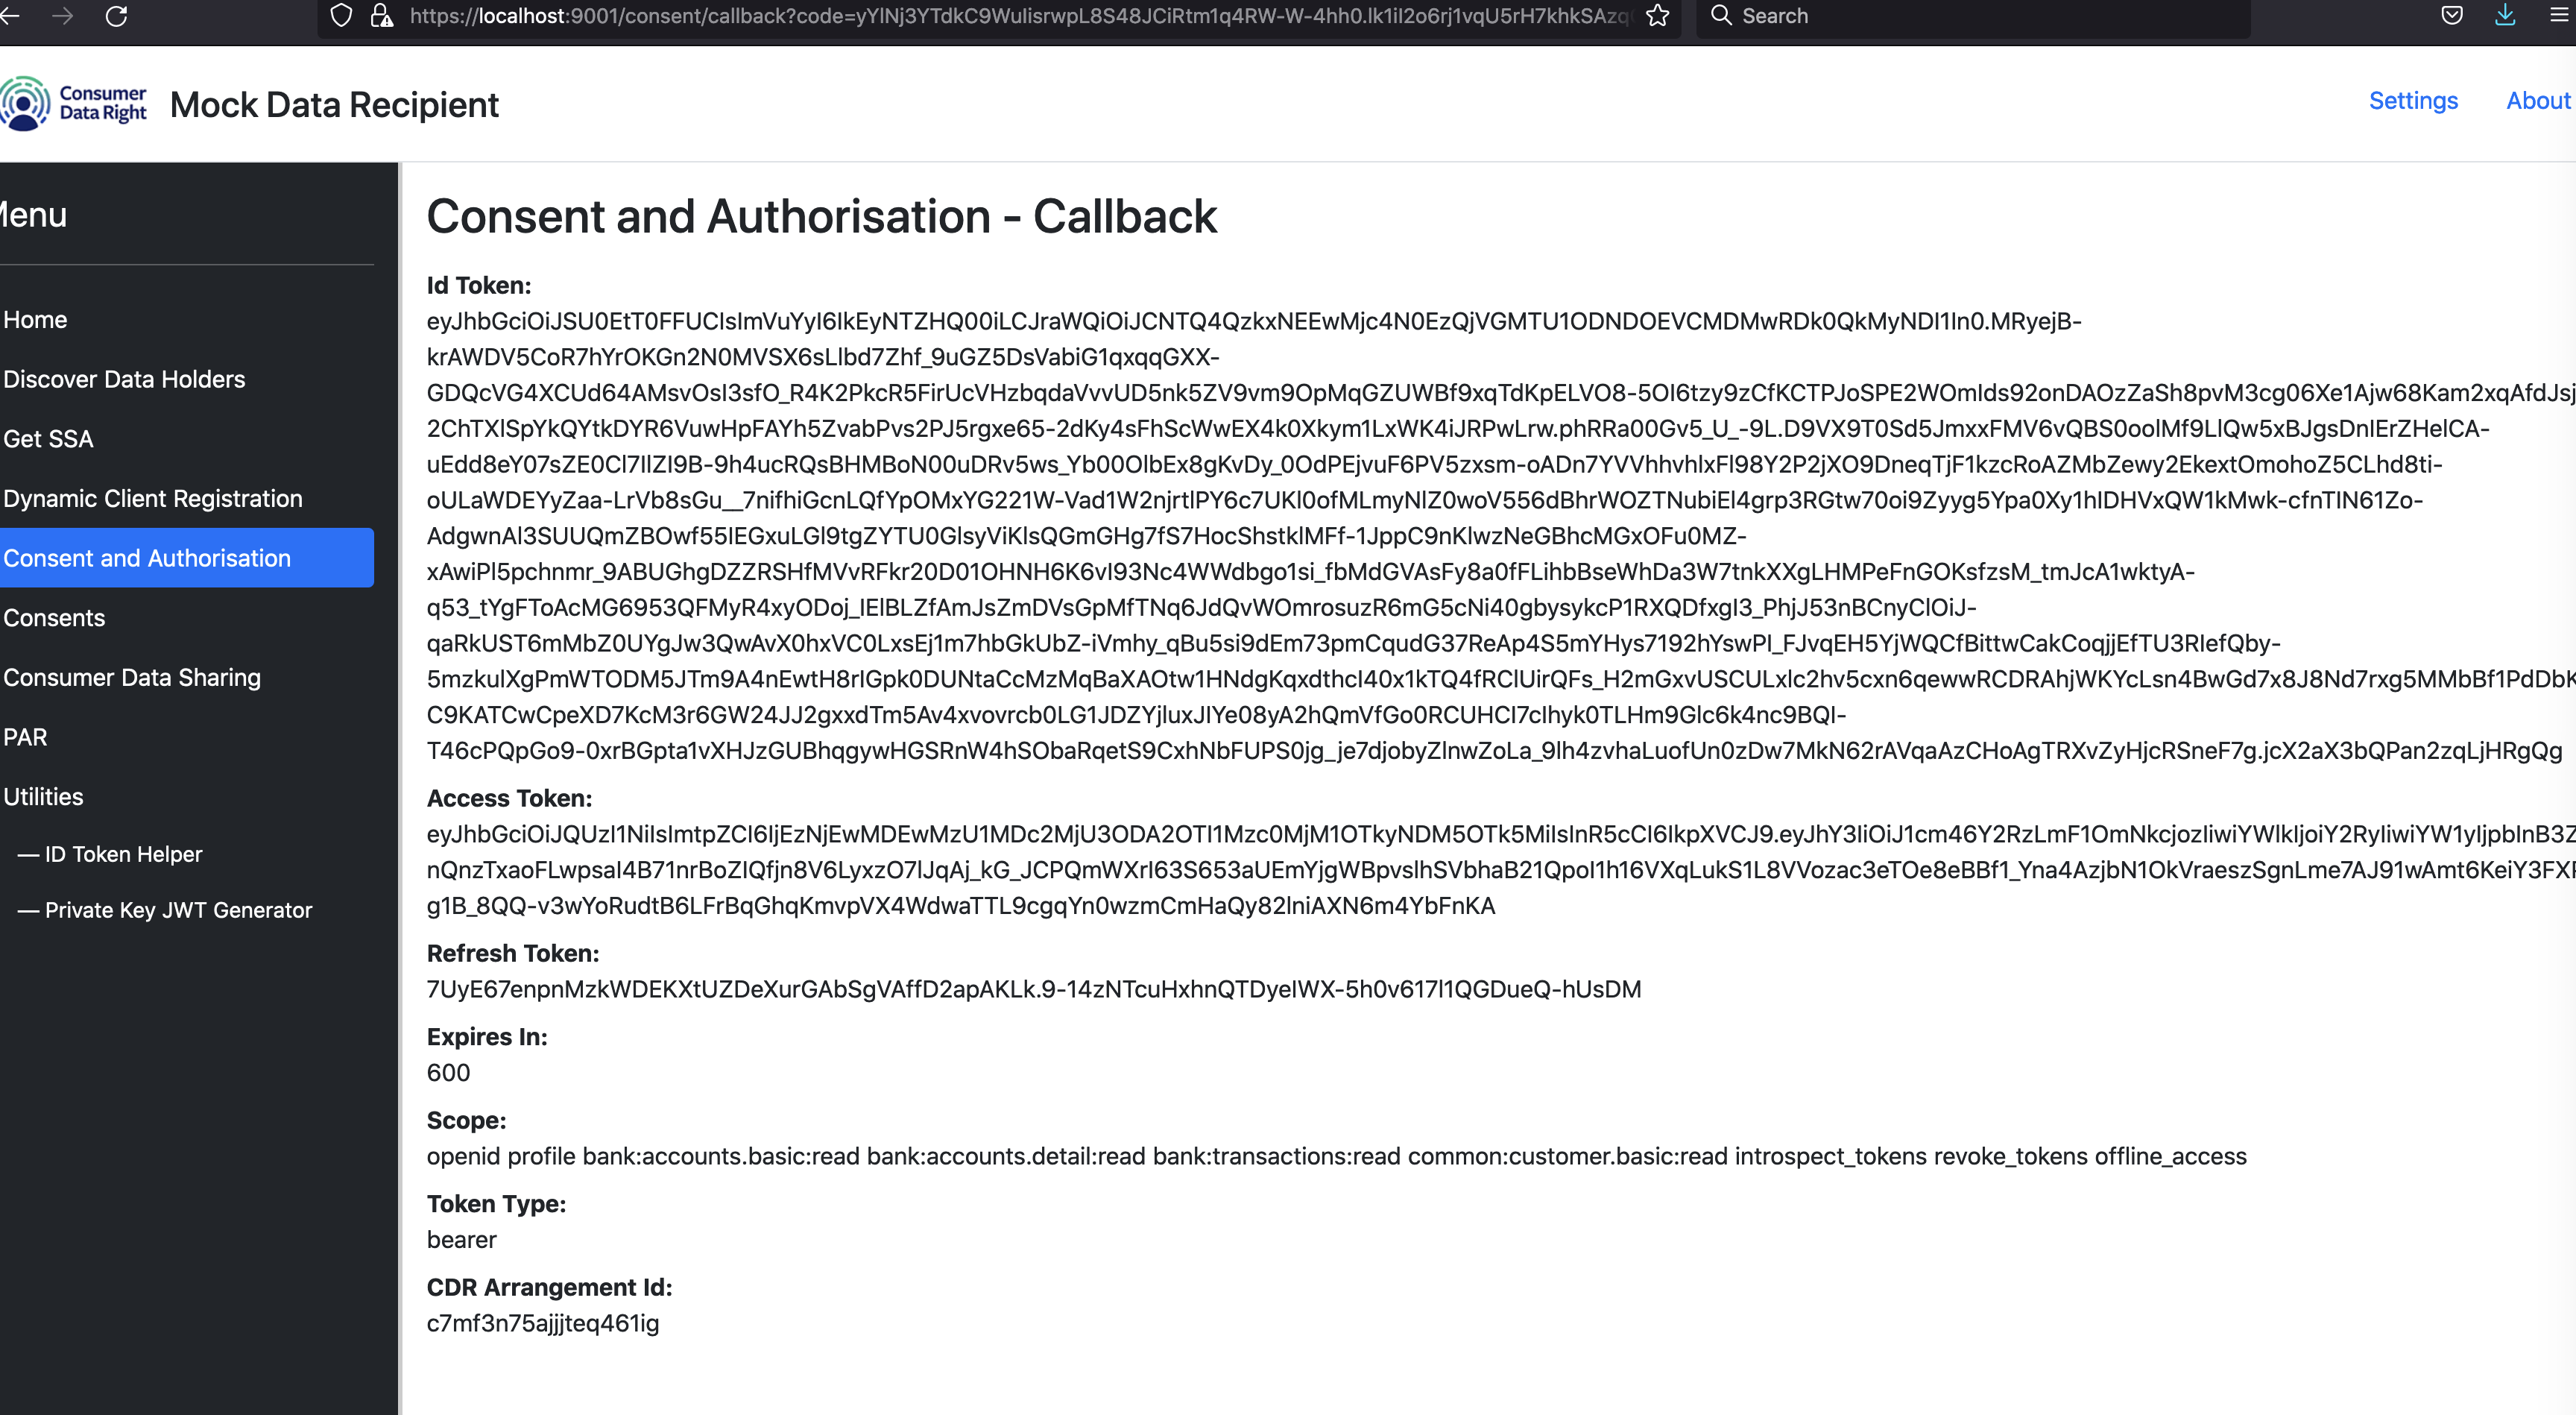
As the result, the data recipient obtaines the consumer consent to fetch their data from Data Holders. Data Recipient can now use the consent in the form of access tokens to call the Data Holder data APIs.
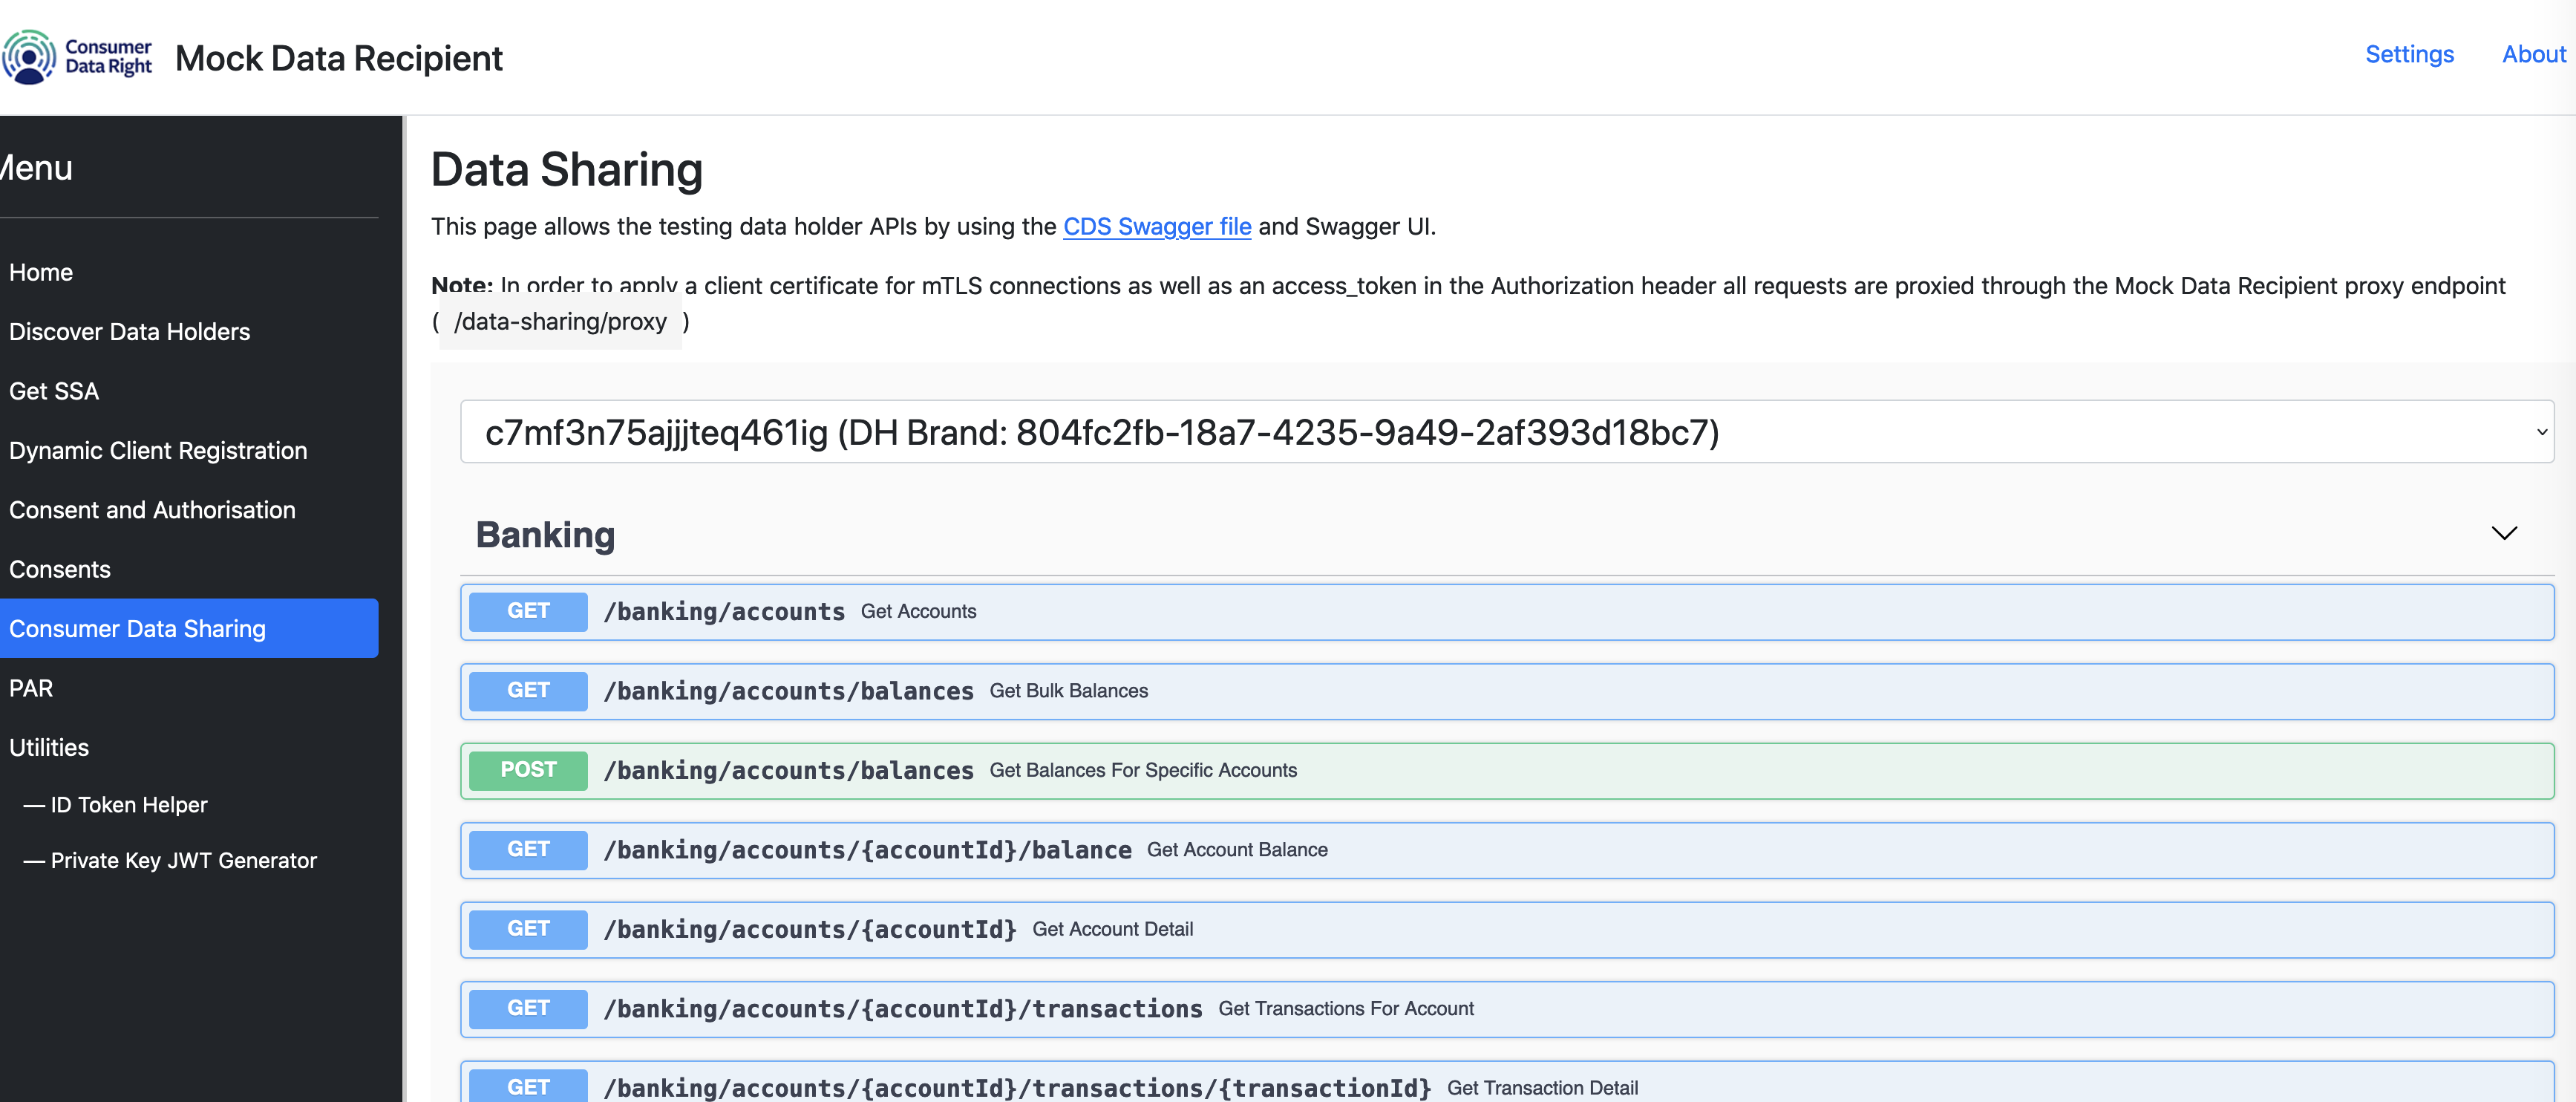
Invoke CDR API’s
Now that we have the cdr-arrangement-id and associated accessToken, we can invoke the API’s
exposed by the data-holder using the accessToken..
Sample curl where the $AT environment variable stands for the access token:
curl -kv -X  'GET' \
  'https://datarecipient.mock:9001/data-sharing/proxy/cds-au/v1/banking/accounts?open-status=ALL&page=1&page-size=2' \
  -H 'accept: application/json' \
  -H 'x-v: 1' \
  -H 'x-inject-cdr-arrangement-id: c7mf3n75ajjjteq461ig' \
  -H 'x-fapi-auth-date: Fri, 01 Jan 2021 00:00:00 GMT' \
  -H 'Authorization: Bearer $AT'
This mock data holder application does not showcase how to completely protect Data holder API. To learn more about it, see the Consumer data API access & protection article.
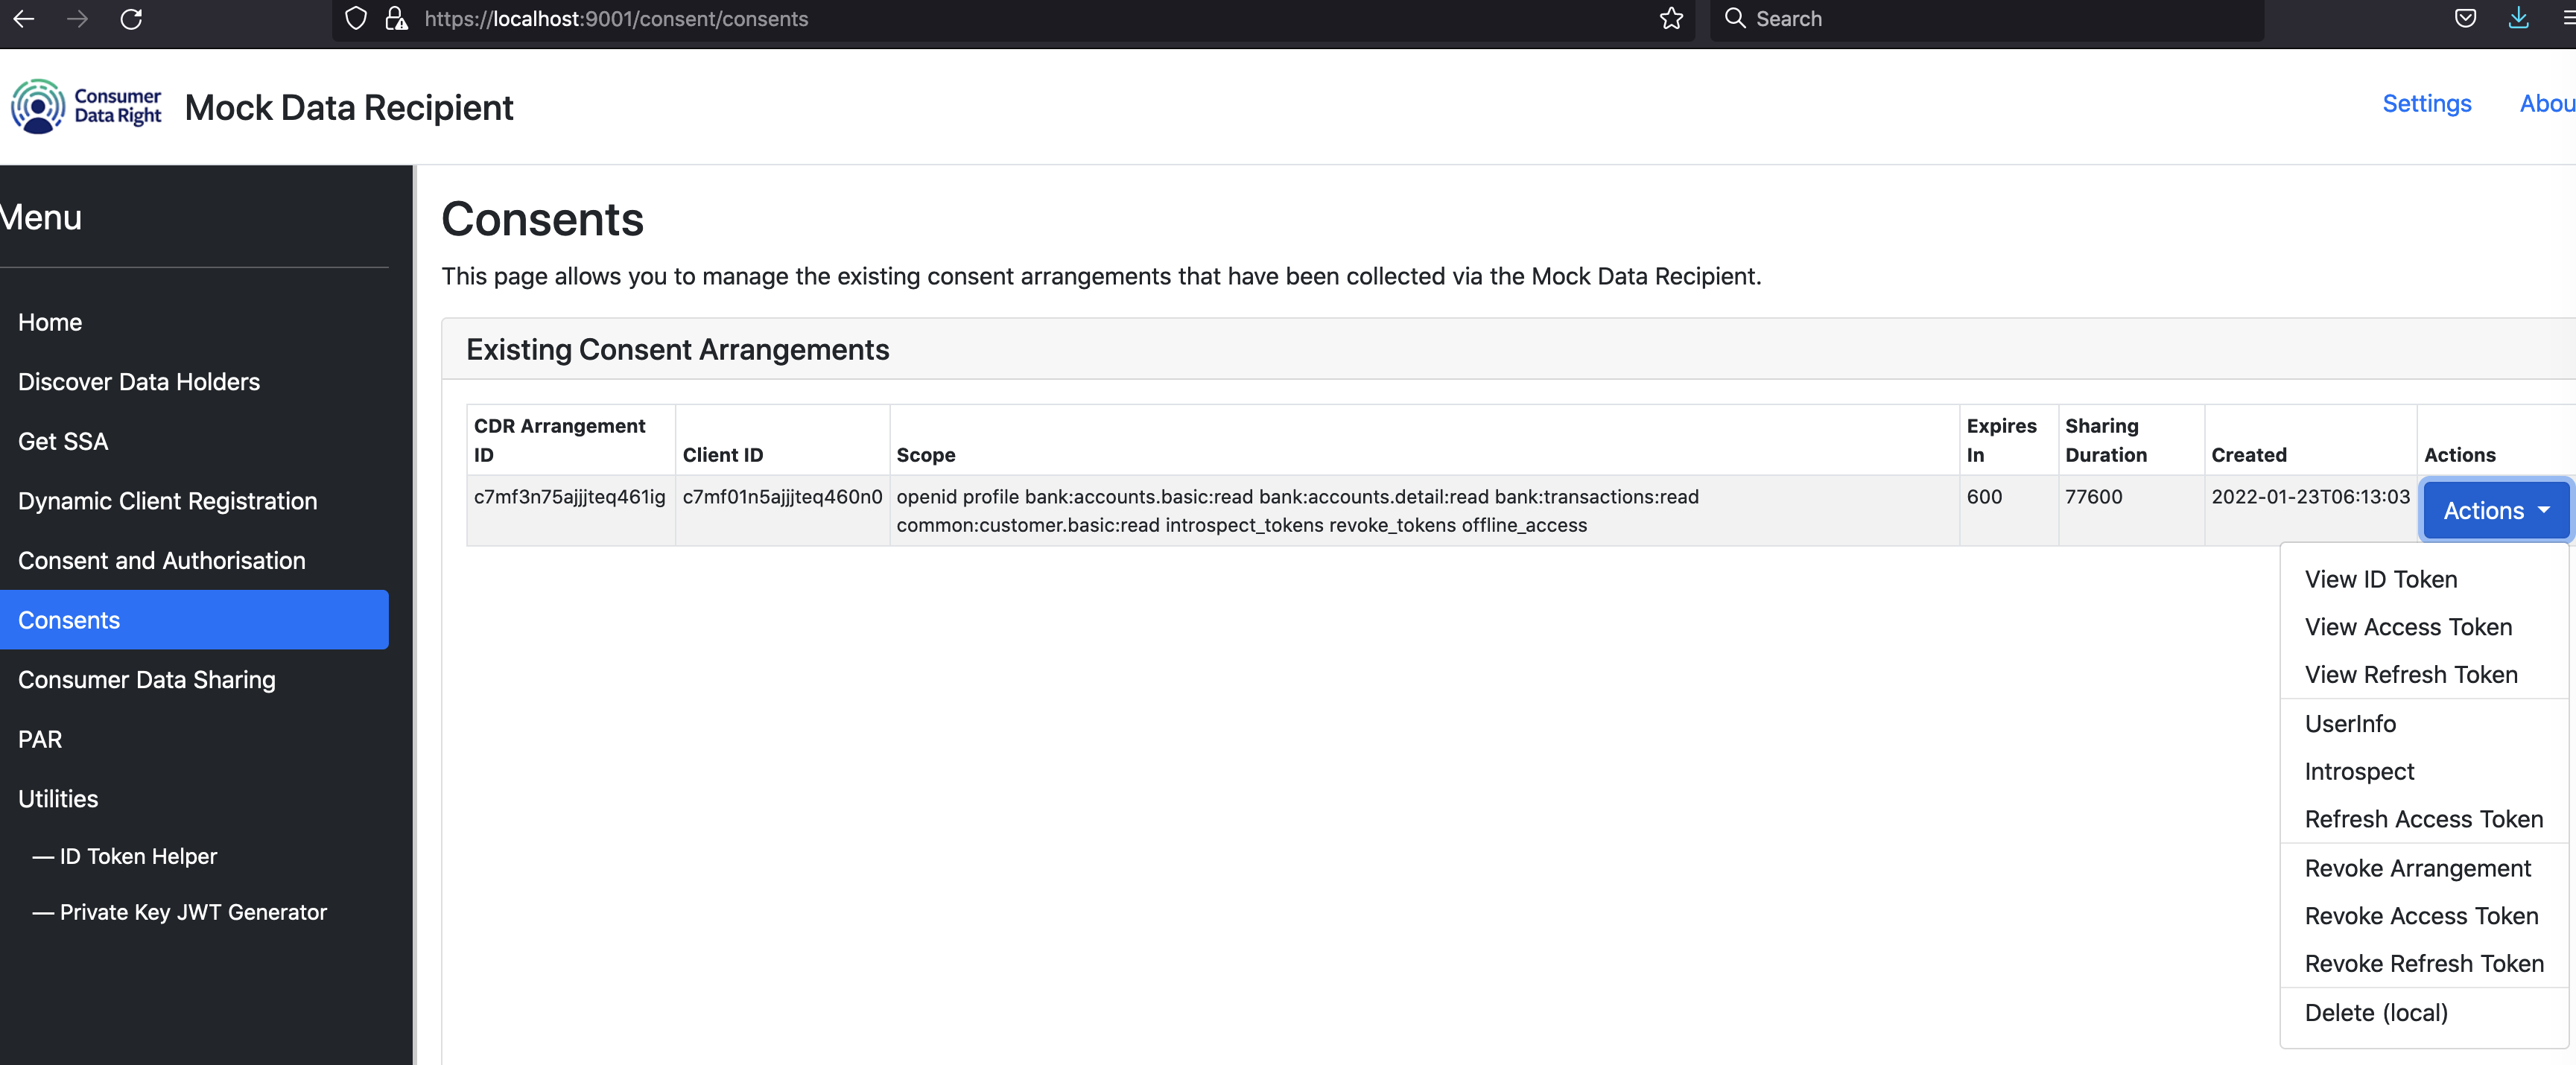
Manage Consents
CDR specifies that consumer should be able to manage their own consents and should be able to revoke them at any point. To manage all the consents and view the access token, ID token, and to see and revoke all the consents, the Data Recipient application provides some UI interfaces.
To build you own consumer consent management dashboards, follow these articles:
- Consumer consent dashboards
- Consumer consent for data sharing with data recipient
- Consumer consent amendements
- Consumer consent withdrawals
Cleanup
If you want to clean up all the locally deployed resources, use the following command:
make clean