Prerequisite
Customize Email Messages
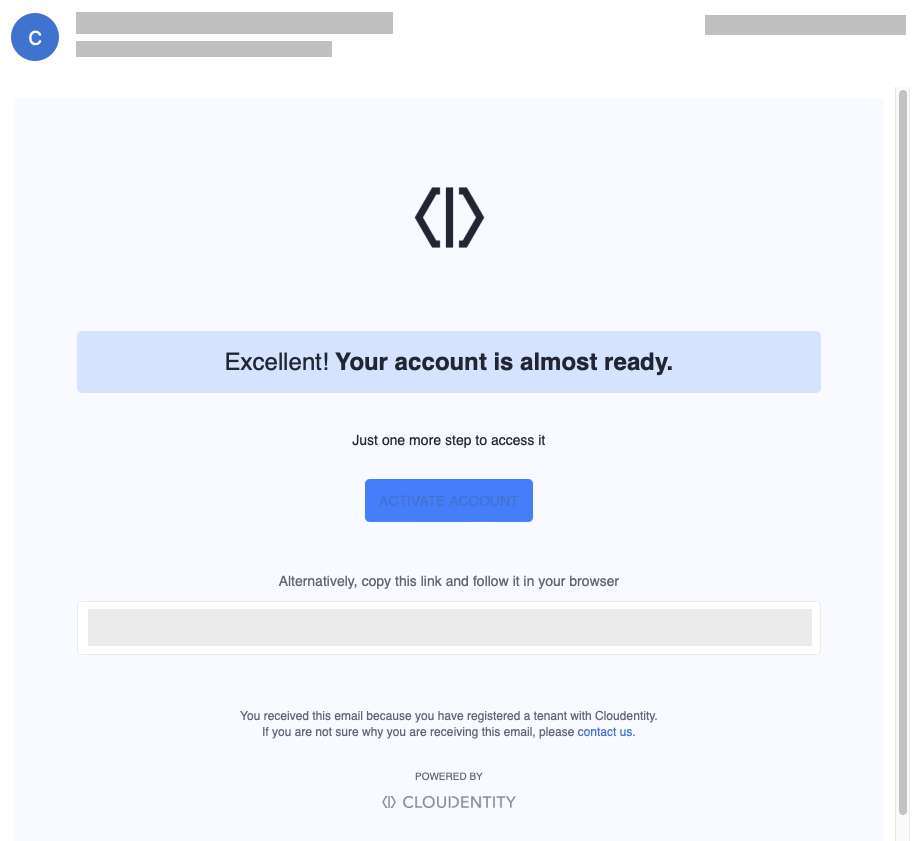
Below, you can see the default email that is sent to users during self registration to Identity Pool. You can:
-
Edit email message base template that defines the base elements of all types of email message, for example, footer contents.
-
Edit the components (like, for example, text) of individual email messages like account activation email, reset password email, and more.
We will modify the email base template by adding a Social Media Panel with links and Social Media Images to all email messages, and adjust the text of an individual email message.
Brand Email Base Template
Modifying Email Base Template results in changing the appearance of all email messages. You can either make just small adjustments or build your own emails from scratch!
In this section, we will add a new part to the email footer - a social tab with some Social Media logos and links to company’s channels.
-
Select Components » base_email.tmpl in your theme HTML editor.
You can now modify the email base template. Note that for base templates there is no preview - if you wish to see your changes, save the template and, in the Messages tab, select any of the emails.
-
Find the
divof thefooter-logoclass and insert the below code beneath it.<div class="caption footer-caption"> FIND US ON: </div> <div class="caption"> <a href="https://twitter.com/CloudentityTEAM"> <img class="footer-image" src="https://www.svgrepo.com/show/416494/connect-media-networking.svg"> </a> <a href="https://github.com/cloudentity"> <img class="footer-image" src="https://www.svgrepo.com/show/416517/code-github-hosting.svg"> </a> </div> -
Add styling for our social panel as part of the
<style>element.See example:
<style type="text/css"> [...] .footer-image { max-height: 32px; margin: 5px; } [...] </style> -
Select Save, go to the Messages tab, and select an email of your choice from the list, for example, the Activate Account With Code message template.
-
Preview your changes to the template.
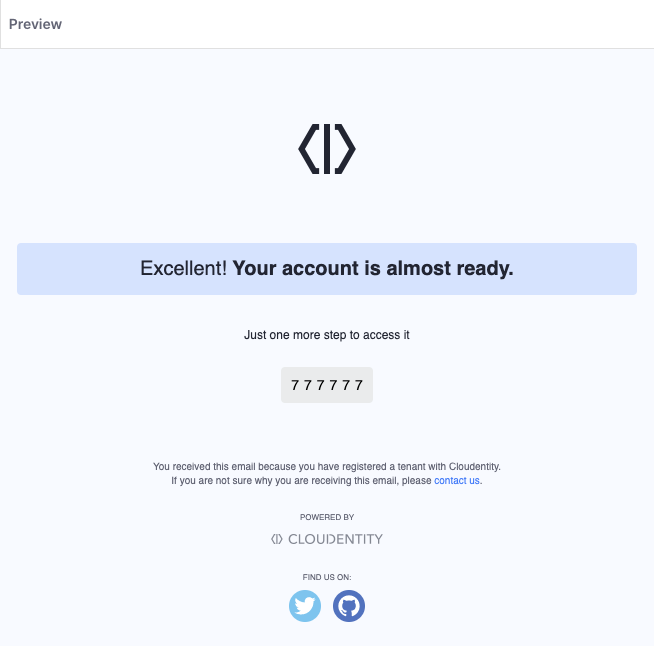
You can check other email message templates and you will see that now all emails have the Social Media panel added.
-
Bind the theme to a workspace if not yet bound.
To view your changes in action, you can now, for example, register a user in Identity Pools and an email will be automatically sent to the user requesting account activation.
Modify Email Message
-
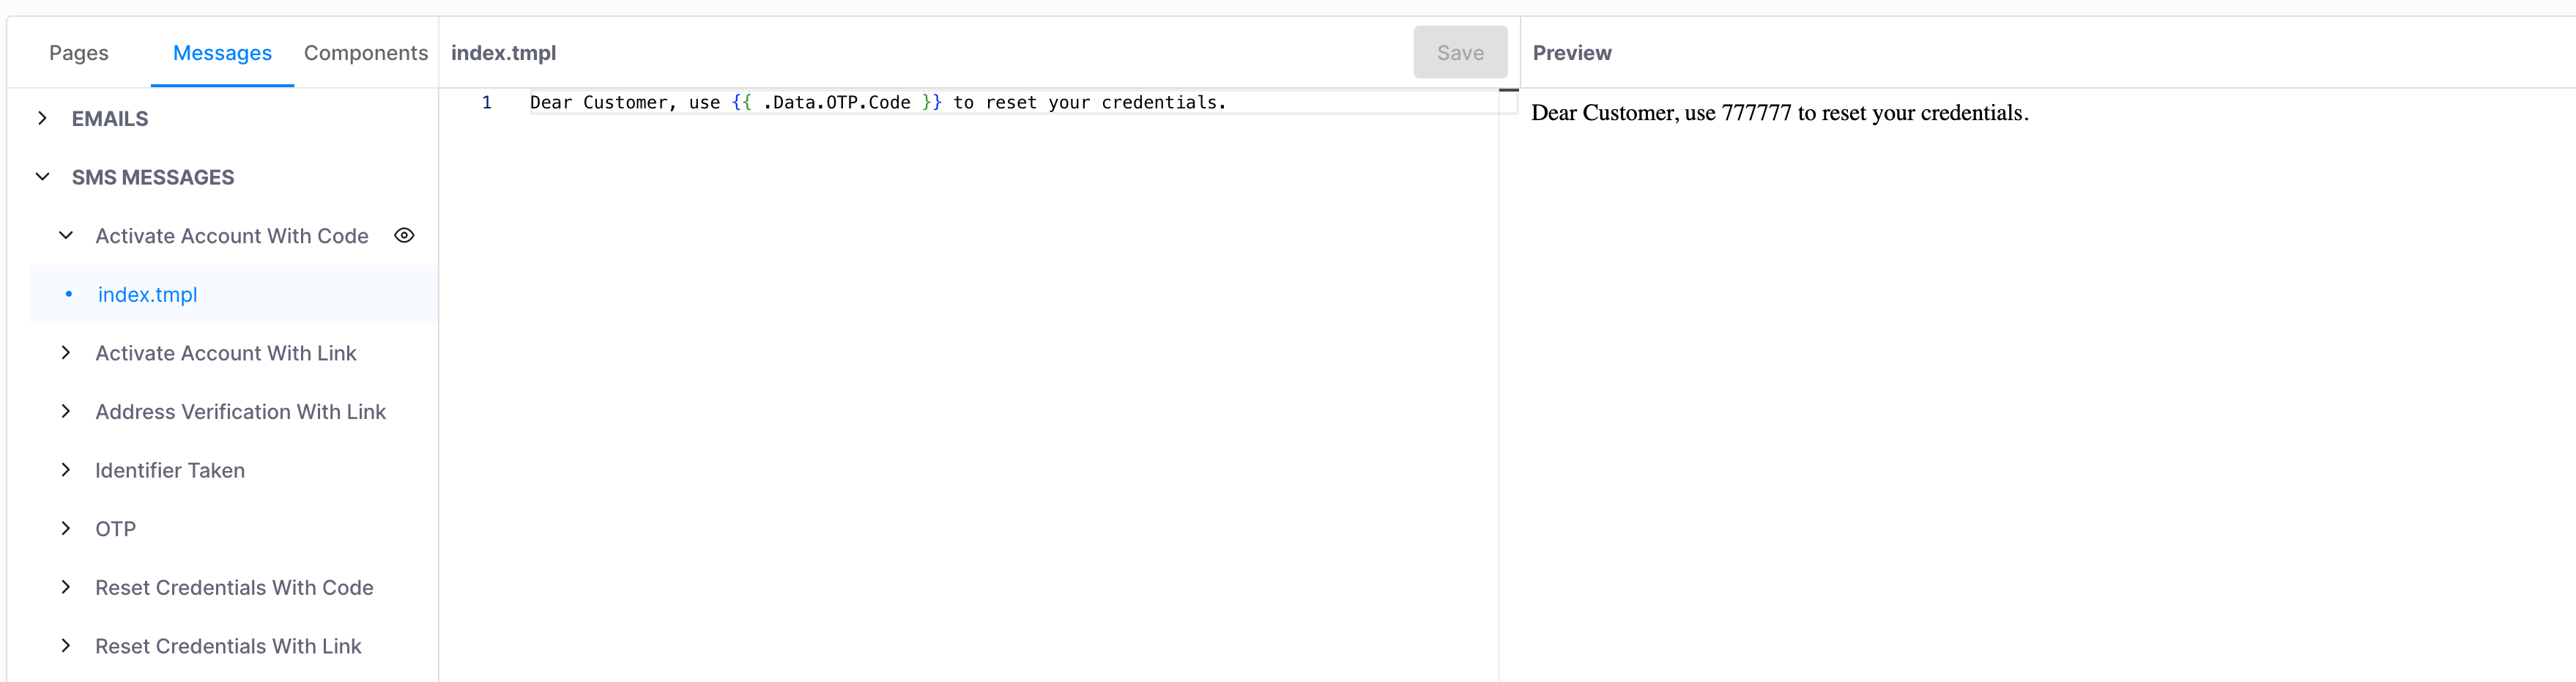
In your theme HTML editor, navigate to Messages tab and select an email template from the dropdown.
For the illustration purposes, we will modify the text content of the Acctivate Account with Code template.
-
Modify the HTML code of the email message template according to your needs.
For example, let’s modify the text of the template. By default, before providing the account activation code, the message has the following HTML content:
<div class="main-text">Just one more step to access it</div>Let’s change it to:
<div class="main-text">Here is your account activation code!</div> -
Save changes.
-
Bind the theme to a workspace if not yet bound.
To view your changes in action, you can now, for example, register a user in Identity Pools and an email will be automatically sent to the user requesting account activation.
Customize Text Messages
Since text messages are rather simple by design, by default, text messages do not use any base template unlike email messages - but they can, if needed. See example text message below:
To edit text message contents:
-
In your theme HTML editor, select the Messages tab and choose the SMS message template you wish to edit.
-
Edit the template and select Save.
-
Bind the theme to a workspace if not yet bound.
Personalizing messages
Messages can be personalized using variables. Some are as simple as OTP value itself but it’s also possible to access user data in the message template. Below is a set of fields that are accessible in message templates under .Data:
| Variable Name | Description |
|---|---|
| OTP | One Time Password struct with data |
| User | User data - see detailed description below |
OTP’s entry structure:
| Variable Name | Description |
|---|---|
| Code | Plain text code, like 12345678 |
| ExtendedCode | Extended code - encrypted combination of user id and code |
| Link | URL - used for sending link instead of OTP value |
User’s entry structure:
| User Variable Name | Description (omitted if self explained) |
|---|---|
| TenantID | |
| UserPoolID | |
| ID | |
| Status | |
| StatusUpdatedAt | |
| Payload | User’s payload in json format that can be further referenced using dots |
| PayloadSchemaID | |
| Metadata | User’s metadata in json format that can be further referenced using dots |
| MetadataSchemaID | |
| CreatedAt | |
| UpdatedAt |
To reference first_name entry from user’s payload just use:
{{ .Data.User.Payload.first_name}}
When inserting user’s data into template remember that Payload and Metadata are json values, and can be different for a different pools (they can be customized by schemas).